Bergamot and cucumber salad
I only recently discovered my love for Earl Grey tea. Not the regular kind, mind you. It was the combination of Redbush tea from my homeland with the intoxicating aroma from the Bergamot oil that swayed me. The Bergamot orange (sometimes mistakenly referred to as a lemon) was created more than 300 years ago in Southern Italy when a sour orange was crossed with a citron/lemon/lime/Palestine sweet lime. No one is quite sure. The oil is extracted from the rind and used in Earl Grey teas, as well as fragrances, aromatherapy and to flavour dishes. Here I’ve put them to good use in a refreshing salad dressing with cucumber and blueberries. But the options really are endless…
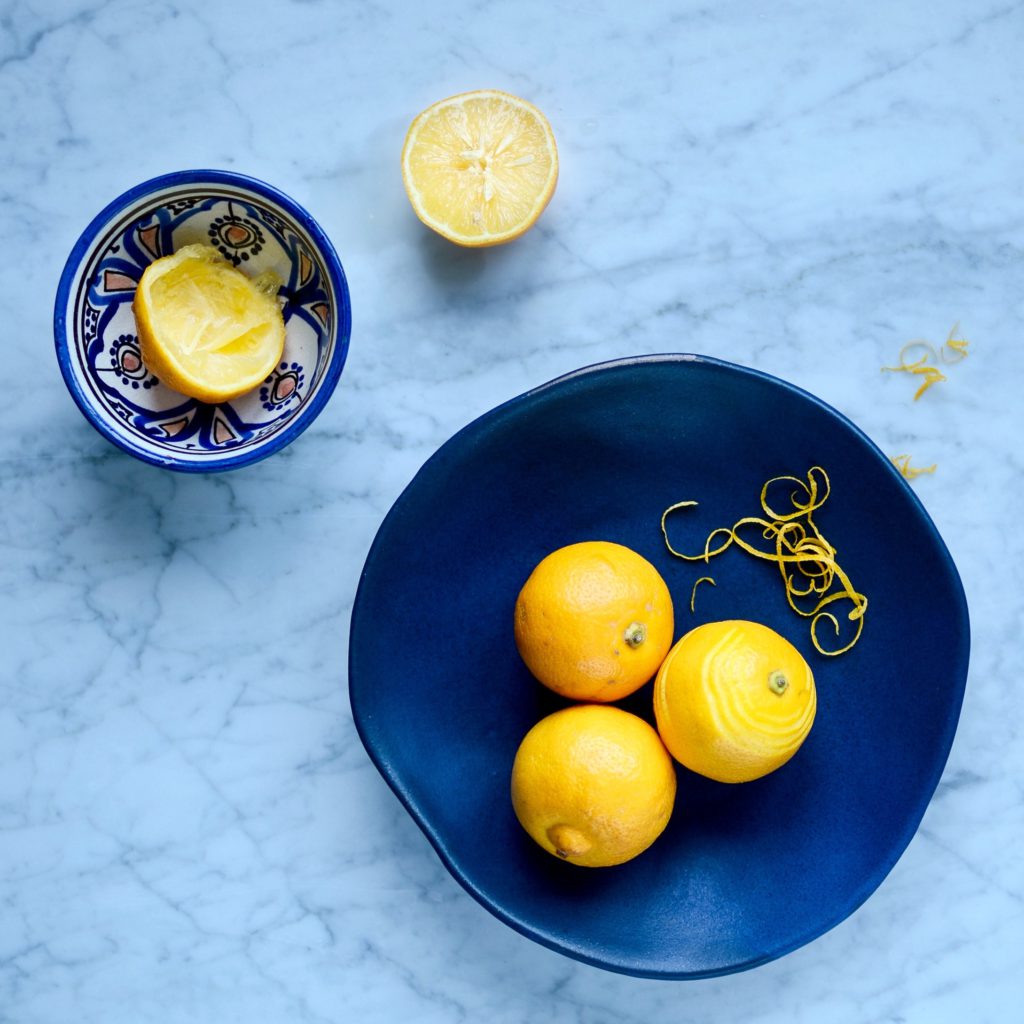
Bergamot lemon cucumber salad
If you cannot find Bergamot oranges (in season from December to February) try a combination of lemon, grapefruit and orange or tangerine, although the distinctive floral, slightly bitter flavour is difficult to replicate.
Serves 4 – 6
Ingredients for the salad
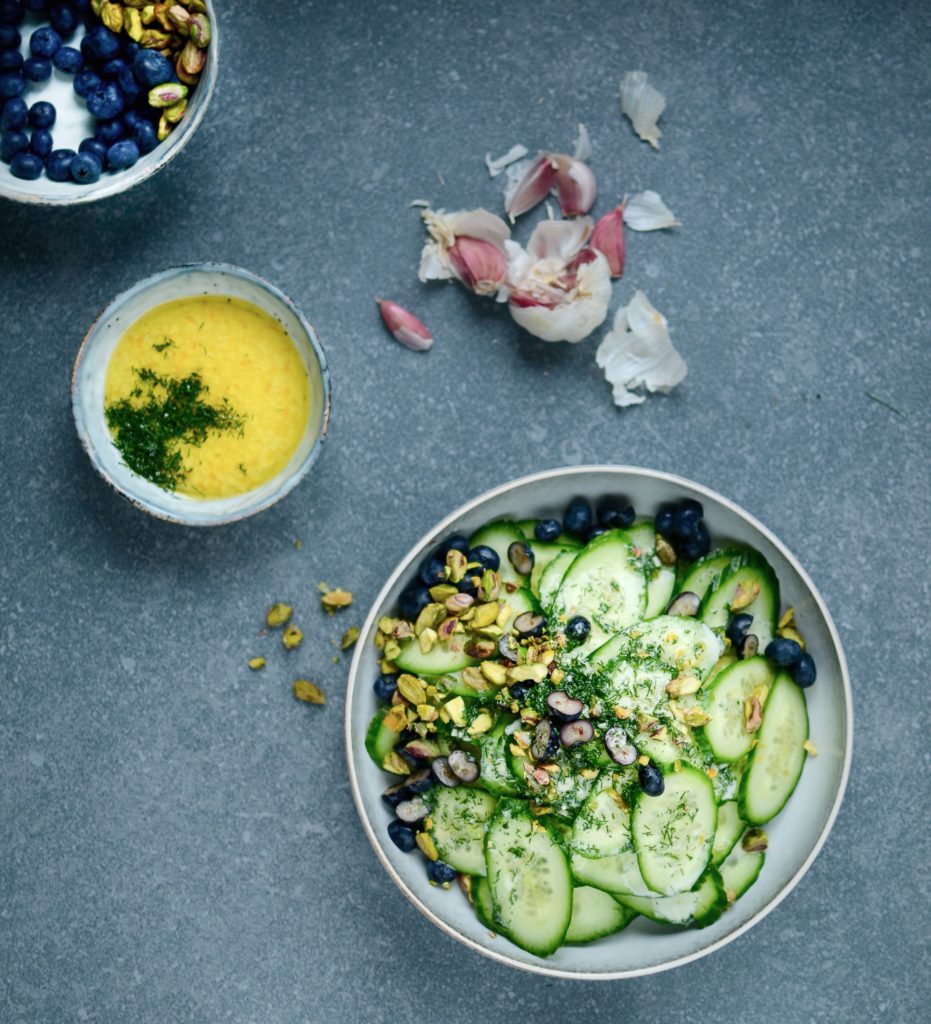
2 English cucumbers, peeled if not organic
1 punnet blueberries (about 125g), washed and halved if you prefer
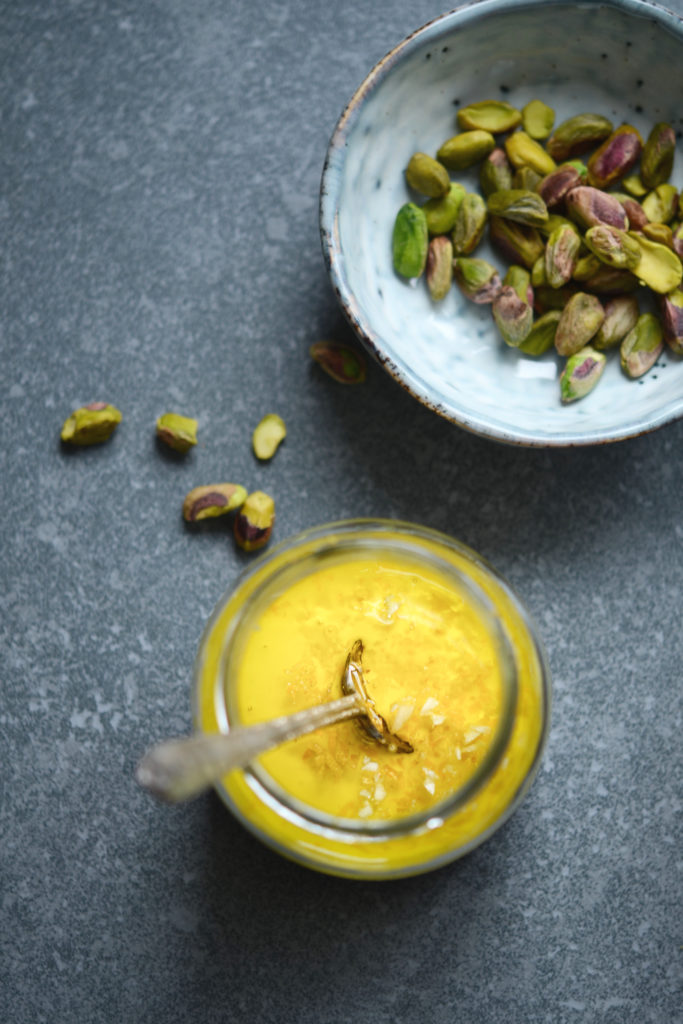
a large handful of pistachio nuts, roughly chopped
Ingredients for the dressing
zest of 2 Bergamot oranges
juice of 1 Bergamot orange
80ml thick Greek yoghurt (or coconut yoghurt)
45ml (3 tablespoons) extra virgin olive oil
1 garlic clove, crushed
large pinch of unrefined rock or sea salt
1 – 2 teaspoons raw honey (or maple syrup), or to taste
small bunch of dill, leaves only, finely chopped
Method
- Thinly slice the cucumber on the diagonal and gently toss with a pinch of unrefined salt. Place the cucumber slices in a colander over a bowl or in the sink and allow to drain for at least half an hour.
- Put all the ingredients for the dressing in a jar, screw on the lid and give it a good shake until the honey is dissolved.
- Add the rest of the salad ingredients, toss with the dressing and serve immediately.
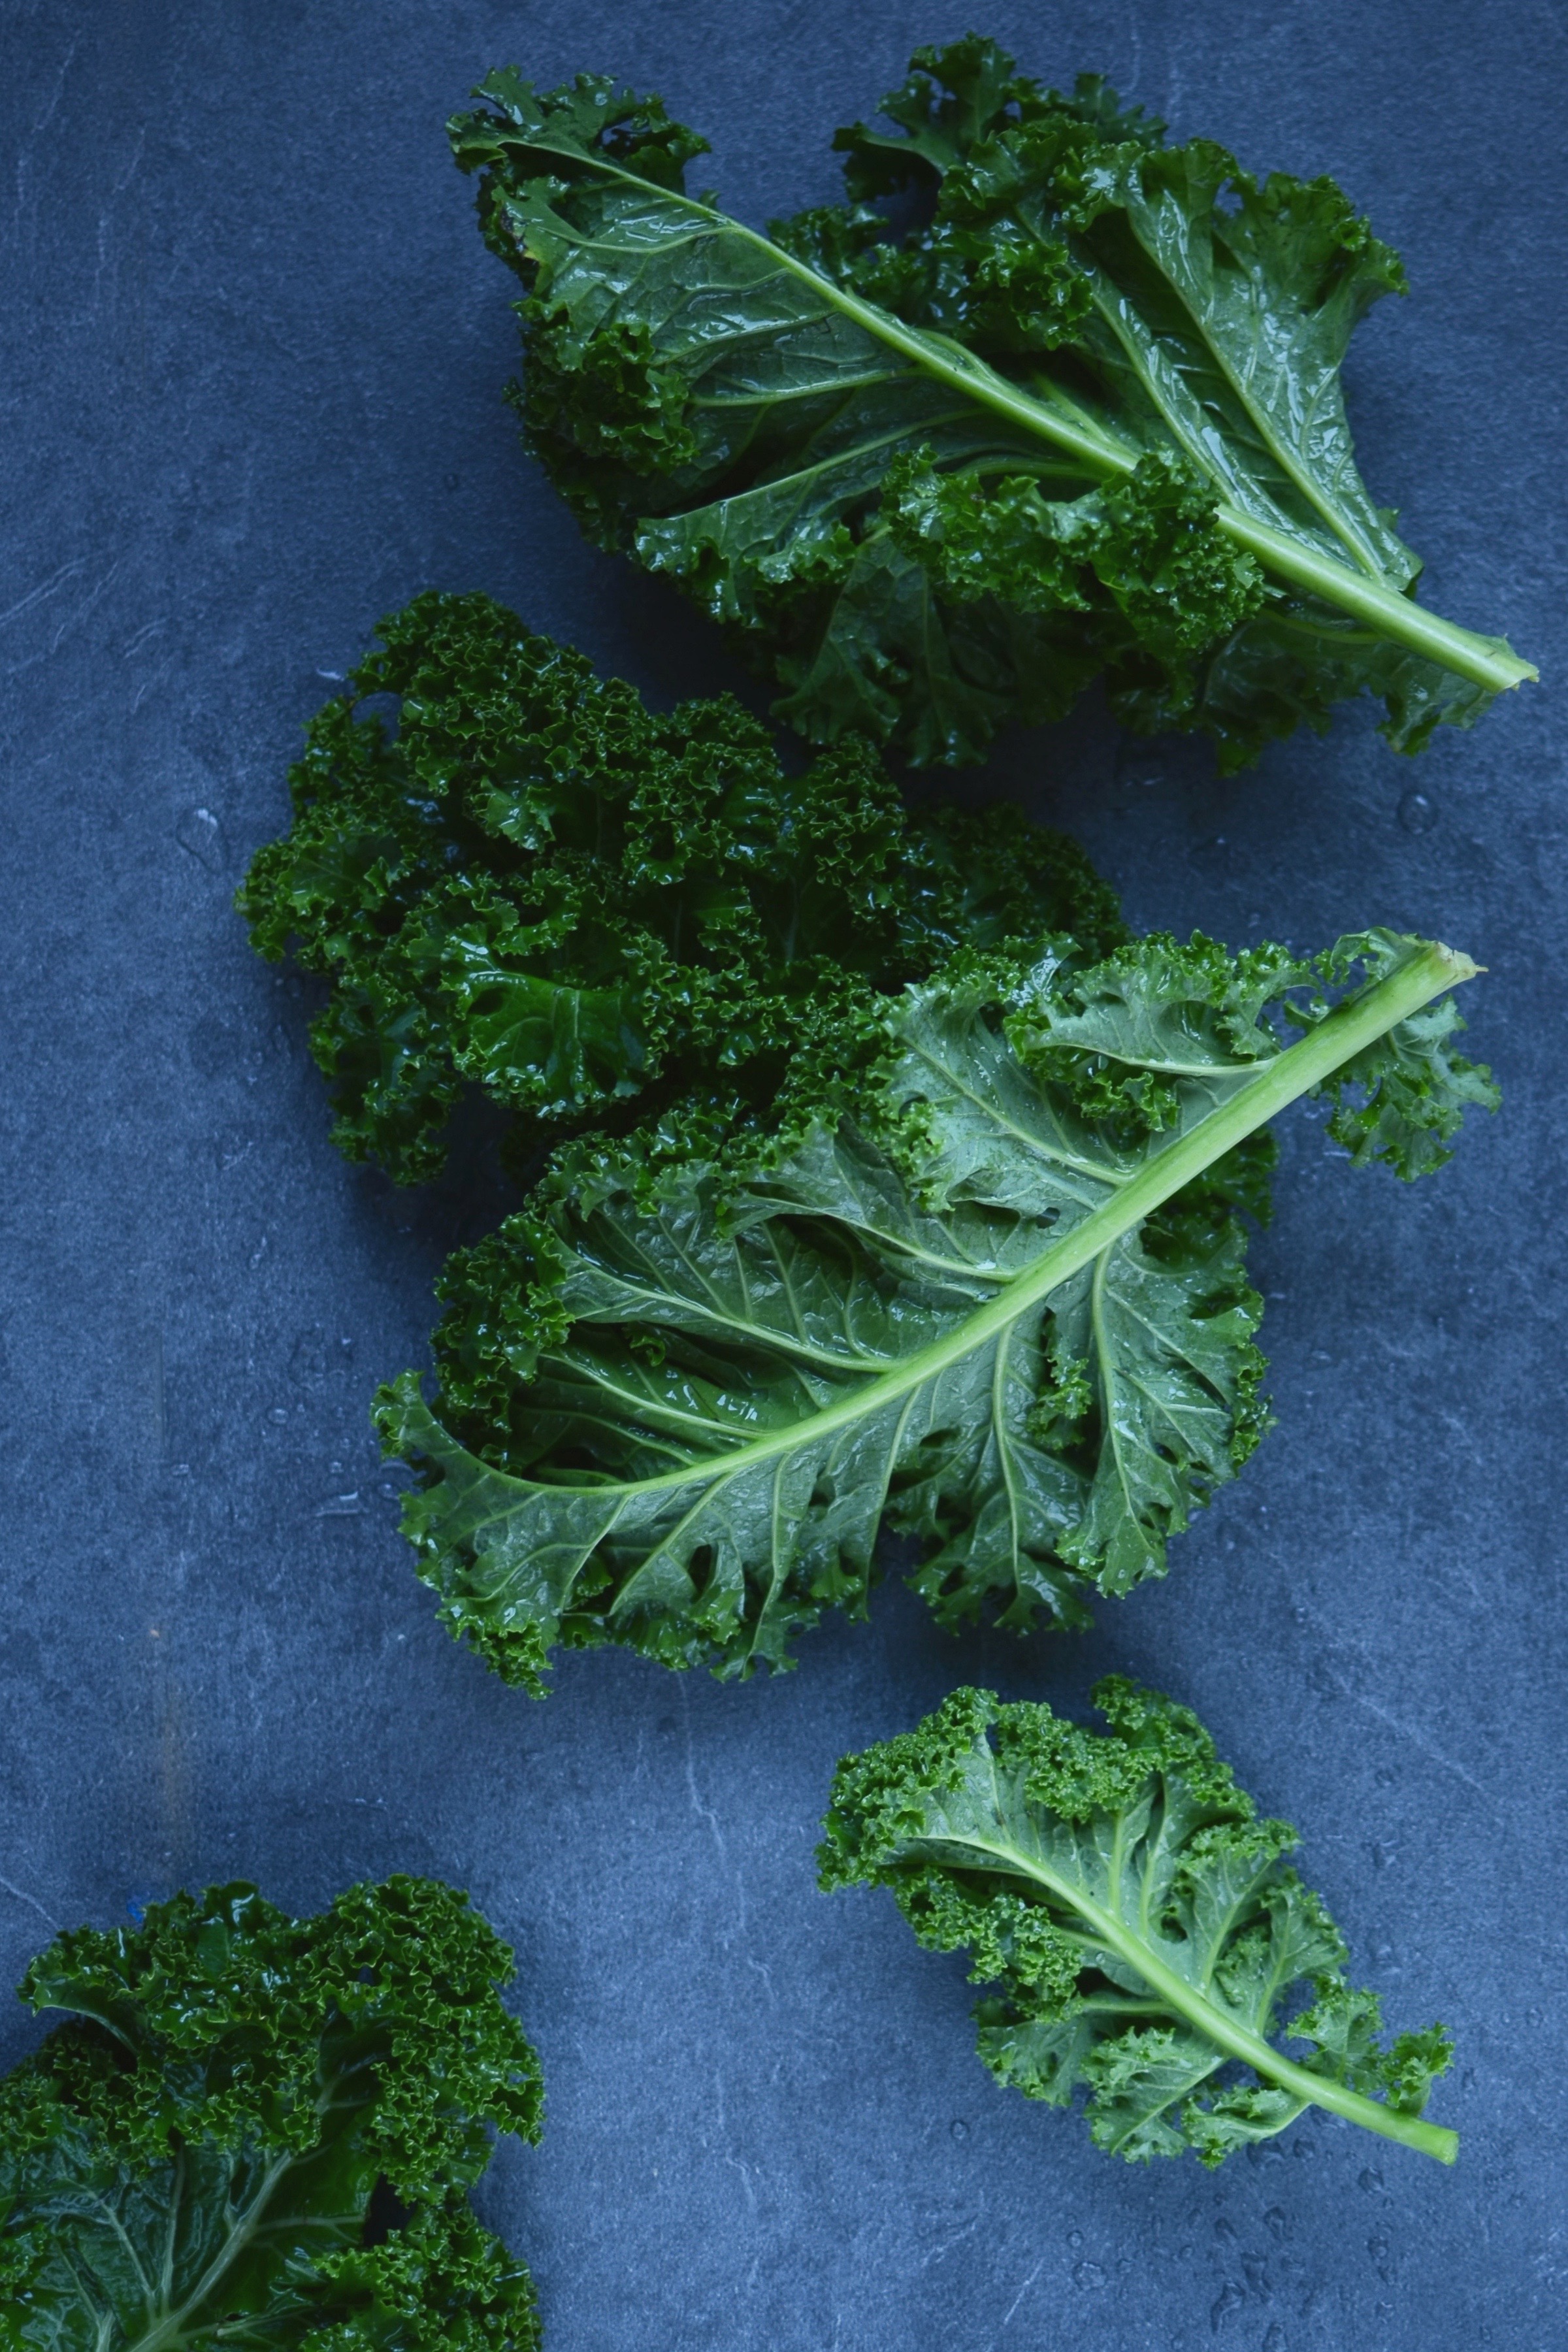
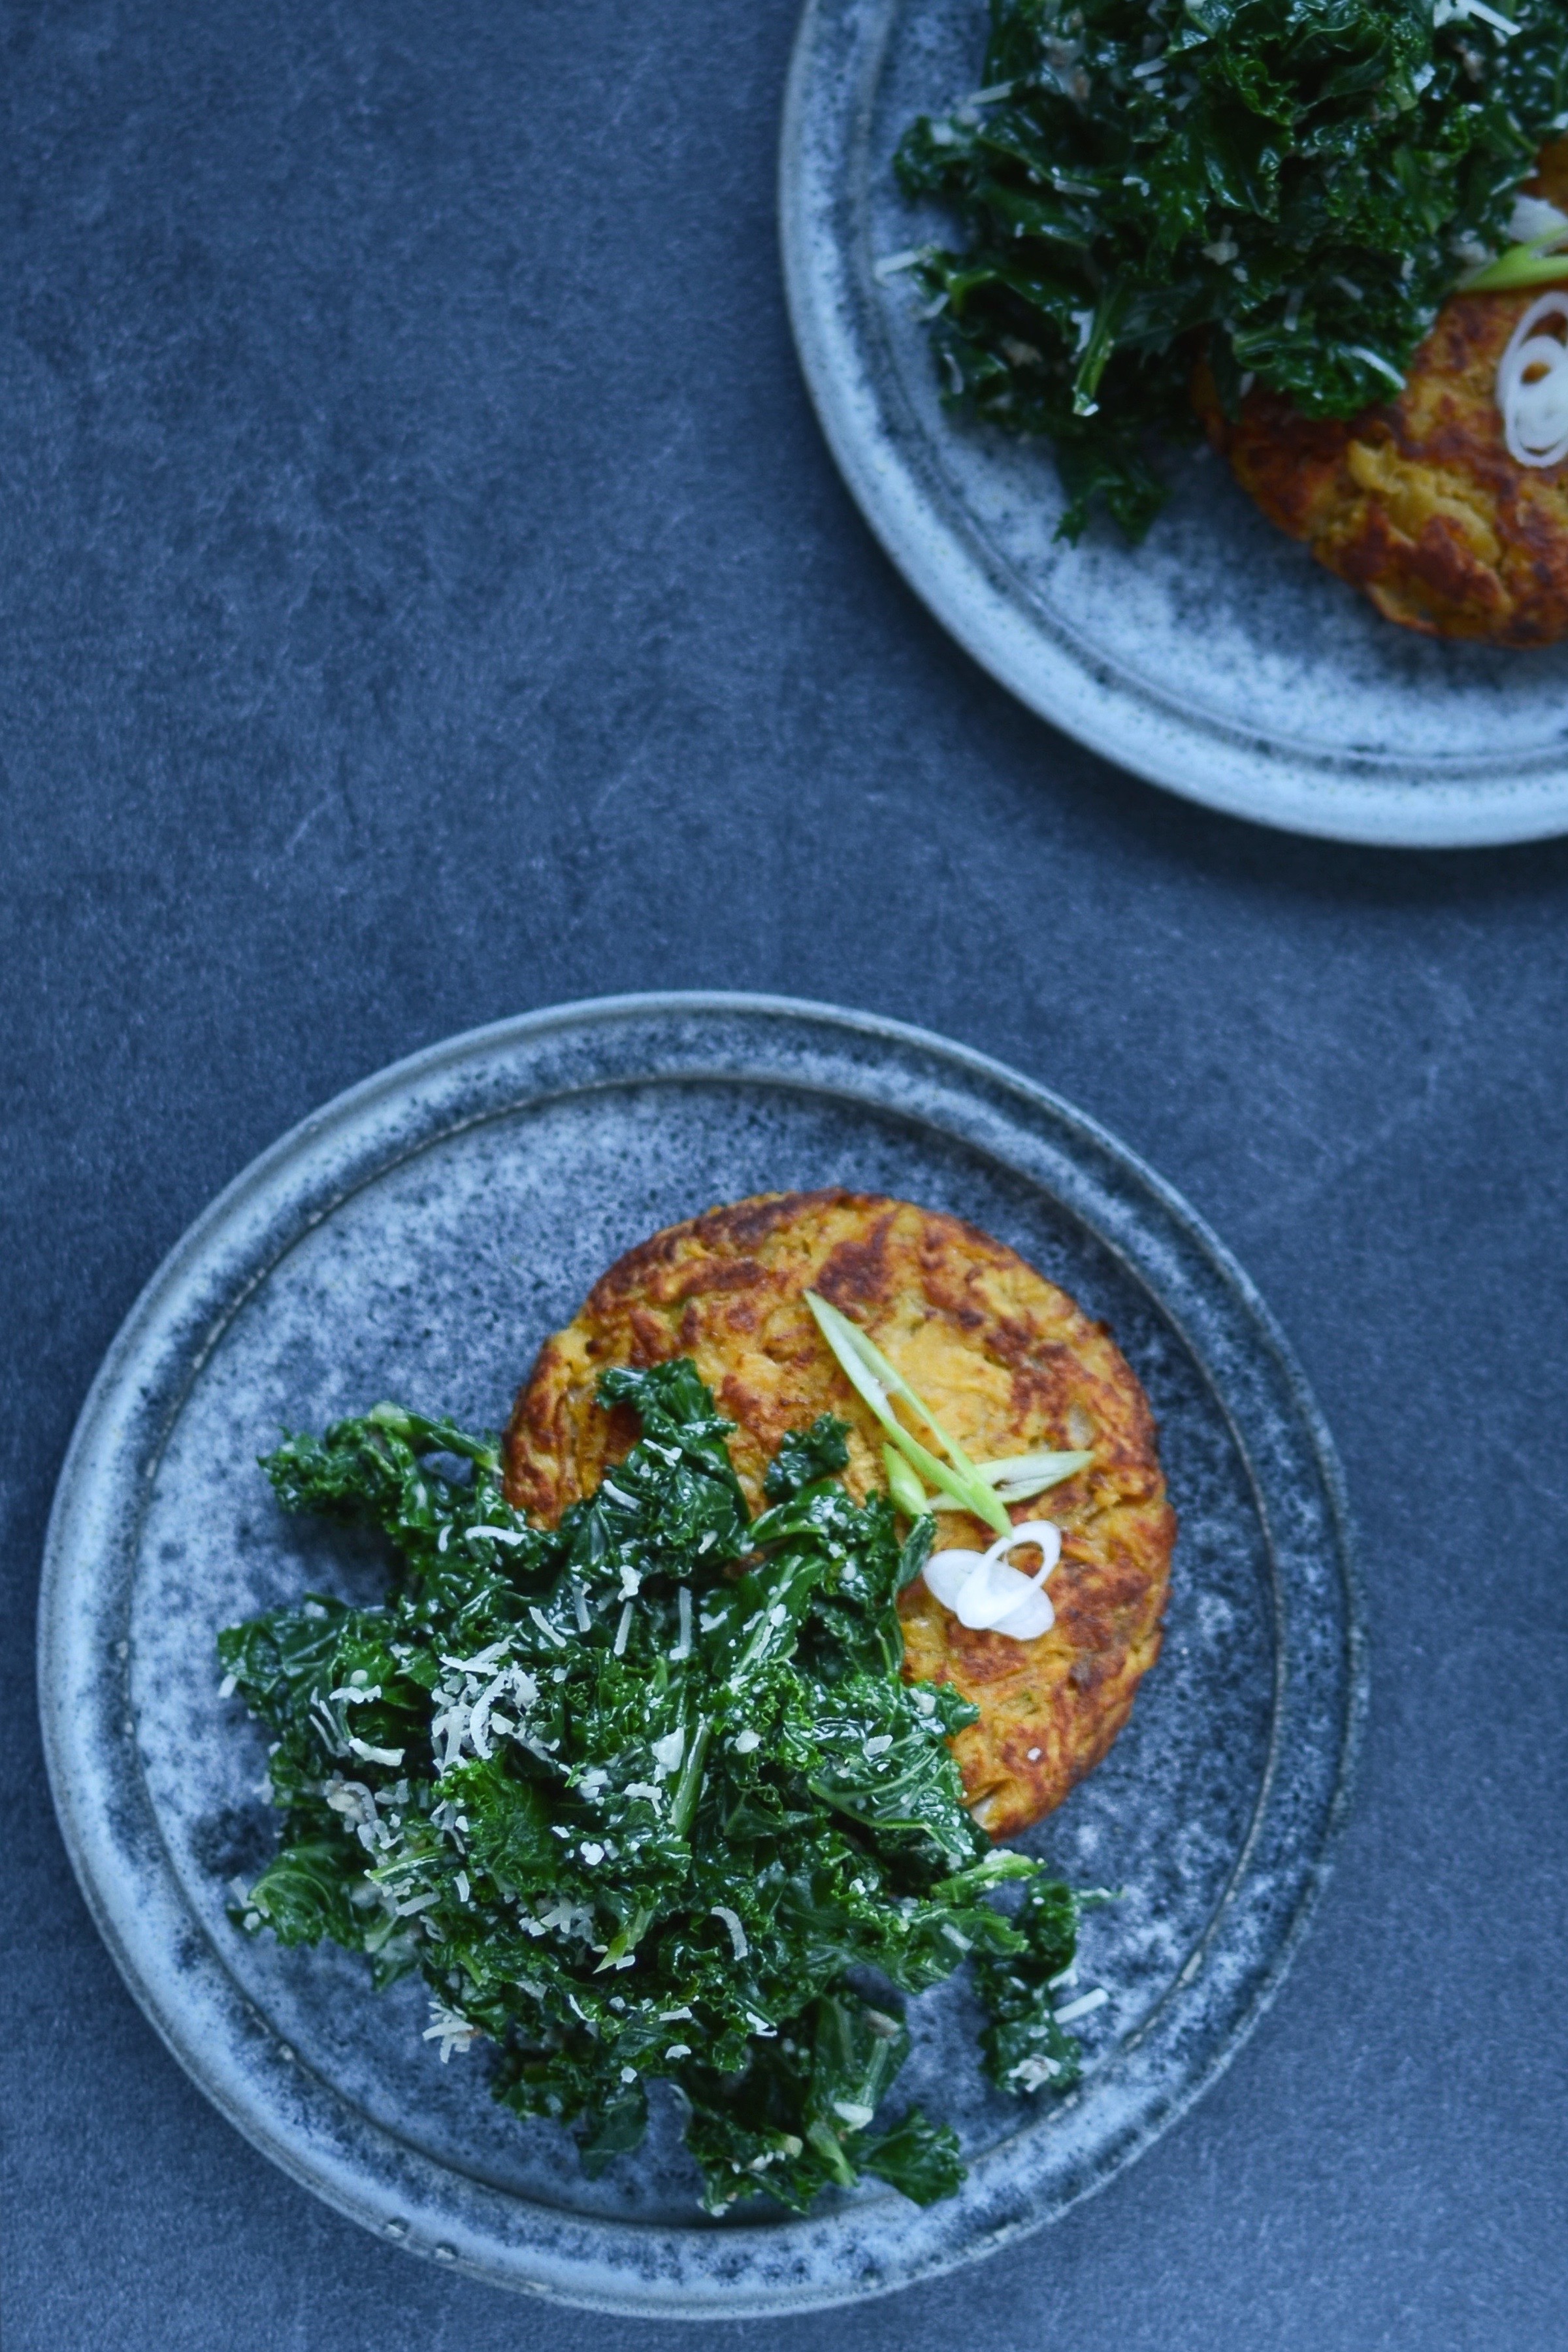
Sweet potato rösti with Caesar kale
My biggest gripe with classifying something as an of-the-moment superfood, is that it inevitably leads to that food going “out of fashion” at some stage. It is such a shame, as many so-called superfoods really are fantastic, nutrient-dense foods that have a lot to offer. It was kale this and kale that for quite some time, but this wonderful veg seems to have fallen out of favour. Don’t be a fashion victim! Add this brunch dish, that I developed for the M&S Super Brunch Campaign, to your Boxing Day brunch, and rediscover an old favourite.
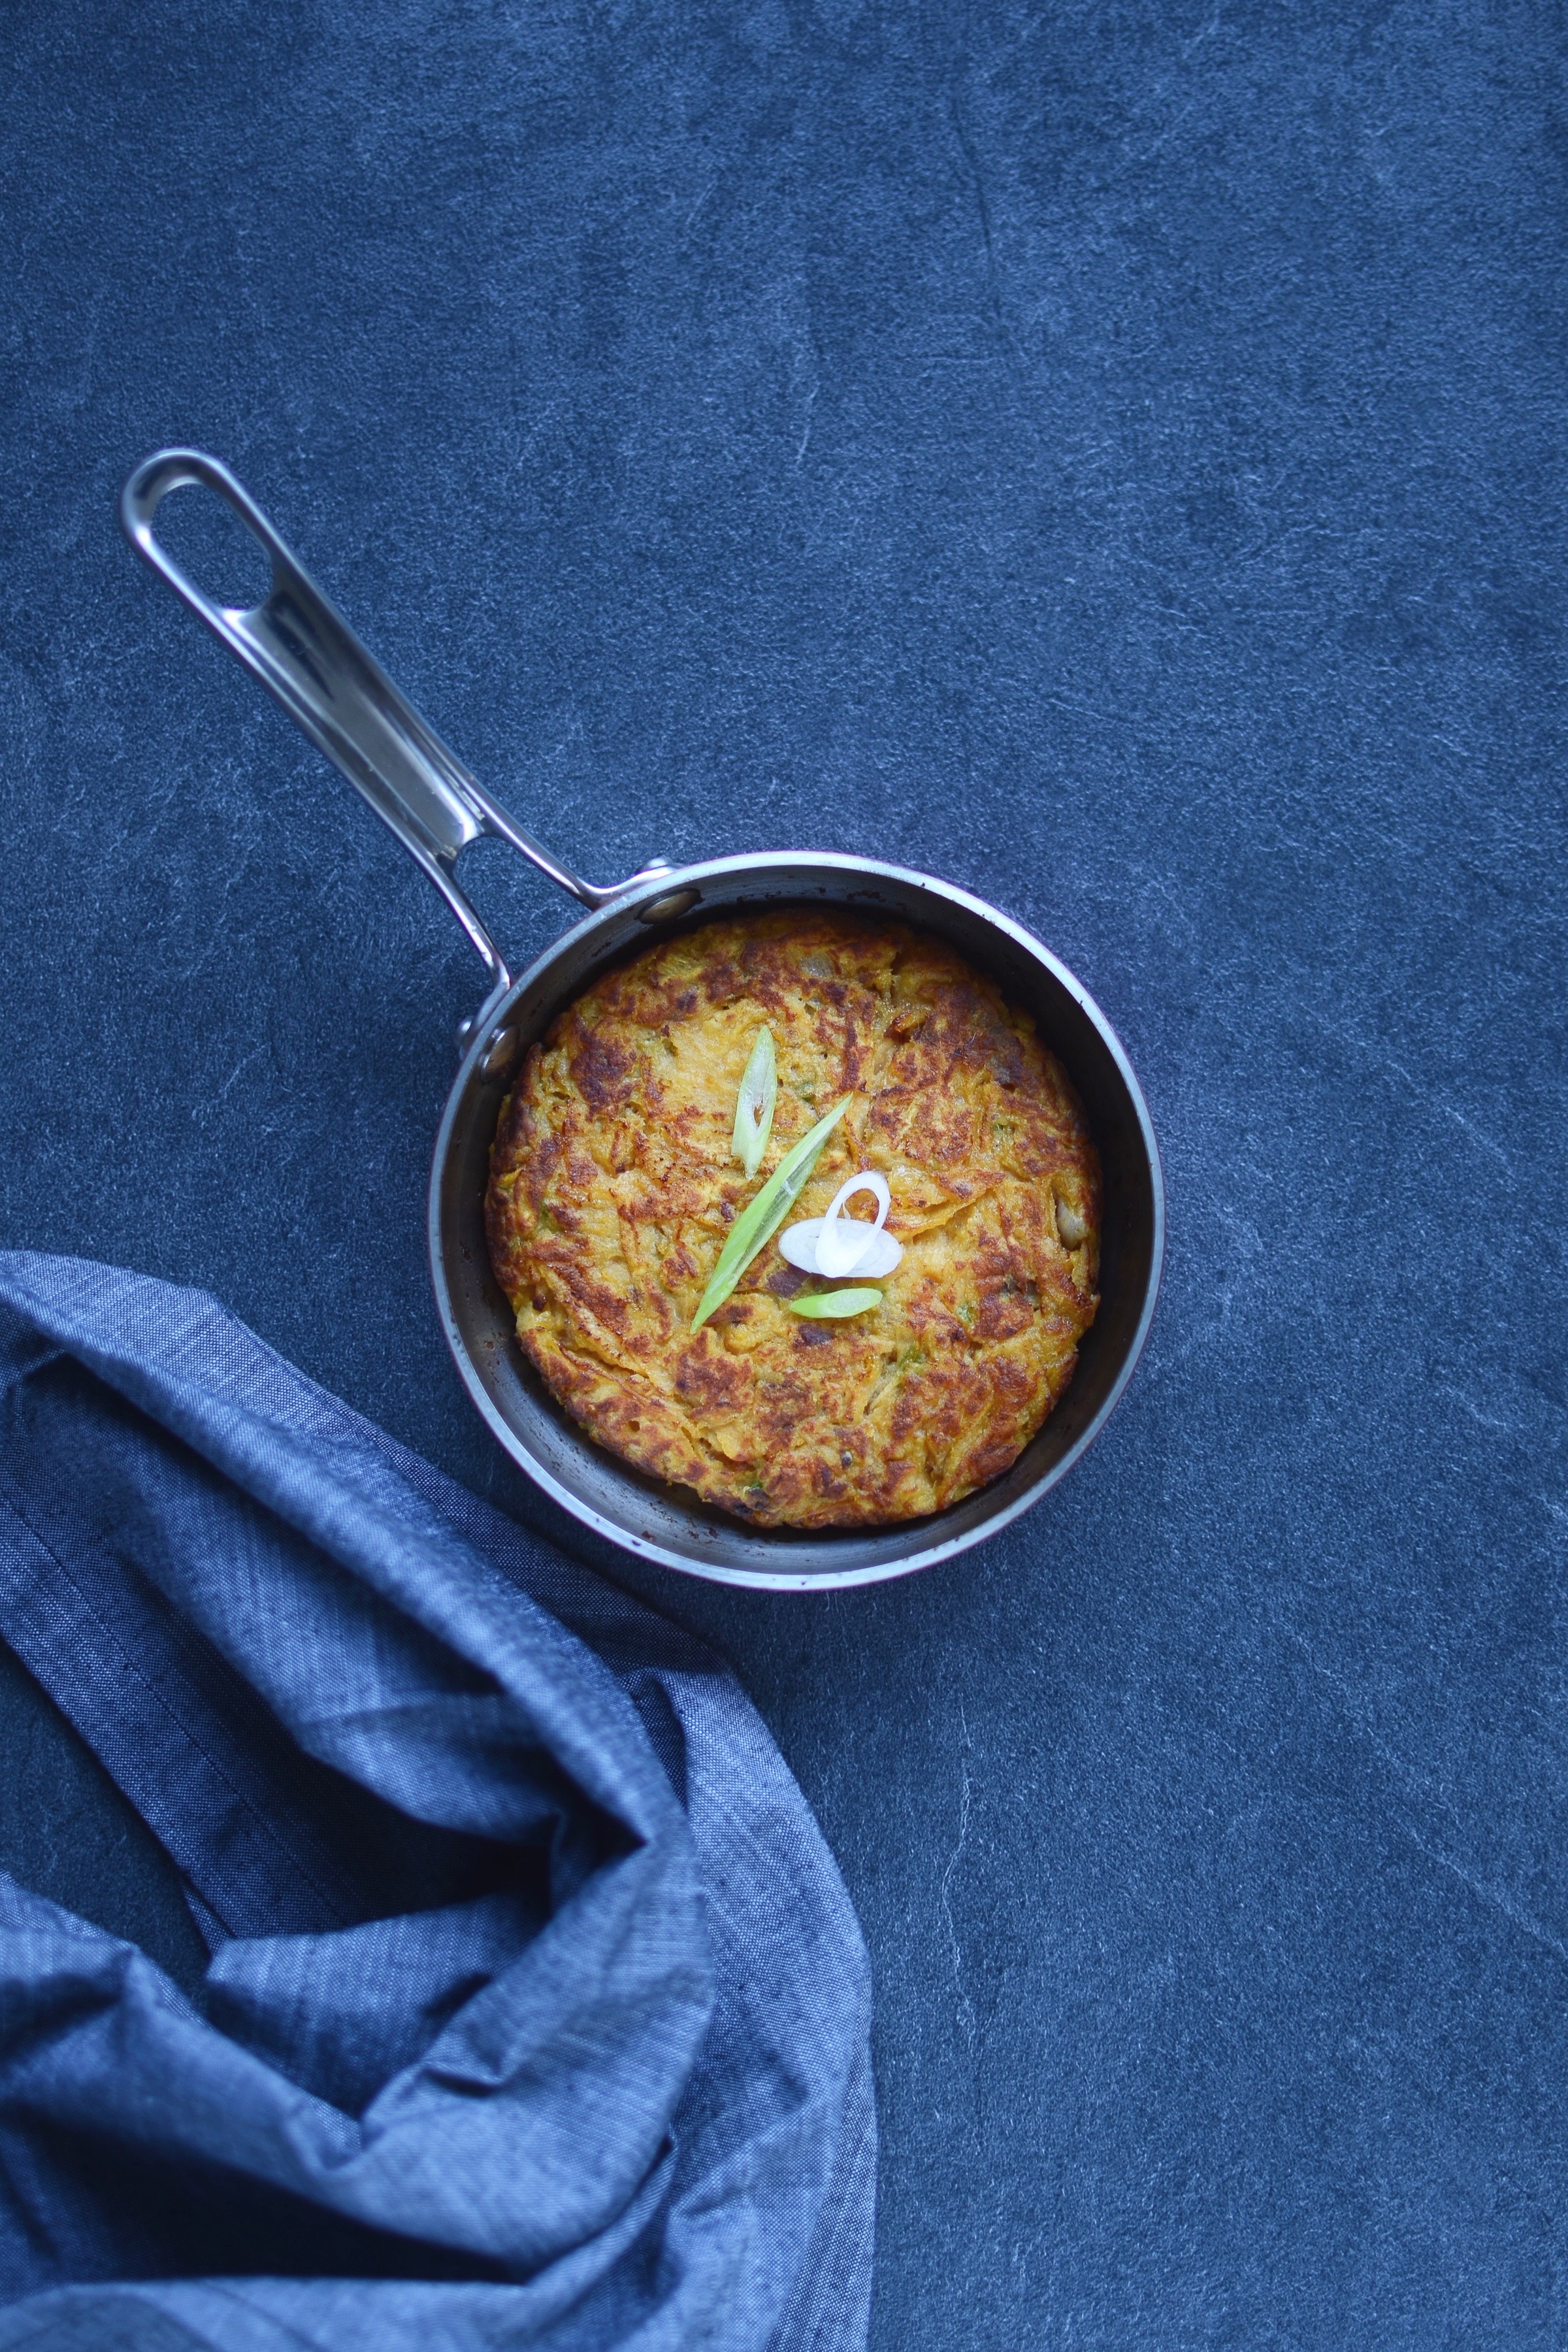
The Caesar-style dressing is delicious with the astringent greens and complemented by the sweet potato pancakes. I used the tiny copper pan from the new M&S chef range to make perfectly shaped individual portions.


This is a fantastic meal, be it for breakfast, brunch or a light supper. Like most things in life, it tastes even better with an egg on top.
Serves 4 – 6
Ingredients for the rösti
4 medium (about 800g) sweet potatoes, peeled
2 spring onions, finely sliced
2 medium eggs, lightly whisked
40g (about 1/4 cup) wholemeal spelt flour or flour of your choice (I use a gluten-free mix)
butter or ghee for frying
Ingredients for the kale
5 anchovy fillets packed in oil, drained and chopped
1 small garlic clove, peeled and chopped
small pinch of coarse salt
60ml (1/4 cup) mayonnaise, preferably home-made
15ml (1 tablespoon) freshly squeezed lemon juice
15g (1/4 cup loosely packed) finely grated Parmesan
Freshly ground black pepper
300g kale, thick stalks discarded and torn or chopped into bite-sized pieces
Method
- For the kale: make the dressing, by placing the anchovies, garlic and salt in a mortar and pounding them together until you have a paste.
- Stir in the mayonnaise, lemon juice, Parmesan and pepper, and set aside.
- For the rösti: boil two of the sweet potatoes in a little water until they are just tender around the outside (do not let them get too soft!). Remove from the pot and allow to cool.
- In the meantime, coarsely grate the other two sweet potatoes and mix with the spring onions, eggs and flour.
- Finally, coarsely grate the slightly softened sweet potatoes and carefully combine with the rest of the ingredients.
- Heat a little butter or ghee (or coconut oil) in a frying pan until hot (but not smoking), then add enough batter to make a patty shape. Press down on the batter to ensure it is compact and will hold together.
- Fry for roughly 5 minutes on each side, or until golden and crispy. Carefully remove with a spatula and keep warm while frying the rest.
- Whilst your final rösti is frying, gently wilt the kale in a little water over a medium heat. As soon as it is tender, drain, return to the pan and stir through the dressing.
- Serve the dressed kale on top of the rösti with or without eggs.
*This blog post was written in collaboration with M&S. All content and photos my own.
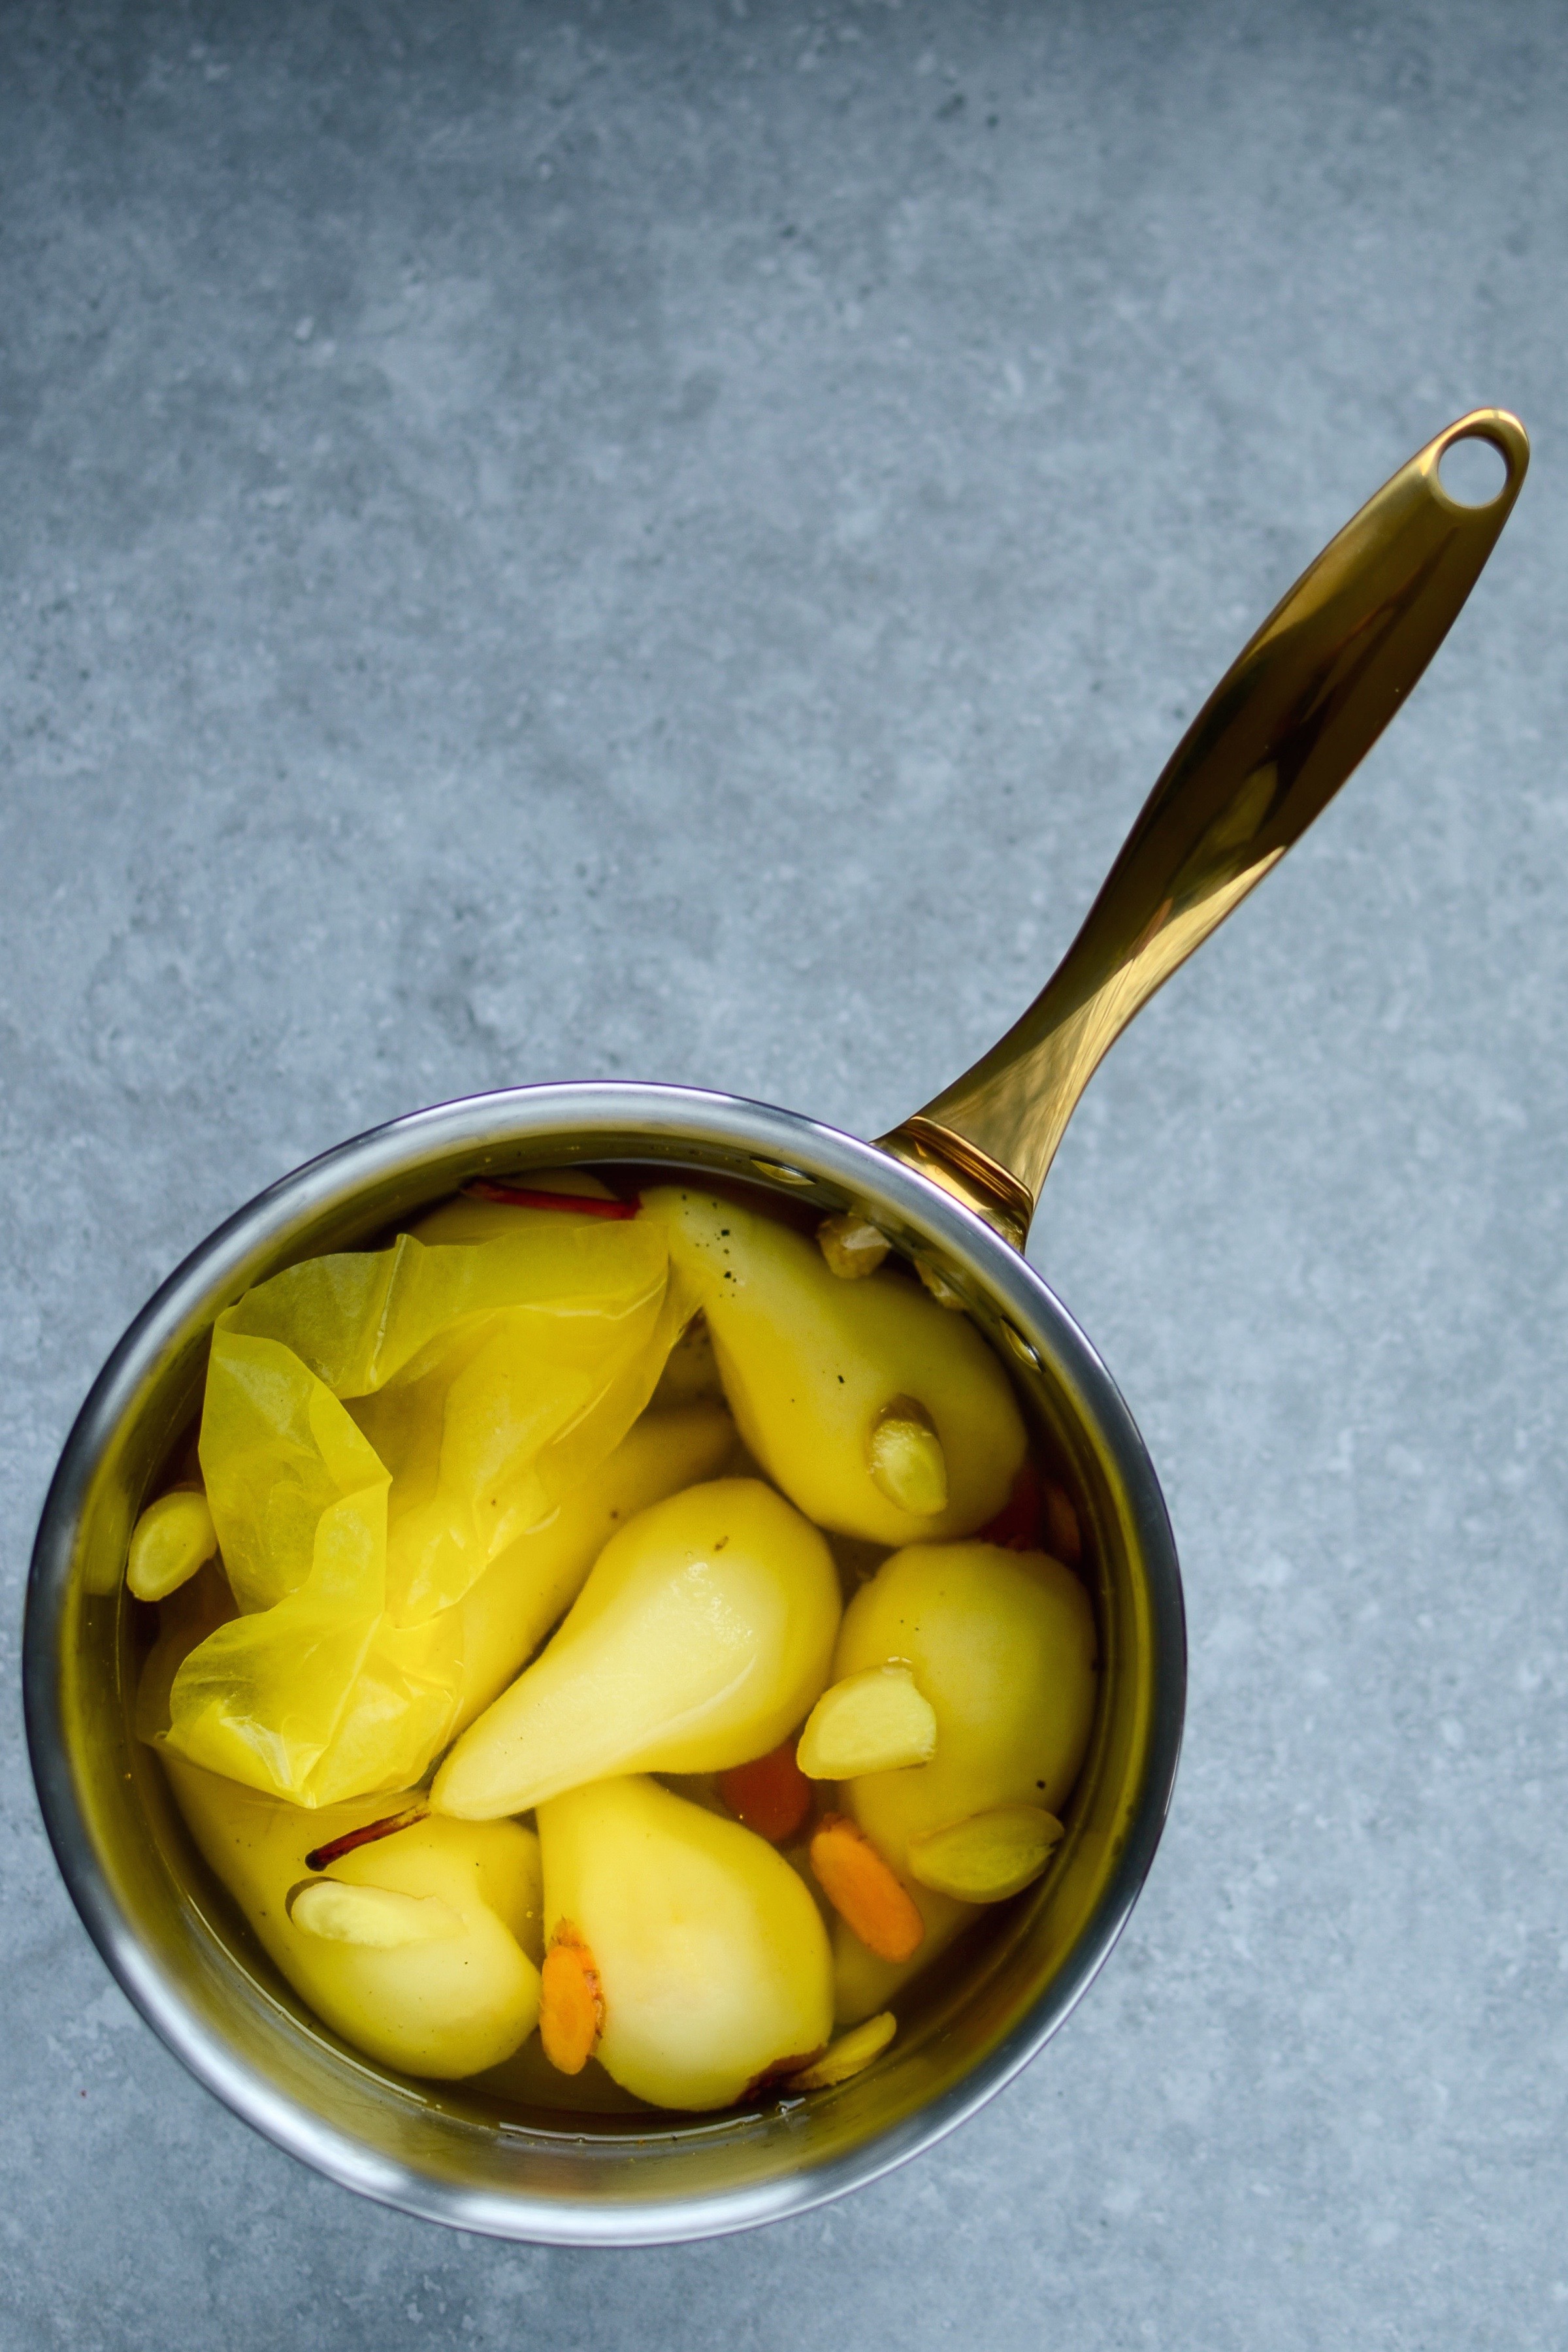
Turmeric poached pears with macadamia nut cream
I love brunches so much, that I centre most of my social engagements around them (click here and here for some easy recipe ideas). Not too early, with an array of delectable foods to choose from, most often vegetable-heavy, and no rush to leave, it is by far my favourite kind of meal. I especially like being creative and pushing boundaries when it comes to menu ideas, so I really enjoyed collaborating with M&S on their Super Brunch campaign using their new Chef range cookware. The products are well-designed, solid and beautiful to look at, and being part of a brunch initiative has me smiling from ear to ear. These pears would make a great addition to any brunch spread, but would also be a spectacular dessert, perhaps with a few candied macadamia nuts scattered over the top.
A lot has been written about curcumin, an active compound in turmeric believed to have many health benefits since they are powerful antioxidant, anti-inflammatory, antiseptic, anti-fungal and anti-bacterial agents. But interestingly enough, turmeric is not that easy for our bodies to assimilate, as most of it is metabolised by the liver before being absorbed. Studies have now shown that eaten with even just a tiny amount of black pepper, absorption of the curcumin is a lot higher, because the chemical compound “piperine” in the pepper inhibits this metabolisation. Bioavailability of curcumin is also higher when eaten with a fat, as it can then be directly absorbed into the bloodstream through the lymphatic system thereby in part bypassing the liver.
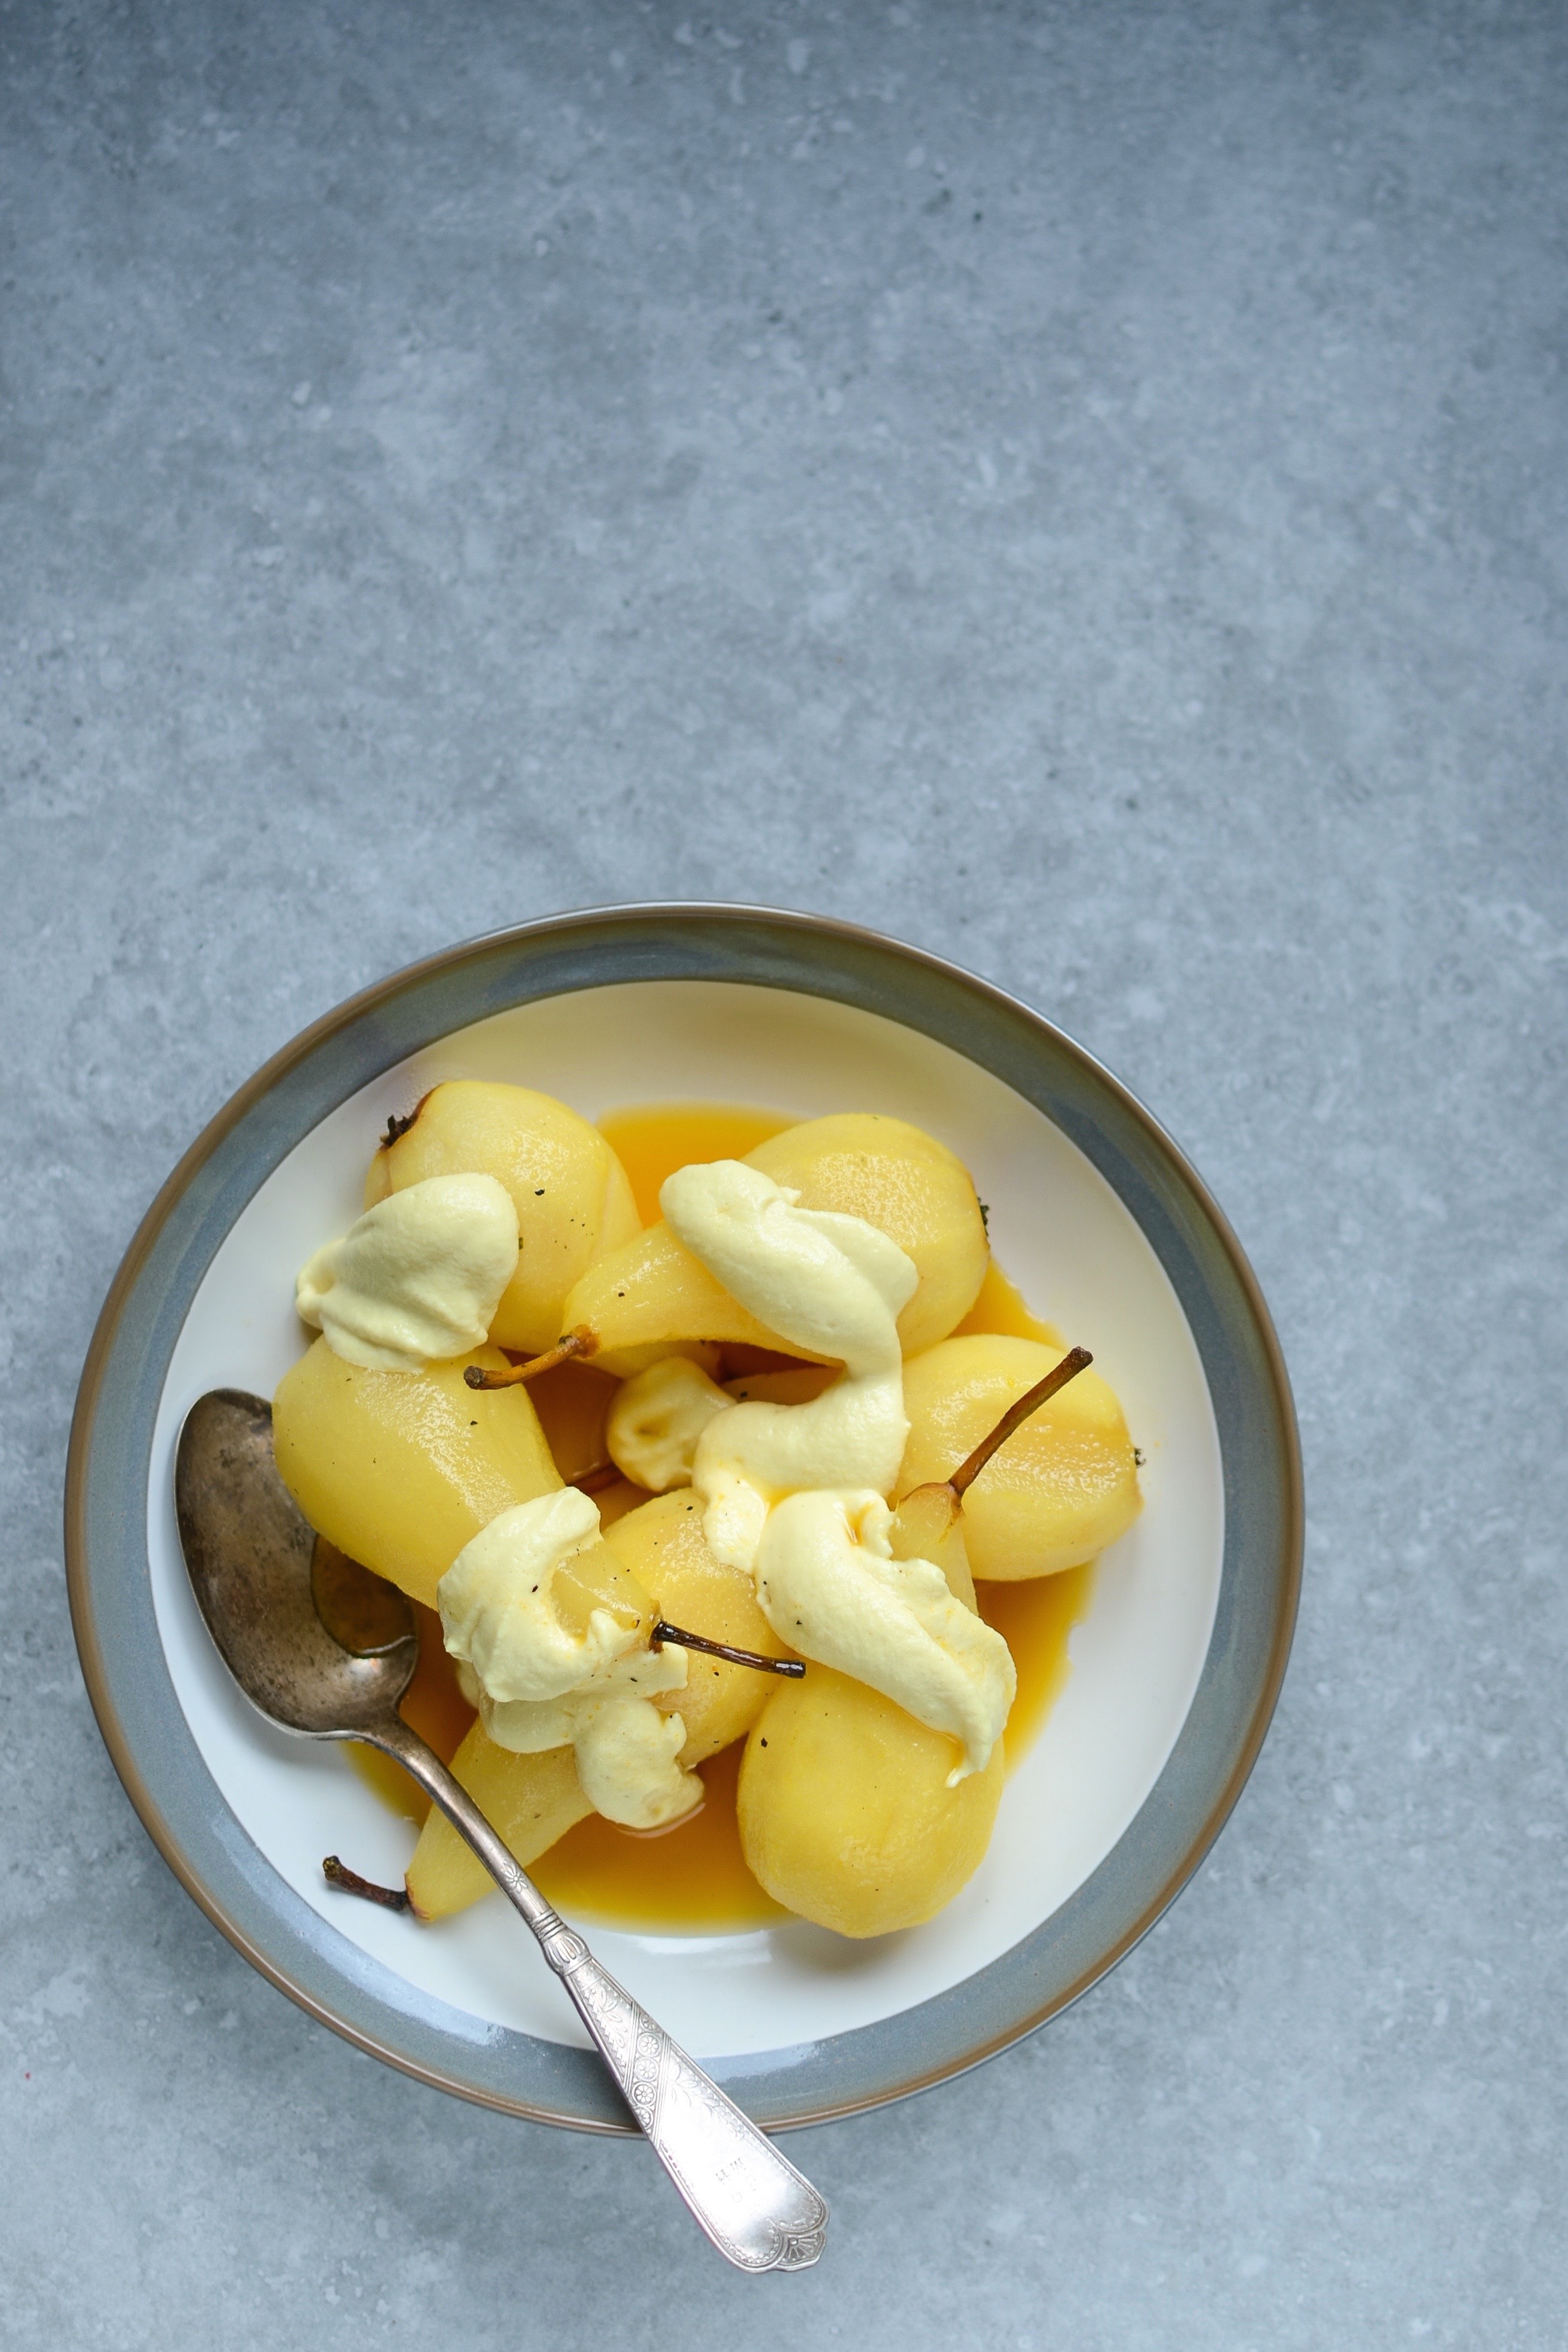
Turmeric poached pears with macadamia nut cream
Serves 6
Ingredients for the pears
6 – 7 ripe but firm pears
5cm (2”) piece of fresh turmeric, scrubbed cleaned (or peeled if not organic) and thinly sliced
thumb-sized piece of ginger, scrubbed cleaned (or peeled if not organic) and thinly sliced
a few gratings of coarse freshly ground black pepper
500 – 600ml dry white wine
40ml (2 1/2 tablespoons) maple syrup
Ingredients for the macadamia nut cream
140g (1 cup) macadamia nuts, soaked in filtered water for 2 – 4 hours
80ml (1/3 cup) reduced poaching liquid
unrefined salt
Method
- Peel the pears, taking care to leave the stalk in tact. Place the pears, turmeric, ginger, black pepper and white wine into a medium, deep saucepan like this one I was recently sent by M&S, and set over medium heat.
- Cut a circle out of greaseproof parchment paper just large enough to fit into the saucepan and lay over the pears in the wine (this is called a cartouche and prevents the liquid from evaporating too quickly whilst the fruit is poaching).
- As soon as you see tiny bubbles form under your cartouche, turn the heat down very low and allow the pears to poach for 15 minutes. Test with a sharp paring knife – the pears should be tender, but not too soft.
- Remove the pears carefully with a slotted spoon and set aside.
- Turn the heat up high and boil the wine with the flavourings until it has reduced by about two thirds to three quarters. You will need about 160ml (2/3 cup) of reduced liquid.
- Now add the maple syrup, whisk and set aside to cool slightly.
- To make the macadamia nut cream, rinse the soaked nuts and place in a blender with roughly half (about 80ml) of the reduced poaching liquid and a small pinch of salt. Blend until the cream is very smooth – if you do not own a high speed blender, you might have to keep going a bit longer.
- Serve the pears with the cream and remaining poaching liquid.

*This blog post was written in collaboration with M&S. All content and photos my own.
Roasted pumpkin with green sauce
I spent some time in beautiful Hamburg in my early 20’s. My neighbour opposite was also a keen cook and I remember chatting to him about his favourite local dishes (his was Steckrübeneintopf). When he asked me whether there were any particular South African specialities I loved, it took about 1 second for “Pumpkin Fritters” to leave my mouth, a little more loudly than I had intended. He was horrified. “Pumpkin? That is what the pigs eat here in Germany…” Say what?! Naturally I rose to the challenge and, once I had finally sourced a pumpkin, made him some Pampoenkoekies. I believe he was a converted man.
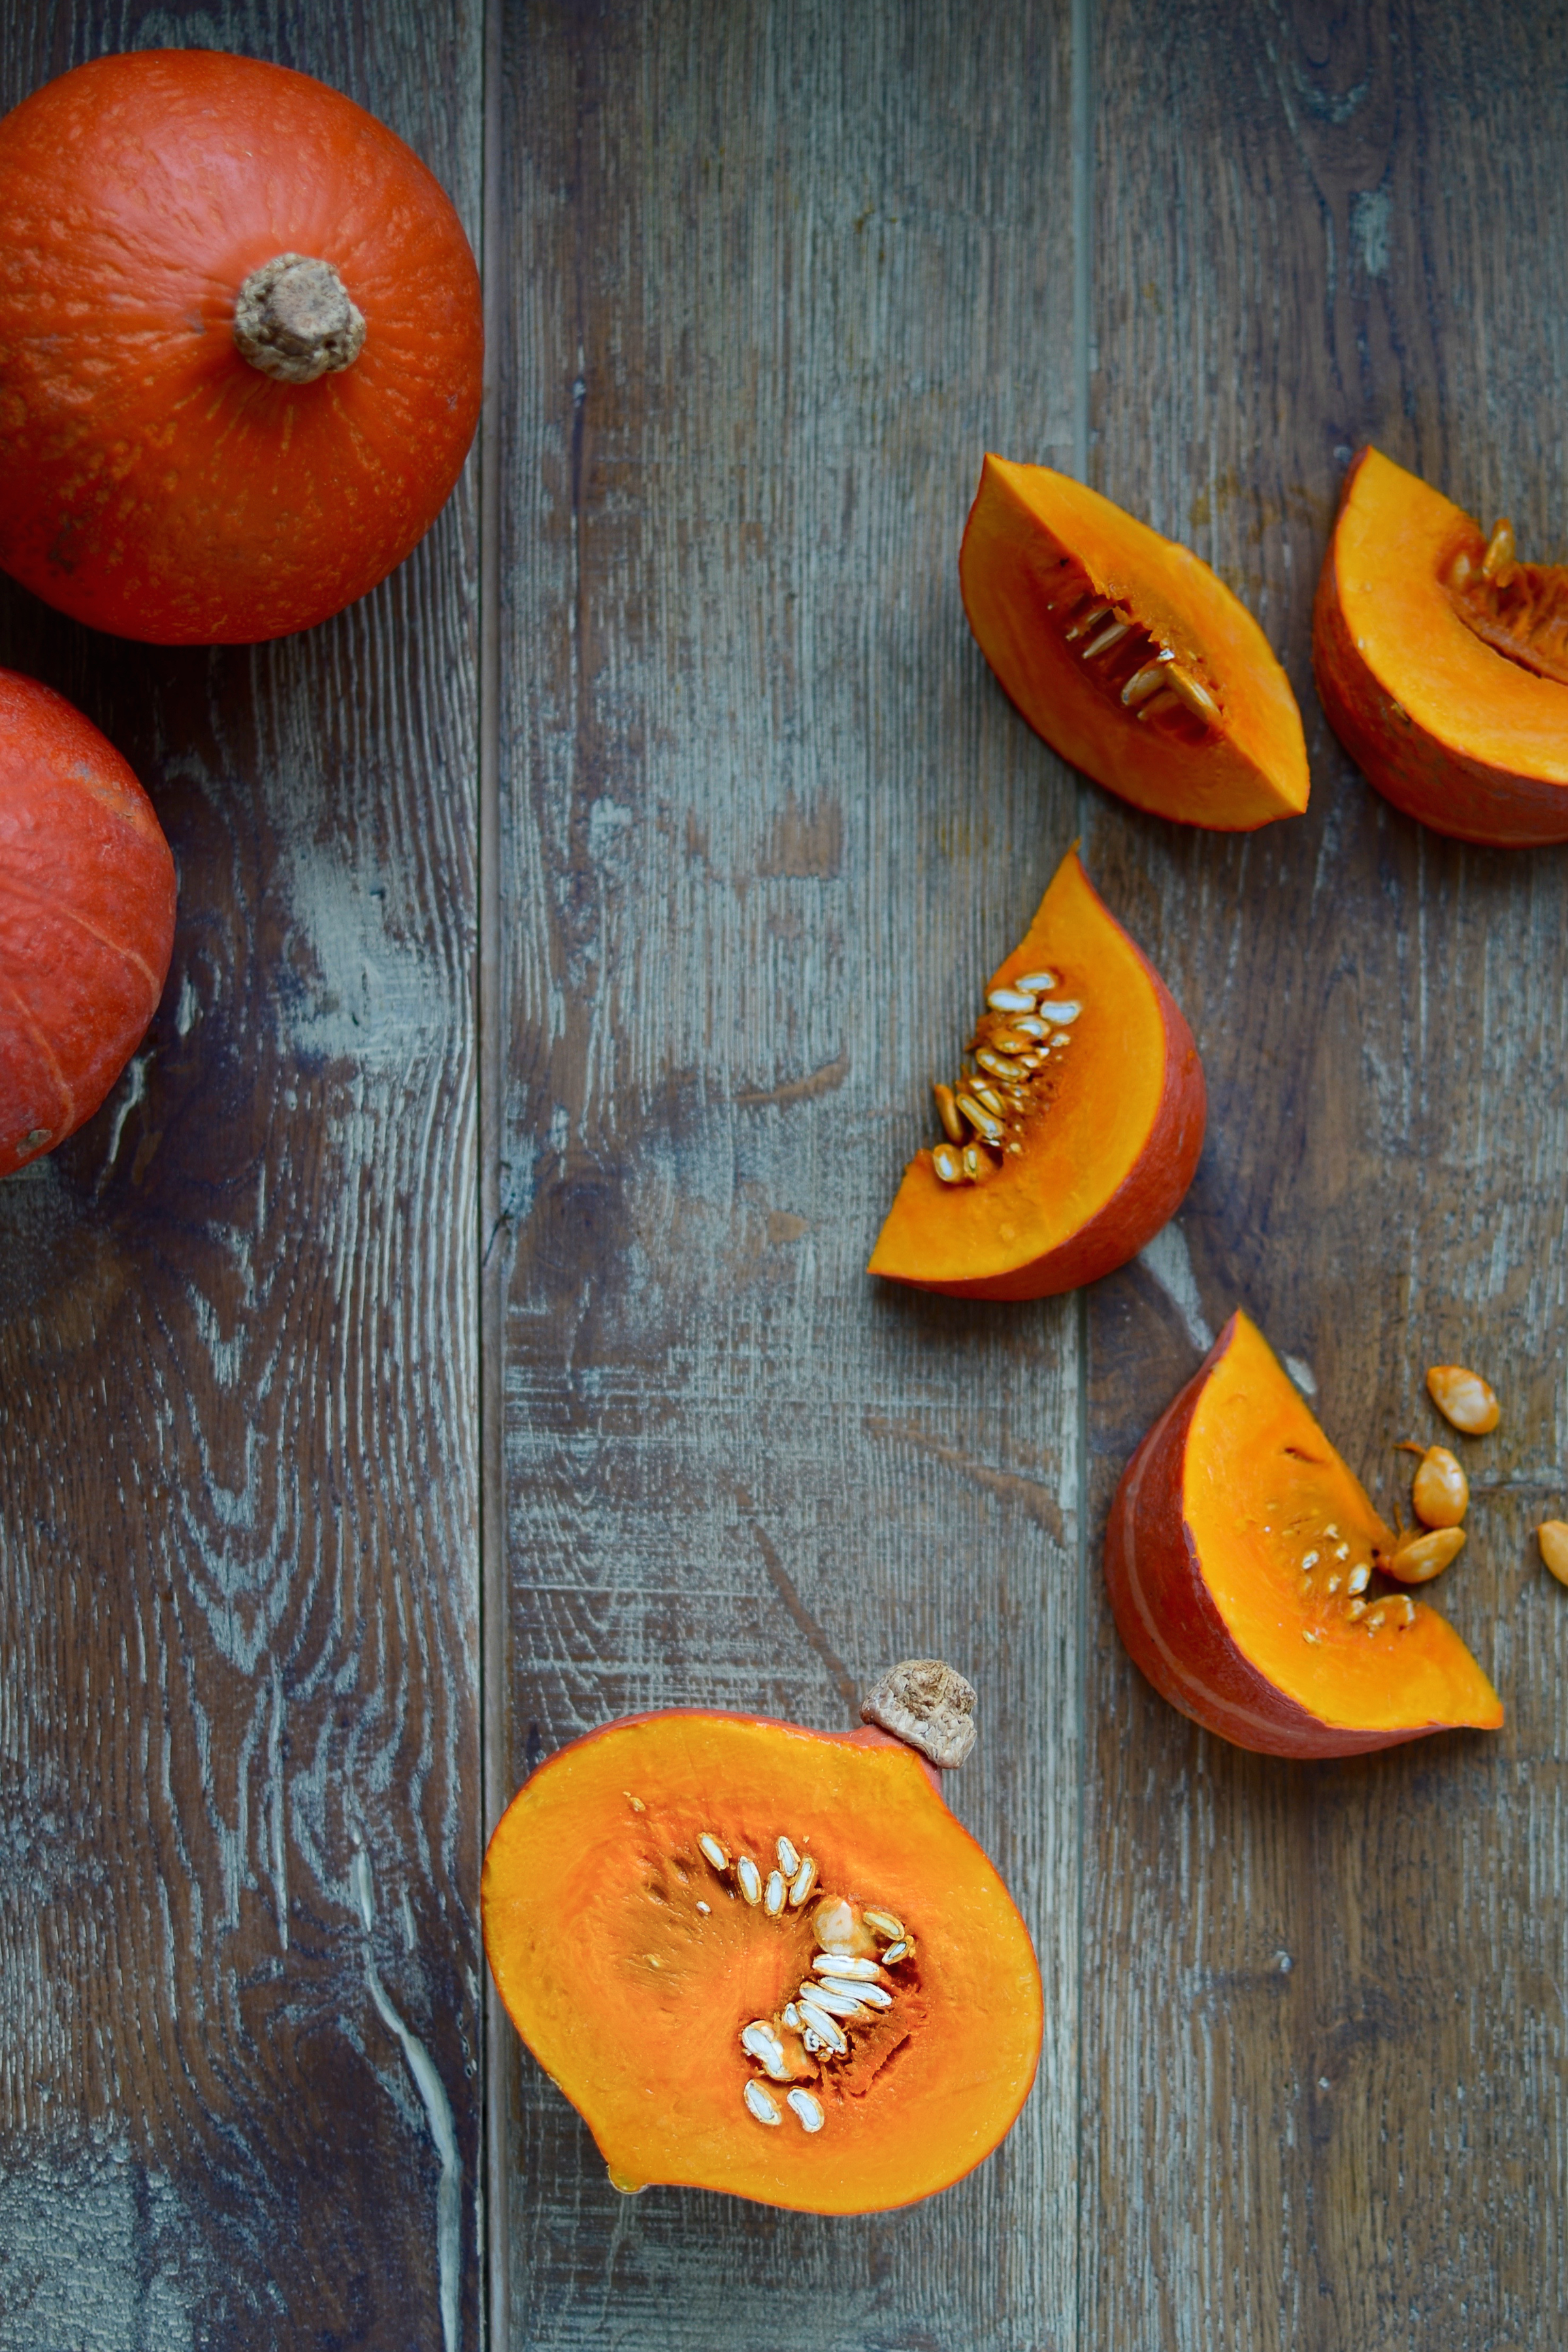
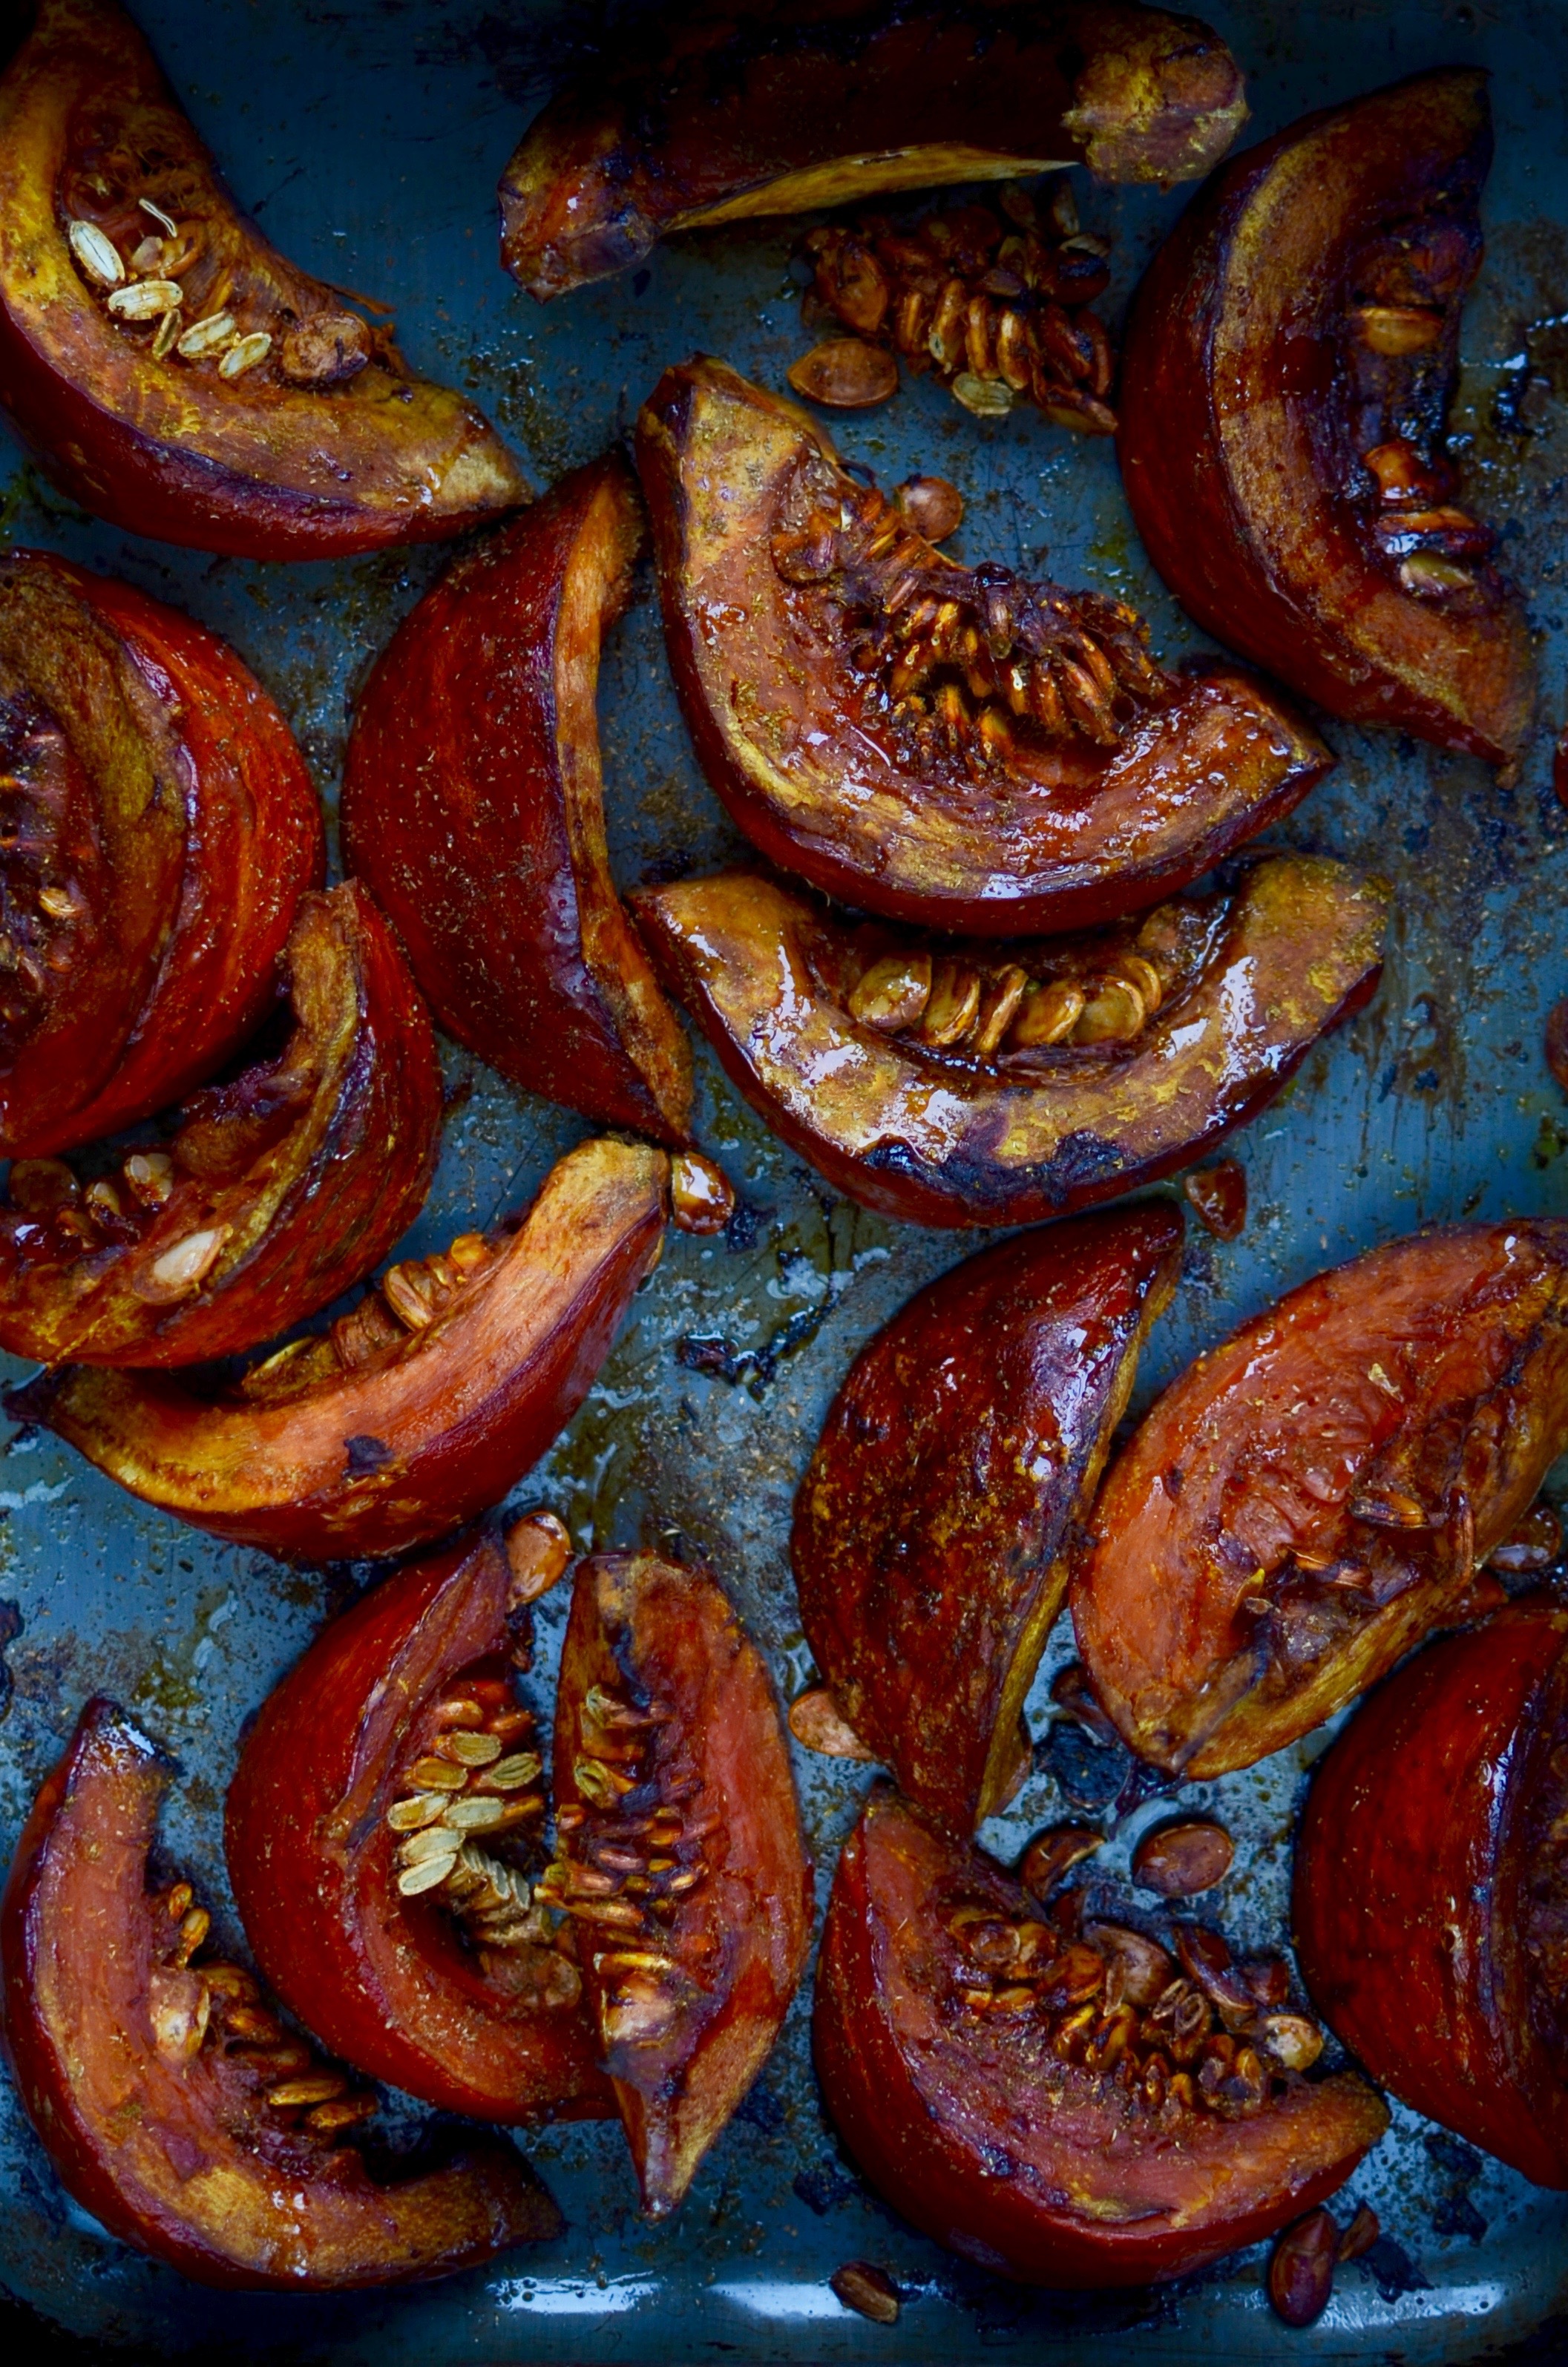
This dish is a lovely make-ahead option for the colder months. Use whatever squash or pumpkin you have, but it is particularly delicious with sugar pumpkin. The green sauce is very moreish and good with any type of grain or pulse-based salad. It will thicken in the fridge, but just give it a good whisk and it should be pourable.
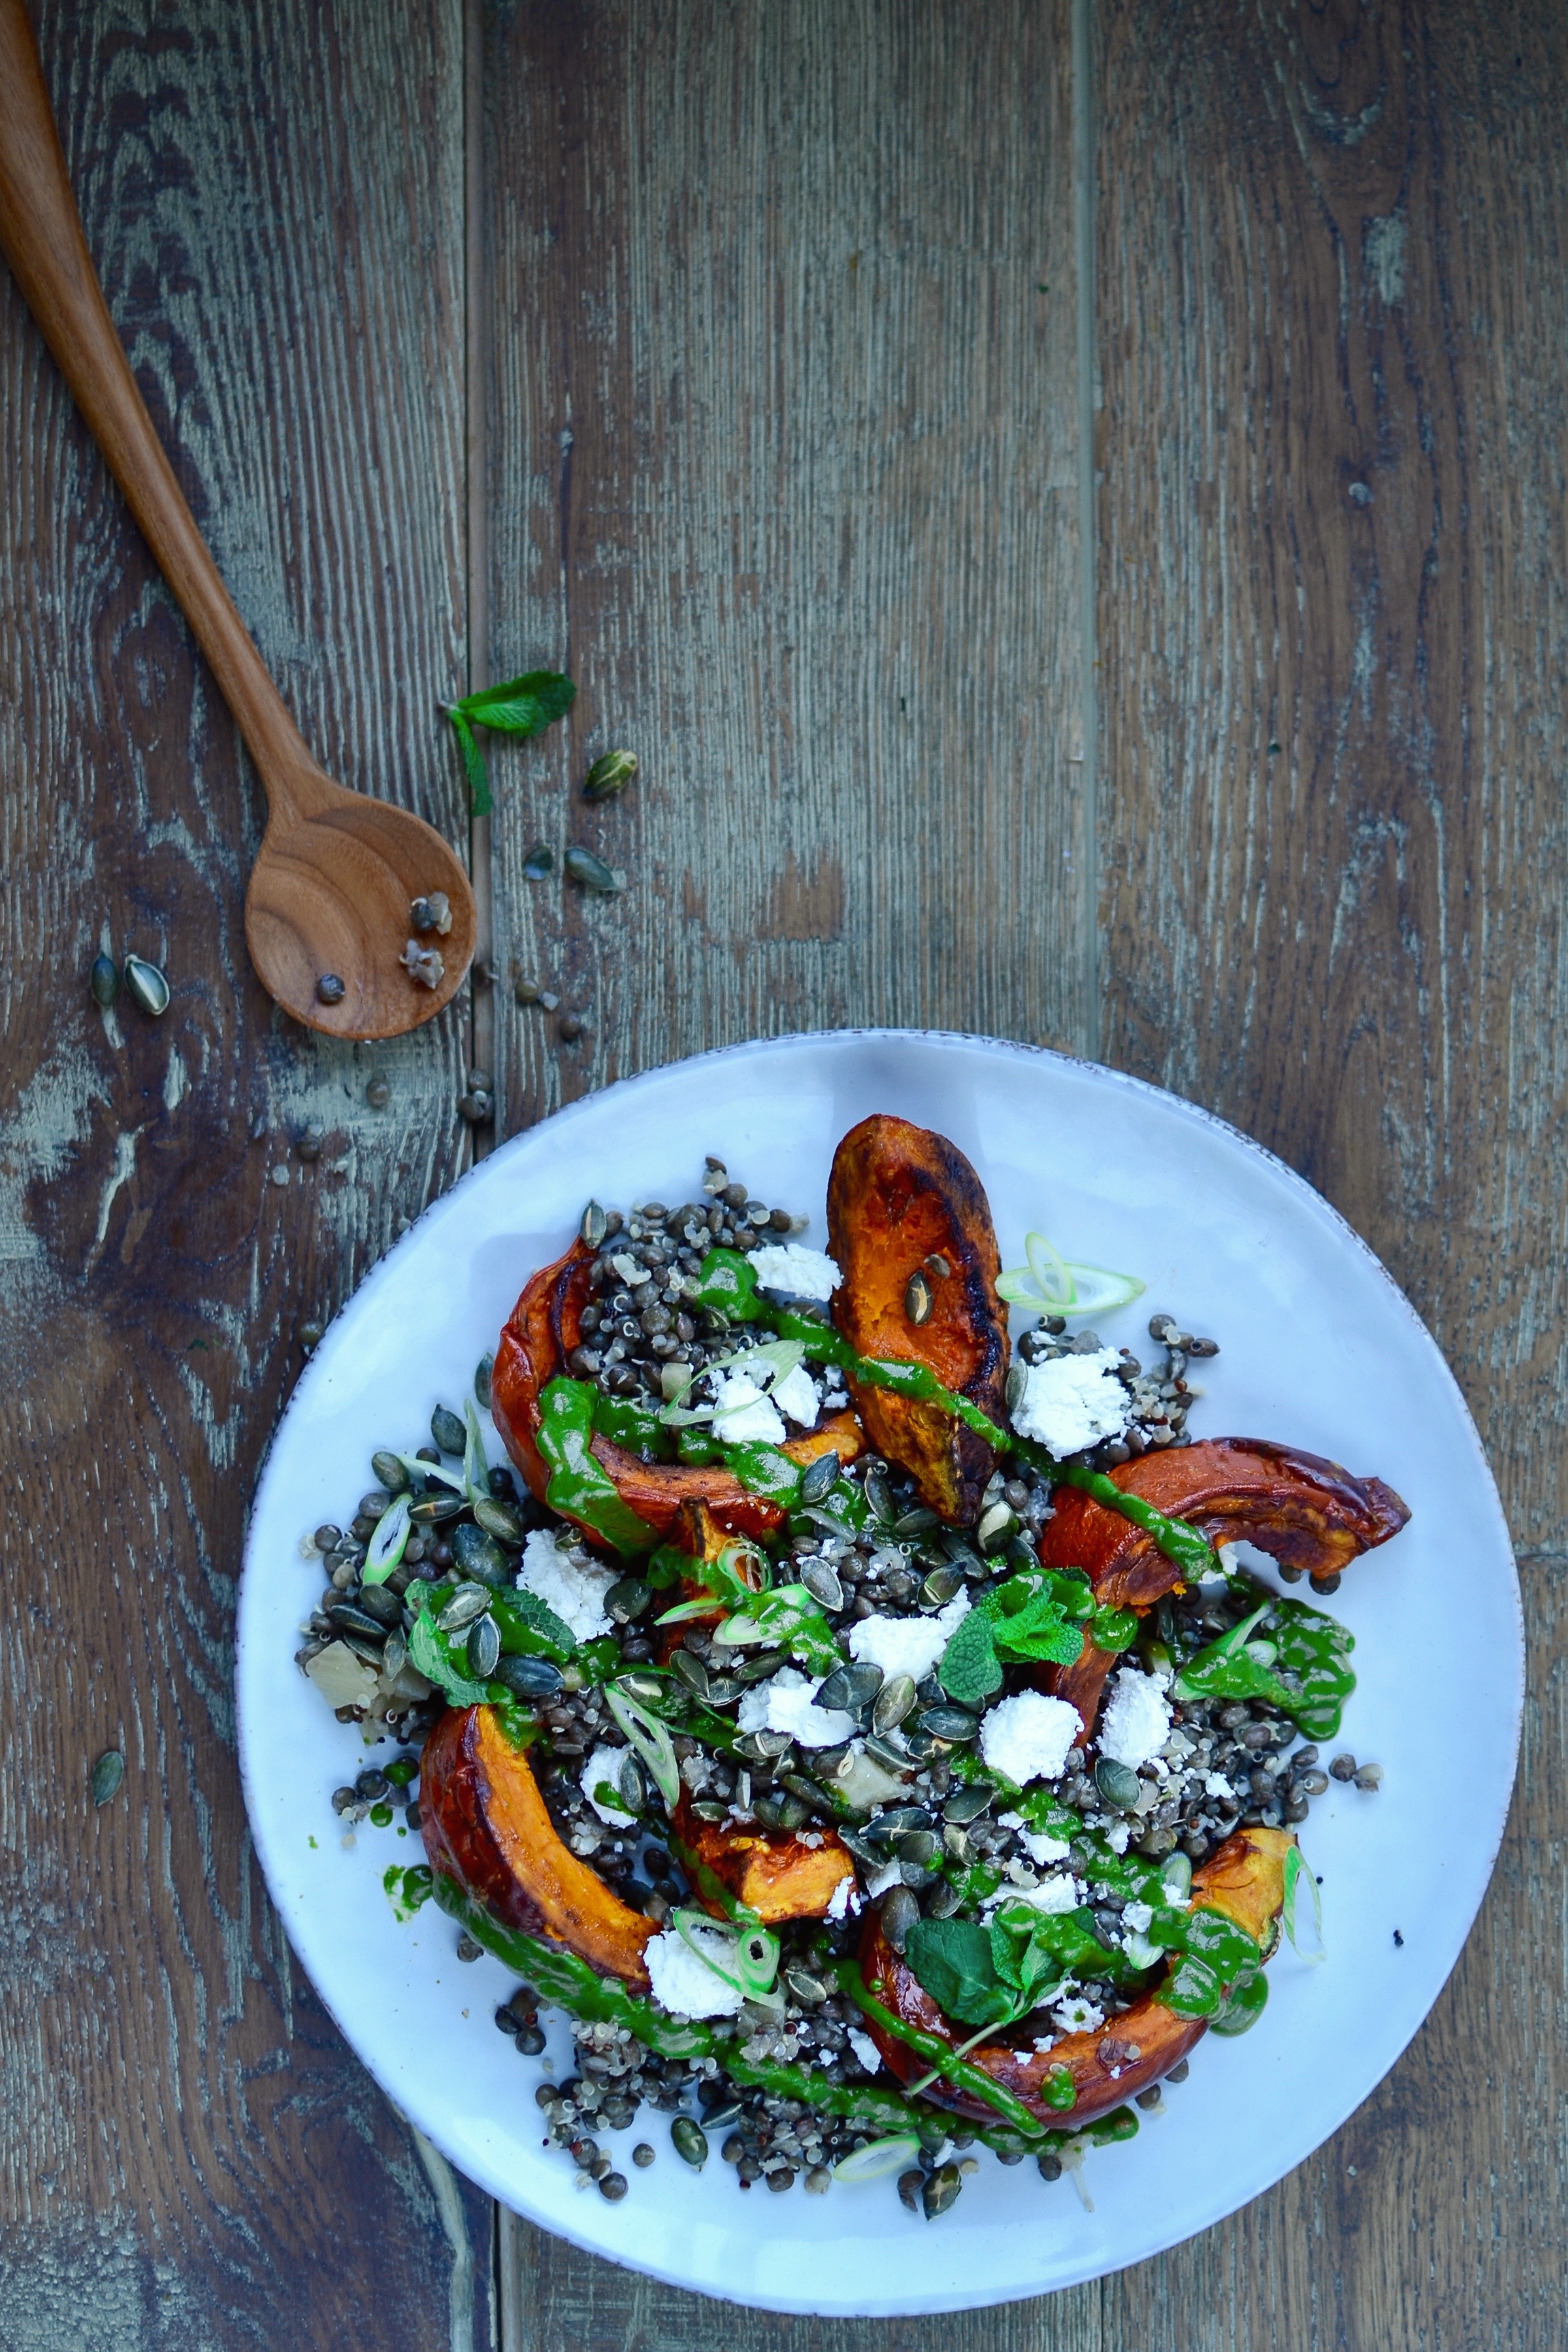
Roasted pumpkin with green sauce
Serves 4 – 6
Ingredients for the sauce
80ml (1/3 cup) coconut milk (if using organic, stand the tin in warm water to melt the fat)
30ml (2 tablespoons) lime juice (about 2 medium limes)
1/2 teaspoon unrefined salt
1/2 small avocado
Juice of 1 tangerine
1 spring onion
large bunch (100g) fresh coriander, leaves and stalks
medium bunch (50g) fresh mint, leaves only
1 teaspoon raw honey
1 green chilli (more or less to taste), seeds removed if you prefer it less spicy
For the rest
1 fennel bulb, the tough outer layer peeled (or a couple of stalks celery)
1 spring onion, finely sliced
3 cups cooked lentils and/ or quinoa
unrefined salt
crumbled goats cheese
roasted pumpkin (I used kabocha squash, but for an extra delicious option, try sugar pumkin)
toasted pumpkin seeds
Method
- Put all the ingredients for the dressing in a blender and blend until smooth. Set aside.
- Separate the layers of the fennel bulb, then chop into small squares. Sauté in a little coconut oil until tender.
- Combine the fennel with the rest of the ingredients, dress with the dressing and serve.
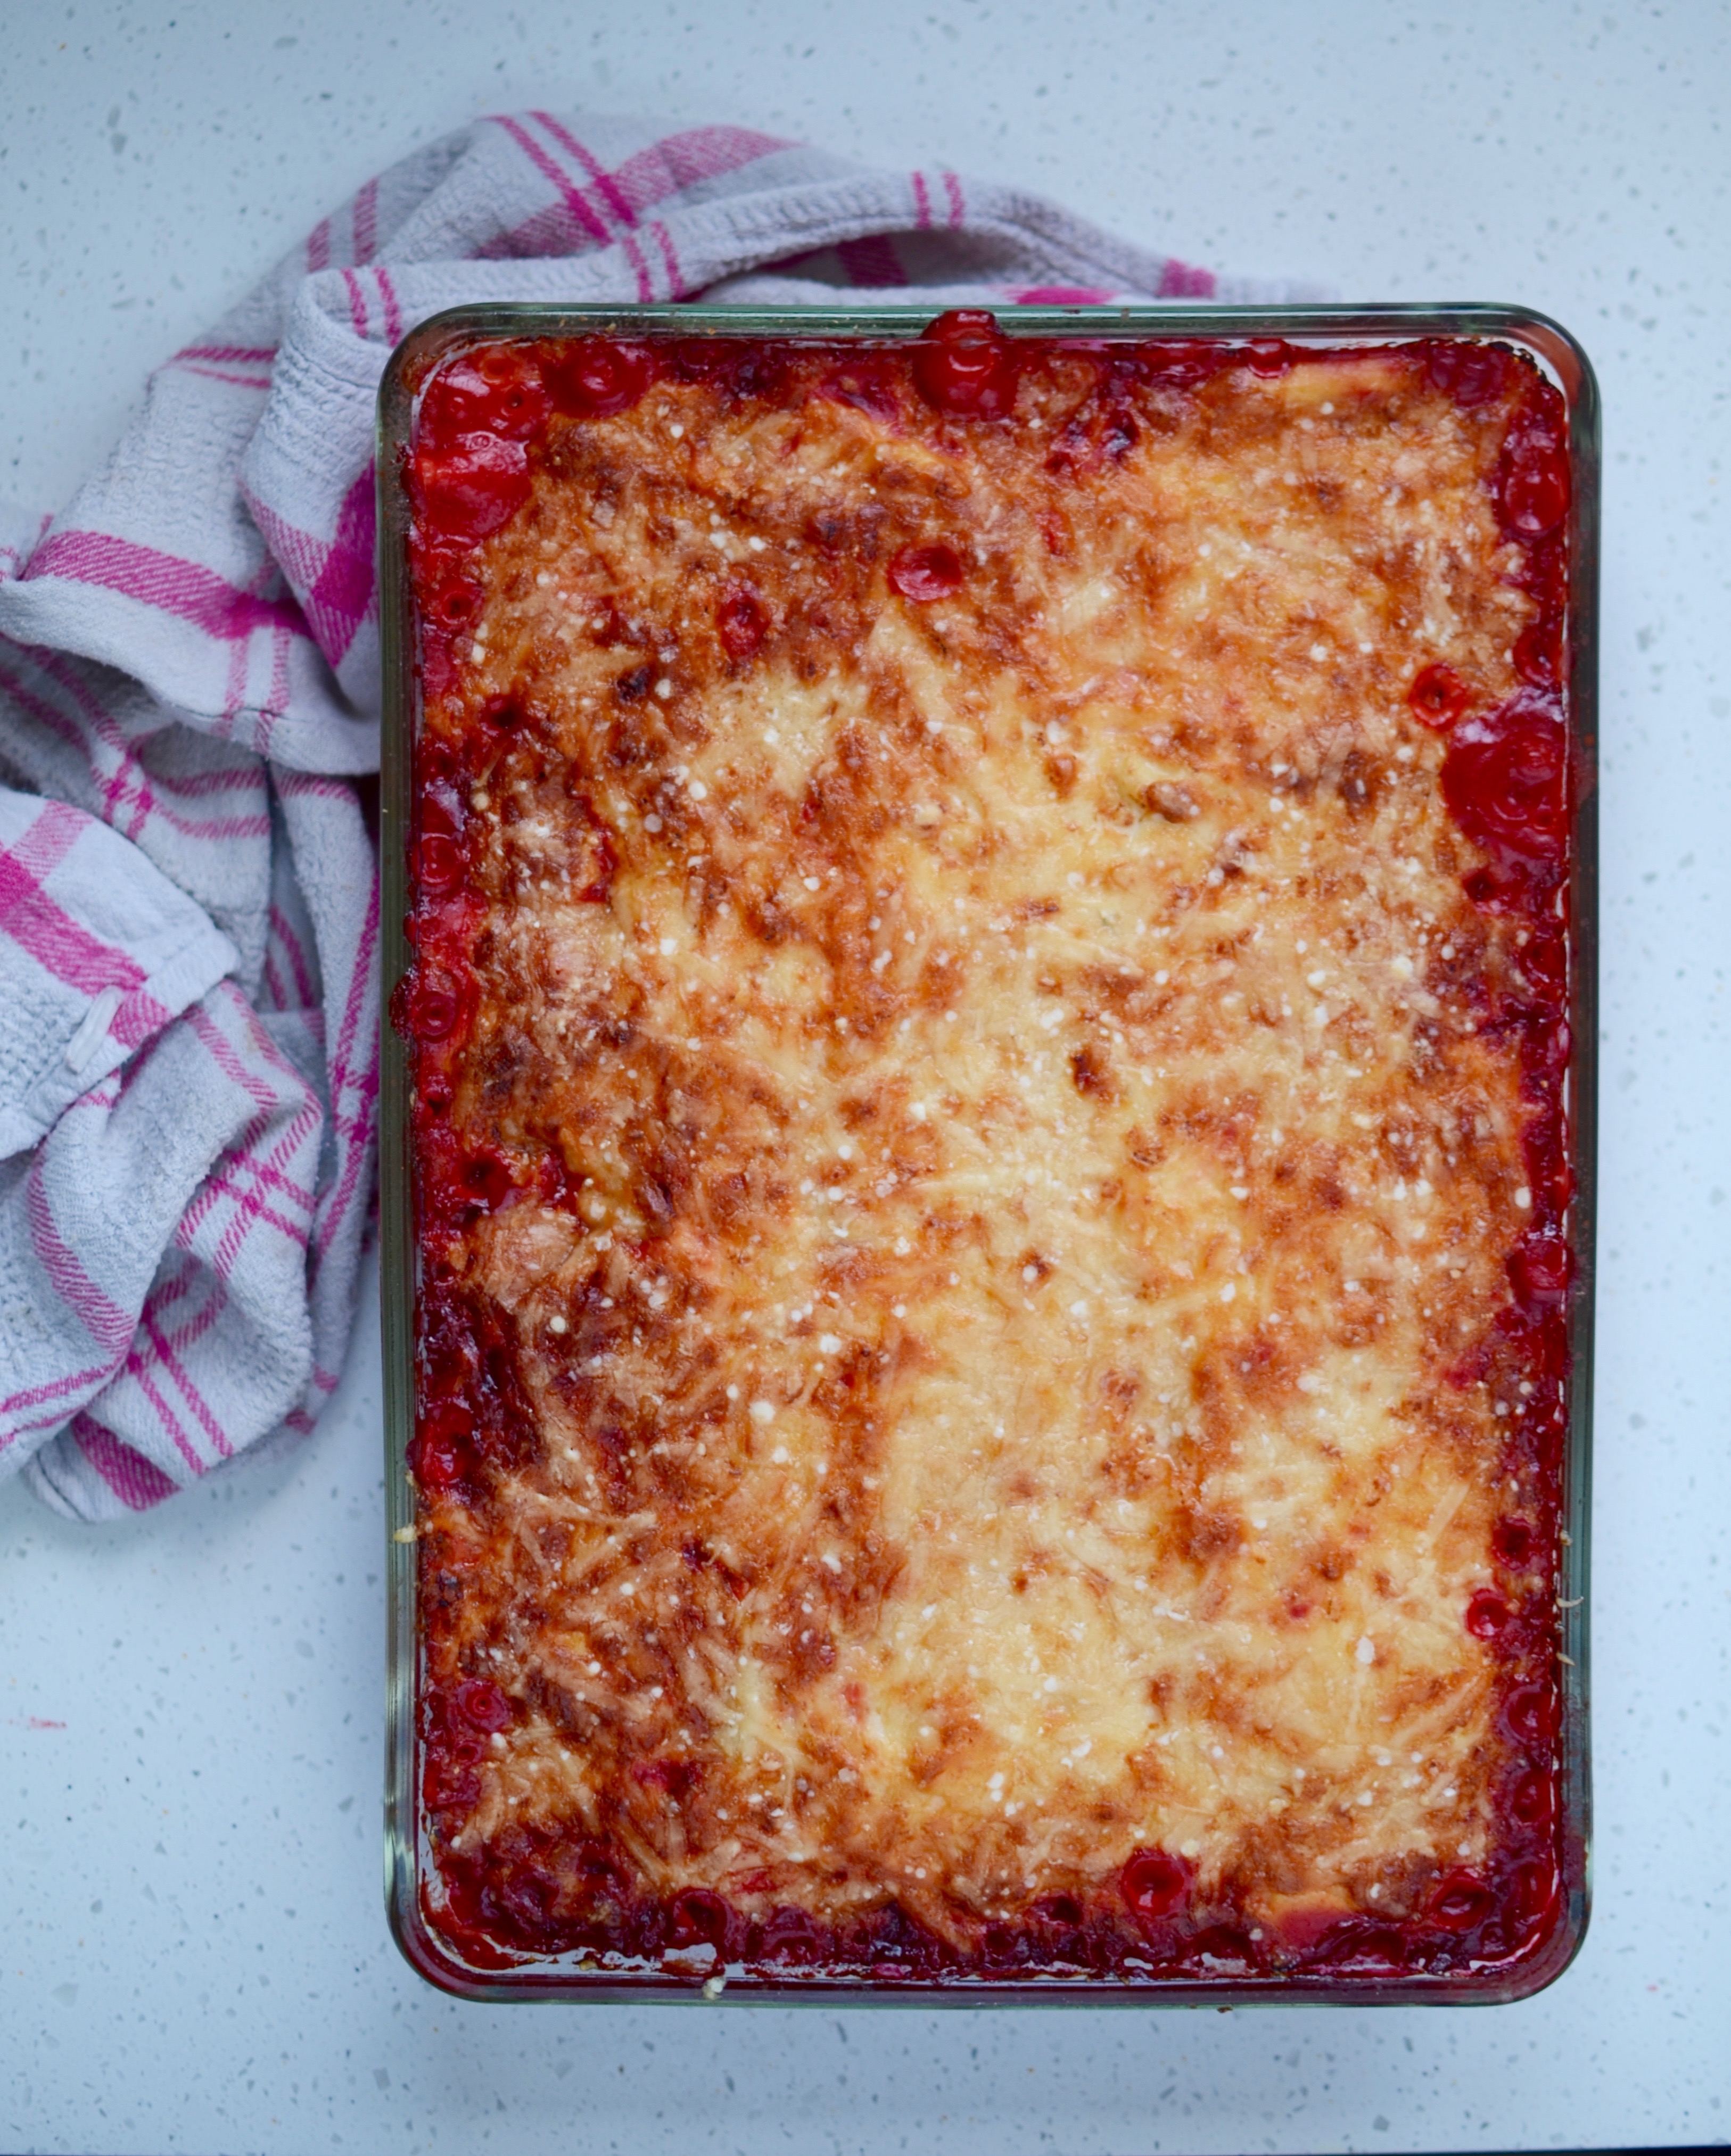
Beet and butternut “fasagne”
I love this time of year, just before the clocks go back. It is sometimes frosty, but mostly bright and often sunny. The Boston ivy cascading over the garden wall has embraced its beautiful autumnal coat of reds, yellows and oranges, while the climbing rose is fighting the change of season with a last few brave blooms. The produce at the farmer’s market is now distinctly different from the offering even a month ago. And our appetites have definitely veered towards more warming, comforting dishes. This fasagne (my son’s name for “fake” meat-, gluten- and (mostly) dairy-free lasagnes) is a delicious way to feed a gathering. It does involve a few steps, but nothing is too complicated or time-consuming. I often double the quantities and freeze one.
Beet and butternut “fasagne”
Serves 6 – 8
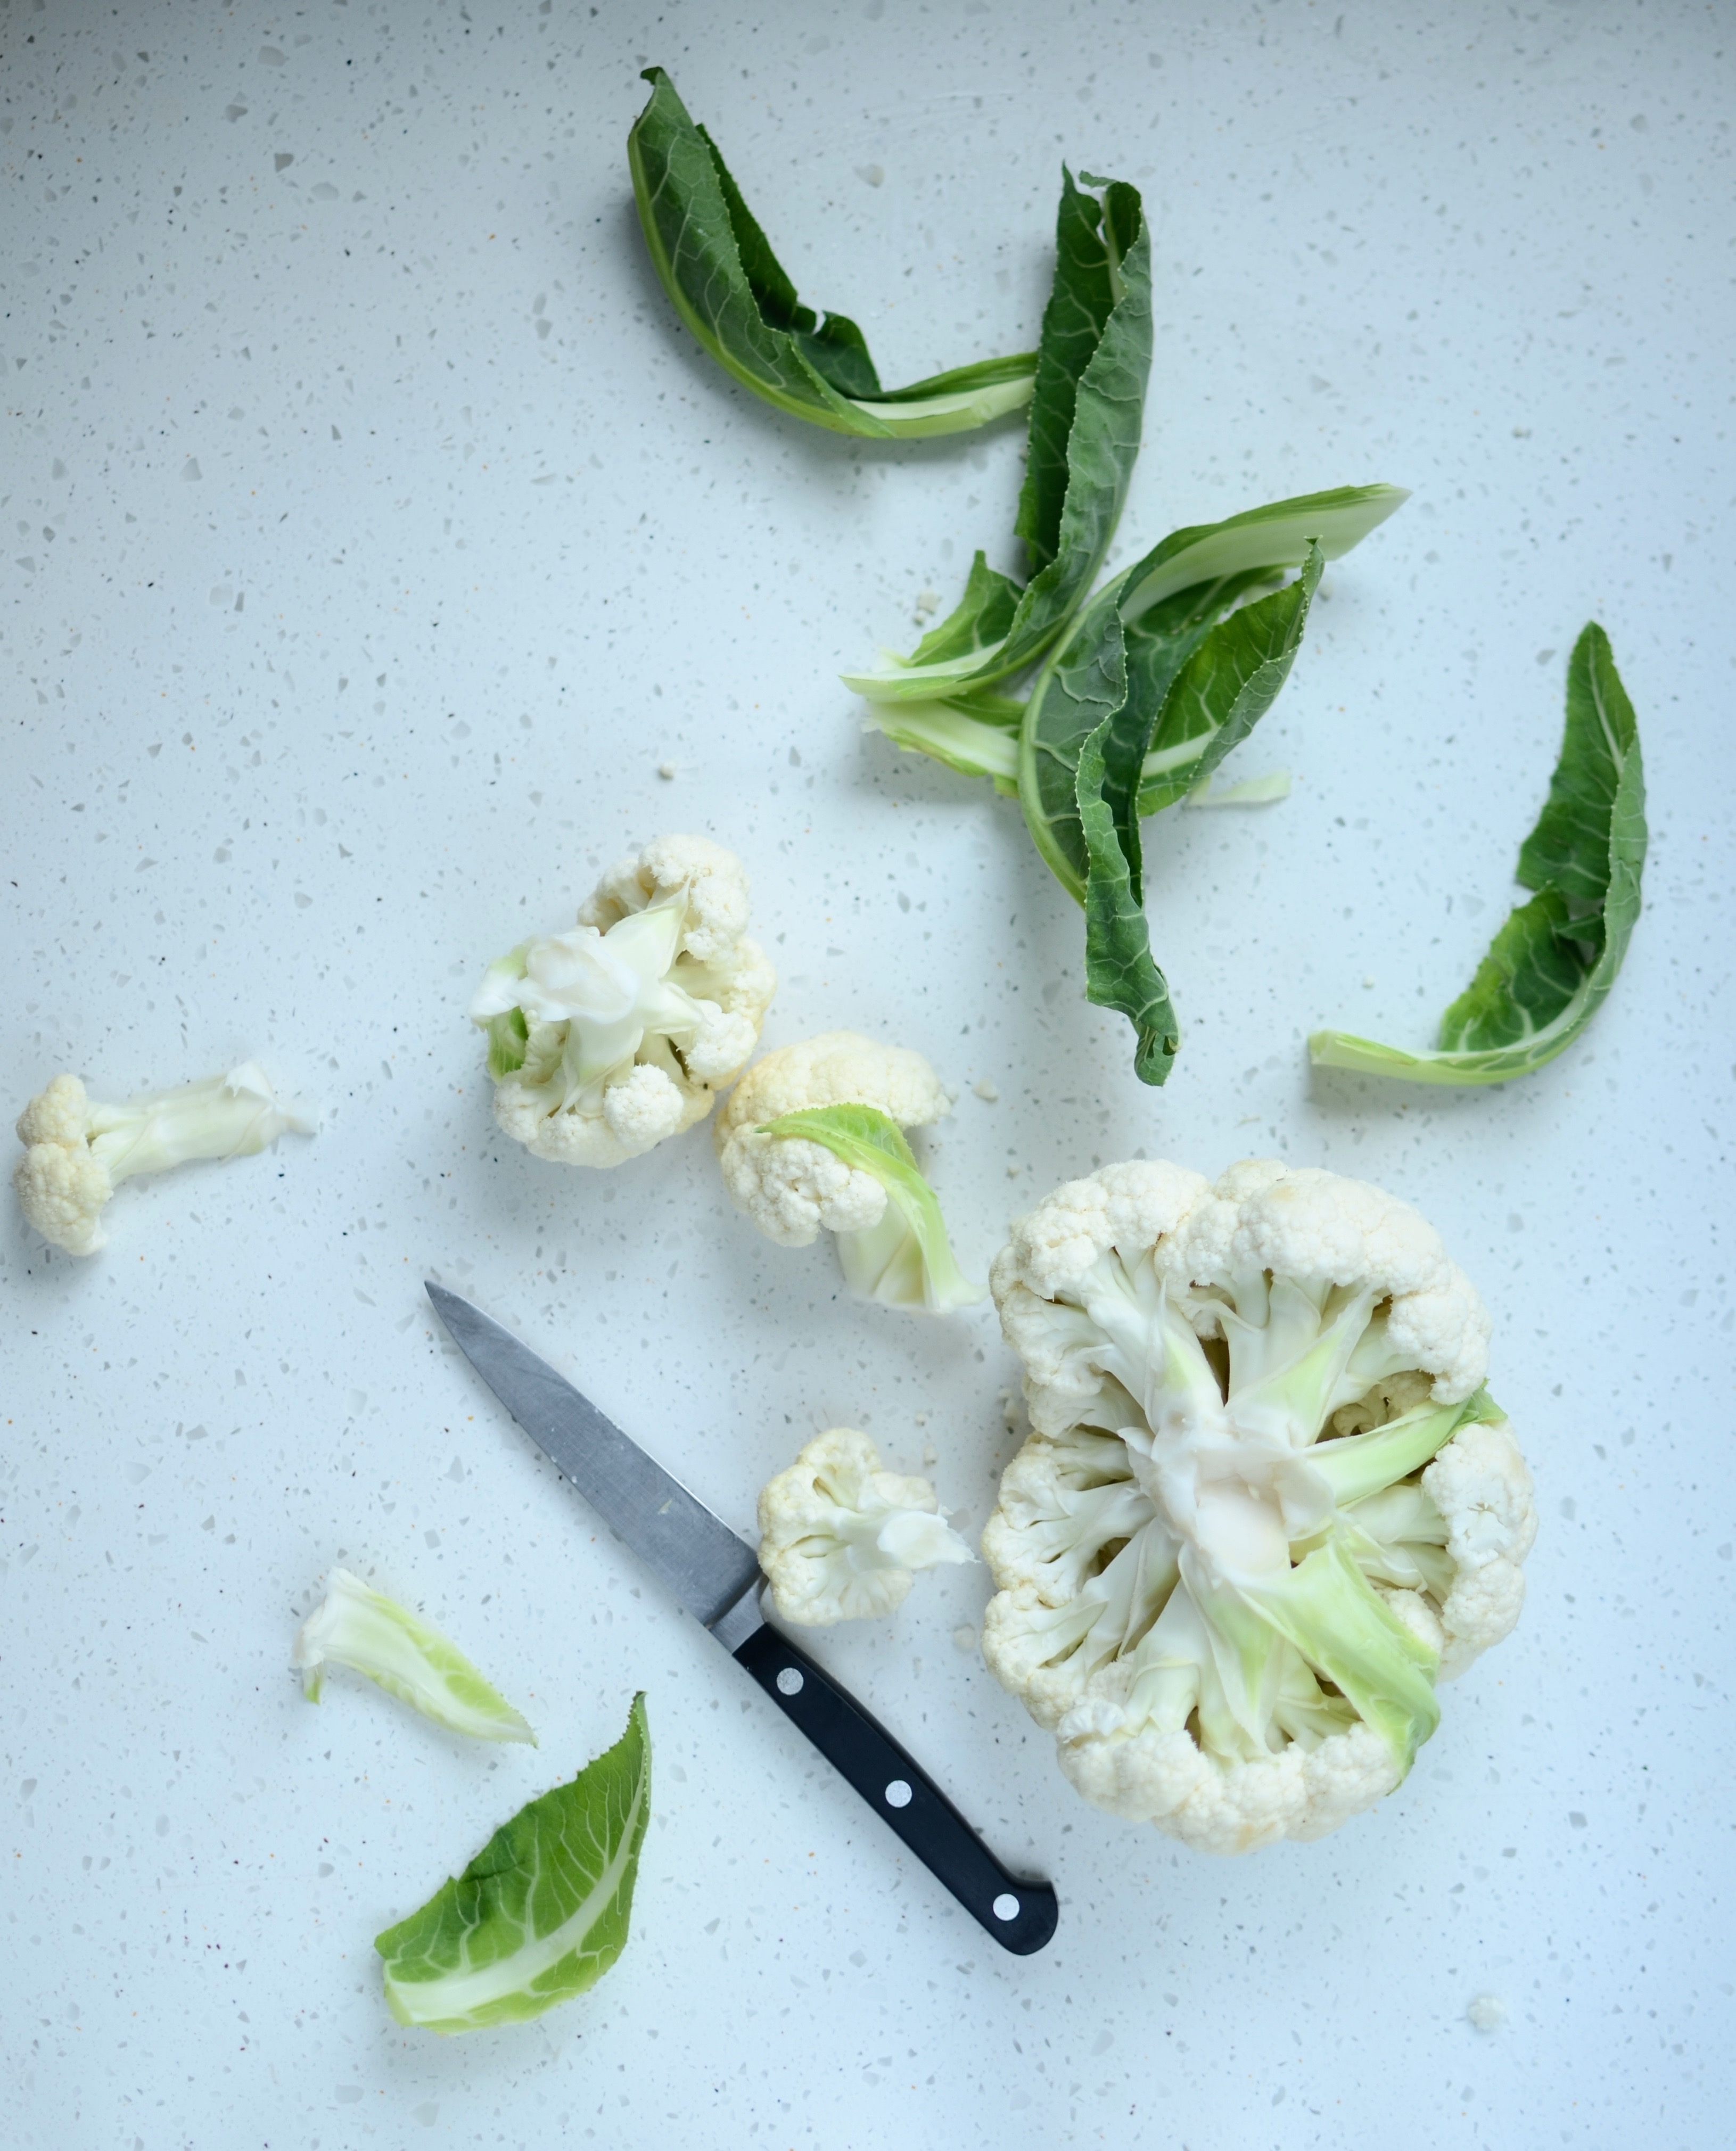
Ingredients for the cauli-béchamel
2 medium cauliflowers, florets steamed until tender (about 1.2kg cooked weight)
30g (2 tablespoons) unsalted butter (preferably organic and grass-fed), omit if vegan or dairy-free
1 teaspoon good quality unrefined salt
2 1/2 teaspoons nutritional yeast flakes (available at health stores and most good supermarkets)
heaped 1/2 teaspoon freshly grated nutmeg
Ingredients for the beet & tomato sauce
extra virgin olive oil
400g red onions, finely chopped (300g chopped weight)
1.4kg (about 14) tomatoes, peeled, deseeded and roughly chopped (or use tinned if you prefer)
500g beetroot, peeled and coarsely grated
1 teaspoon good quality unrefined salt
freshly ground black pepper, to taste
thumb-sized piece of fresh ginger, peeled and grated
Ingredients for the rest
1 large or 2 medium butternut squashes, peeled
extra virgin olive oil
350g (roughly 2 medium) leeks, washed, cut in half length ways and finely sliced
3 garlic cloves, finely chopped
400g chard, washed, stalks finely chopped and leaves finely shredded
1/2 teaspoon good quality unrefined salt
large handful of finely grated Parmesan, optional
Method
- In a blender or food processor, blend all the ingredients for the béchamel and set aside.
- For the tomato sauce, sweat the onion in a large heavy bottomed saucepan in a glug of olive oil over a medium heat until soft an translucent. Add the rest of the ingredients and simmer uncovered, stirring occasionally, until the mixture has a chutney-like consistency (about 30 minutes).
- While the tomato sauce is simmering, prepare the rest of the layers. Cut the butternut squash(es) in half just above the rounded end. Set aside the half with the seeds for use at a later stage (try the Pumpkin Pie smoothie in my book Good Better Green). Slice the other half into thin slices, roughly 0.5cm/1/4” thick. These will form your lasagne sheets. Place the “sheets” in a large saucepan and boil in a little water until just tender when tested with a sharp knife. Be careful not to let them cook too soft. Carefully remove with a slotted spoon and set aside.
- Pour the water from the butternut saucepan and add a glug of olive oil. Gently sweat the leeks and garlic until soft. Add the salt and chard stalks and continue to cook over medium heat until tender. Finally add the chard leaves and cook until wilted. Set aside.
- You are now ready to assemble the lasagne. In a large ovenproof dish, place a layer of butternut squash “sheets”. Spread half the tomato sauce on top, then half the béchamel followed by all of the chard and leek mix. Repeat the process, ending with a layer of béchamel.
- For an extra-delicious end result, sprinkle grated Parmesan over the top, then bake for roughly 1 hour at 180°C/360°F. It should be bubbling around the edges and the butternut “sheets” should be very tender when tested with a sharp knife. Remove from the oven and allow to cool for 10 minutes before serving with a large green salad.
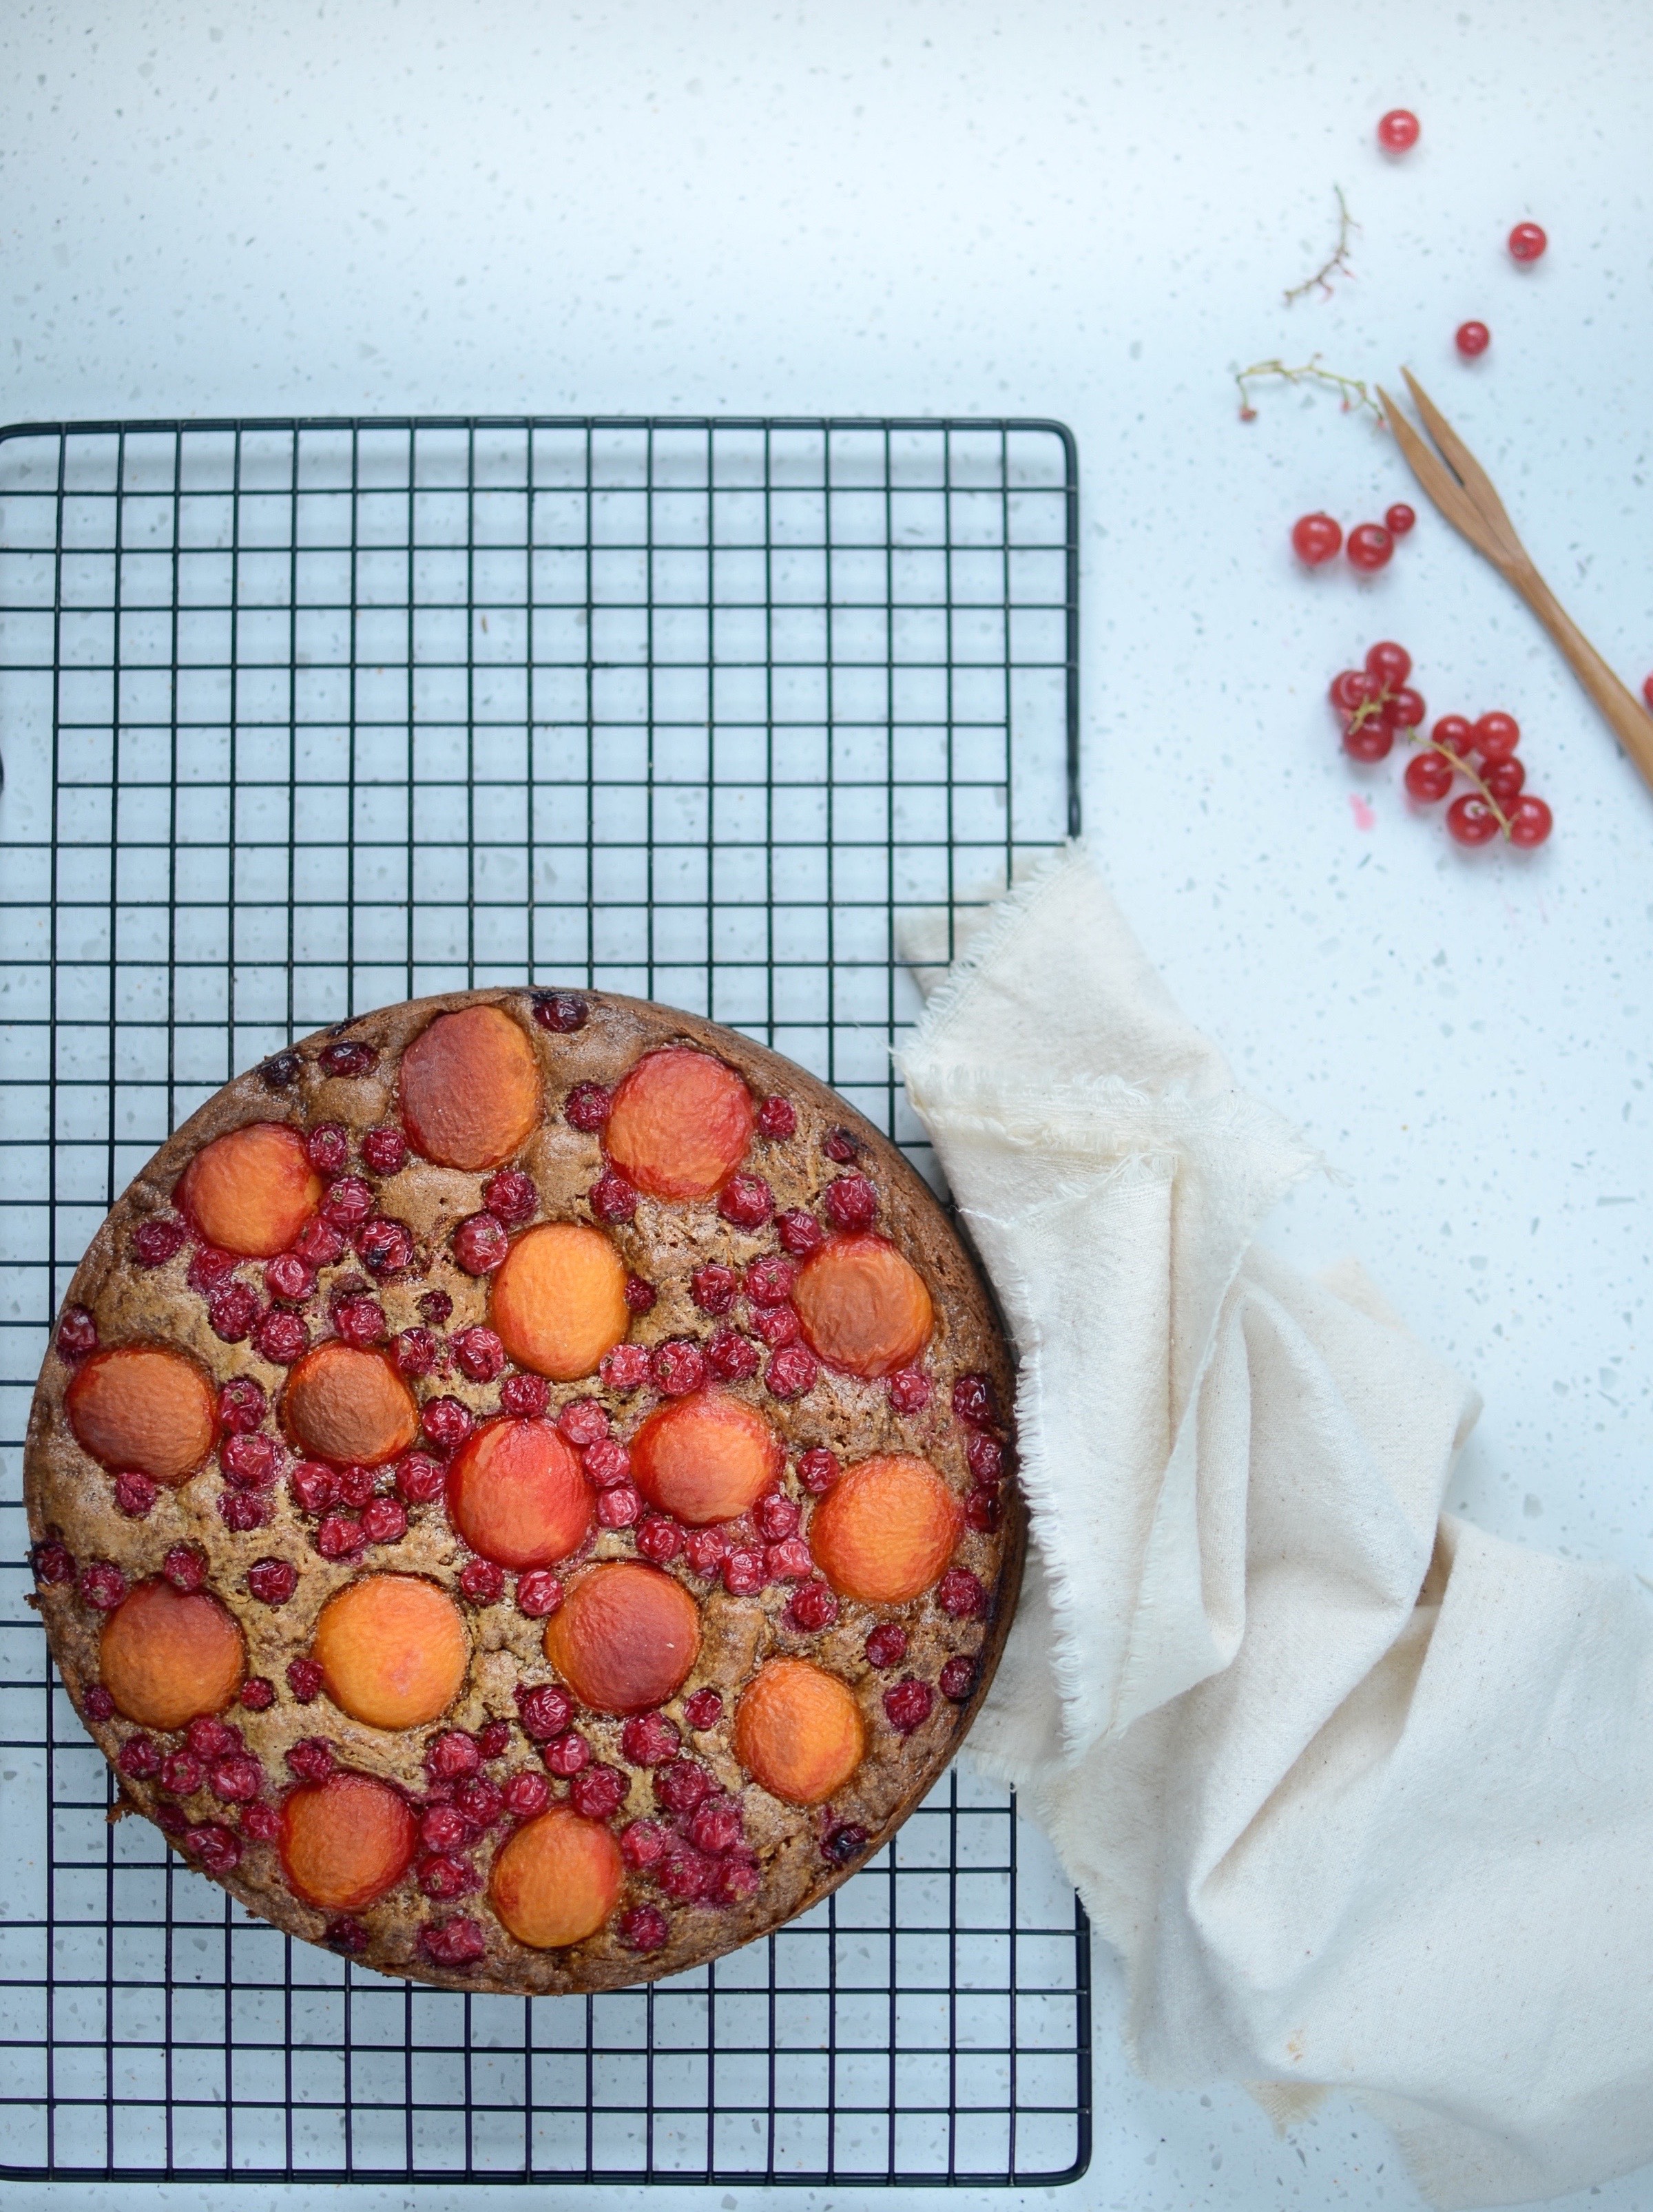
Apricot, red currant & butternut cake
I absolutely love cooked apricots, whether in a cake, jam, compote, tart or savoury dish. I find that they offer the perfect balance of flavour, and the vibrant colour is always a treat. This cake has a firm texture and is not very crumbly, so makes for an ideal dessert to take along on a picnic. Use frozen red currants if you can’t find fresh.
Apricot, red currant and butternut squash cake
Makes one 20cm cake
Ingredients
3 medium eggs
150ml (1/2 cup plus 2 tablespoons) macadamia nut or extra virgin olive oil
140g (1 cup) palm sugar or dark muscovado sugar
1 vanilla pod, cut into smaller pieces (or just the seeds if you are not using a high-speed blender)
130g (1 cup) wholemeal spelt or buckwheat flour
1 teaspoon baking soda
1 teaspoon baking powder
pinch of sea salt
165g (1 1/2 cups) grated peeled butternut squash
150g red currants, stripped from the stalks
8 small apricots, halved and stone removed
Toasted macadamias, optional
Method
- Pre-heat the oven to 180°C/360°F, and grease a 20cm spring form.
- In a blender, whisk together the eggs, oil, sugar and vanilla pod pieces (or vanilla seeds, if not using a strong blender).
- Mix together the flour, baking soda, baking powder and salt. Make a well in the centre and add the egg mix. Stir until just combined.
- Stir in the butternut and half the red currants, then scrape into prepared tin.
- Place the apricot halves, cut sides down, onto the cake batter and scatter the rest of the currants on top. Use the back of a large spoon to gently press the fruit into the batter.
- Bake for about 60 minutes or until a toothpick inserted in the centre of the cake comes out clean or with a few dry crumbs. It may need a little longer, depending on your oven.
- Let the cake cool in the pan for 10 minutes, then turn out onto a wire rack to cool.
- Serve with whipped cream and toasted macadamia nuts.
Strawberry and tomatillo salsa
Tomatillos look like little green tomatoes but are, in fact, related to the cape gooseberry (or physalis). They are a staple in Mexican cooking, and with their tart, refreshing taste, make a great addition to all kinds of dishes, especially salsa verde. Once you’ve removed the husk, rinse them well as they are sticky, then chop or blend and add to guacamole, or cook it down with red onion and chilli for the most delectable sauce. I received mine with my weekly Riverford Organic box, but you could also try online grocers specialising in Mexican ingredients.
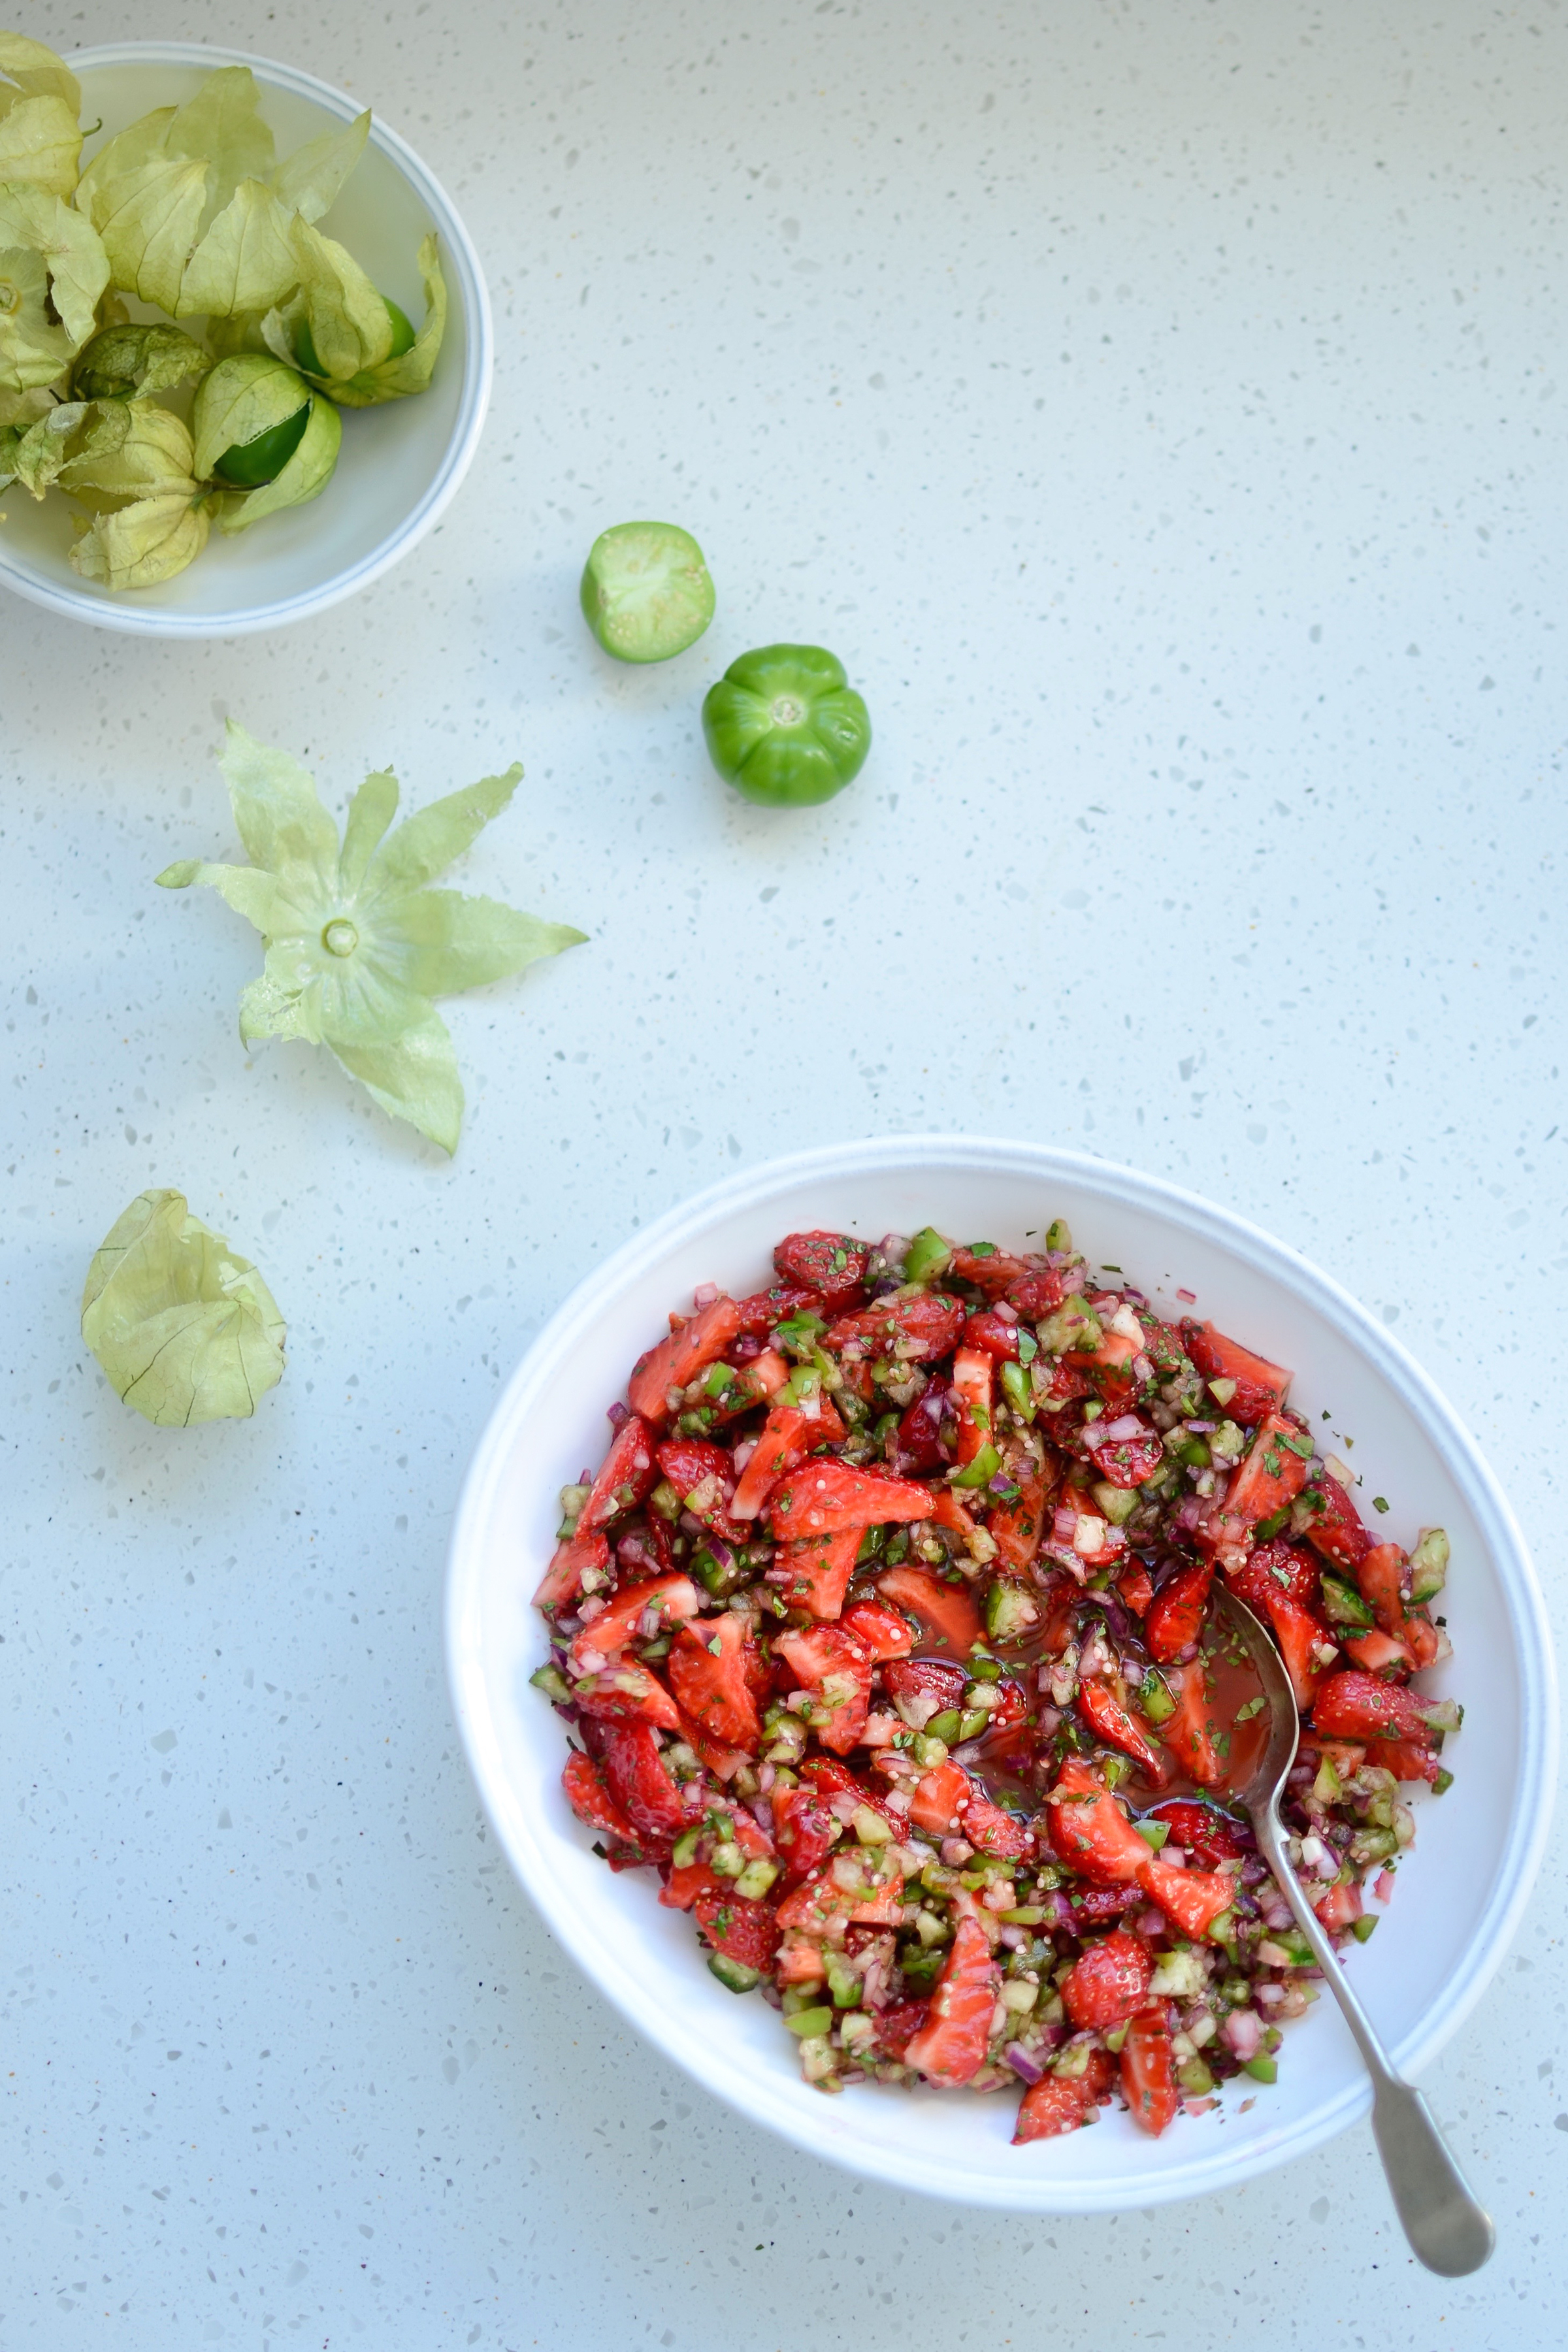
Strawberry and tomatillo salsa
Delicious with a Mexican-inspired barbecue or grilled fish, this salsa is a lovely alternative to your regular tomato version. Make sure your strawberries are super sweet – the salsa needs it. Tomatillos are a good source of niacin, potassium, and manganese, and are very rich in vitamin C and vitamin K. They also contain iron, magnesium, phosphorus, and copper.
Serves 4 – 6
Ingredients
juice of 1 lime
large pinch of sea salt
1 teaspoon raw honey
1/2 red onion, finely diced
200g tomatillos, finely chopped
400g strawberries, hulled and quartered
small bunch fresh coriander, finely chopped
1 – 2 red or green chillies, chopped (deseeded if preferred), optional
Method
- Whisk together the lime juice, salt and raw honey. Then add the onion and set aside.
- Prepare the rest of your ingredients, then toss with the dressed onions and serve.
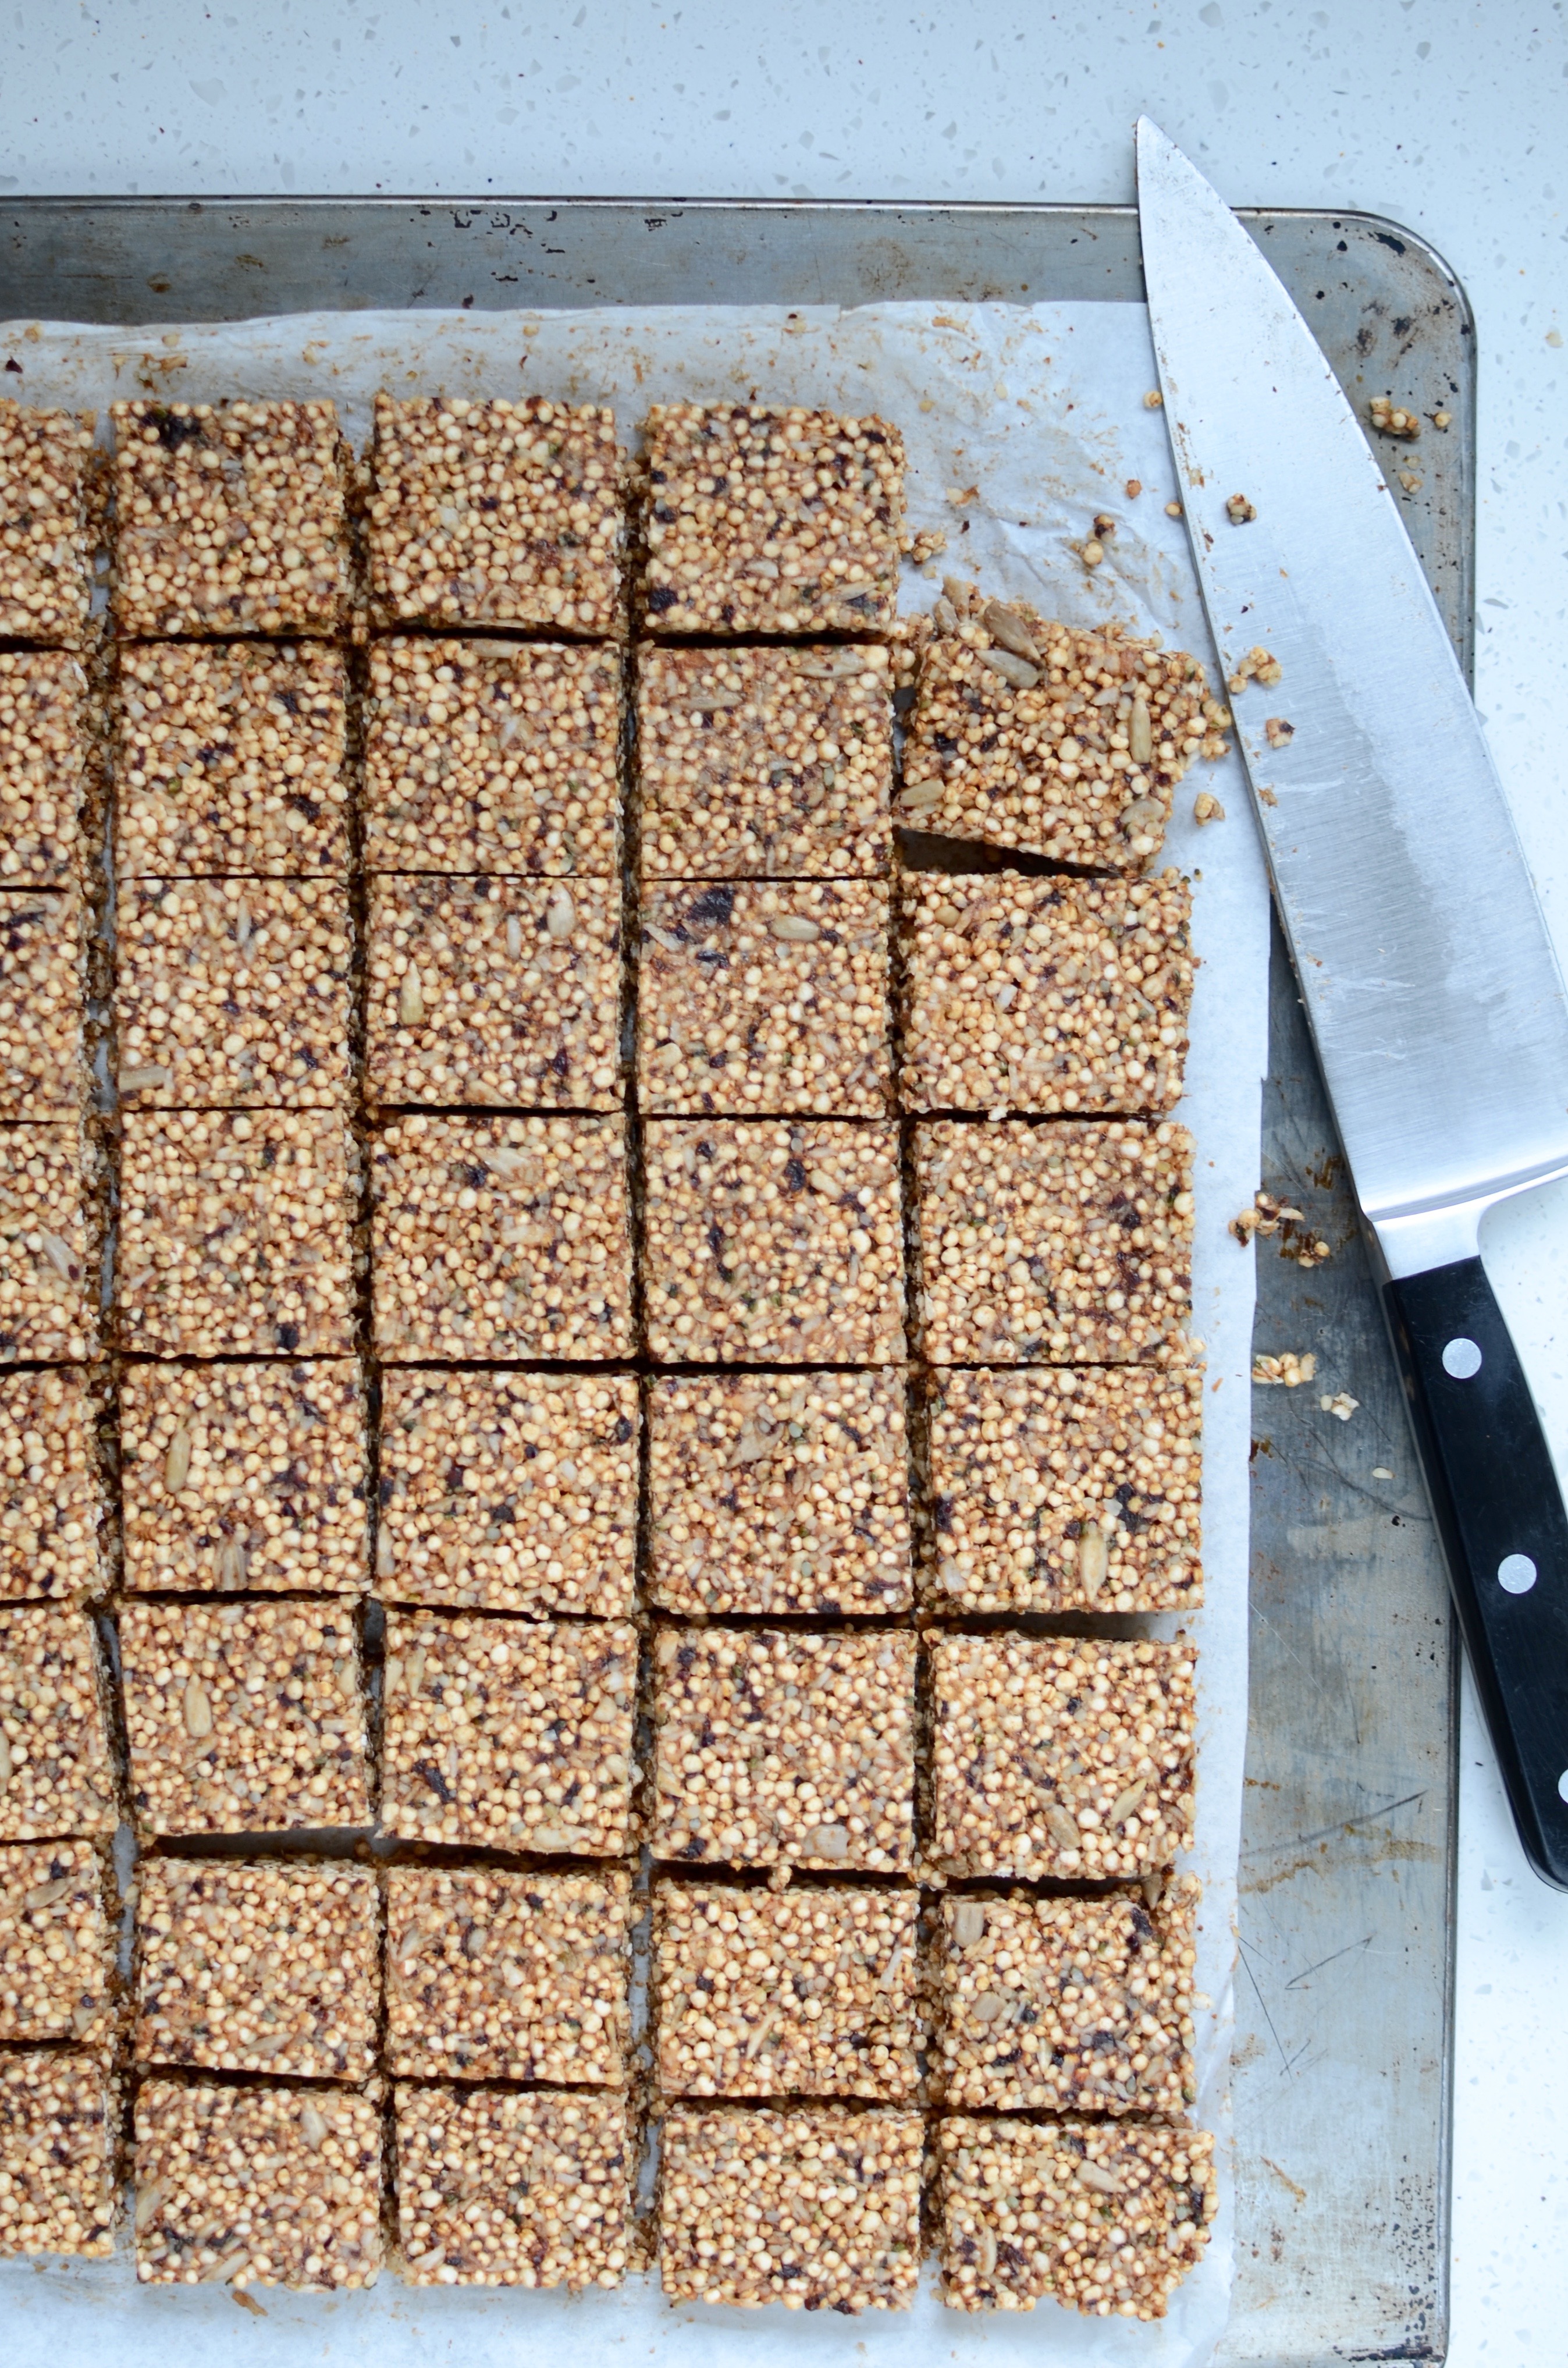
Puffed quinoa squares
A relative unknown a few years ago, South American-born Quinoa has since crept into our hearts and is unlikely to disappear anytime soon. This little pseudo-grain is very nutritious, rich in protein and gluten-free to boot, making it an ideal addition to any meal. It is most often cooked and prepared in the same way as rice, but I love grinding and making a delicious breakfast porridge with it. You can also make puffed quinoa as if you were making popcorn. Heat a large heavy bottomed pot (cast iron ones work best) and add about half a cup of quinoa. Keep shaking the pot until most of the seeds have popped. If your pot is deep enough, you won’t need a lid to keep the little nippers at bay. Tip them out onto a baking sheet to cool and use in muesli, as a topping on yoghurt or in recipes such as these squares below.

Puffed quinoa squares
The squares make an excellent after-school snack, as they are a mini version of a complete meal.
Makes about 40
Ingredients
200g (1 1/2 loosely packed cups) soft, dried prunes
125ml coconut water, at room temperature and preferably raw (i.e. unpasteurised)
150ml (125g or 1/2 cup plus 2 tablespoons) liquid coconut oil
125ml (1/2 cup) raw honey
Pinch of sea salt
5 cups puffed quinoa (home-made or store-bought)
90g (1 cup) toasted desiccated coconut
70g (1/2 cup) shelled hemp seeds
70g (1/2 cup) shelled sunflower seeds
Method
- Soak the prunes in the coconut water whilst you get your other ingredients together.
- In a powerful blender, blend the prunes, coconut water and enough of the coconut oil to give you a smooth paste. Scrape into a bowl.
- Add the rest of the oil, honey, salt, quinoa, desiccated coconut and seeds, and stir until well combined. Your mixture needs to be sticky and hold together when pressed.
- Line a 34cm x 26cm (9” x 13”) tin or oven dish with greaseproof paper, then press the mixture into the tin and refrigerate until set (at least a couple of hours).
- Turn out onto a chopping board and cut into squares. They will keep a week or so in the fridge, and freeze really well.
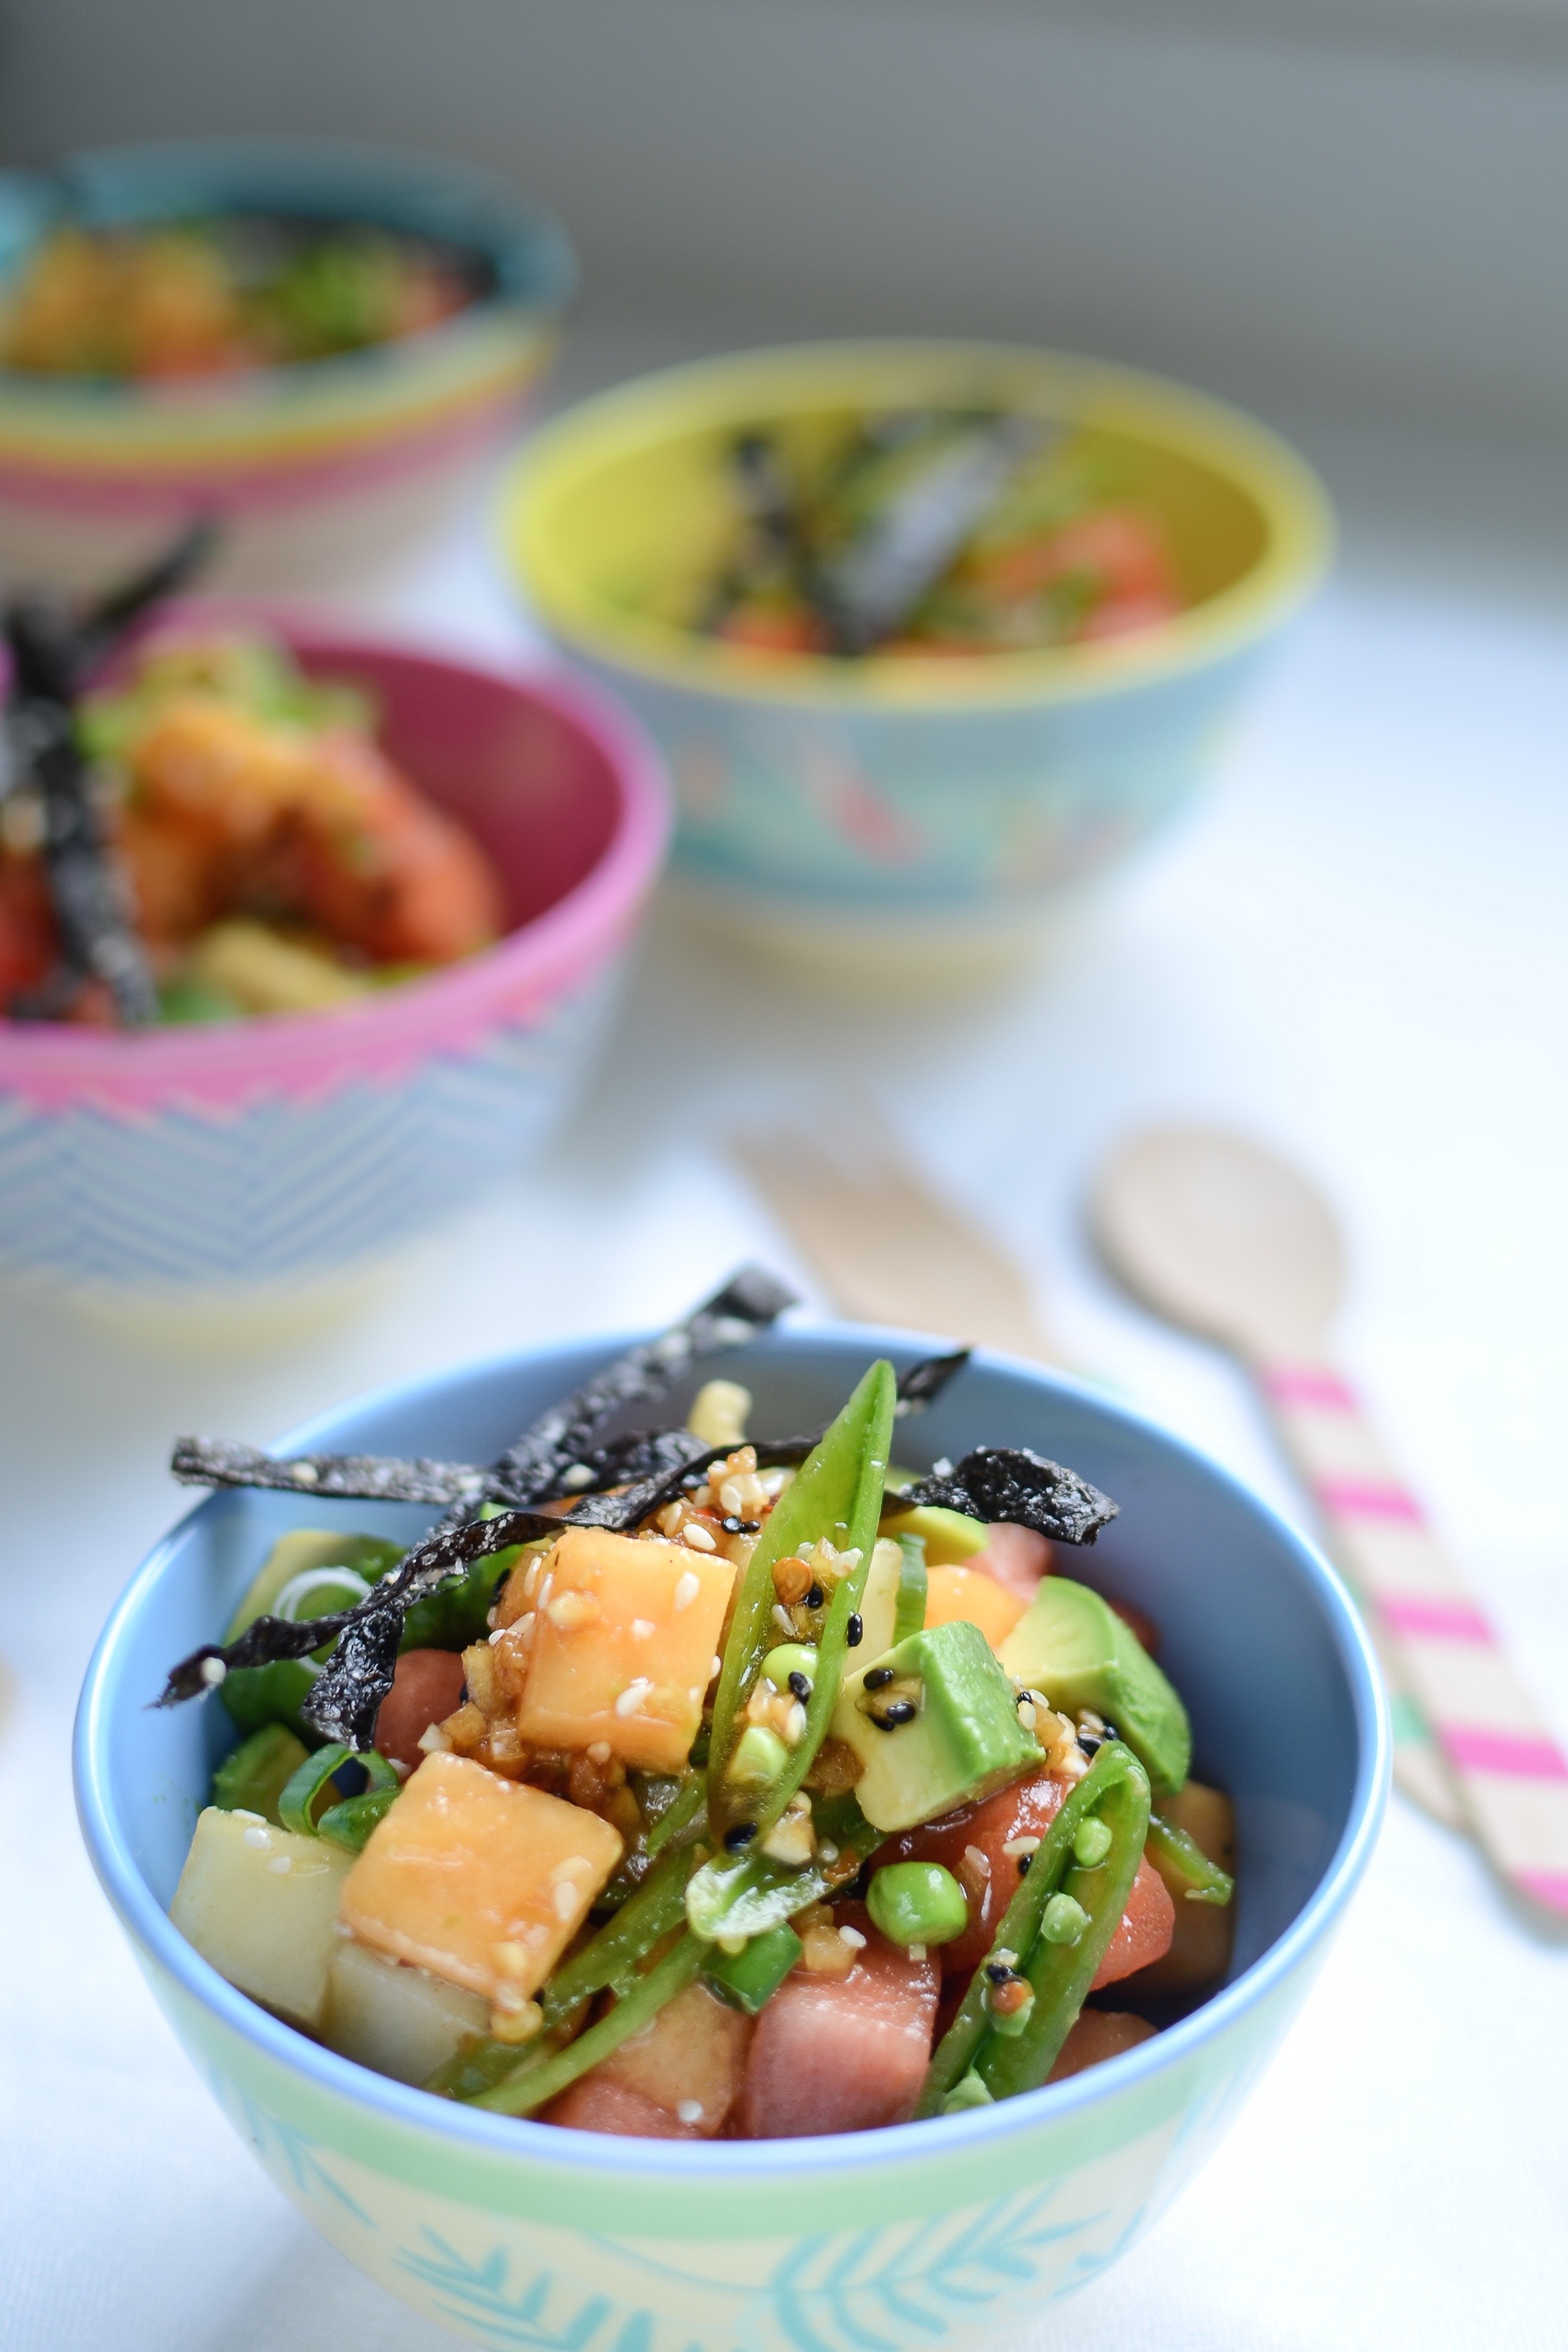
Melon and avocado poke
This is refreshing and utterly summery. Unlike the British weather. (Here’s hoping the guys at the met office are right about that heat wave…) Poke (pronounced poke-keh) is a Hawaiian staple and can be found in many different guises, with chunks of tuna marinated in soy being the most popular and ubiquitous. This is a meat- and fish-free version and something I love eating whilst sat on my garden chair with the sun kissing my toes. It serves 4 as a starter, but I often eat the entire bowlful for lunch. Whatever you do, only attempt this if you can get your hands on seriously good melons.
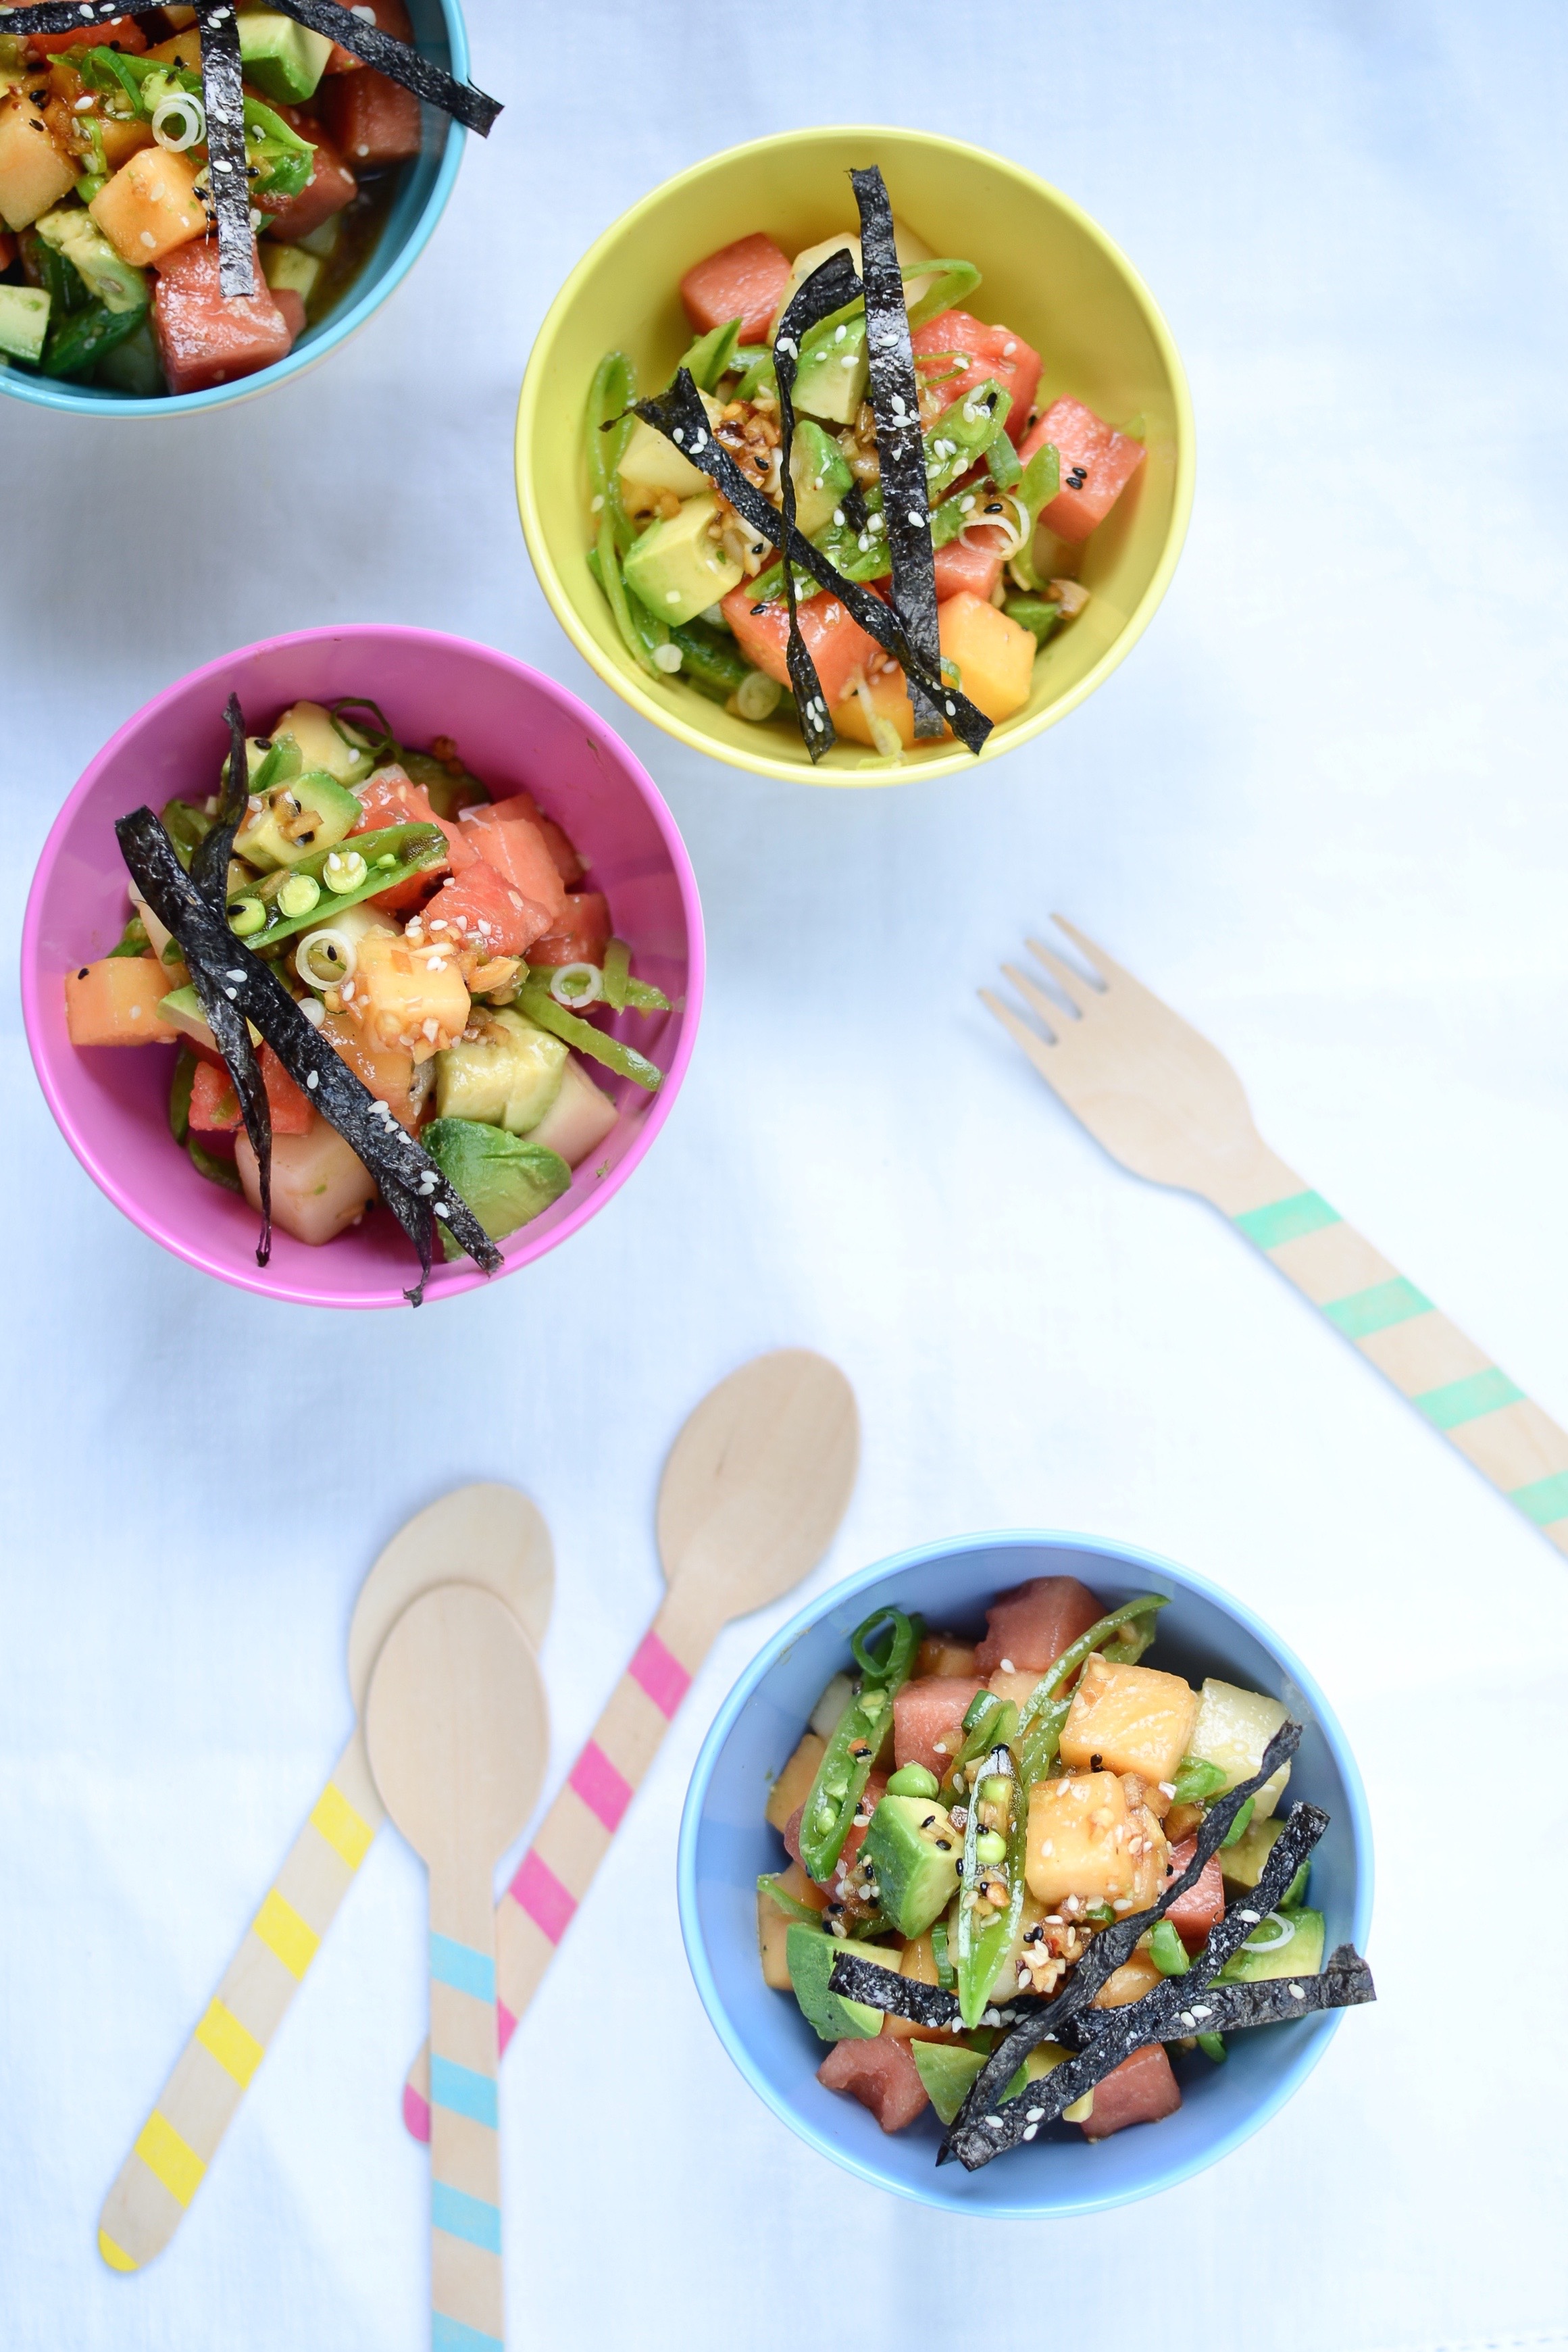
Melon & avocado poké with nori crisps
Serves 4 as a starter
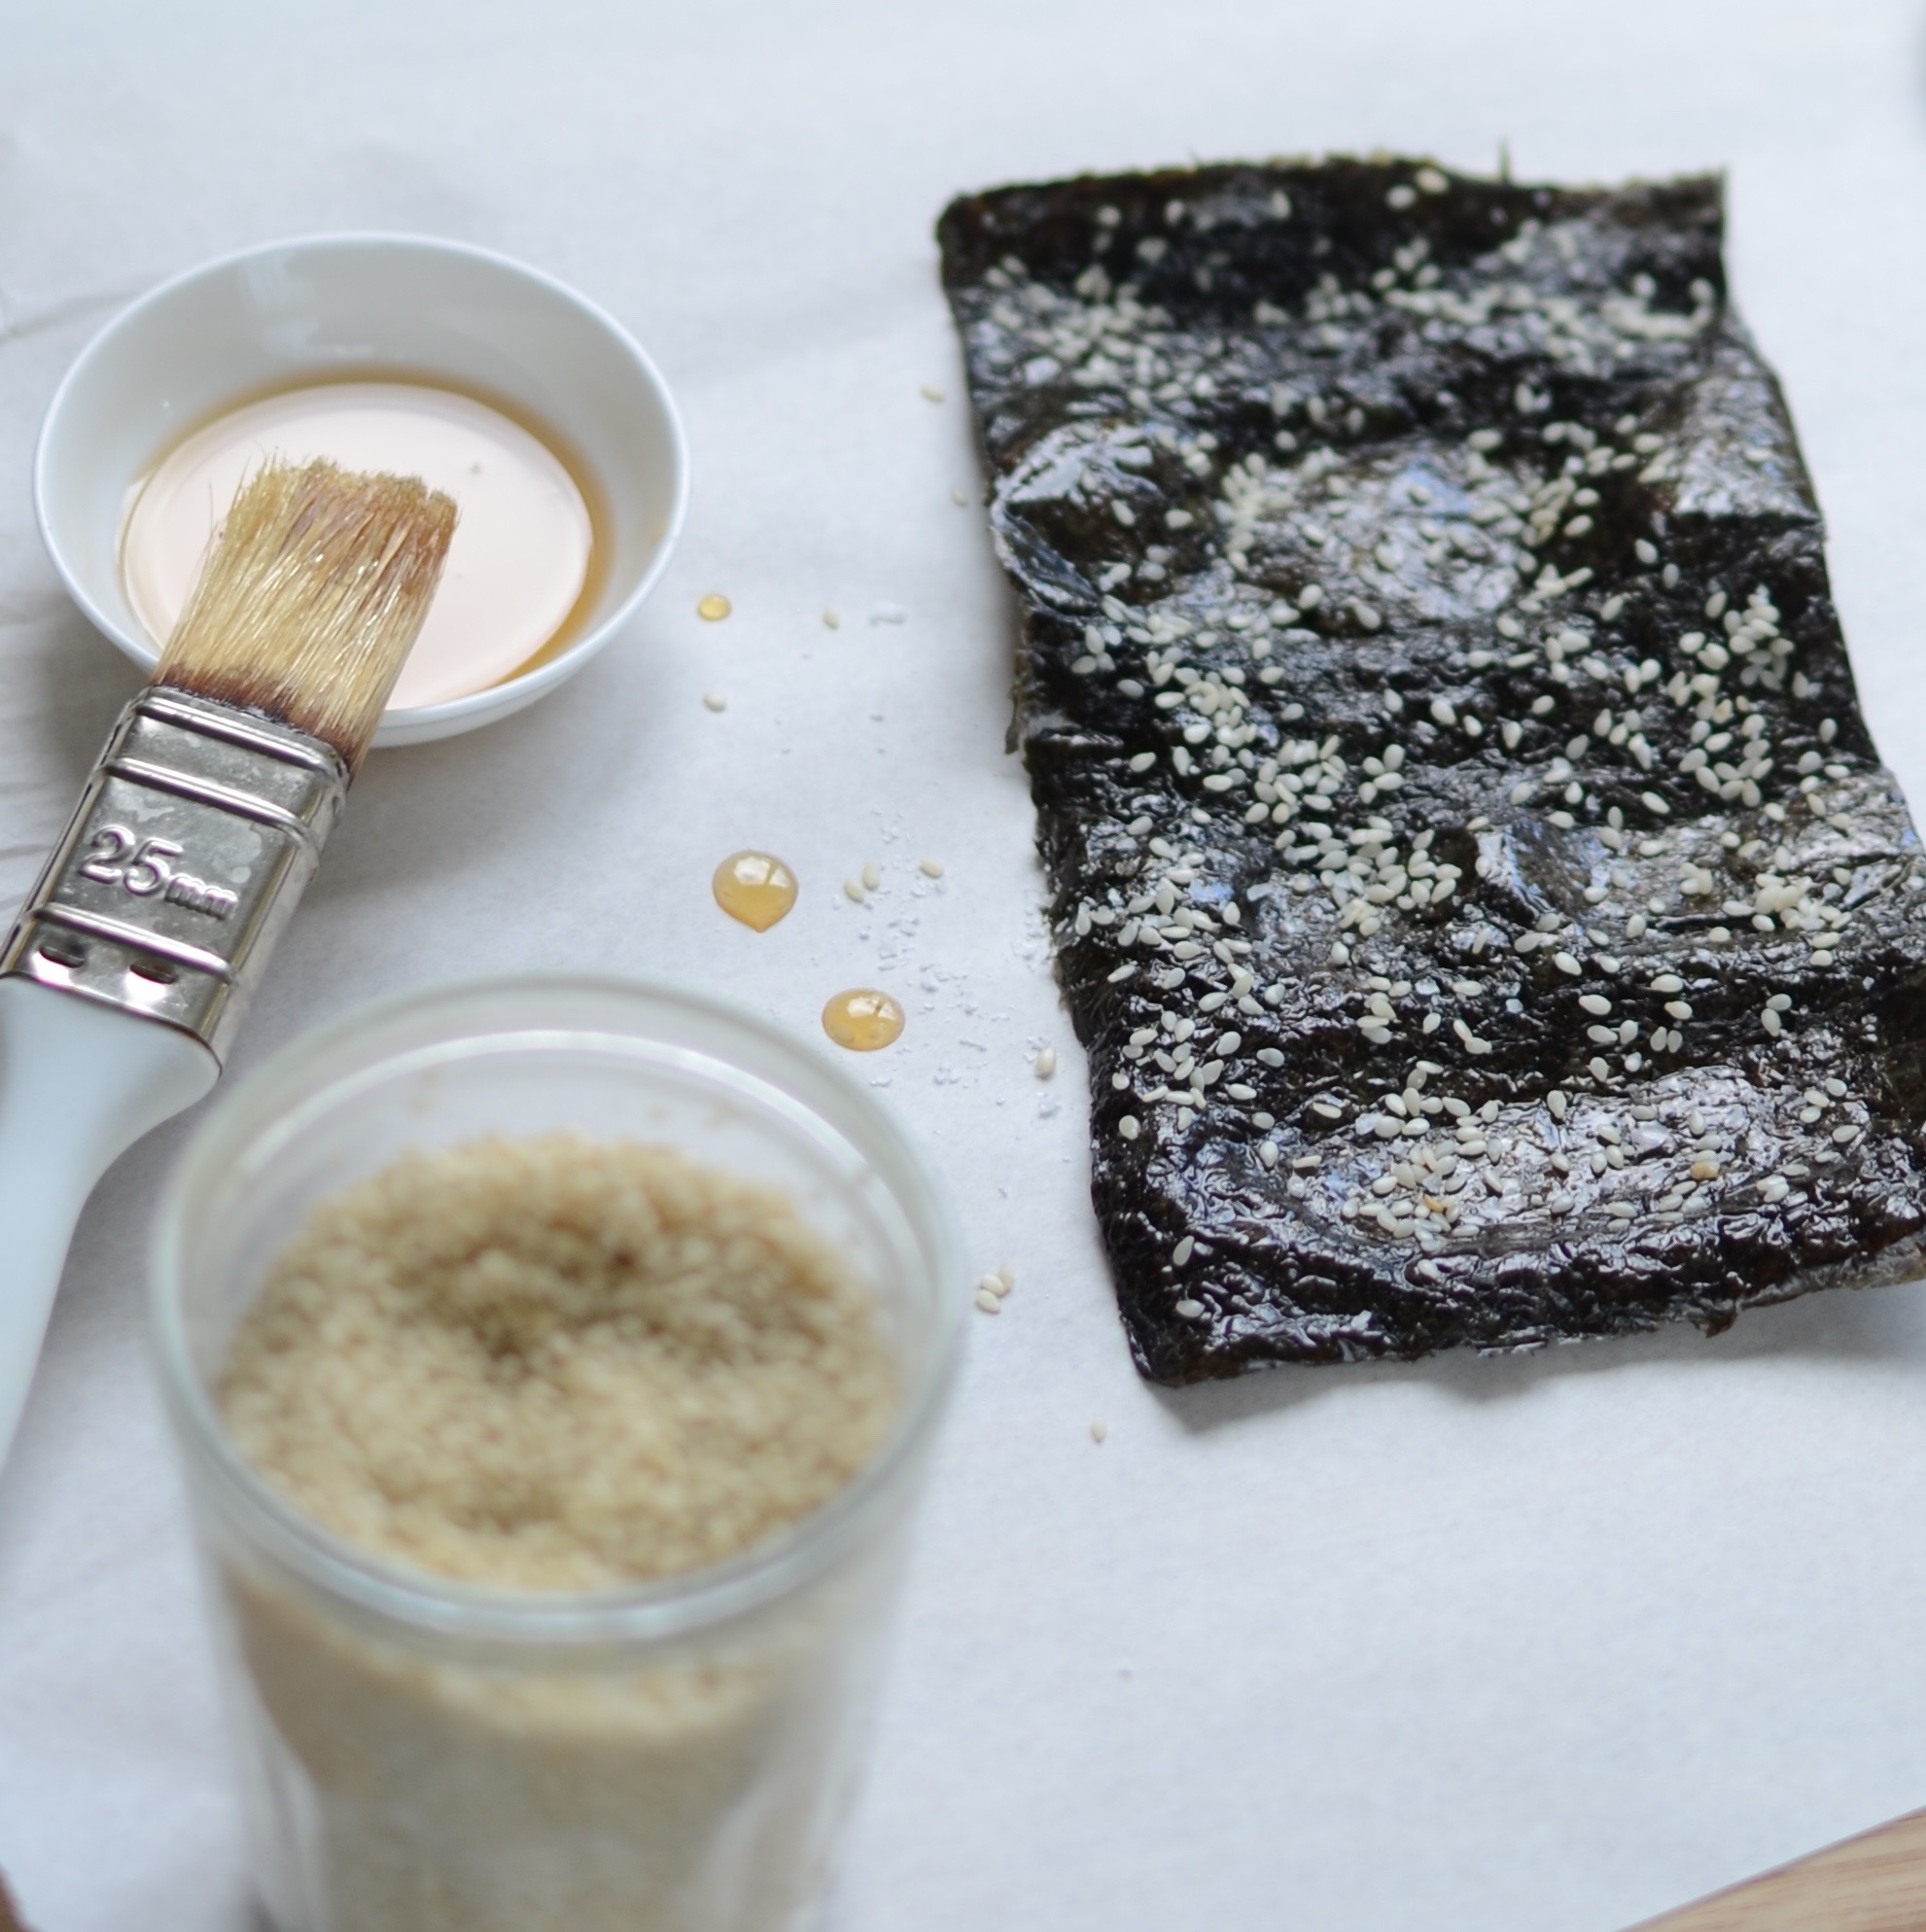
Ingredients for the nori crisps
2 sheets nori
white sesame seeds
sesame oil
sea salt
Ingredients for the dressing
15ml (1 tablespoon) extra virgin olive oil
5ml (1 teaspoon) rice wine vinegar
5ml (1 teaspoon) toasted sesame oil
15ml (1 tablespoon) tamari
30ml (2 tablespoons) lemon juice
1/2 – 1 teaspoon raw honey
1 teaspoon each of white and black sesame seeds, plus more for garnish
pinch of dried chilli flakes (or to taste)
1 shallot, very finely chopped
1 large clove garlic, finely chopped
Ingredients for the poké
500g (3 1/2 cups) diced watermelon (or a mixture of melons)
2 ripe avocado, cut into small dice
large handful sugar snap peas, thinly sliced lengthways
1 spring onion, finely sliced
sea salt
Method
- For the nori crisps: Preheat the oven to 140°C (275°F). Line a large baking sheet with parchment paper and set aside. Place two sheets of nori, shiny side up, on a chopping board. Using a pastry brush, lightly brush one sheet with water, then press the other one firmly firmly on top to stick the two together.
- Now brush the uppermost sheet with sesame oil, sprinkle on some sea salt and sesame seeds, and using scissors or a sharp knife, cut the nori into thin strips.
- Arrange the strips in a single layer on the baking sheet and bake for 15 to 20 minutes or until they have turned crispy and dark green. Remove from the oven and allow to cool.
- For the dressing: Combine all the ingredients in a jar and give it a good shake. Taste and adjust seasoning.
- To serve: Gently toss together the melon and other poké ingredients with the dressing and serve immediately topped with nori crisps.
Red Velvet Ice Cream Sandwiches
If you have never tasted a slice of red velvet cake with cream cheese frosting, you may not understand what all the fuss is about. Its intriguing name refers partly to its smooth and velvety texture, and partly to the sensual red colour, which is achieved in most modern recipes by adding (lots of) red food colouring to a chocolate cake batter.
Both these features were, however, originally due to the reaction of an acid (like vinegar or buttermilk) with the cocoa powder in the batter, which not only created bubbles and aeration, but also enhanced the red anthocyanin in the cocoa, a compound (also found in foods like red cabbage) that gets more red in the presence of strong acids. However, these days most cocoa powder undergoes Dutch processing, where an alkalizing agent is added to neutralise its acidity. Hence the need for (lots of) red colouring was created amongst bakers, and expertly fulfilled in the US by Adams Extract, a Texan company with good marketing sense.
But now for the really interesting bit. For our purposes today, at least. During the Second World War, bakers used reduced beet juice to enhance the colour (and texture) of their cakes, including the infamous Red Velvet cake, and give otherwise cheap bakes a dramatic appearance. Ah ha! As you know, adding vegetables to any kind of dish is my forte, so I present to you: the very beet-y red velvet ice cream sandwich.
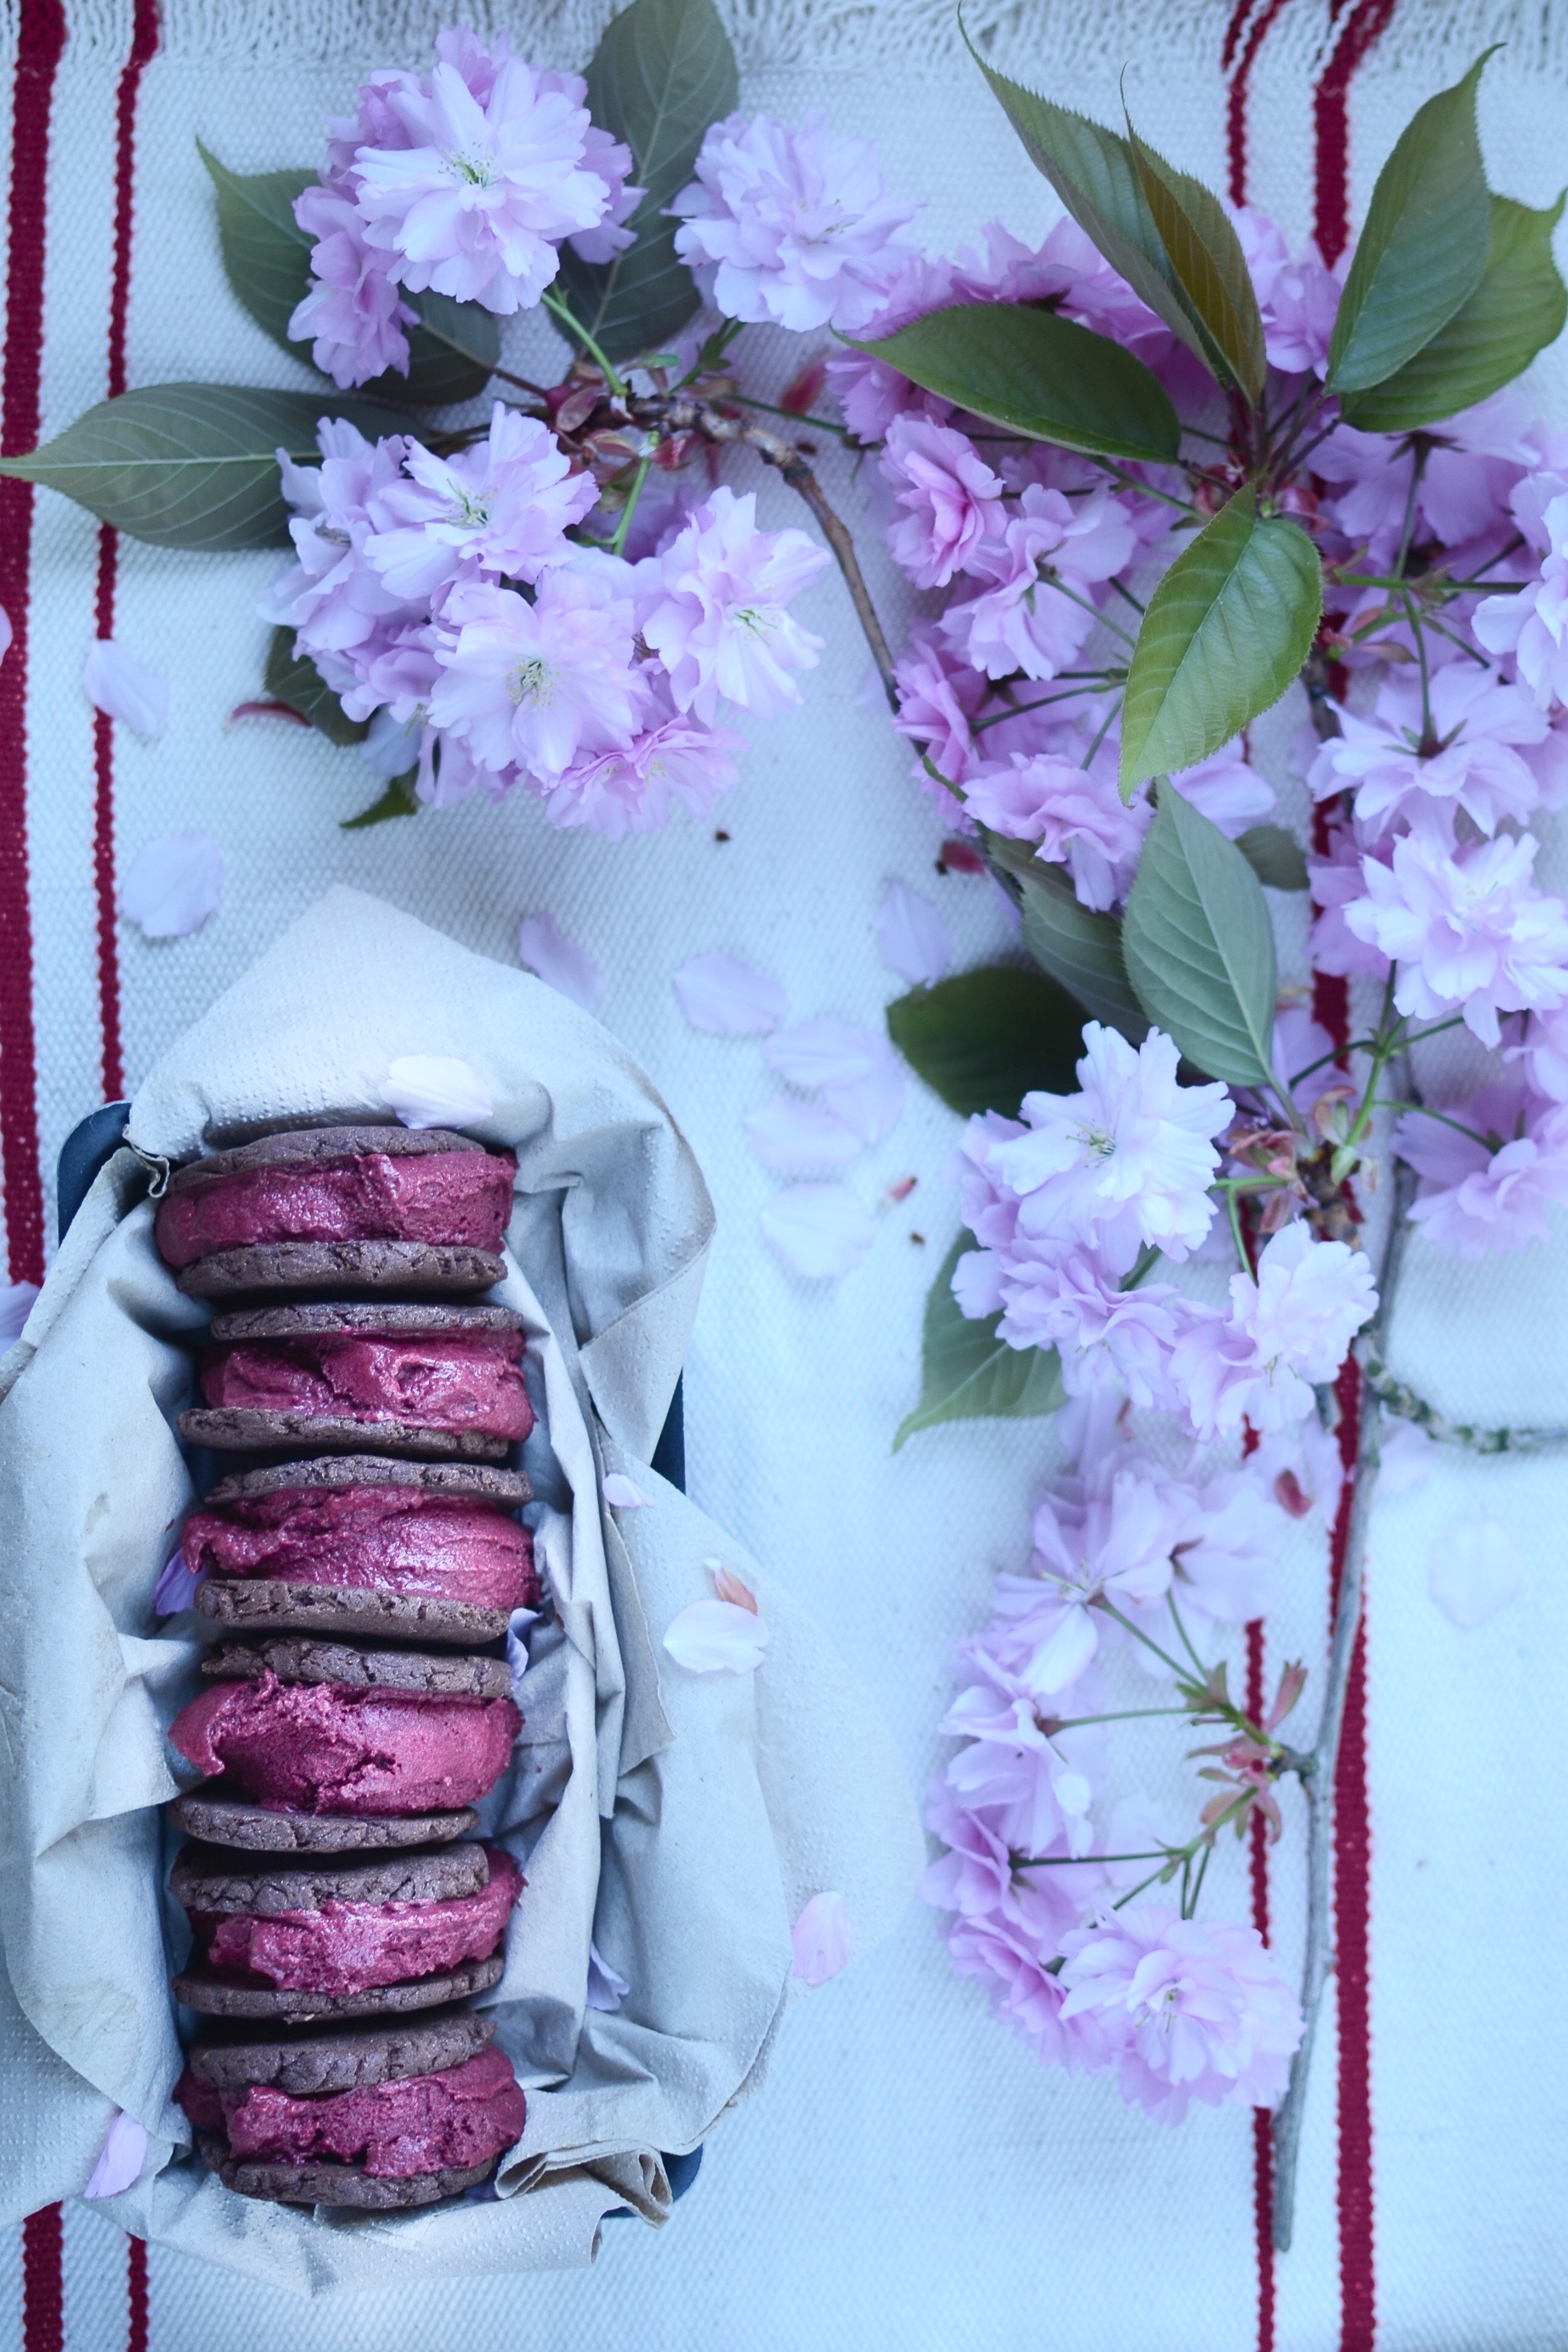
Red velvet ice cream sandwiches
These sandwiches are a beguiling mix of earthy, sweet, cool and chewy. I used buckwheat flour to keep it gluten-free, but if you are not a fan of the taste, use stoneground spelt flour instead. Be sure to freeze the sandwiches until firm, or else you will end up with more ice cream on your shirt than between your biscuits!
Makes 8 sandwiches
Ingredients for the ice cream
200g roasted beetroot (about 500g peeled, raw beetroot)
1 whole vanilla pod
1 can coconut milk, gently warmed to melt the fat
60ml (1/4 cup) raw honey, plus a little extra to taste
flesh of 1/2 ripe avocado (about 50g)
15g (2 tablespoons) organic unsweetened cocoa powder
7g (1 tablespoon) arrowroot powder, dissolved in 15ml (1 tablespoon) water
Ingredients for the cookies
1 tablespoon ground golden linseeds (flax seeds)
60ml (1/4 cup) milk of your choice
60ml (1/4 cup) melted coconut oil
60g (1/2 cup) coconut blossom sugar
1 teaspoon good quality vanilla extract
30g (1/4 cup) organic unsweetened cocoa powder
1/2 teaspoon baking powder
pinch of sea salt
160g (1 cup) buckwheat flour
Method
- For the ice cream: put all the ingredients, except 2/3 of the coconut milk and the arrowroot powder slurry, in a blender and blend until smooth. Set aside. (If you do not have a high speed blender, scrape out the seeds of the vanilla pod and only use these – pop the pod in your coffee or sugar pot.)
- Whisk the arrowroot slurry into the rest of the gently warmed coconut milk. As soon as it thickens, remove from the heat, and once cooled, add the beetroot mix and whisk. Refrigerate until cold.
- For the cookies: whisk the ground linseeds and milk together. Set aside for a few minutes to allow it to swell.
- Whisk the oil and sugar together until light and frothy. Add the vanilla & linseed mix, then sift the dry ingredients into the wet. Mix together briefly until you have a ball of dough.
- Using a small ice cream scoop or a tablespoon, scoop 16 dough balls onto a baking sheet (no need to grease) and flatten each ball (I use a small palette knife to do this).
- Bake for 10 minutes at 180°C/360°F. Allow to cool slightly before transferring to a cooling rack.
- For the sandwiches: churn the refrigerated ice cream mixture in your ice cream maker.
- Transfer the soft ice cream to a shallow container that will yield a slab of ice cream 3 – 4 cm thick. Pop it in the freezer until almost solidly frozen, then use a cookie cutter the same size as your cookies to cut out ice cream rounds and place between two cooled cookies. You could also remove the ice cream slightly earlier and use an ice cream scoop to place one scoop between two cookies and press down lightly.
- If you would like to make these ahead of time, put the sandwiches in a container in the freezer and remember to take them out at least 5 – 10 minutes before eating.
Note:
To roast the beetroot, scrub clean, peel and cut into medium dice. Toss lightly in melted coconut oil and roast at 180°C/360°F until tender (about 1 hour), turning every so often. Be careful not to let them burn.
If you do not own an ice cream maker, you can make the ice cream by freezing the mixture and whisking it every 30 minutes or so, to prevent the formation of ice crystals.
