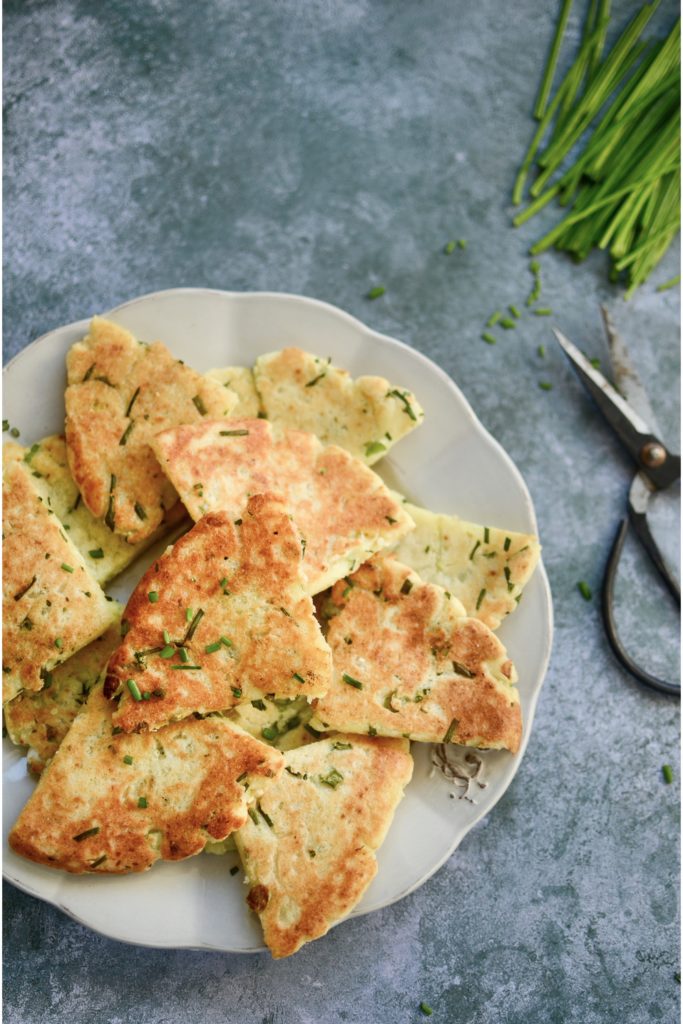
Irish potato farls with chives and spring onions
Irish potato farls are a quick and easy dish to make with leftover mashed potatoes. They are delicious on their own with butter or as part of a larger meal as a bread replacement, especially a cooked breakfast. I like leaving them in the oven a little longer, to make them extra crispy on the bottom. But I know there are people who prefer them soft and pale.
Potatoes are often slated as unhealthy high-carb foods, but they contain more potassium than bananas, and they also contain fibre, vitamin C, vitamin B6, plus a bit of iron and calcium. They also contain phytonutrients like flavonoids that function as powerful antioxidants. This recipe would also be great with purple potatoes, but sweet potato mash is not “dry” enough for farls. If you’d like to use sweet potatoes or mashed pumpkin, try the South African “pampoenkoekies” instead.
Irish potato farls
Serves 4
Ingredients
500g mashed potatoes
heaped 1/2 teaspoon salt
freshly ground black pepper
50g butter, melted
15g chives, finely snipped
3 spring onions, finely sliced
150g flour of your choice
1 teaspoon baking powder
Method
- Preheat the oven to 200°C.
- Mix all the ingredients into the mashed potatoes – use the back of your large spoon to squash the potatoes into the flour. As soon as you can no longer see any flour, use your hands to form the dough into 3 balls. You can add more flour if the mixture is too wet and a little milk if it is too dry.
- Flatten each ball with the palm of your hand and gently roll out on a lightly floured surface until about 1cm thickness. Cut the circle into quarters.
- Heat one or more small cast iron frying pans with a knob of butter each over a medium heat until hot, but not smoking. Place four quarters carefully into each of the pans and bake in the oven for 10 to 20 minutes, depending on how brown you like them. You can flip them over half-way, although we just leave them on the same side until we’re happy with the colour.
- Serve with butter or pesto and grated cheese, with a cooked breakfast or topped with your favourite sandwich toppings.
Healthy lunch box ideas
Lunch boxes take me back to my school days and the AMAZING lunches my mum used to pack for us whenever we had after school activities, and couldn’t eat lunch at home. When I moved out, first to study, then to live and work abroad, I adopted the all too common approach of regularly skipping breakfasts, grabbing something quick and ready-made for lunch, and ending the day with a very late, and very large dinner. But the traditional saying “breakfast like a king and dinner like a pauper” is proving rather accurate, as the mounting research† in favour of intermittent fasting shows.
Frontloading your calory intake to the first half of the day reduces risk factors for heart disease, cancer, obesity and diabetes. People who don’t eat large meals in the latter half of the day also tend to sleep better, suffer less digestive issues and show less signs of ageing. This, and all the research I have been reading about children performing better at school, being better behaved and less prone to falling ill when they have a healthy breakfast and nutritious lunch, has convinced me to start making an effort to pack my family some decent lunches. Here are some ideas, which I put together for the team at Compass Fostering to help inspire parents to pack a punch on the lunch box front.
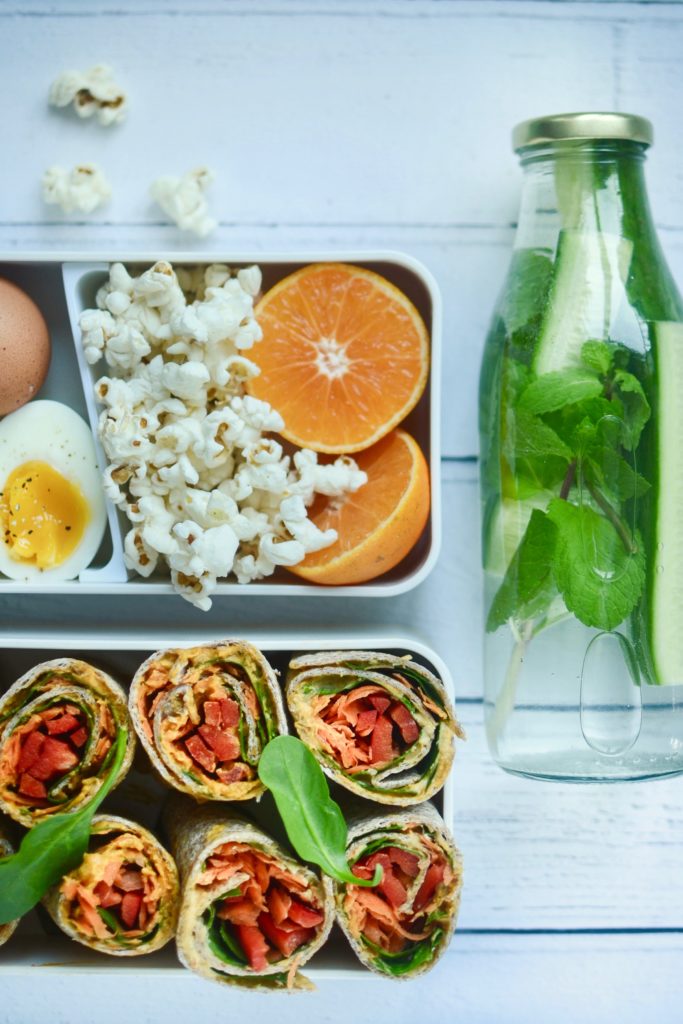
Lunch box 1
Fruit water (cucumber and mint)
Tangerine
Lightly salted popcorn
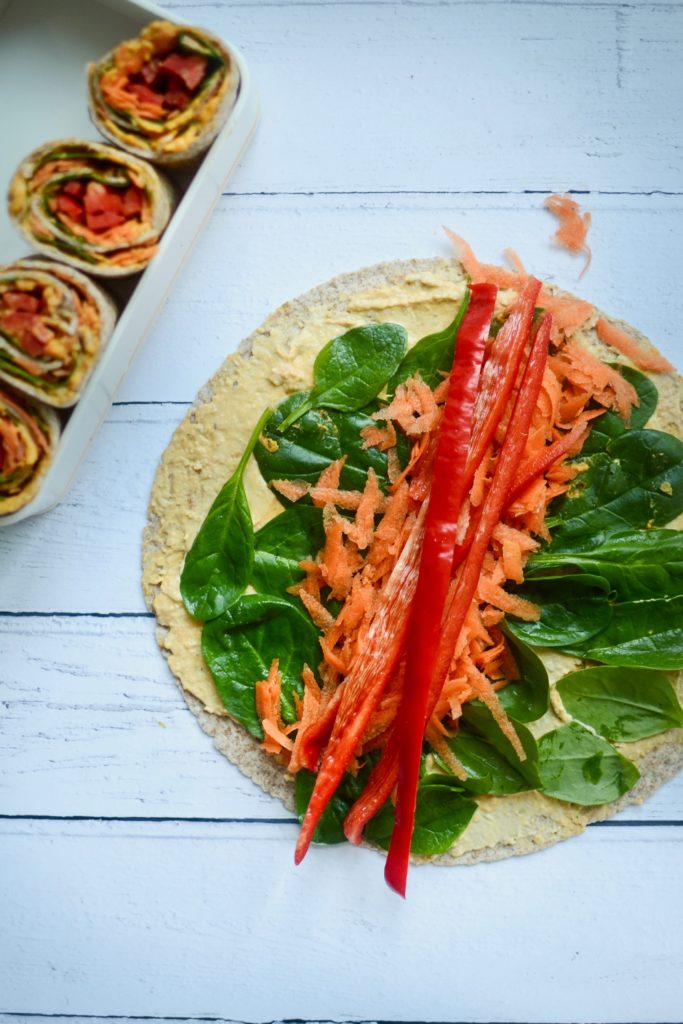
Rainbow wrap
Boiled egg
Ingredients for the rainbow wrap
wholemeal wrap or flatbread
1 – 2 tablespoons hummus or red pepper hummus
small handful baby leaf spinach
1 small carrot, coarsely grated
1/4 red pepper, cut into long strips (the long Romano variety works well here)
Method
1. Spread the hummus evenly onto the wrap, leaving a border along the top end.
2. Place the spinach leaves down in a single layer, pile grated carrot into the centre and lay pepper sticks across.
3. Fold the bottom half over the fillings, ensuring you have a tight roll, then roll upward towards the top end. Cut in half or slice into thirds.
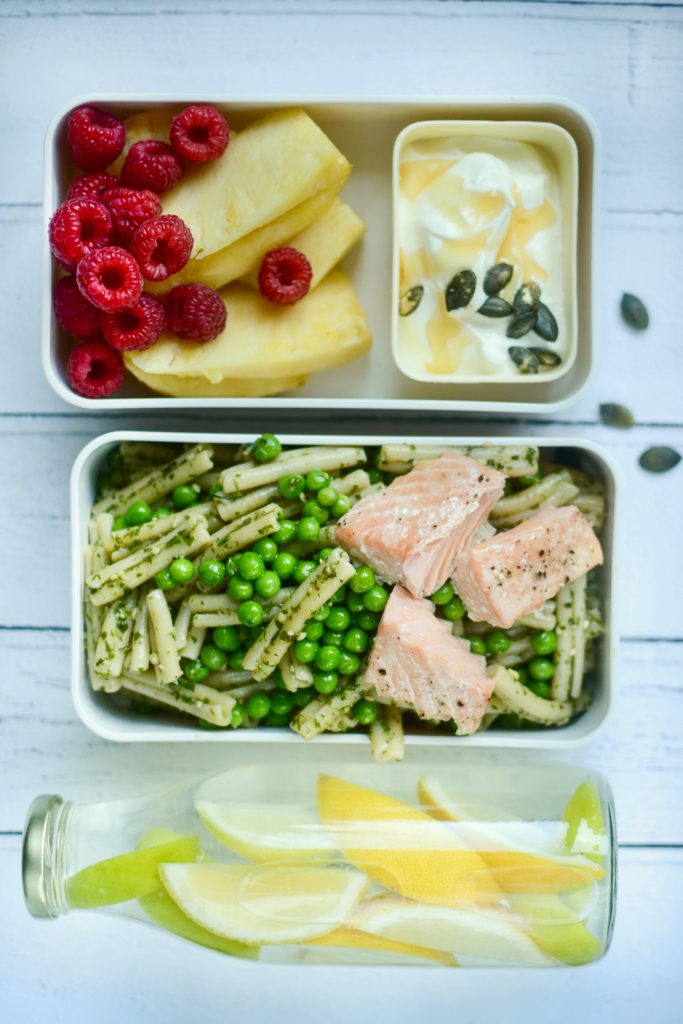
Fruit water (lemon and lime)
Pineapple wedges, raspberries
Wholemeal pesto pasta salad with salmon and peas
Natural Greek yoghurt with pumpkin seeds and raw honey
Ingredients for the pasta
medium bunch basil
small bunch dill, thickest part of stems discarded
medium bunch parsley, thickest part of stems discarded
1 small garlic clove, peeled
salt and pepper
about 80ml (1/3 cup) extra virgin olive oil
cooked salmon (left-overs work well here)
cooked wholemeal pasta (save some of the cooking liquid)
handful of frozen peas
Method
- Put the herbs, garlic, pinch of salt and black pepper in a food processor and blitz until roughly chopped.
- With the motor running, slowly add the olive oil until you reach your desired consistency (the green “pesto” sauce should be loose enough to fold into cooked pasta).
Combine the pesto with cooked pasta, cooked salmon or deboned trout, and defrosted frozen peas. - Add a little more olive oil and pasta cooking liquid if it needs it.
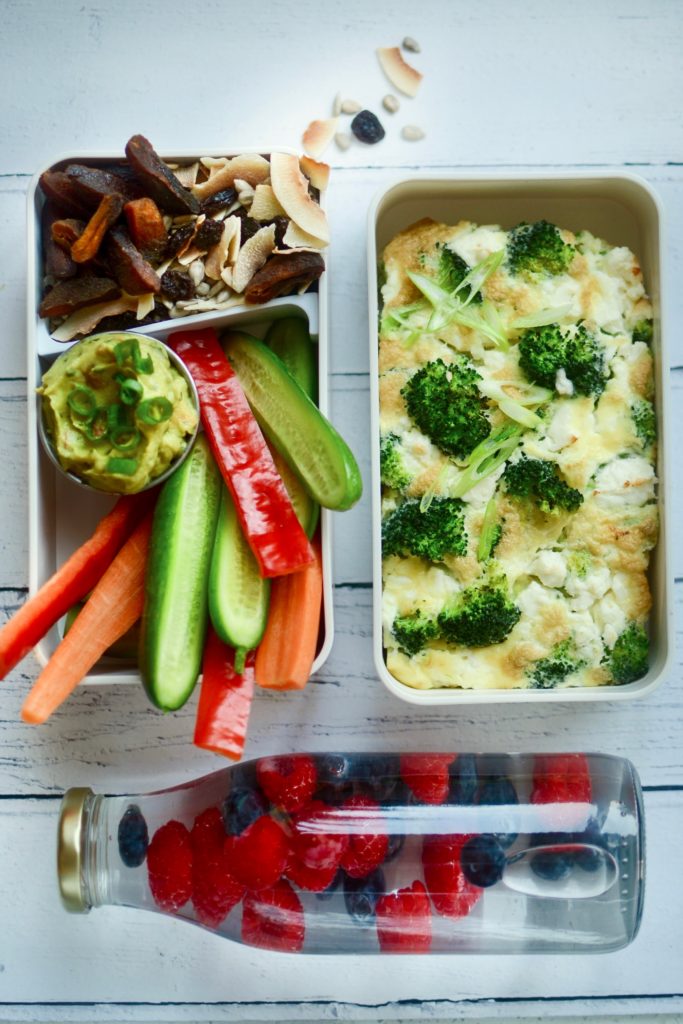
Lunch box 3
Fruit water (raspberries and blueberries)
Cucumber and carrot sticks with guacamole
Trail mix (sunflower seeds, coconut chips, chopped dates)
Mini frittata with broccoli and feta
Ingredients for the frittata
2 eggs
1 tablespoon water
small pinch of salt
freshly ground black pepper
2 spring onions, thinly sliced
small knob of butter
handful of steamed broccoli florets (left-overs are great for this) 25g crumbled feta
Method
- Whisk the eggs with the water, salt and pepper. Stir in the sliced spring onions.
- Heat the butter in a small ovenproof skillet or pan over a medium heat until sizzling, then pour the egg mix into the pan, and scatter over the broccoli and feta cheese.
- Cover the pan, turn the heat down and cook for 5 to 10 minutes or until the egg has just set.
- Pop the pan under a hot grill for half a minute if you’d like, to add some colour. Cool, turn out and slice to serve.
This post was written in collaboration with Compass Fostering. All opinions, words and images are my own.
†Intermittent Fasting: the surprising update
†Fasting: Molecular Mechanisms and Clinical Applications
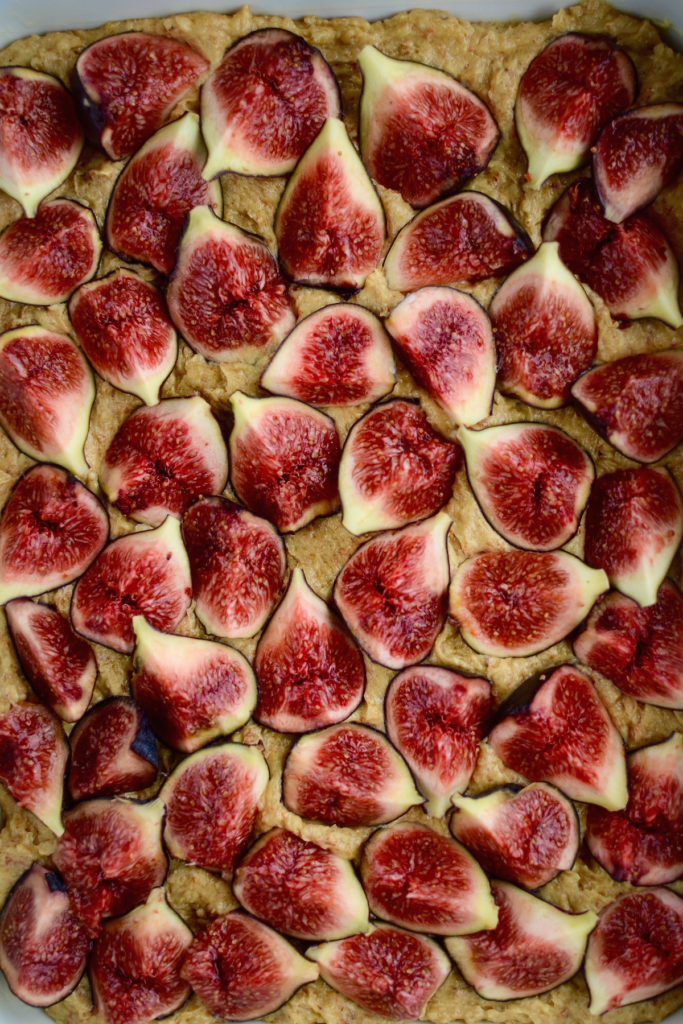
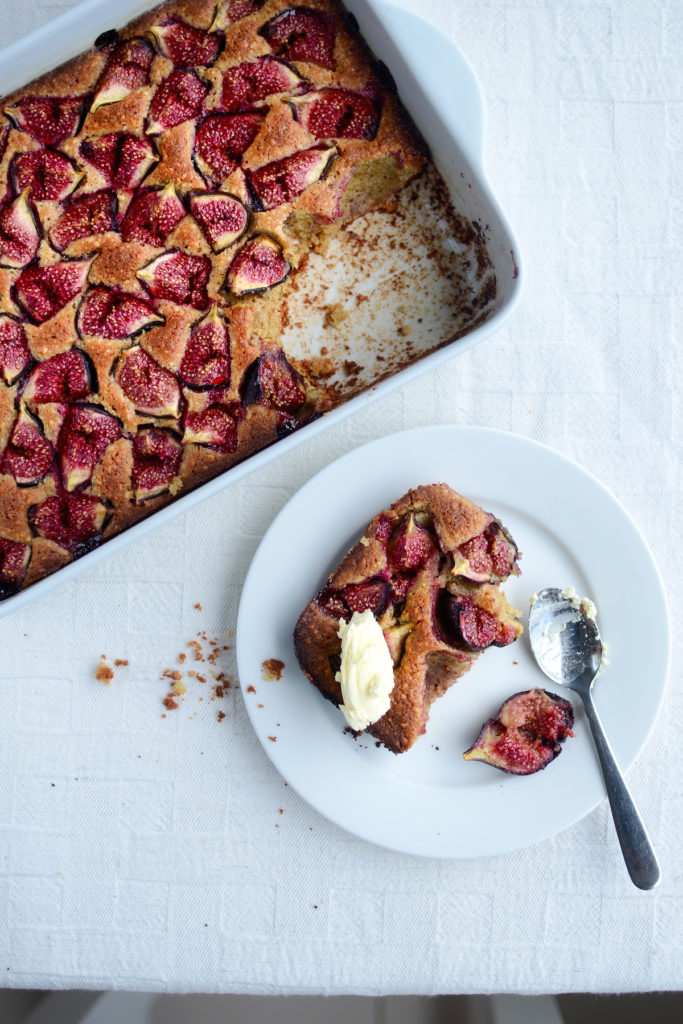
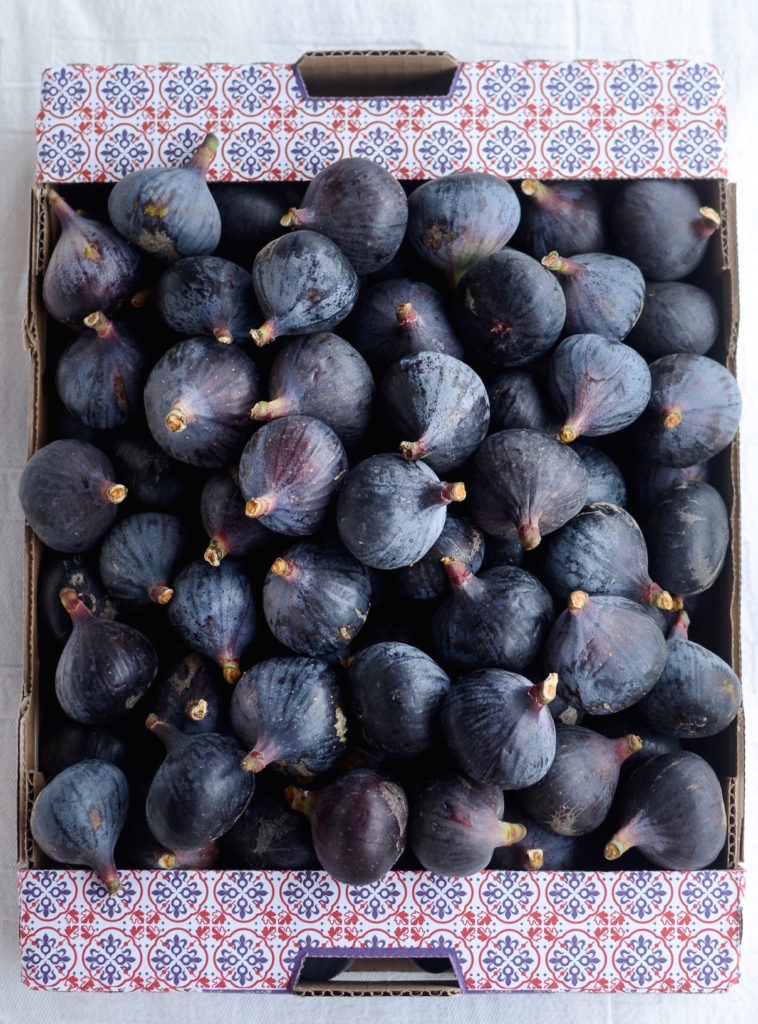
Fig and almond cake
Ah, a beautiful, juicy fig… and sunshine. And saltwater hugs. It was so good to be back in South Africa, spending time with family and friends. The kids loved every moment (especially the fact that they could wear shorts most of the time) and I enjoyed the slightly more relaxed pace. On our way from Hermanus to Plettenberg Bay, we stopped at a fig farm and bought a whole box of figs for £3.50! We were all salivating in the car the rest of the journey. We enjoyed them in so many different ways: gobbled up whole, sliced into salads, in smoothies, smashed on buttered toast. And then there was the cake, of course. The first piece eaten very quickly with a dollop of mascarpone. The second piece nibbled a little more slowly, savouring its crumbly texture and delicious flavour.
Ingredients
125g unsalted butter, room temperature
65g (1/2 cup loosely packed) light muscovado sugar
3 medium eggs
160g (roughly 1 cup) whole raw almonds
80g (scant ½ cup) spelt flour or gluten-free flour blend
½ teaspoon baking powder
pinch of salt
zest from 3 large organic lemons
12 figs, stalk removed and quartered
Method
- Preheat oven to 180°C. Lightly grease a medium sized ovenproof dish (or cake tin).
- Beat the butter until light and fluffy. Add the sugar and beat for another minute or two.
- Add the eggs, one at a time, beating well after each addition.
- Process the almonds in a food processor until they resemble a coarse meal. Add this, as well as the flour, baking powder and salt to the mixture and stir until just combined. Stir in the lemon zest.
- Spoon the mixture into the greased dish, flatten the top with a spatula and press the fig quarters into the batter.
- Bake for 25 – 30 minutes or until golden and crunchy-looking, and a toothpick inserted in the centre comes out clean. Do not overbake, as it will dry out.
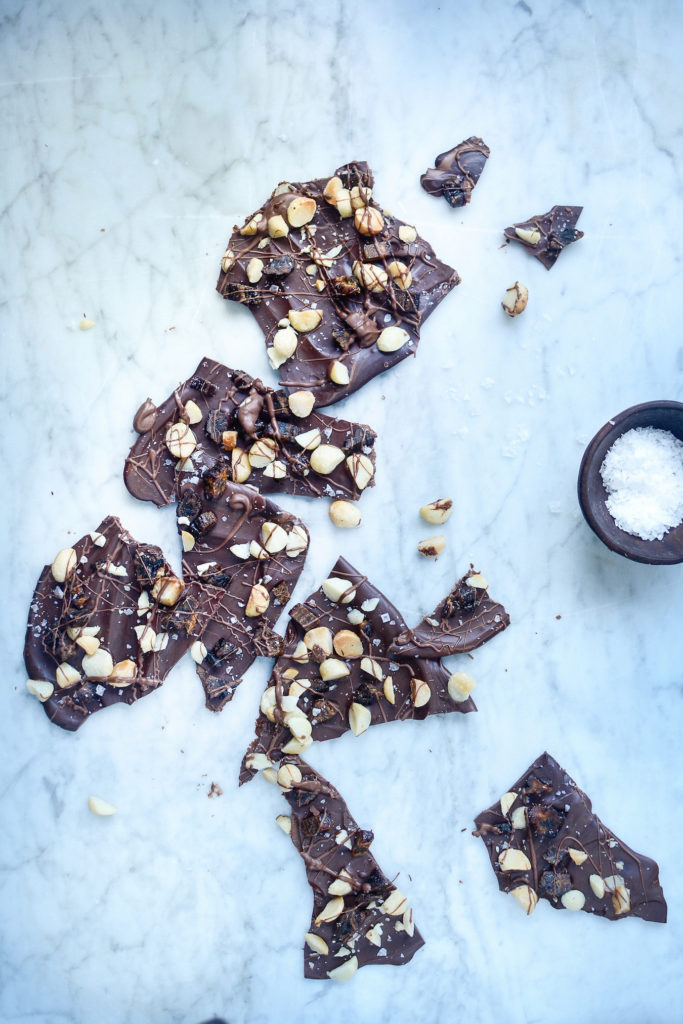
Chocolate bark with macadamia nuts, dried banana and sea salt
Another delicious topping for chocolate bark is a combination of toasted macadamia nuts, dried bananas and flaked sea salt. Drizzle everything with melted milk chocolate and ta-dah!
Chocolate bark with macadamia nuts, dried banana and sea salt
Makes enough for 2 – 4 little bags
Ingredients
150g dark chocolate (minimum 60% cocoa solids)
large pinch of sea salt flakes
30g (1/4 cup) macadamia nuts, toasted for 5 minutes at 180˚C pre-heated
30g dried bananas, finely chopped
5g popped quinoa, optional
20g milk chocolate
Method
- Melt 2/3 of the dark chocolate in a double boiler until just melted, stirring continuously. As soon as it has melted, stir in the rest of the chocolate until all has melted. You could also melt the chocolate in a microwave in 15 second bursts, stirring after each, until just melted. Do not let the chocolate get warm.
- Pour the melted chocolate onto a large piece of greaseproof paper and quickly spread out to about 1/4” thickness with a spatula.
- Quickly scatter over all the toppings evenly.
- While the bark is cooling, melt the milk chocolate in the same way as the dark chocolate. Either drizzle this over the bark with a spoon or use a small sandwich bag (or piping bag) to pipe the melted chocolate onto the bark. Set aside to cool completely.
- Peel away the paper and snap into pieces.
Apricot, red currant & butternut cake
I absolutely love cooked apricots, whether in a cake, jam, compote, tart or savoury dish. I find that they offer the perfect balance of flavour, and the vibrant colour is always a treat. This cake has a firm texture and is not very crumbly, so makes for an ideal dessert to take along on a picnic. Use frozen red currants if you can’t find fresh.
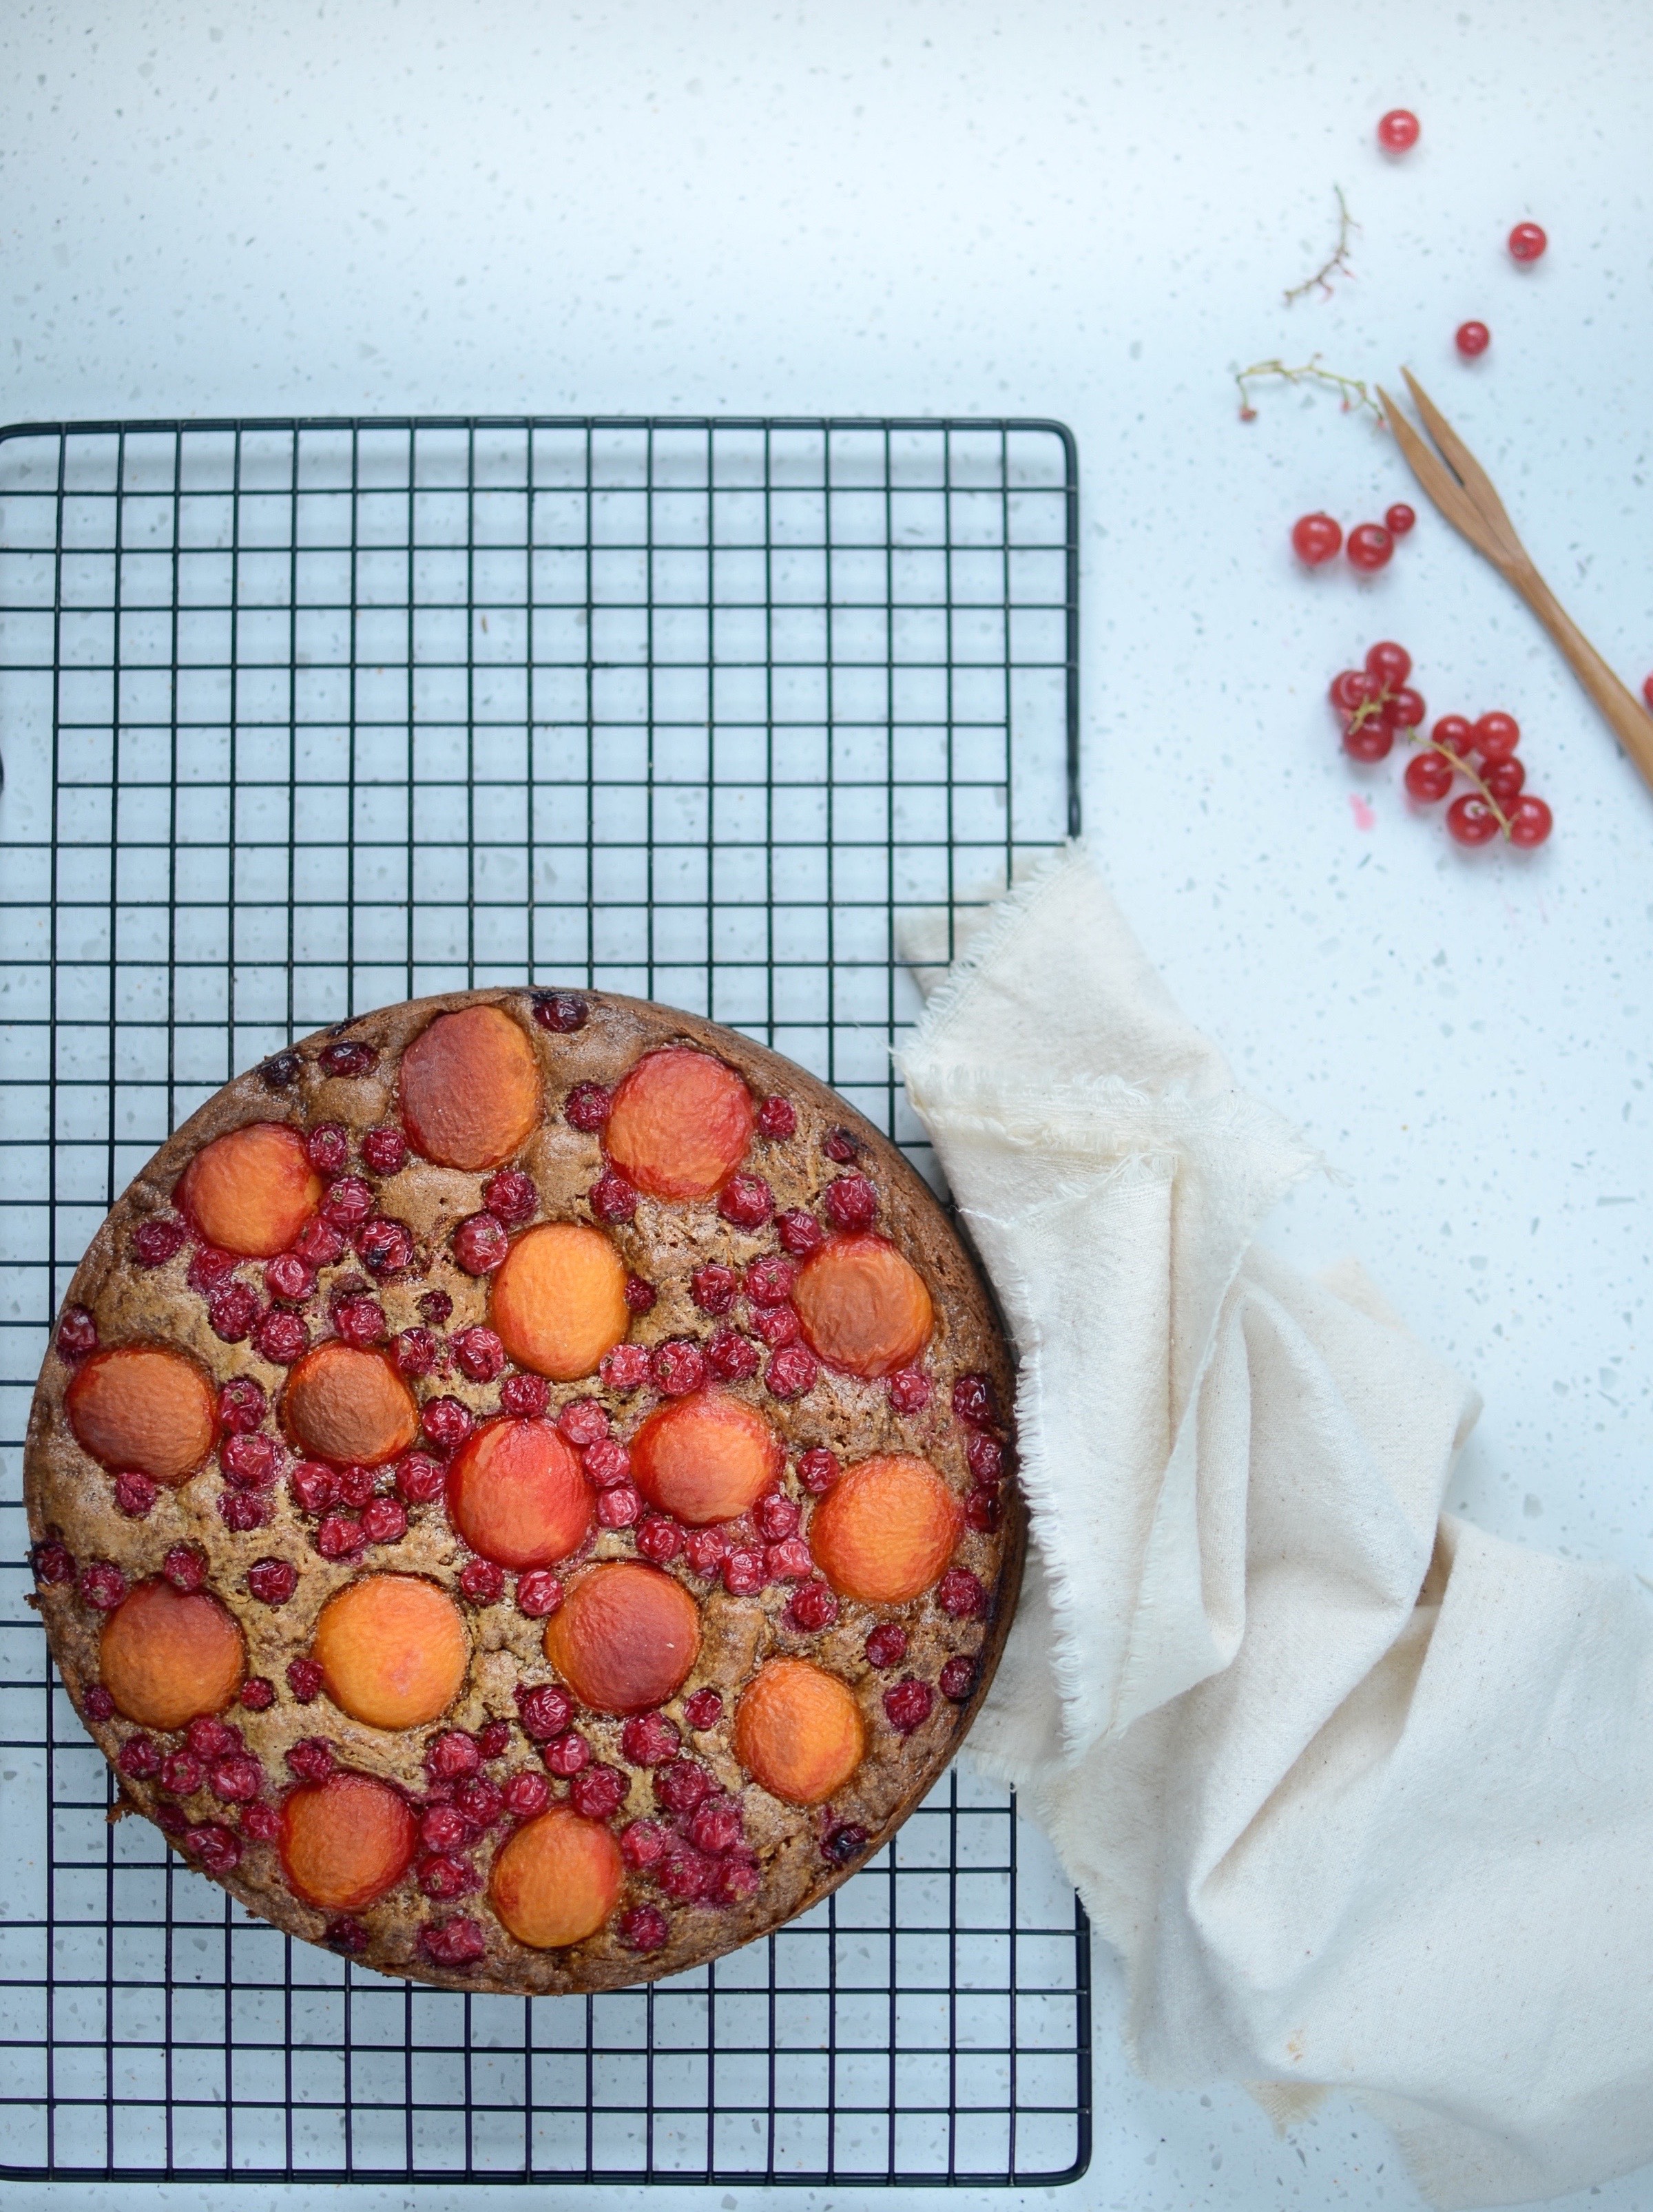
Apricot, red currant and butternut squash cake
Makes one 20cm cake
Ingredients
3 medium eggs
150ml (1/2 cup plus 2 tablespoons) macadamia nut or extra virgin olive oil
140g (1 cup) palm sugar or dark muscovado sugar
1 vanilla pod, cut into smaller pieces (or just the seeds if you are not using a high-speed blender)
130g (1 cup) wholemeal spelt or buckwheat flour
1 teaspoon baking soda
1 teaspoon baking powder
pinch of sea salt
165g (1 1/2 cups) grated peeled butternut squash
150g red currants, stripped from the stalks
8 small apricots, halved and stone removed
Toasted macadamias, optional
Method
- Pre-heat the oven to 180°C/360°F, and grease a 20cm spring form.
- In a blender, whisk together the eggs, oil, sugar and vanilla pod pieces (or vanilla seeds, if not using a strong blender).
- Mix together the flour, baking soda, baking powder and salt. Make a well in the centre and add the egg mix. Stir until just combined.
- Stir in the butternut and half the red currants, then scrape into prepared tin.
- Place the apricot halves, cut sides down, onto the cake batter and scatter the rest of the currants on top. Use the back of a large spoon to gently press the fruit into the batter.
- Bake for about 60 minutes or until a toothpick inserted in the centre of the cake comes out clean or with a few dry crumbs. It may need a little longer, depending on your oven.
- Let the cake cool in the pan for 10 minutes, then turn out onto a wire rack to cool.
- Serve with whipped cream and toasted macadamia nuts.
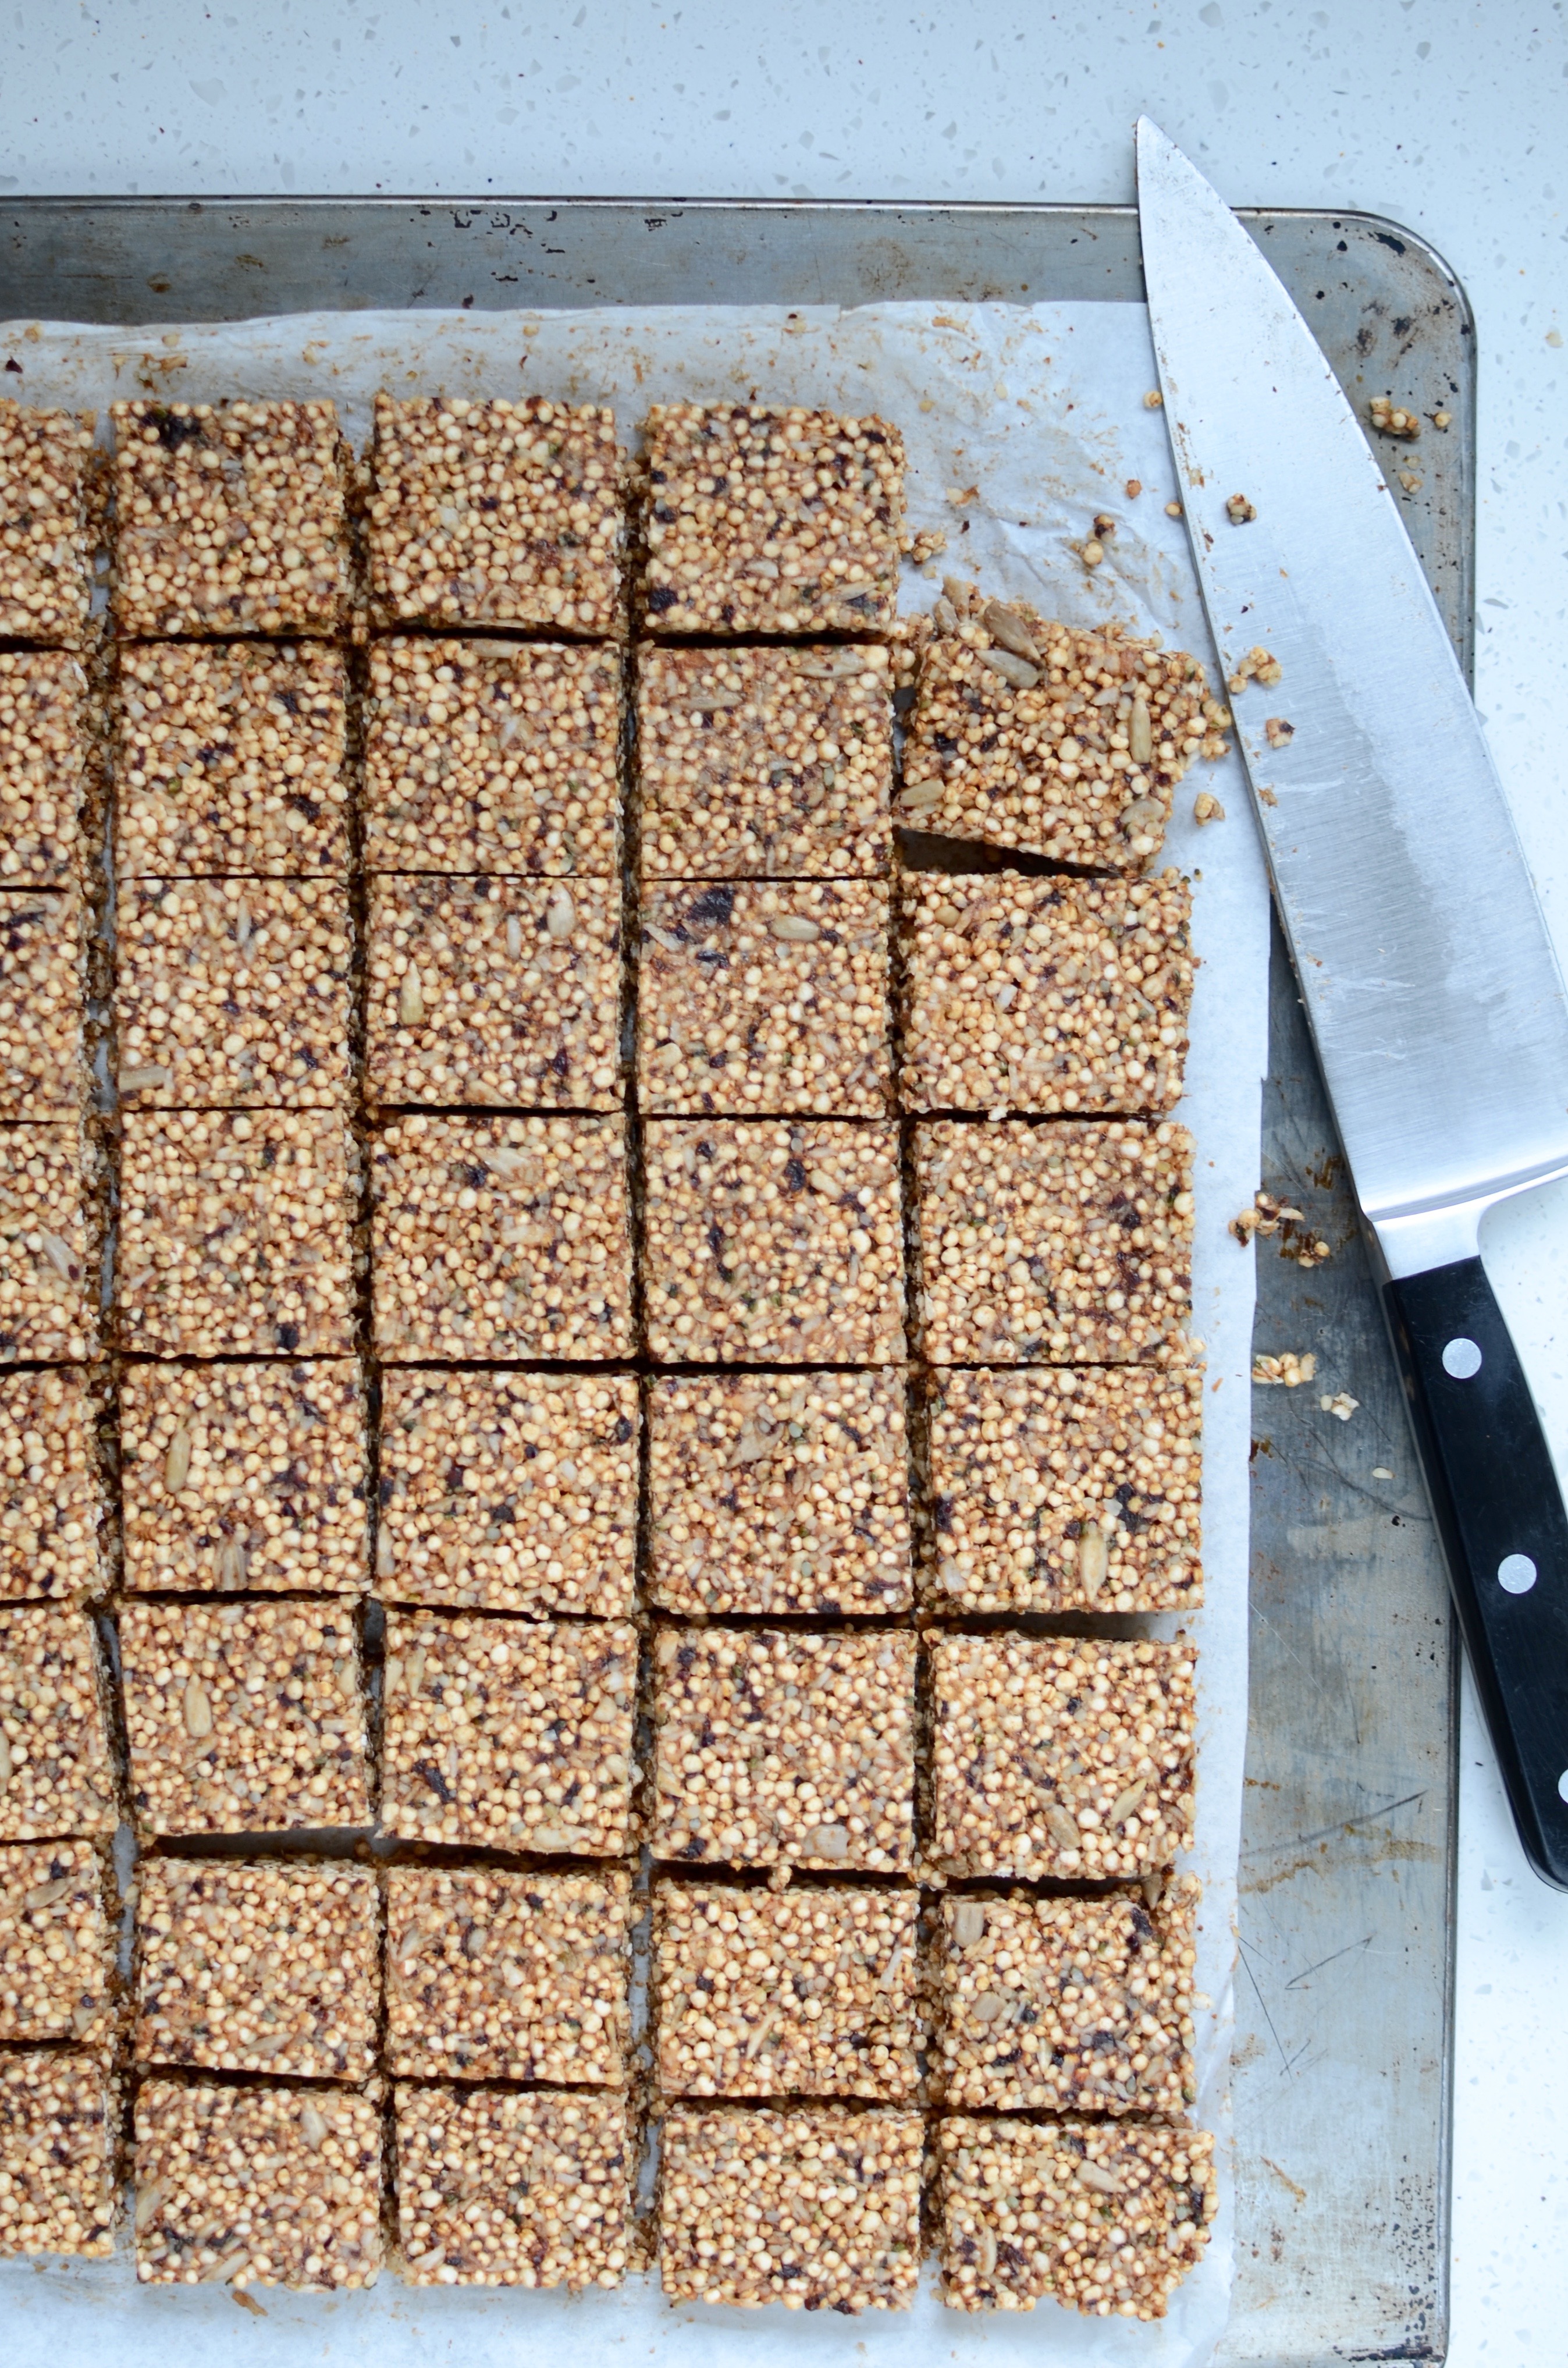
Puffed quinoa squares
A relative unknown a few years ago, South American-born Quinoa has since crept into our hearts and is unlikely to disappear anytime soon. This little pseudo-grain is very nutritious, rich in protein and gluten-free to boot, making it an ideal addition to any meal. It is most often cooked and prepared in the same way as rice, but I love grinding and making a delicious breakfast porridge with it. You can also make puffed quinoa as if you were making popcorn. Heat a large heavy bottomed pot (cast iron ones work best) and add about half a cup of quinoa. Keep shaking the pot until most of the seeds have popped. If your pot is deep enough, you won’t need a lid to keep the little nippers at bay. Tip them out onto a baking sheet to cool and use in muesli, as a topping on yoghurt or in recipes such as these squares below.

Puffed quinoa squares
The squares make an excellent after-school snack, as they are a mini version of a complete meal.
Makes about 40
Ingredients
200g (1 1/2 loosely packed cups) soft, dried prunes
125ml coconut water, at room temperature and preferably raw (i.e. unpasteurised)
150ml (125g or 1/2 cup plus 2 tablespoons) liquid coconut oil
125ml (1/2 cup) raw honey
Pinch of sea salt
5 cups puffed quinoa (home-made or store-bought)
90g (1 cup) toasted desiccated coconut
70g (1/2 cup) shelled hemp seeds
70g (1/2 cup) shelled sunflower seeds
Method
- Soak the prunes in the coconut water whilst you get your other ingredients together.
- In a powerful blender, blend the prunes, coconut water and enough of the coconut oil to give you a smooth paste. Scrape into a bowl.
- Add the rest of the oil, honey, salt, quinoa, desiccated coconut and seeds, and stir until well combined. Your mixture needs to be sticky and hold together when pressed.
- Line a 34cm x 26cm (9” x 13”) tin or oven dish with greaseproof paper, then press the mixture into the tin and refrigerate until set (at least a couple of hours).
- Turn out onto a chopping board and cut into squares. They will keep a week or so in the fridge, and freeze really well.
Melon and avocado poke
This is refreshing and utterly summery. Unlike the British weather. (Here’s hoping the guys at the met office are right about that heat wave…) Poke (pronounced poke-keh) is a Hawaiian staple and can be found in many different guises, with chunks of tuna marinated in soy being the most popular and ubiquitous. This is a meat- and fish-free version and something I love eating whilst sat on my garden chair with the sun kissing my toes. It serves 4 as a starter, but I often eat the entire bowlful for lunch. Whatever you do, only attempt this if you can get your hands on seriously good melons.
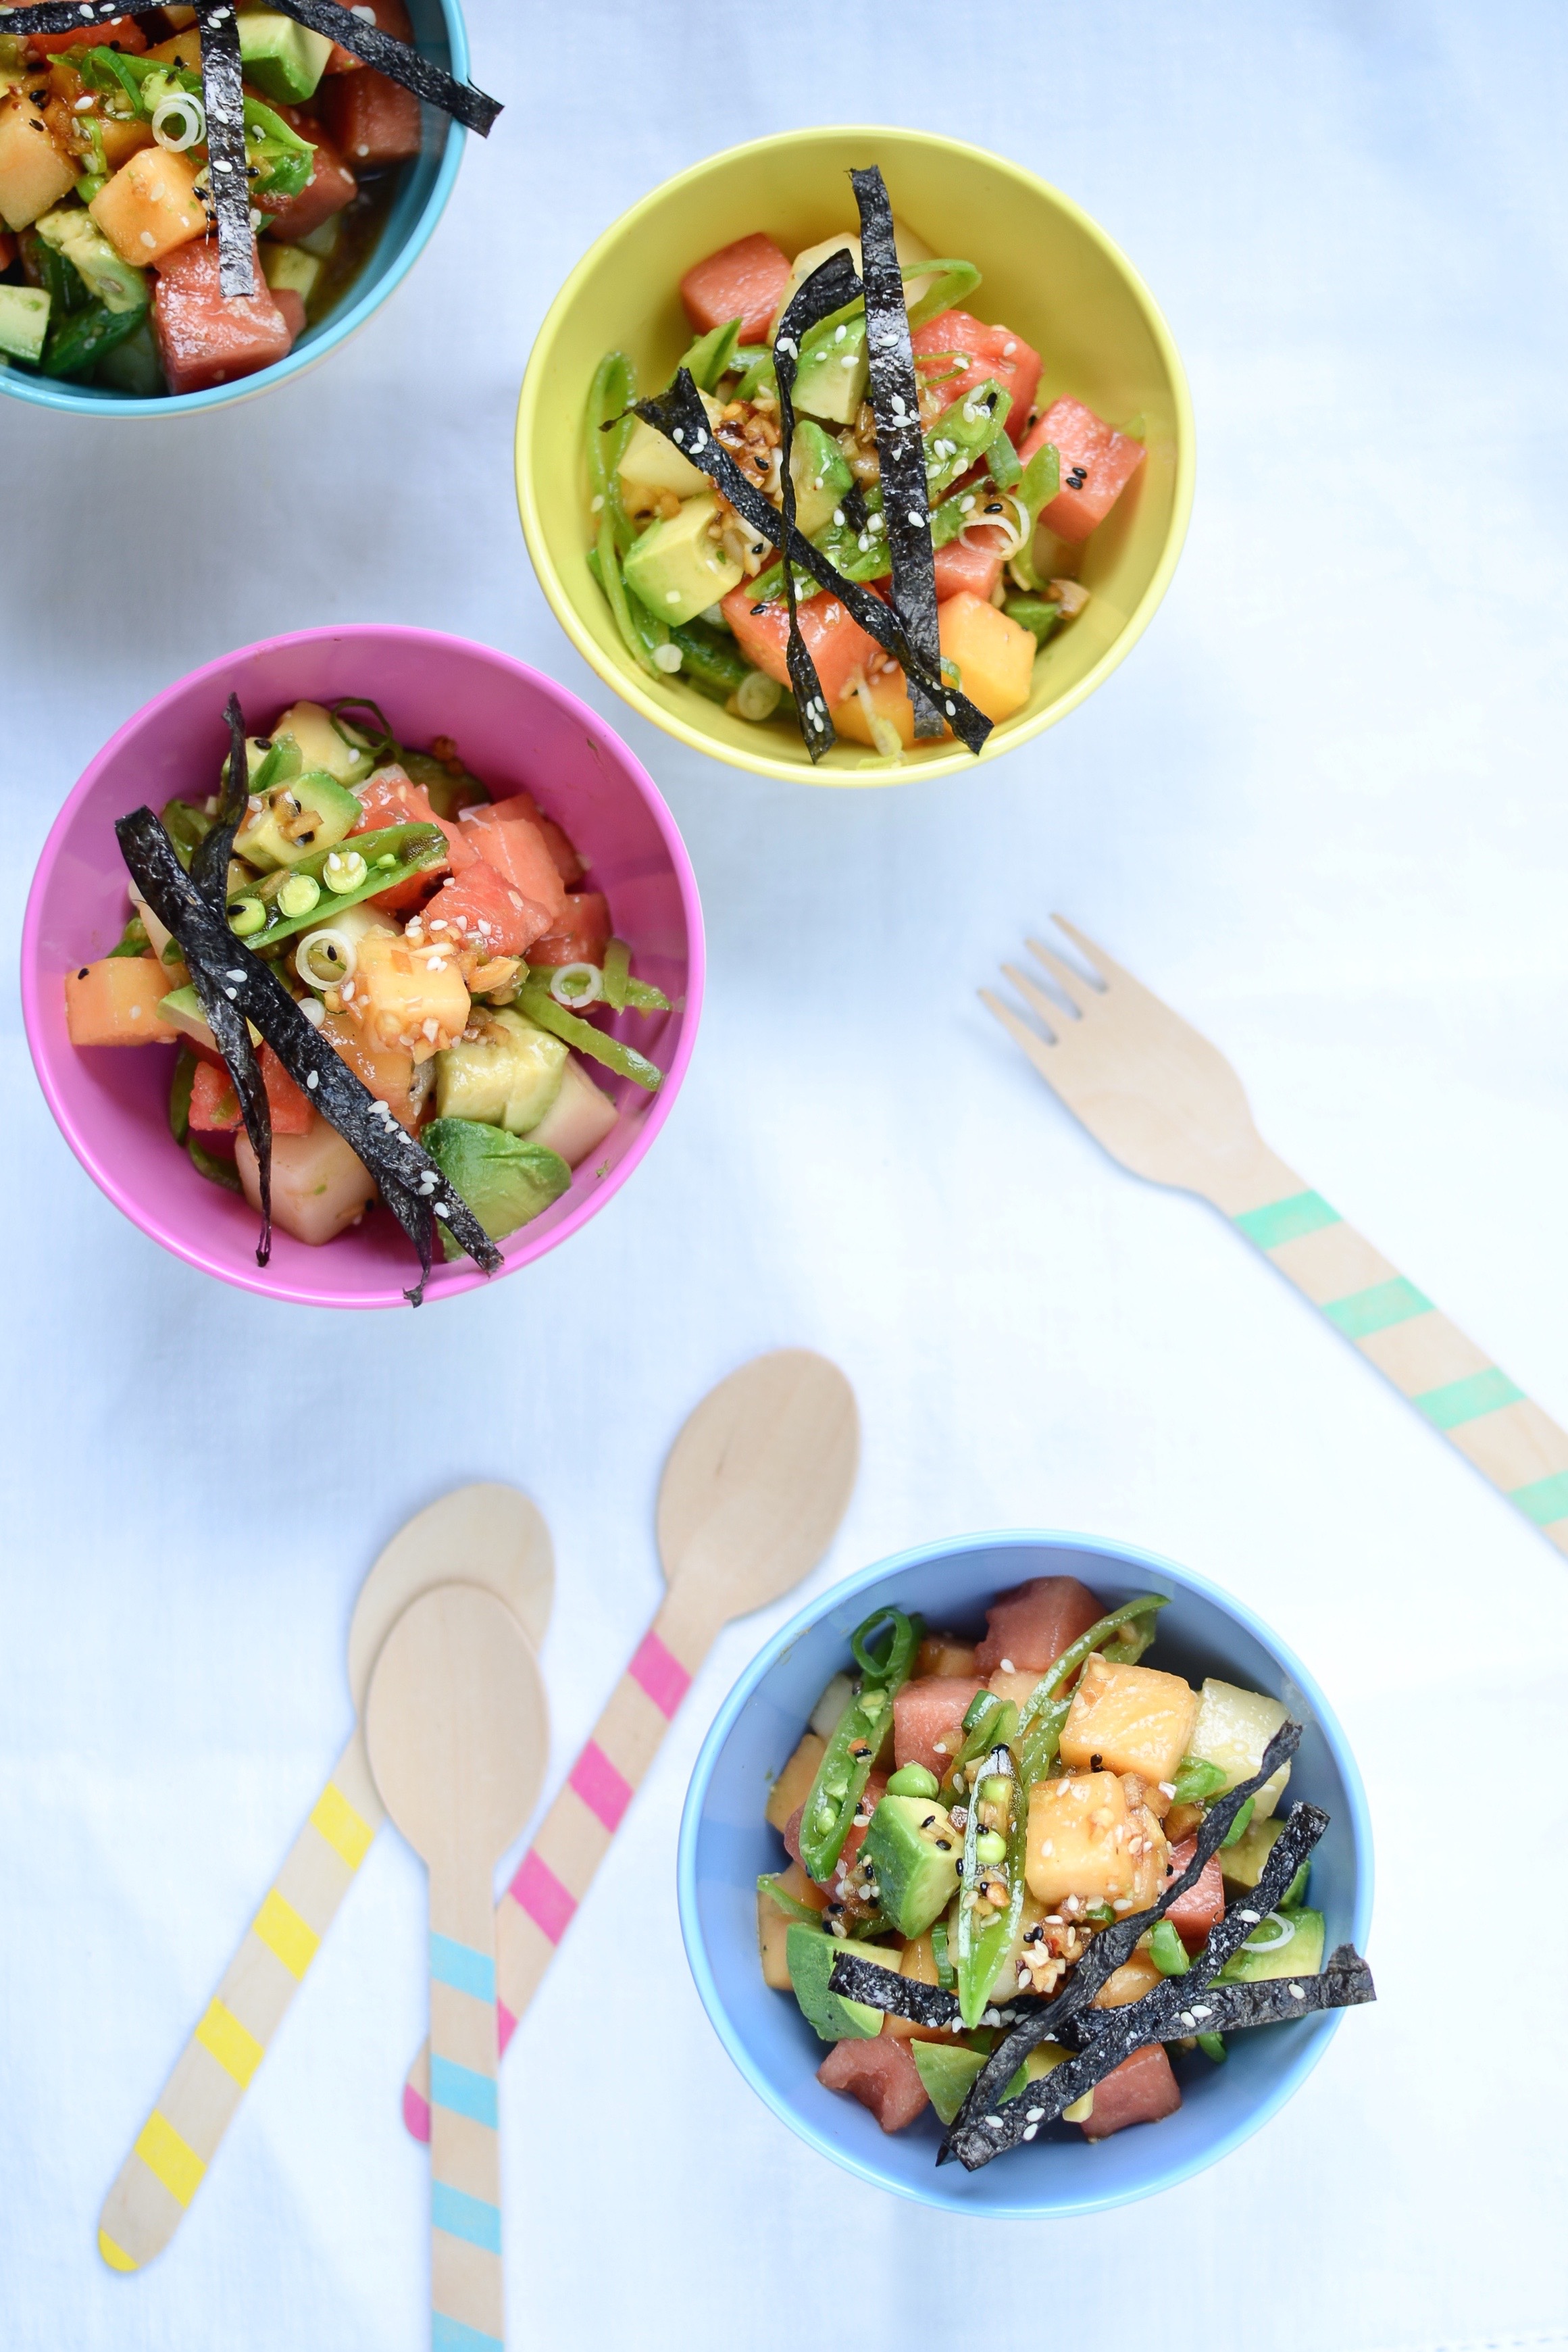
Melon & avocado poké with nori crisps
Serves 4 as a starter
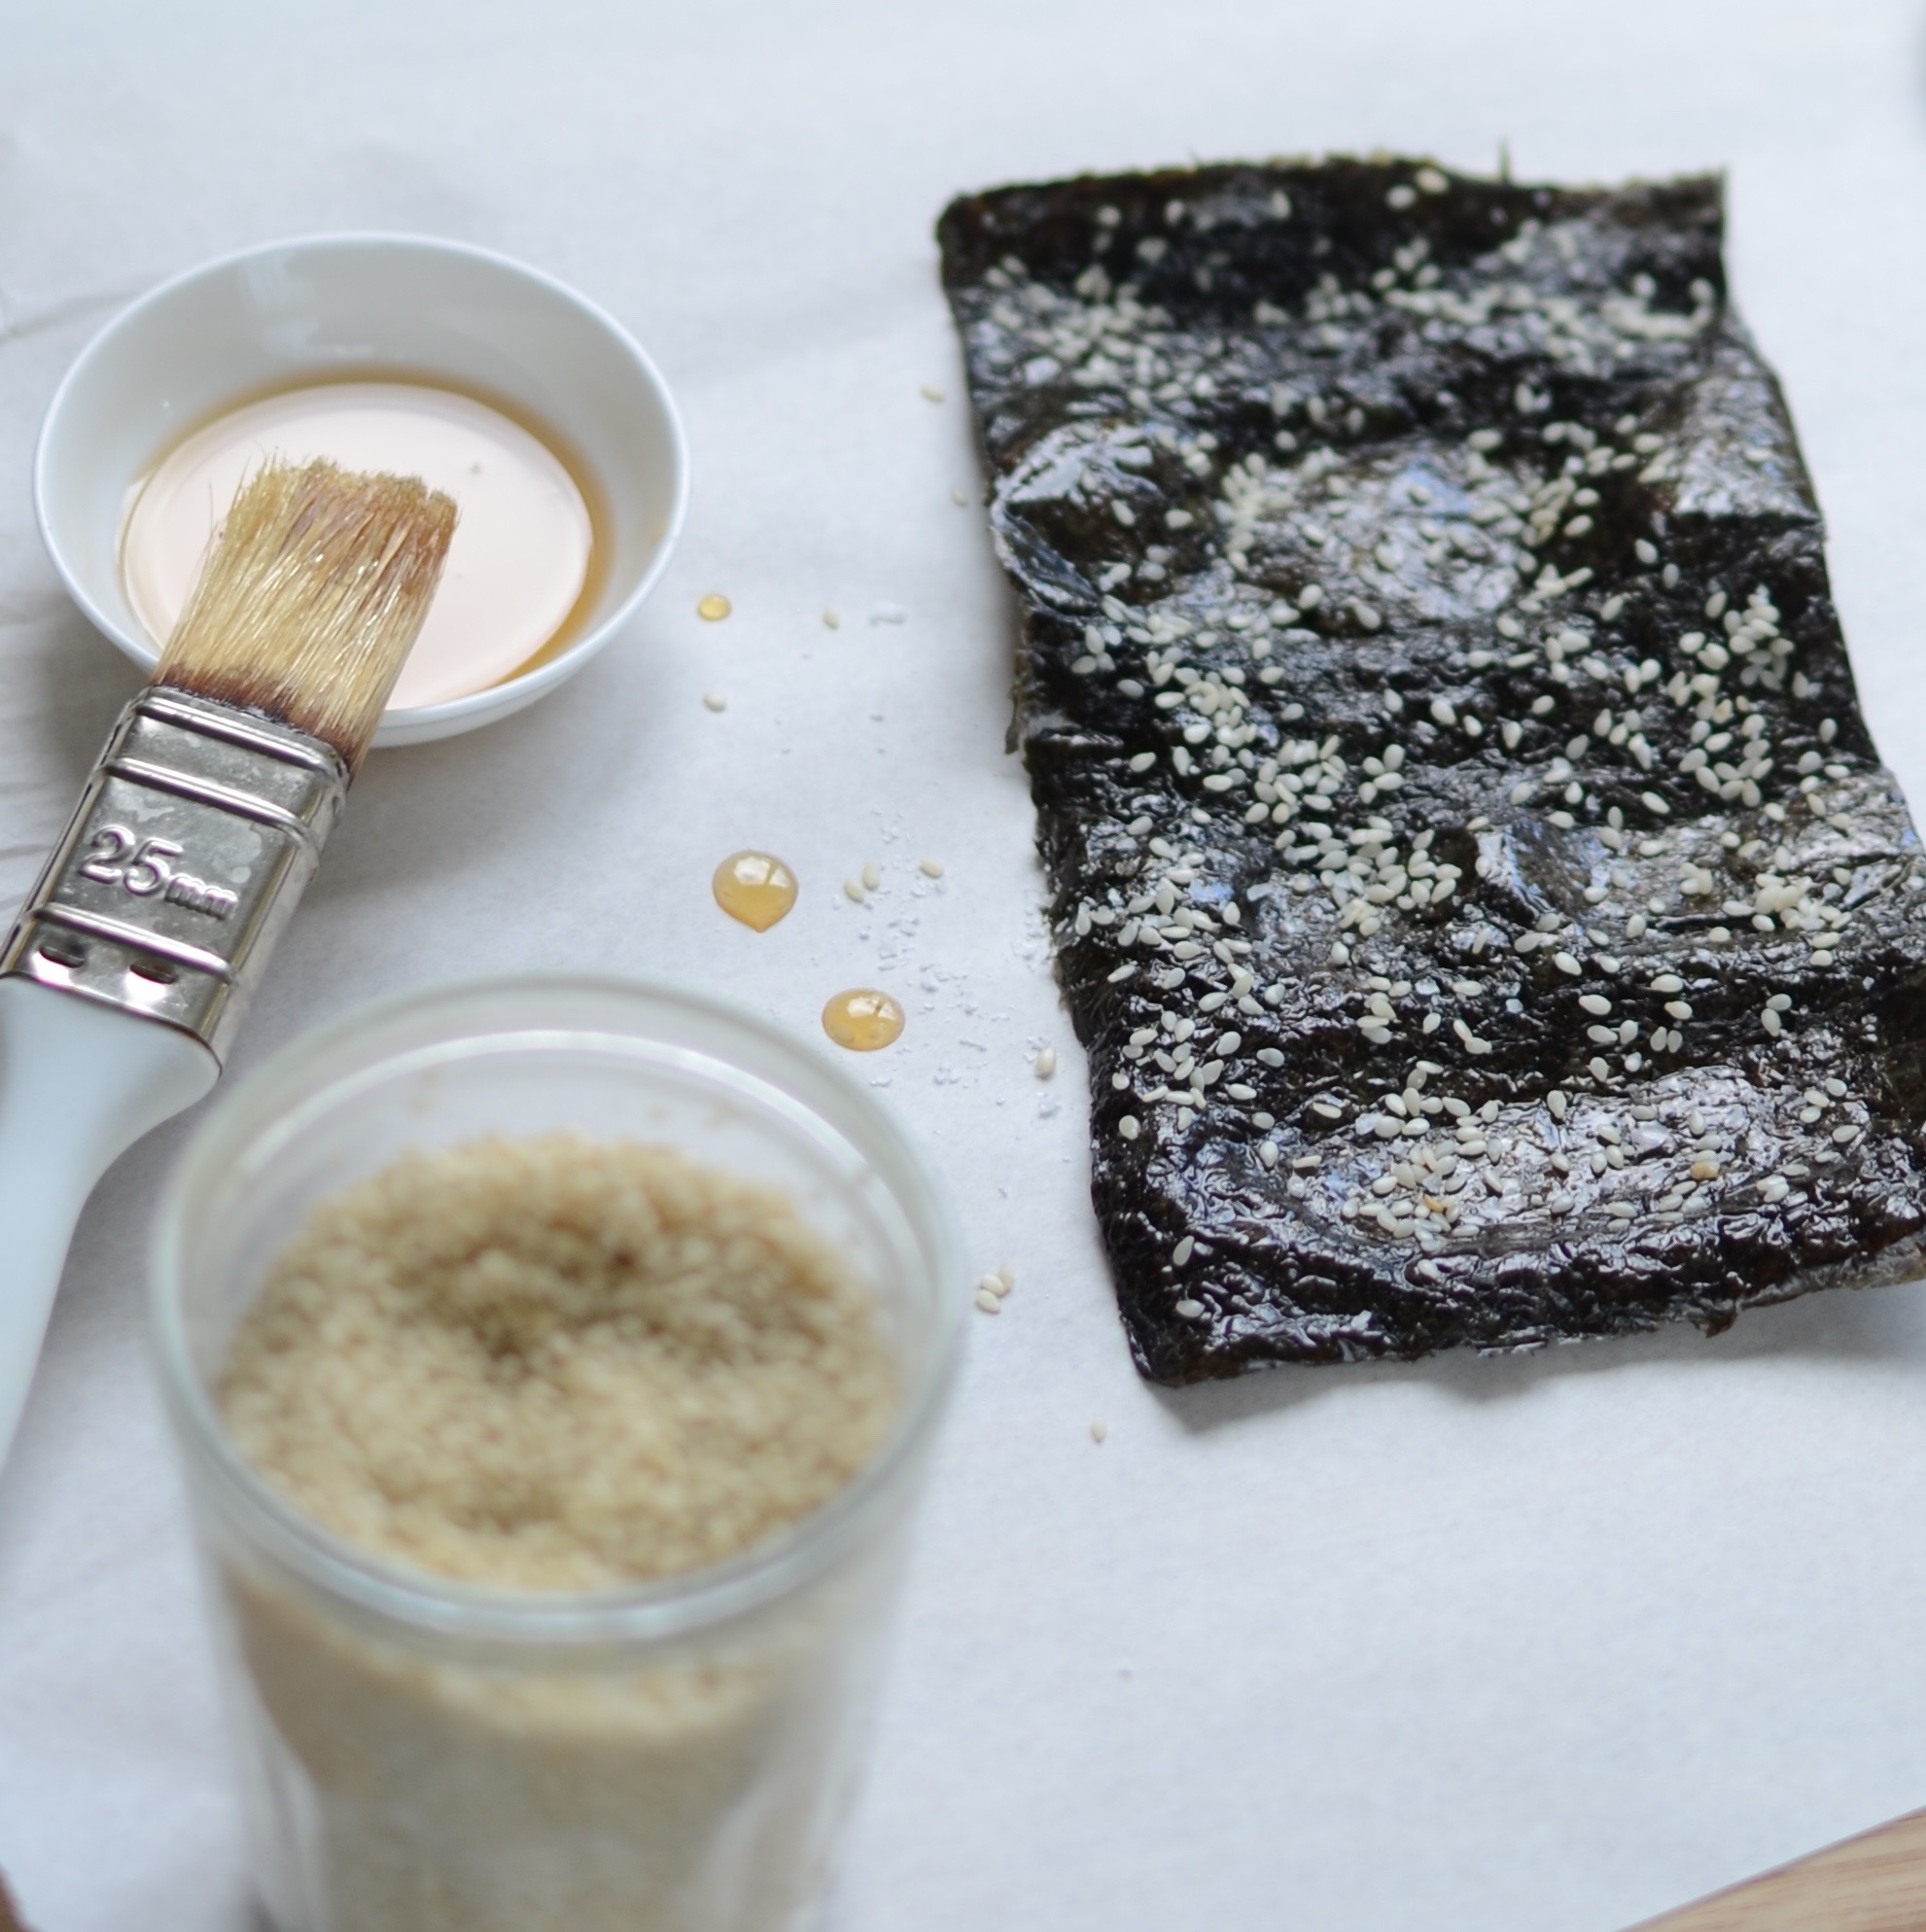
Ingredients for the nori crisps
2 sheets nori
white sesame seeds
sesame oil
sea salt
Ingredients for the dressing
15ml (1 tablespoon) extra virgin olive oil
5ml (1 teaspoon) rice wine vinegar
5ml (1 teaspoon) toasted sesame oil
15ml (1 tablespoon) tamari
30ml (2 tablespoons) lemon juice
1/2 – 1 teaspoon raw honey
1 teaspoon each of white and black sesame seeds, plus more for garnish
pinch of dried chilli flakes (or to taste)
1 shallot, very finely chopped
1 large clove garlic, finely chopped
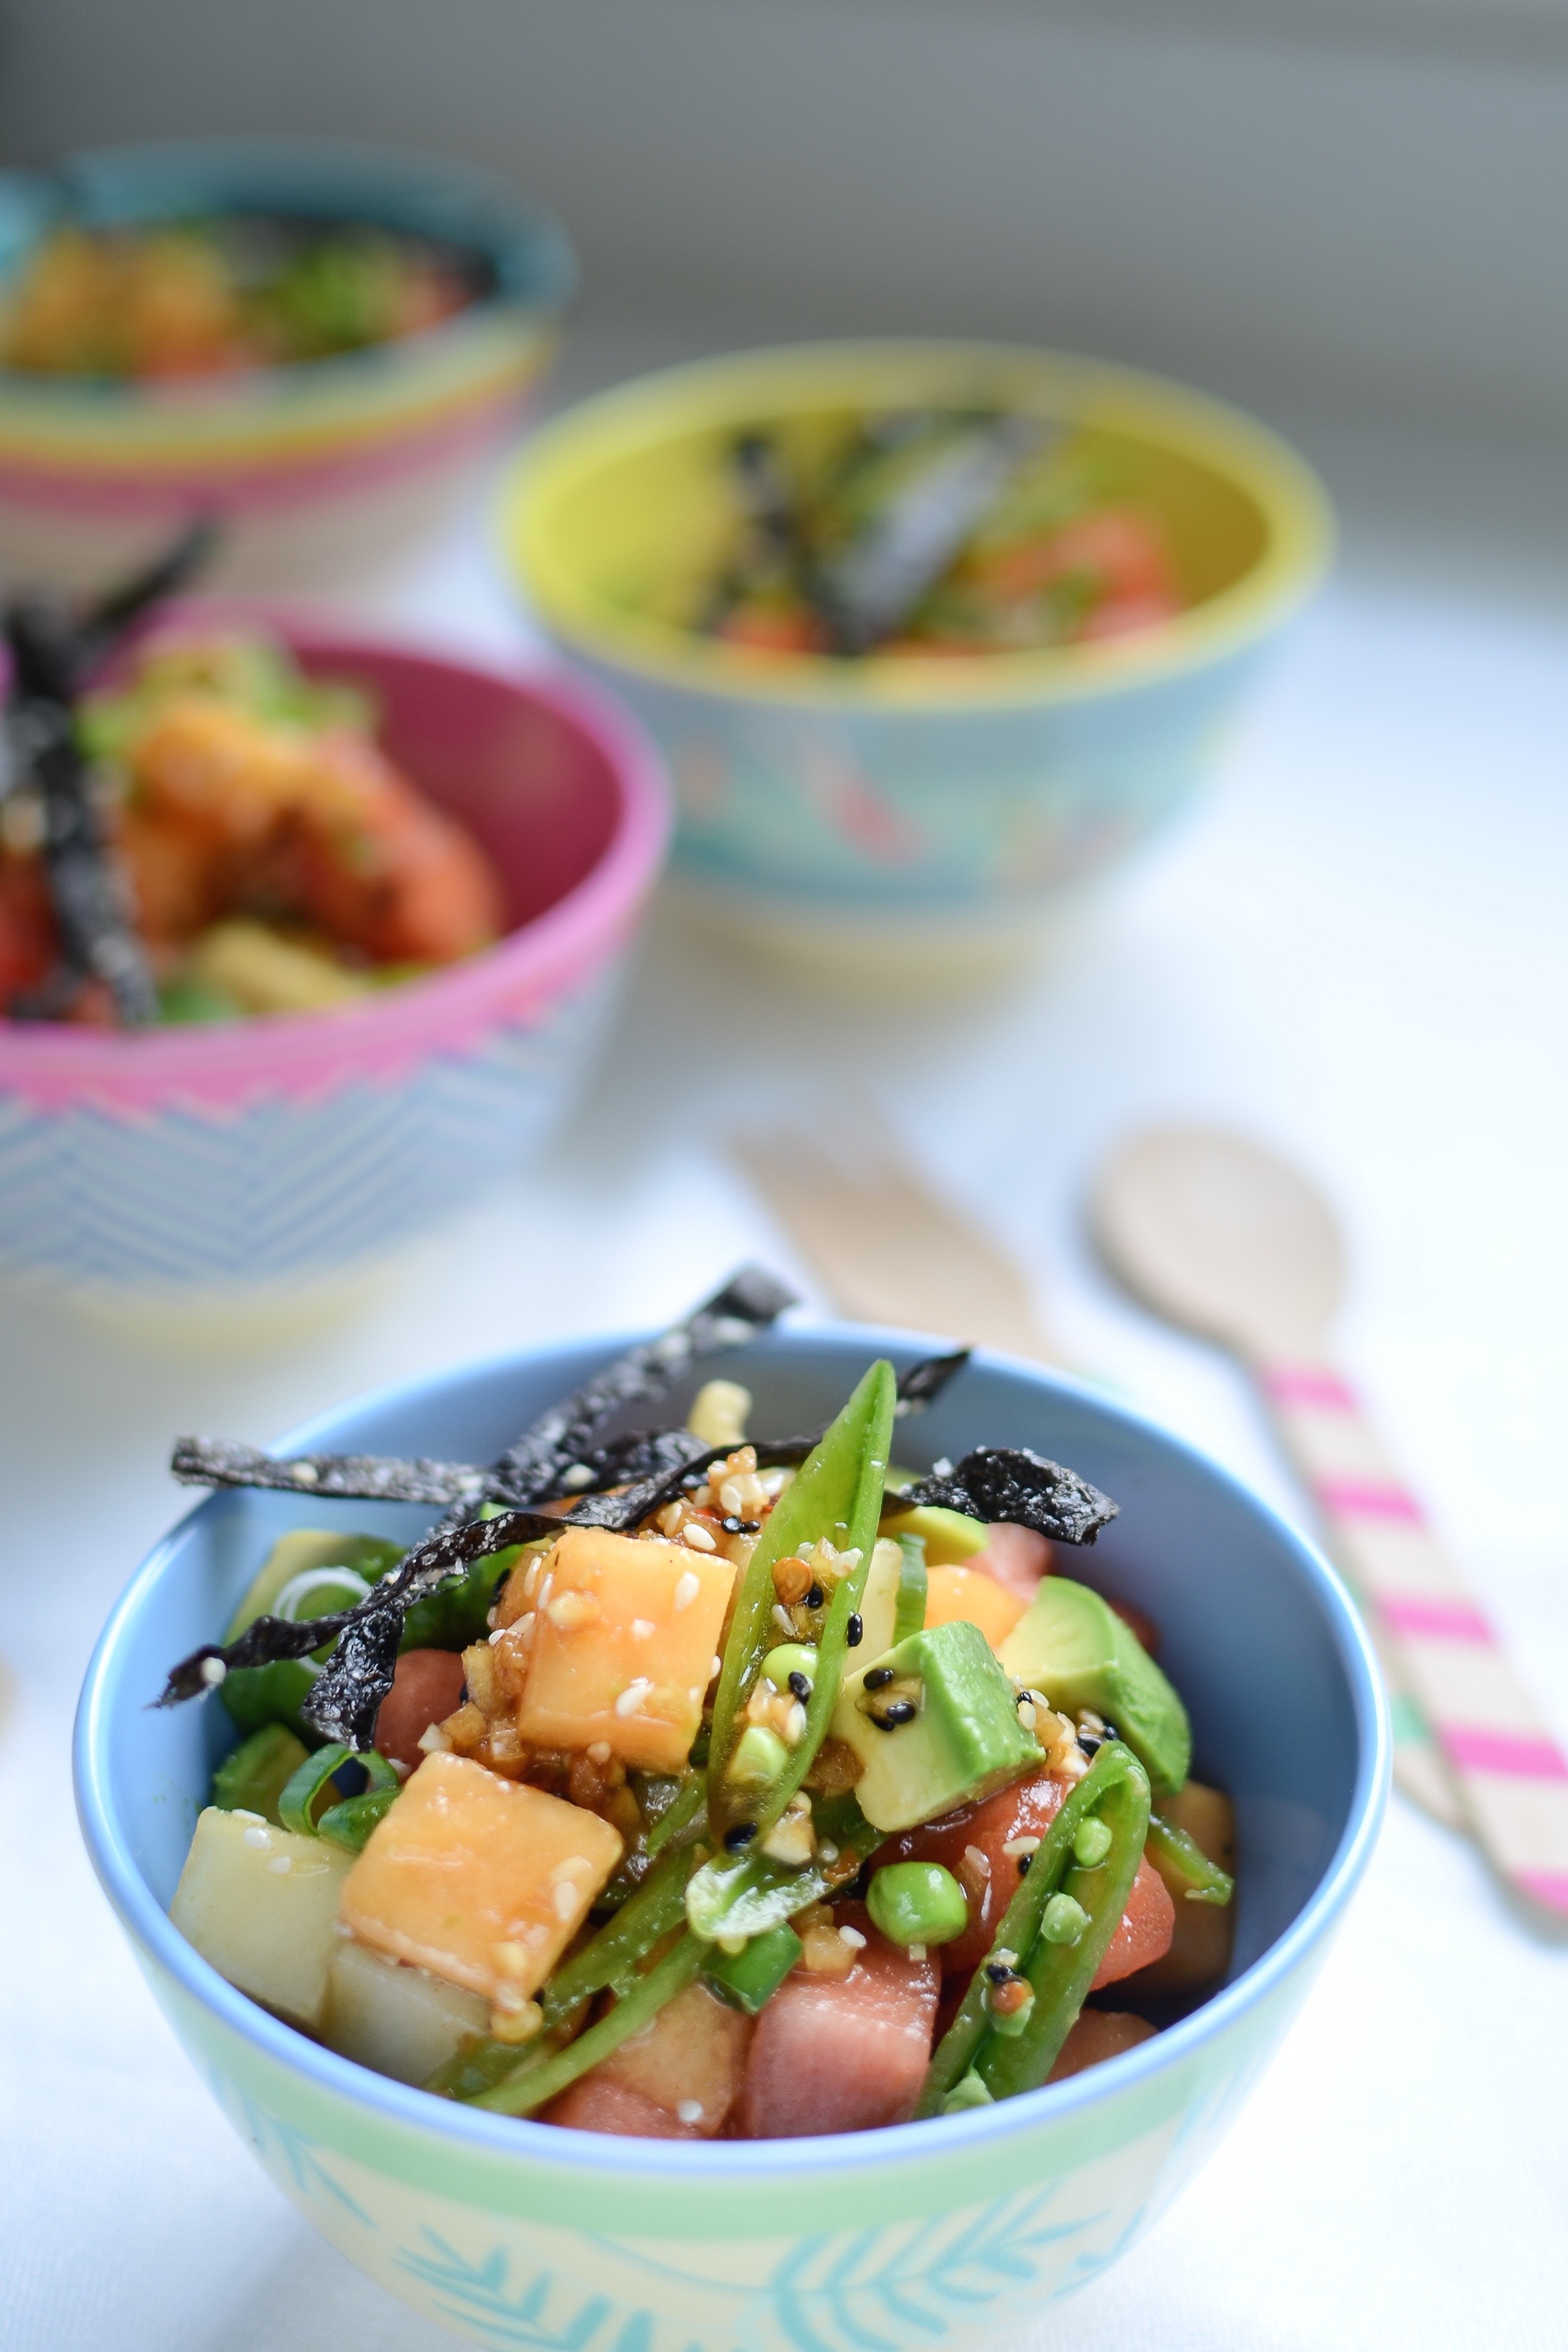
Ingredients for the poké
500g (3 1/2 cups) diced watermelon (or a mixture of melons)
2 ripe avocado, cut into small dice
large handful sugar snap peas, thinly sliced lengthways
1 spring onion, finely sliced
sea salt
Method
- For the nori crisps: Preheat the oven to 140°C (275°F). Line a large baking sheet with parchment paper and set aside. Place two sheets of nori, shiny side up, on a chopping board. Using a pastry brush, lightly brush one sheet with water, then press the other one firmly firmly on top to stick the two together.
- Now brush the uppermost sheet with sesame oil, sprinkle on some sea salt and sesame seeds, and using scissors or a sharp knife, cut the nori into thin strips.
- Arrange the strips in a single layer on the baking sheet and bake for 15 to 20 minutes or until they have turned crispy and dark green. Remove from the oven and allow to cool.
- For the dressing: Combine all the ingredients in a jar and give it a good shake. Taste and adjust seasoning.
- To serve: Gently toss together the melon and other poké ingredients with the dressing and serve immediately topped with nori crisps.
Crustless courgette quiche
Zucchini. Courgette. Summer squash. Or baby marrow, as it is called in South Africa. I have a love-hate relationship with this veg. It tastes great grilled, marinated or slathered in dressing, but it is not the most nutrient dense choice, and I struggle to get it down raw (I know, I shouldn’t be admitting this, given the current zoodle fad…) And it really is a tad boring, if you’re honest. Having said that, it is a regular in my shopping basket, as its neutral taste means it is a good canvas for more exciting things, and makes it rather versatile from being grated into omelettes, breads, fritters and even brownies (check out the recipe in my book!), to featuring in beautiful sides such as a this one. Another surefire way to make the most of the humble zucchini, is this gluten- and grain-free quiche. It looks spectacular and tastes pretty darn good too.
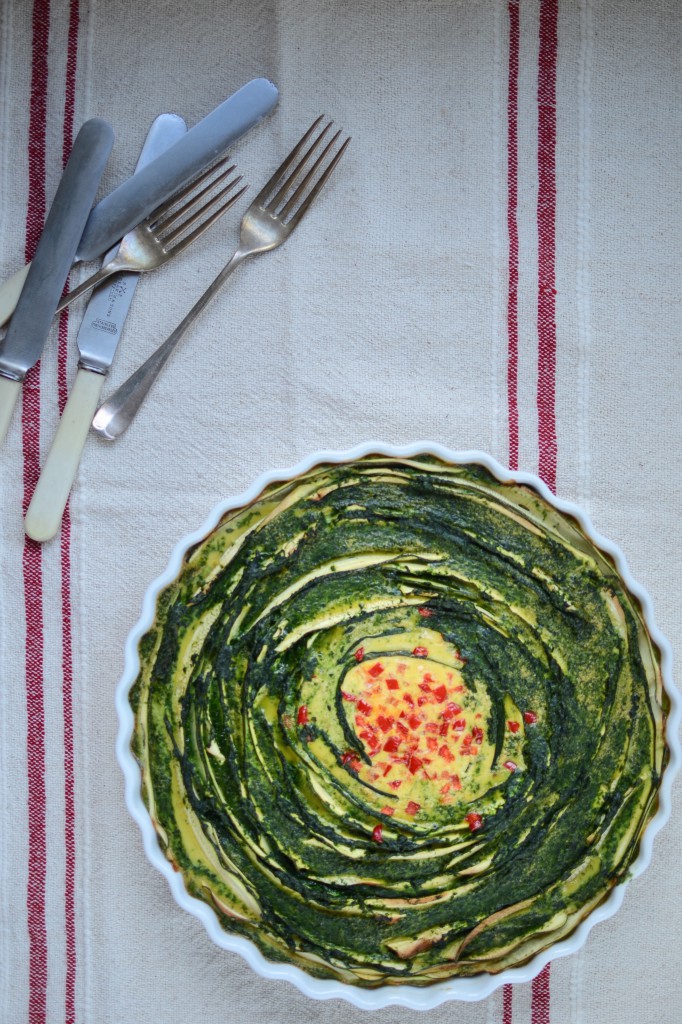

Crustless Courgette Quiche
The leek and egg mix forms a rather delicious grain-free base and helps keep the courgette slices upright. Feel free to add a large handful of good quality grated Parmesan to the filling if you like – it will make it even more delicious!
Ingredients
Knob of butter or glug of extra virgin olive oil
2 leeks, trimmed, cut in half length-wise and thinly sliced (about 250g)
1 medium onion, finely chopped
2 teaspoons mixed dried herbs such as oregano, thyme, parsley and marjoram
200g spinach
9 medium eggs, whisked
125ml (1/2 cup) milk of your choice
1 teaspoon sea salt
1/2 teaspoon cayenne pepper
4 medium courgette (about 550g), trimmed
1/3 red pepper, finely diced
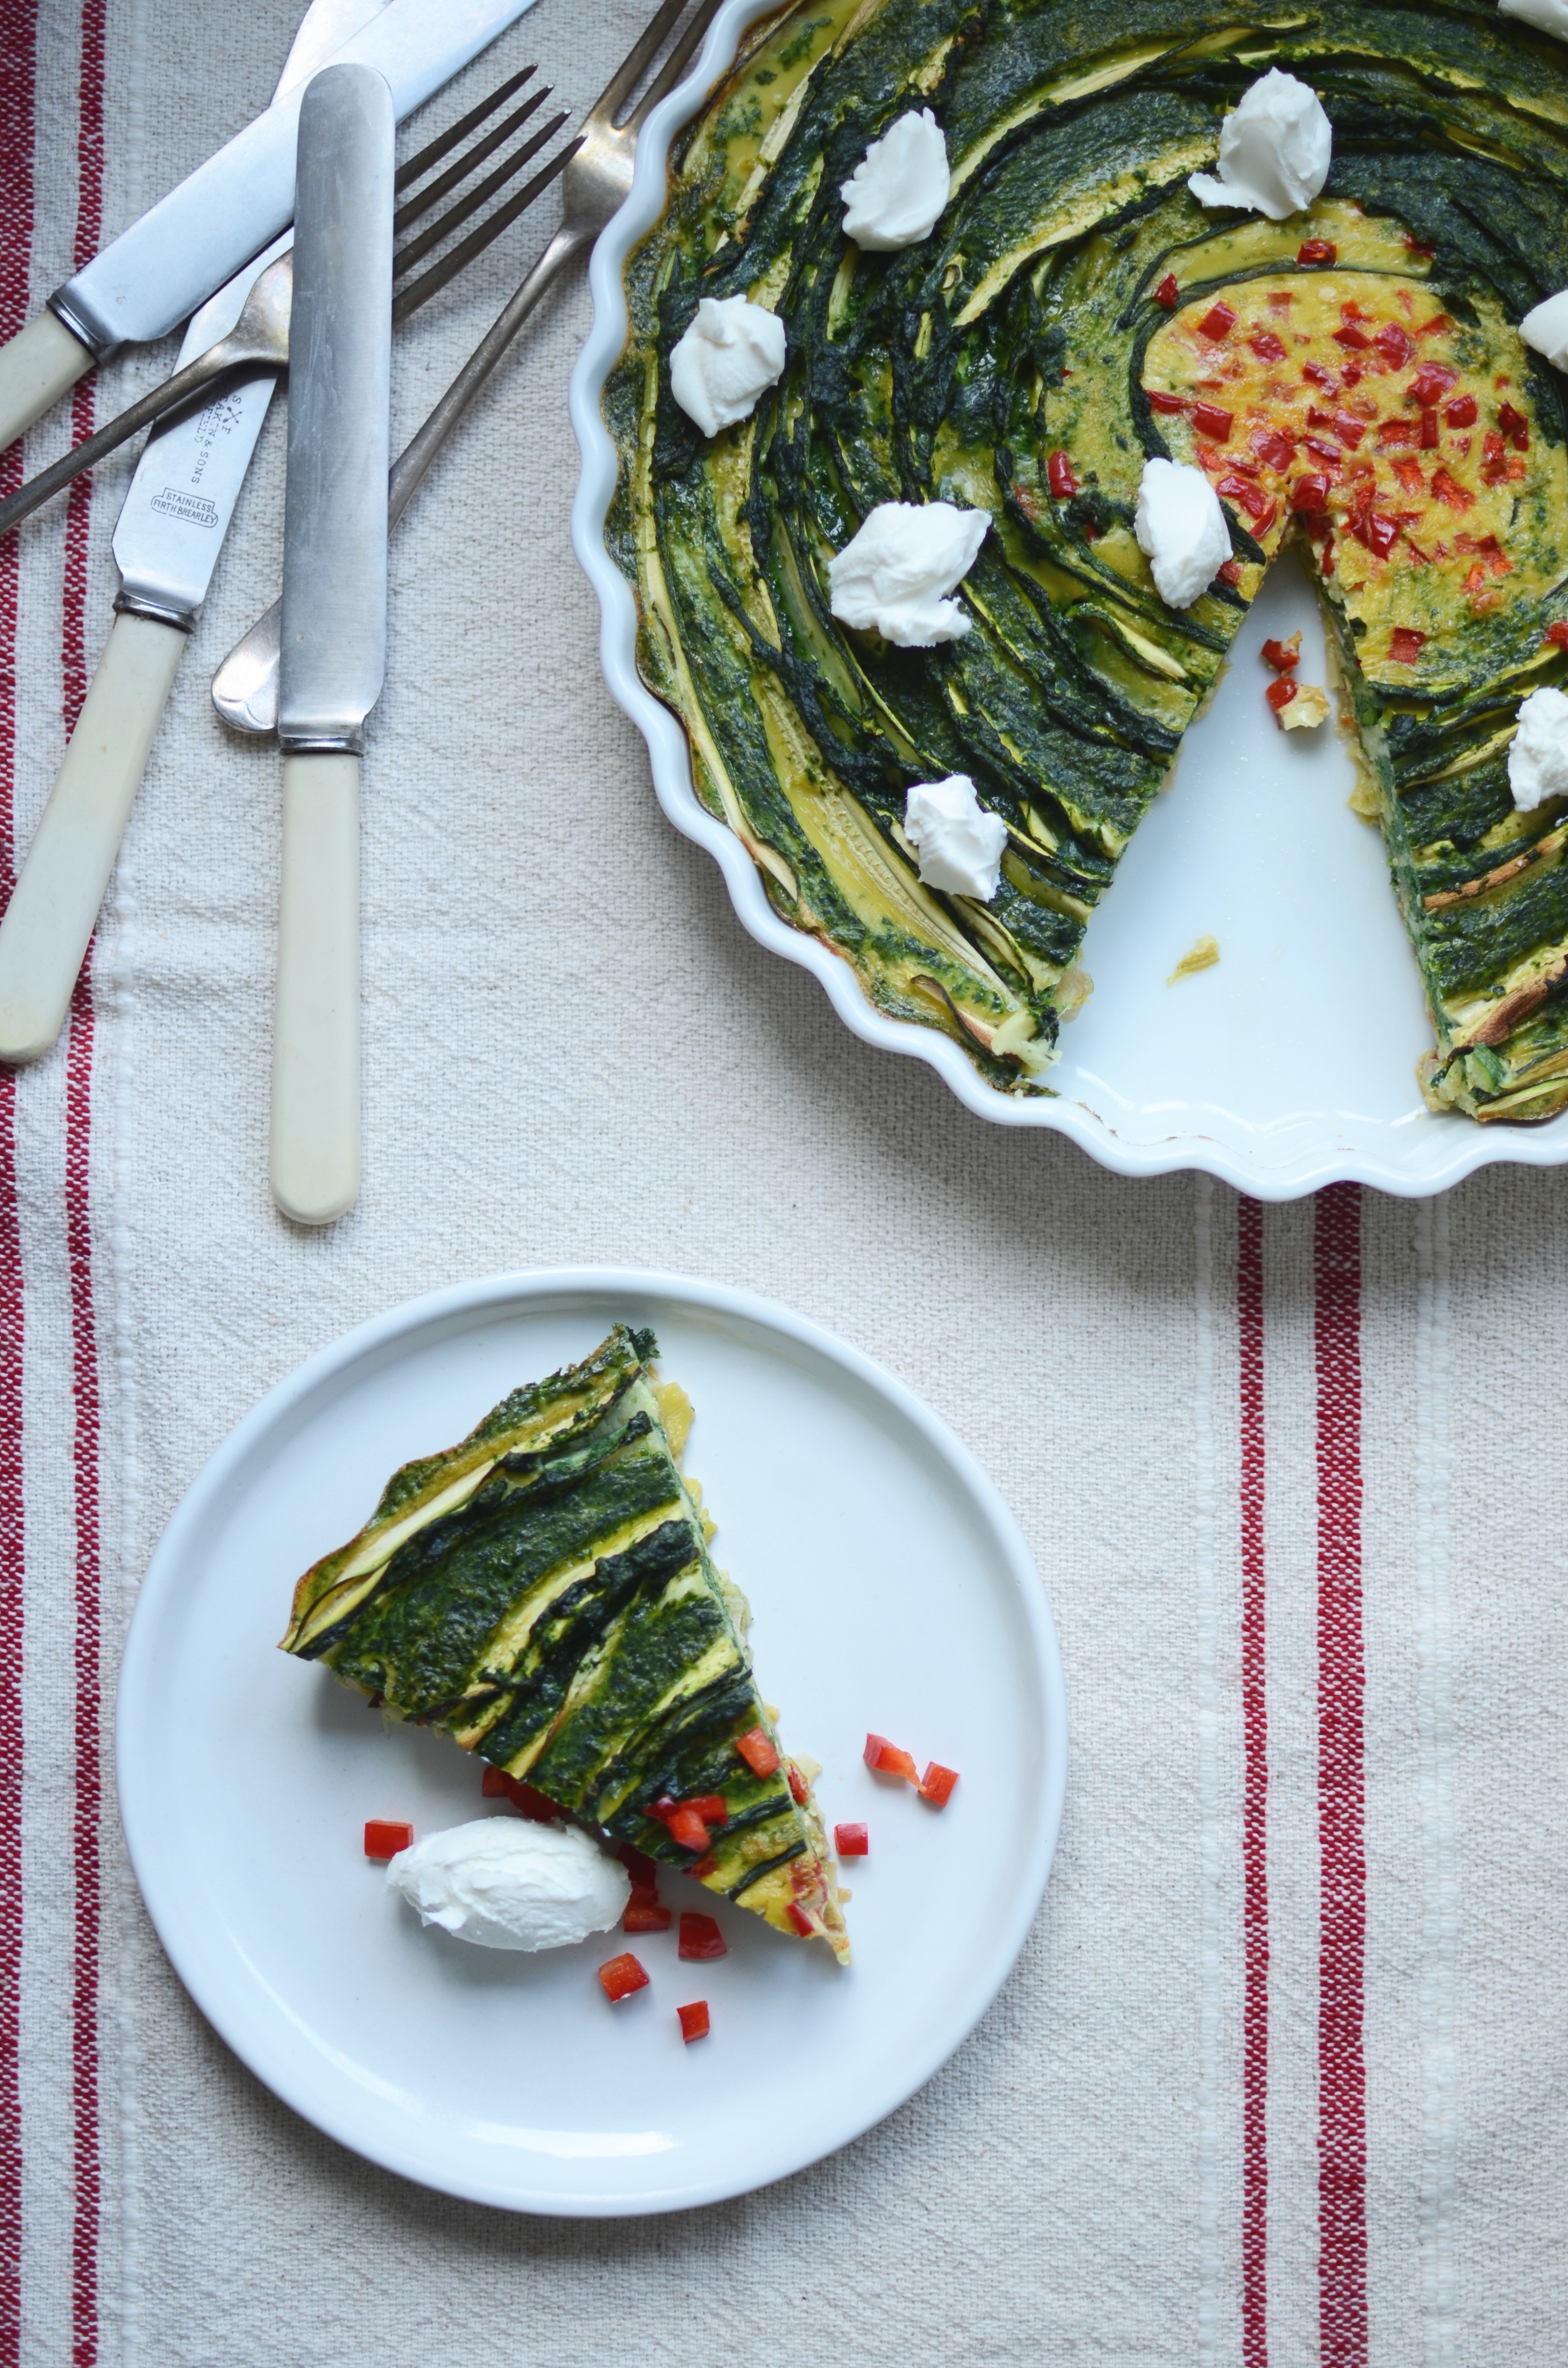
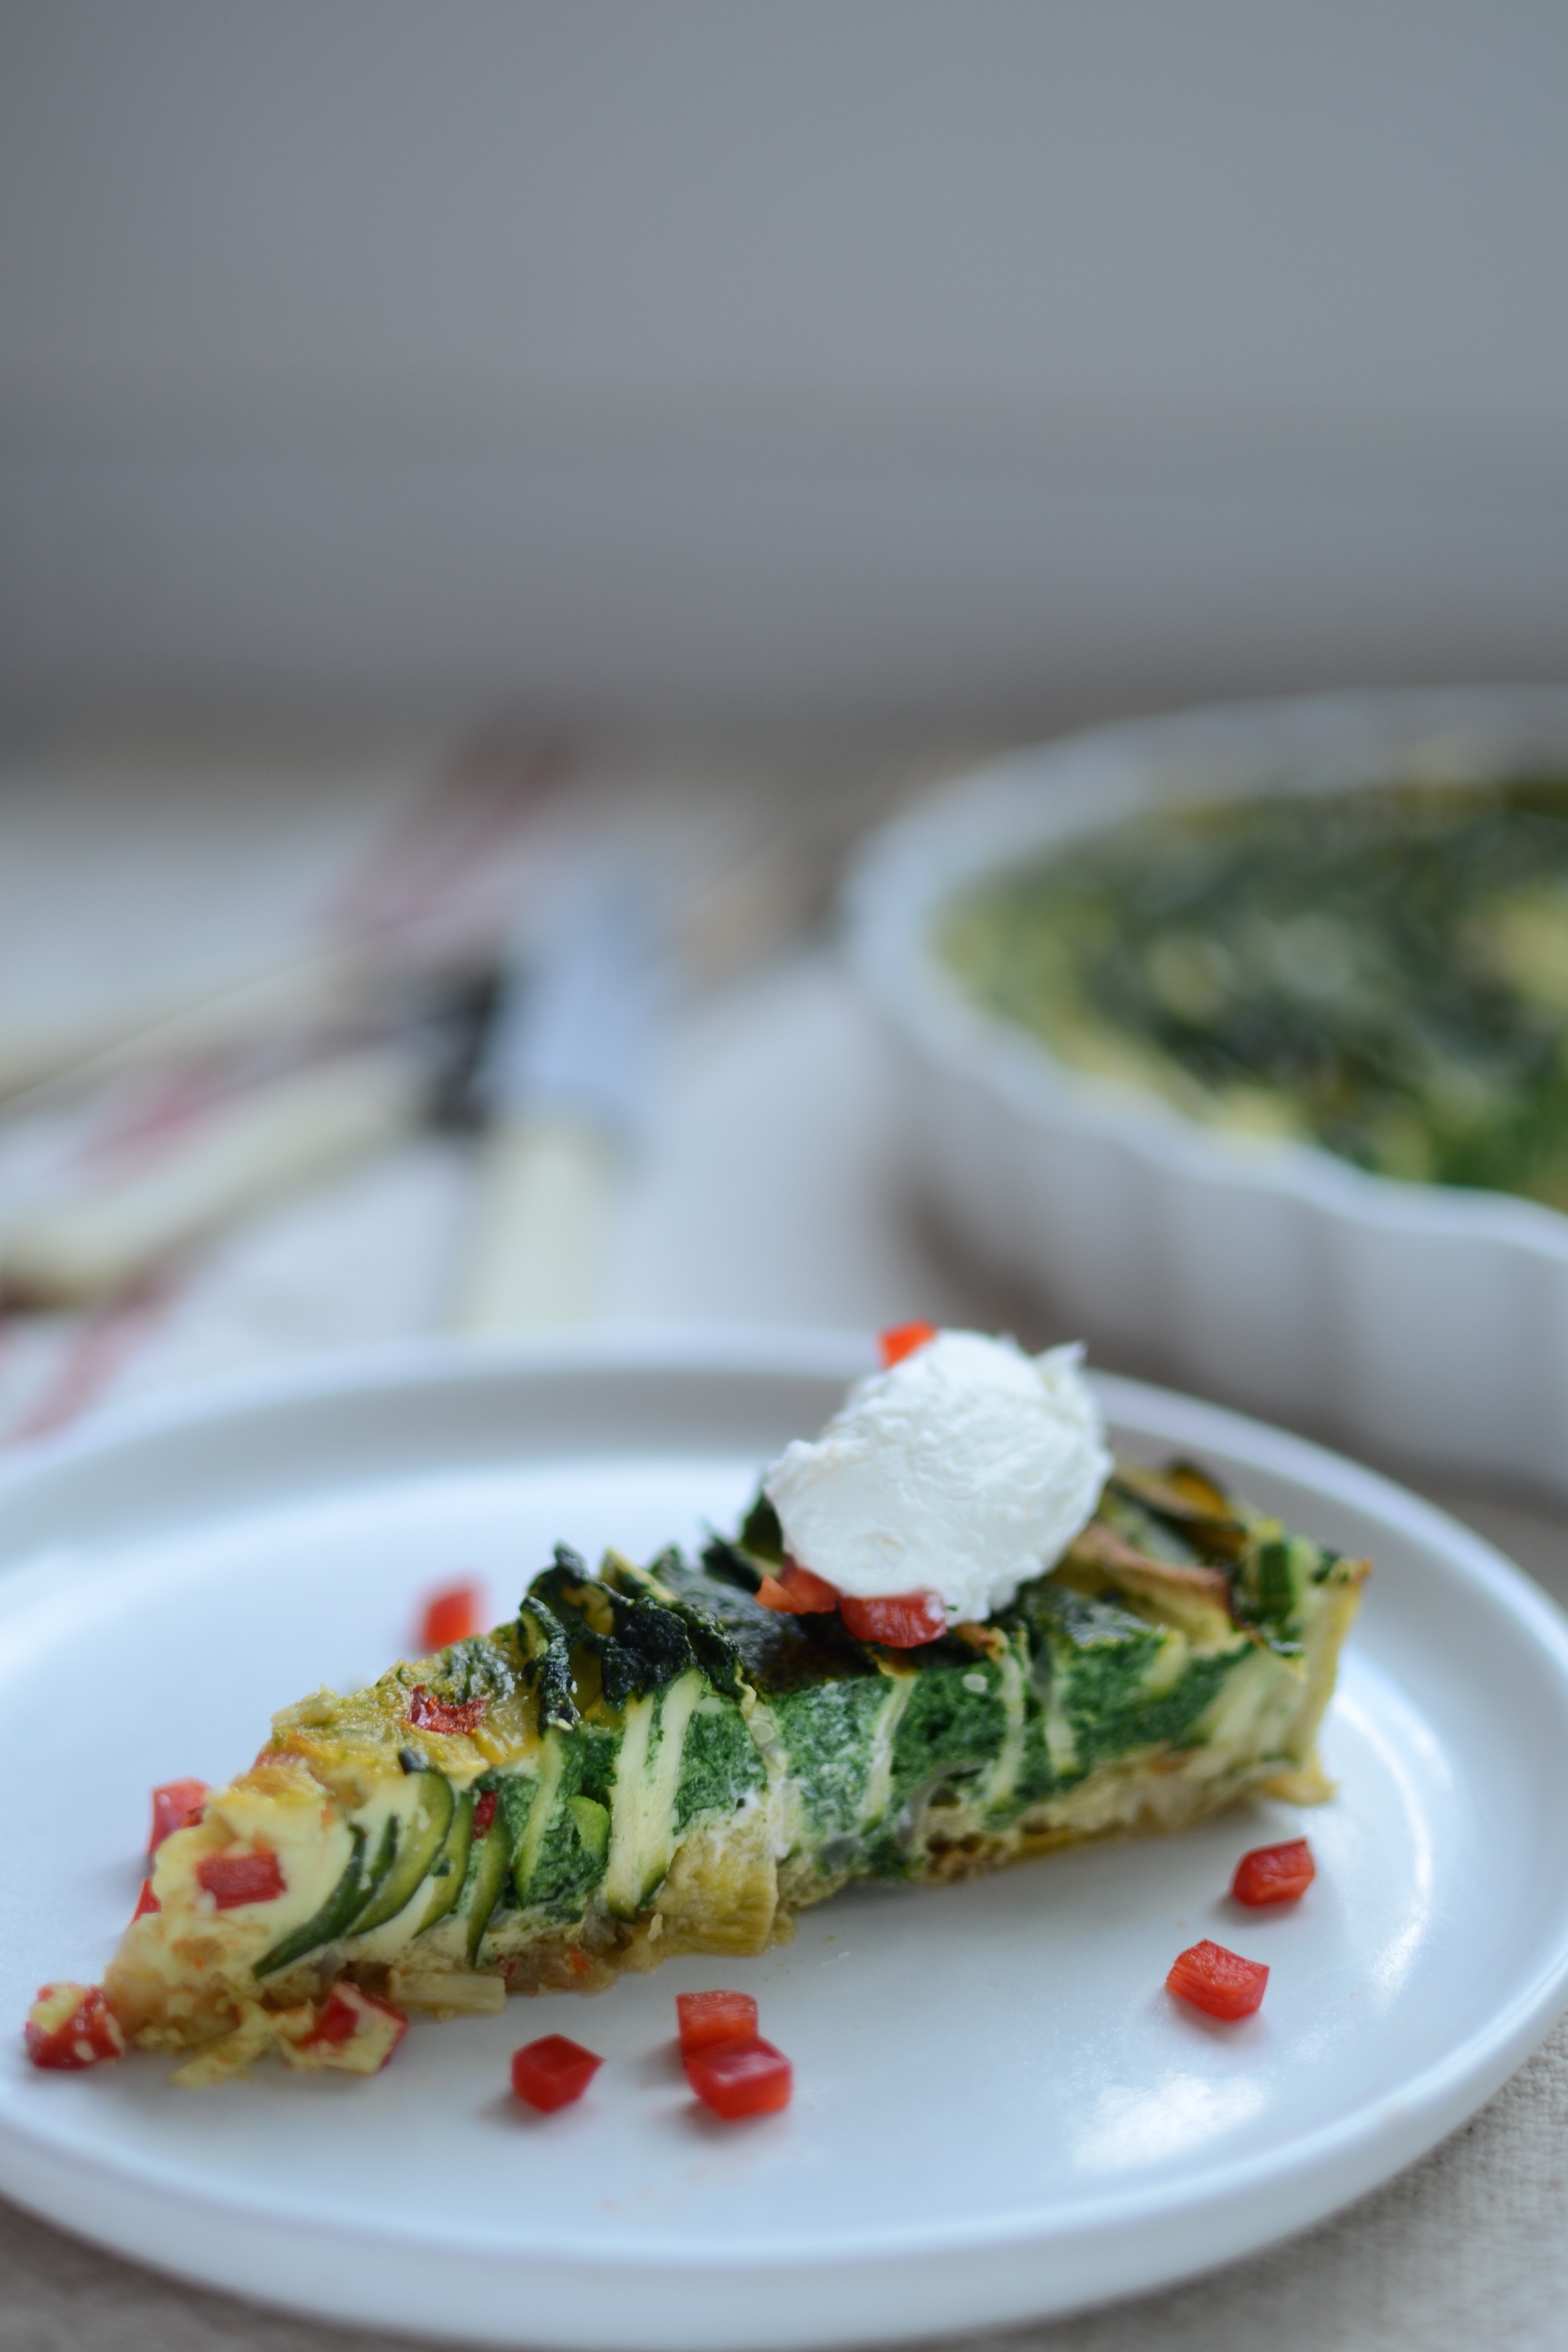
soft goats cheese (optional)
Method
- Butter a 27/28cm oven-proof round dish and pre-heat the oven to 180°C/360°F.
- In a medium saucepan, sauté the leeks, onion and dried herbs with some of the salt over a low to medium heat until soft. Scrape into a bowl and allow to cool.
- In the same saucepan wilt the spinach (the water left over after washing should be enough), then remove from the heat and set aside to cool slightly.
- Use a mandolin (or a very sharp knife) to thinly slice your zucchini. Thin enough to bend, but thick enough to stand up on its side (about 3mm).
- Add 125ml (1/2 cup) of the whisked egg to the cooled leek mix. Spread this over the bottom of your buttered dish.
- Place the wilted spinach in a blender with the rest of the eggs, milk, salt and cayenne pepper, and whizz until the spinach is well blended.
- Now start placing the courgette slices into the leek “base”, starting along the edge of the dish, for stability, working your way inwards. Leave a little space between the “petals” of your rose, if possible. I steamed the slightly thicker rind pieces first, before slotting them into the rose, as they aren’t malleable enough otherwise.
- Now carefully pour the spinach egg mix in between the courgette petals, ensuring an even distribution.
- Finally scatter the little red pepper dice into the centre and bake for roughly 1 hour or until set in the centre.
- Serve with a mixed salad, soft goat’s cheese and additional red pepper dice.
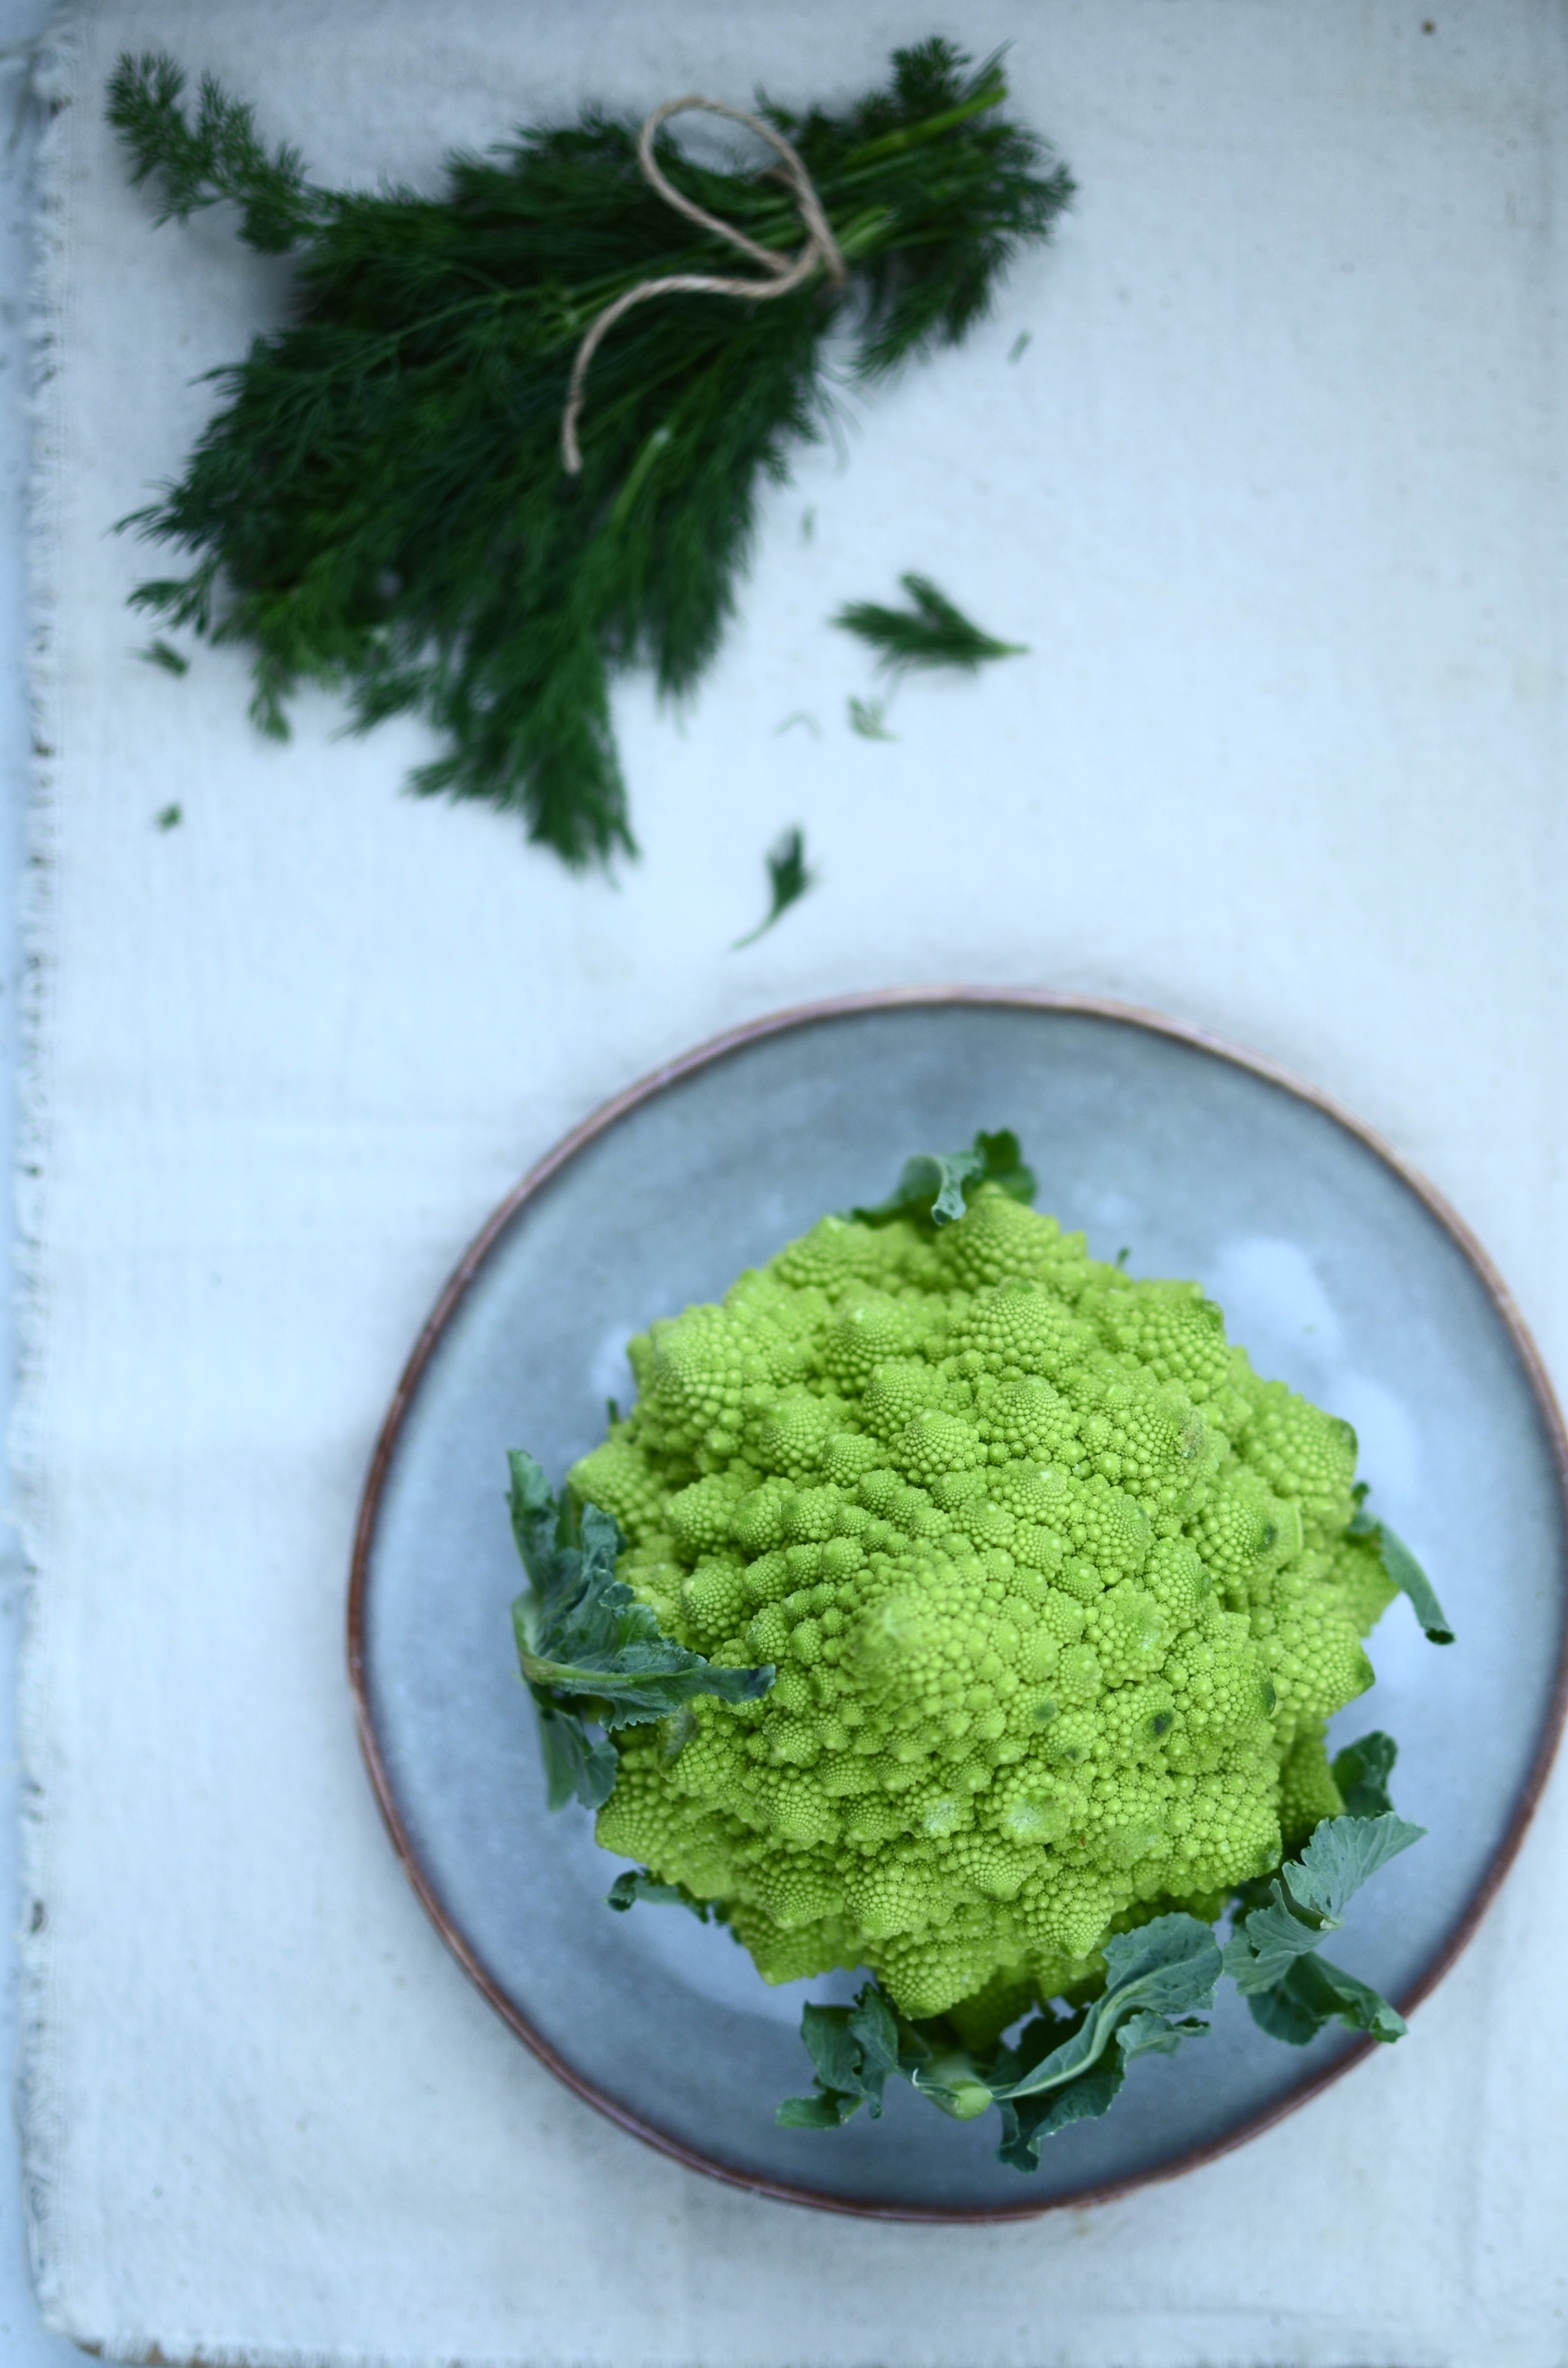
Mackerel and romanesco with preserved lemon
Writing a book about greens has helped me rekindle relationships with some vegetables that I have neglected somewhat, such as this little beauty, the romanesco. It looks like the strange yet stunning lovechild of Mr Broccoli and Ms Cauliflower, but is indeed a unique Italian variety of broccoli that develops multiple compact heads that can be individually snapped off. Each bud is composed of a series of smaller buds, all arranged in a logarithmic spiral, and this pattern continues at several smaller levels. To retain the gorgeous green hue after blanching or steaming, be sure to shock the florets in ice cold water. Nutritionally, romanesco is rich in vitamin C, vitamin K, dietary fiber and carotenoids.

Mackerel and romanesco with preserved lemon dressing
Serves 4
Ingredients for the salad
85g (1/2 cup) wild rice, rinsed, soaked in fresh water overnight and cooked until tender
3 smoked mackerel fillets, skin discarded and flaked
one large handful of rocket per person
150g large green olives, pitted and halved
45g (a heaped 1/4 cup) organic raisins
1 small head of romanesco, cut into florets and lightly steamed until tender, then shocked under ice cold water (90g reserved for dressing)
Ingredients for the dressing
2 small preserved lemons, pulp discarded and peel roughly chopped (about 2 tablespoons)
90g (about 3/4 cup) cooked romanesco
125ml (1/2 cup) extra virgin olive oil
45ml (3 tablespoons) lemon juice
1 – 2 teaspoons Dijon mustard
2 – 3 teaspoons raw honey
2 tablespoons fresh thyme leaves
small bunch of dill
freshly ground black pepper
sea salt to taste
Method
- Put all the ingredients for the dressing in a blender and blend until smooth and creamy. Set aside.
- Combine all the salad ingredients, season with salt and gently toss with enough dressing to coat.
Note: It is possible to enjoy wild rice – the seed of an aquatic grass and not a grain at all! – in its raw form, if you allow it to sprout (or “bloom”). Rinse the rice well, then soak in fresh water for 2 to 3 days, changing the water twice daily. You will know it is ready when most of the rice kernels have split open and are soft.
Chewy almond and fig thins
It doesn’t really matter when you make these, but you should! They are rather easy to throw together and definitely hit the spot when you need a little something to cheer up your darling (or yourself!). If you can’t find matcha powder, use a few drops of beetroot juice instead, to colour the chocolate pink.
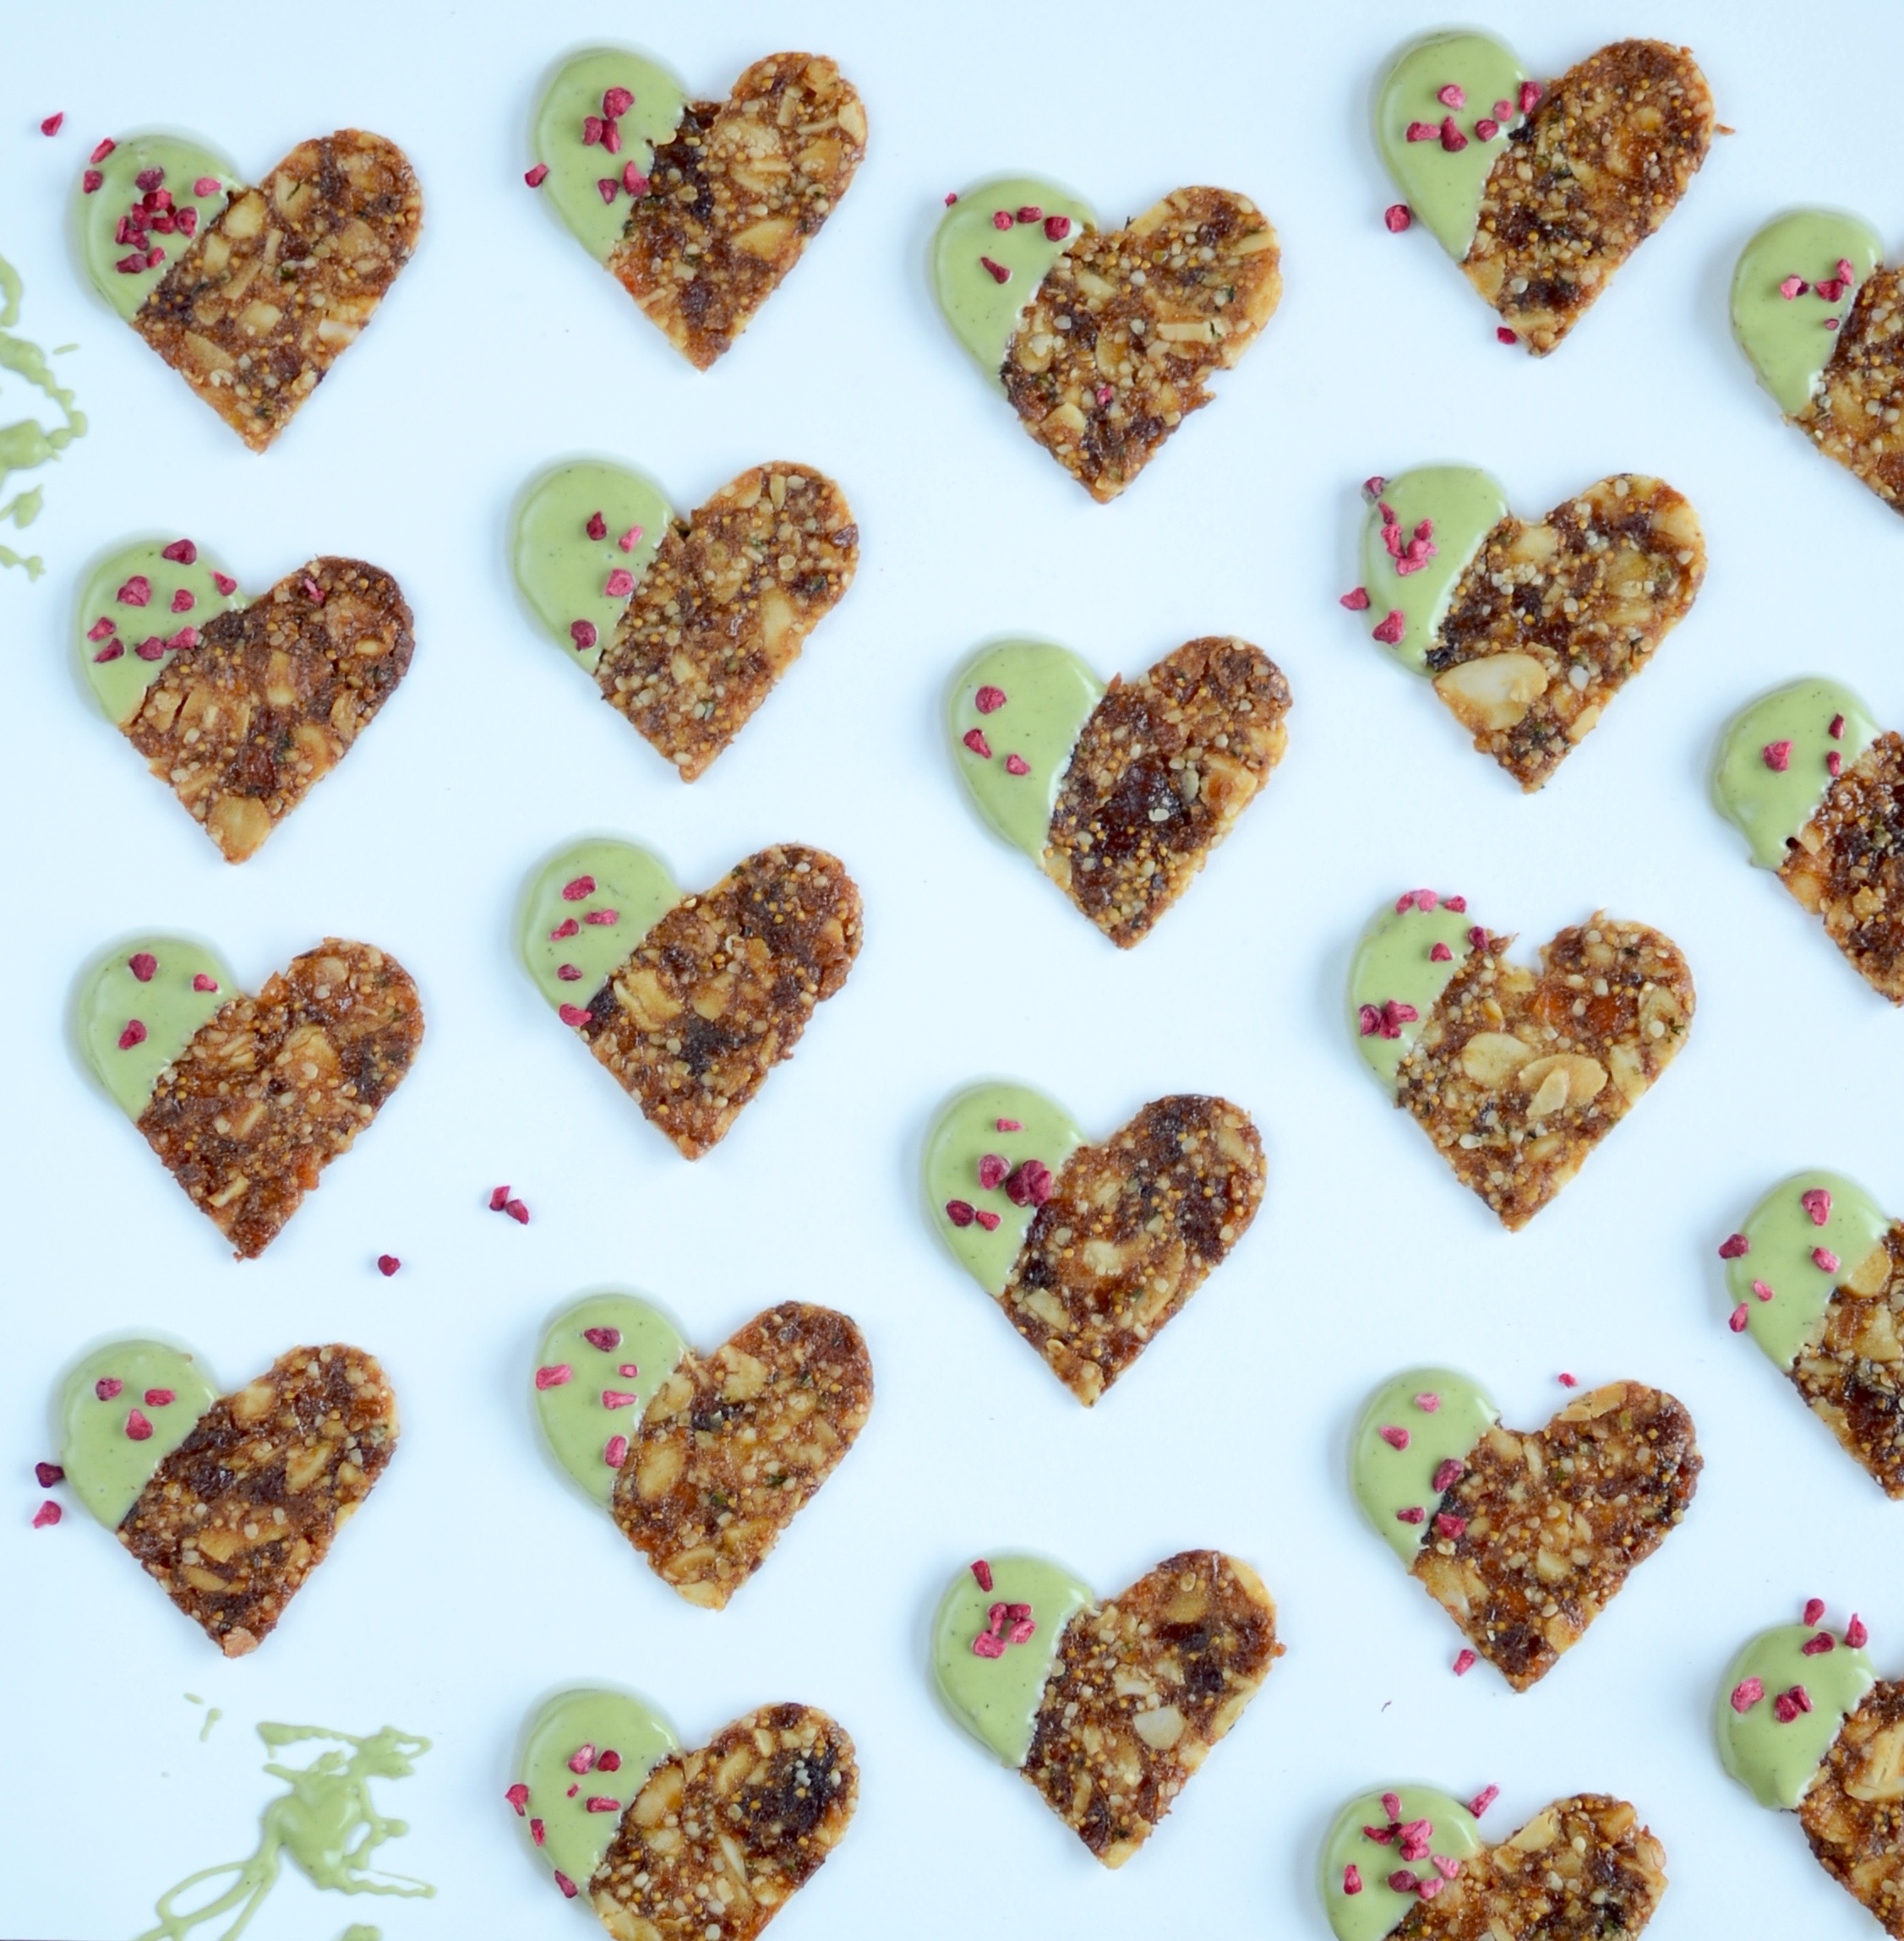
Chewy almond and fig thins
Ingredients
50g unsalted organic butter (or coconut oil)
50g coconut palm sugar (or you could use demarara sugar)
Pinch of sea salt
65g orange marmalade, very finely chopped
100g soft dried figs, finely chopped
80g flaked blanched almonds
30g shelled hemp seeds (also called hemp hearts)
25g brown rice flour
For the chocolate drizzle
100g organic white chocolate, broken into pieces
matcha powder (roughly 1 teaspoon)
freeze-dried raspberries or additional hemp hearts
Method
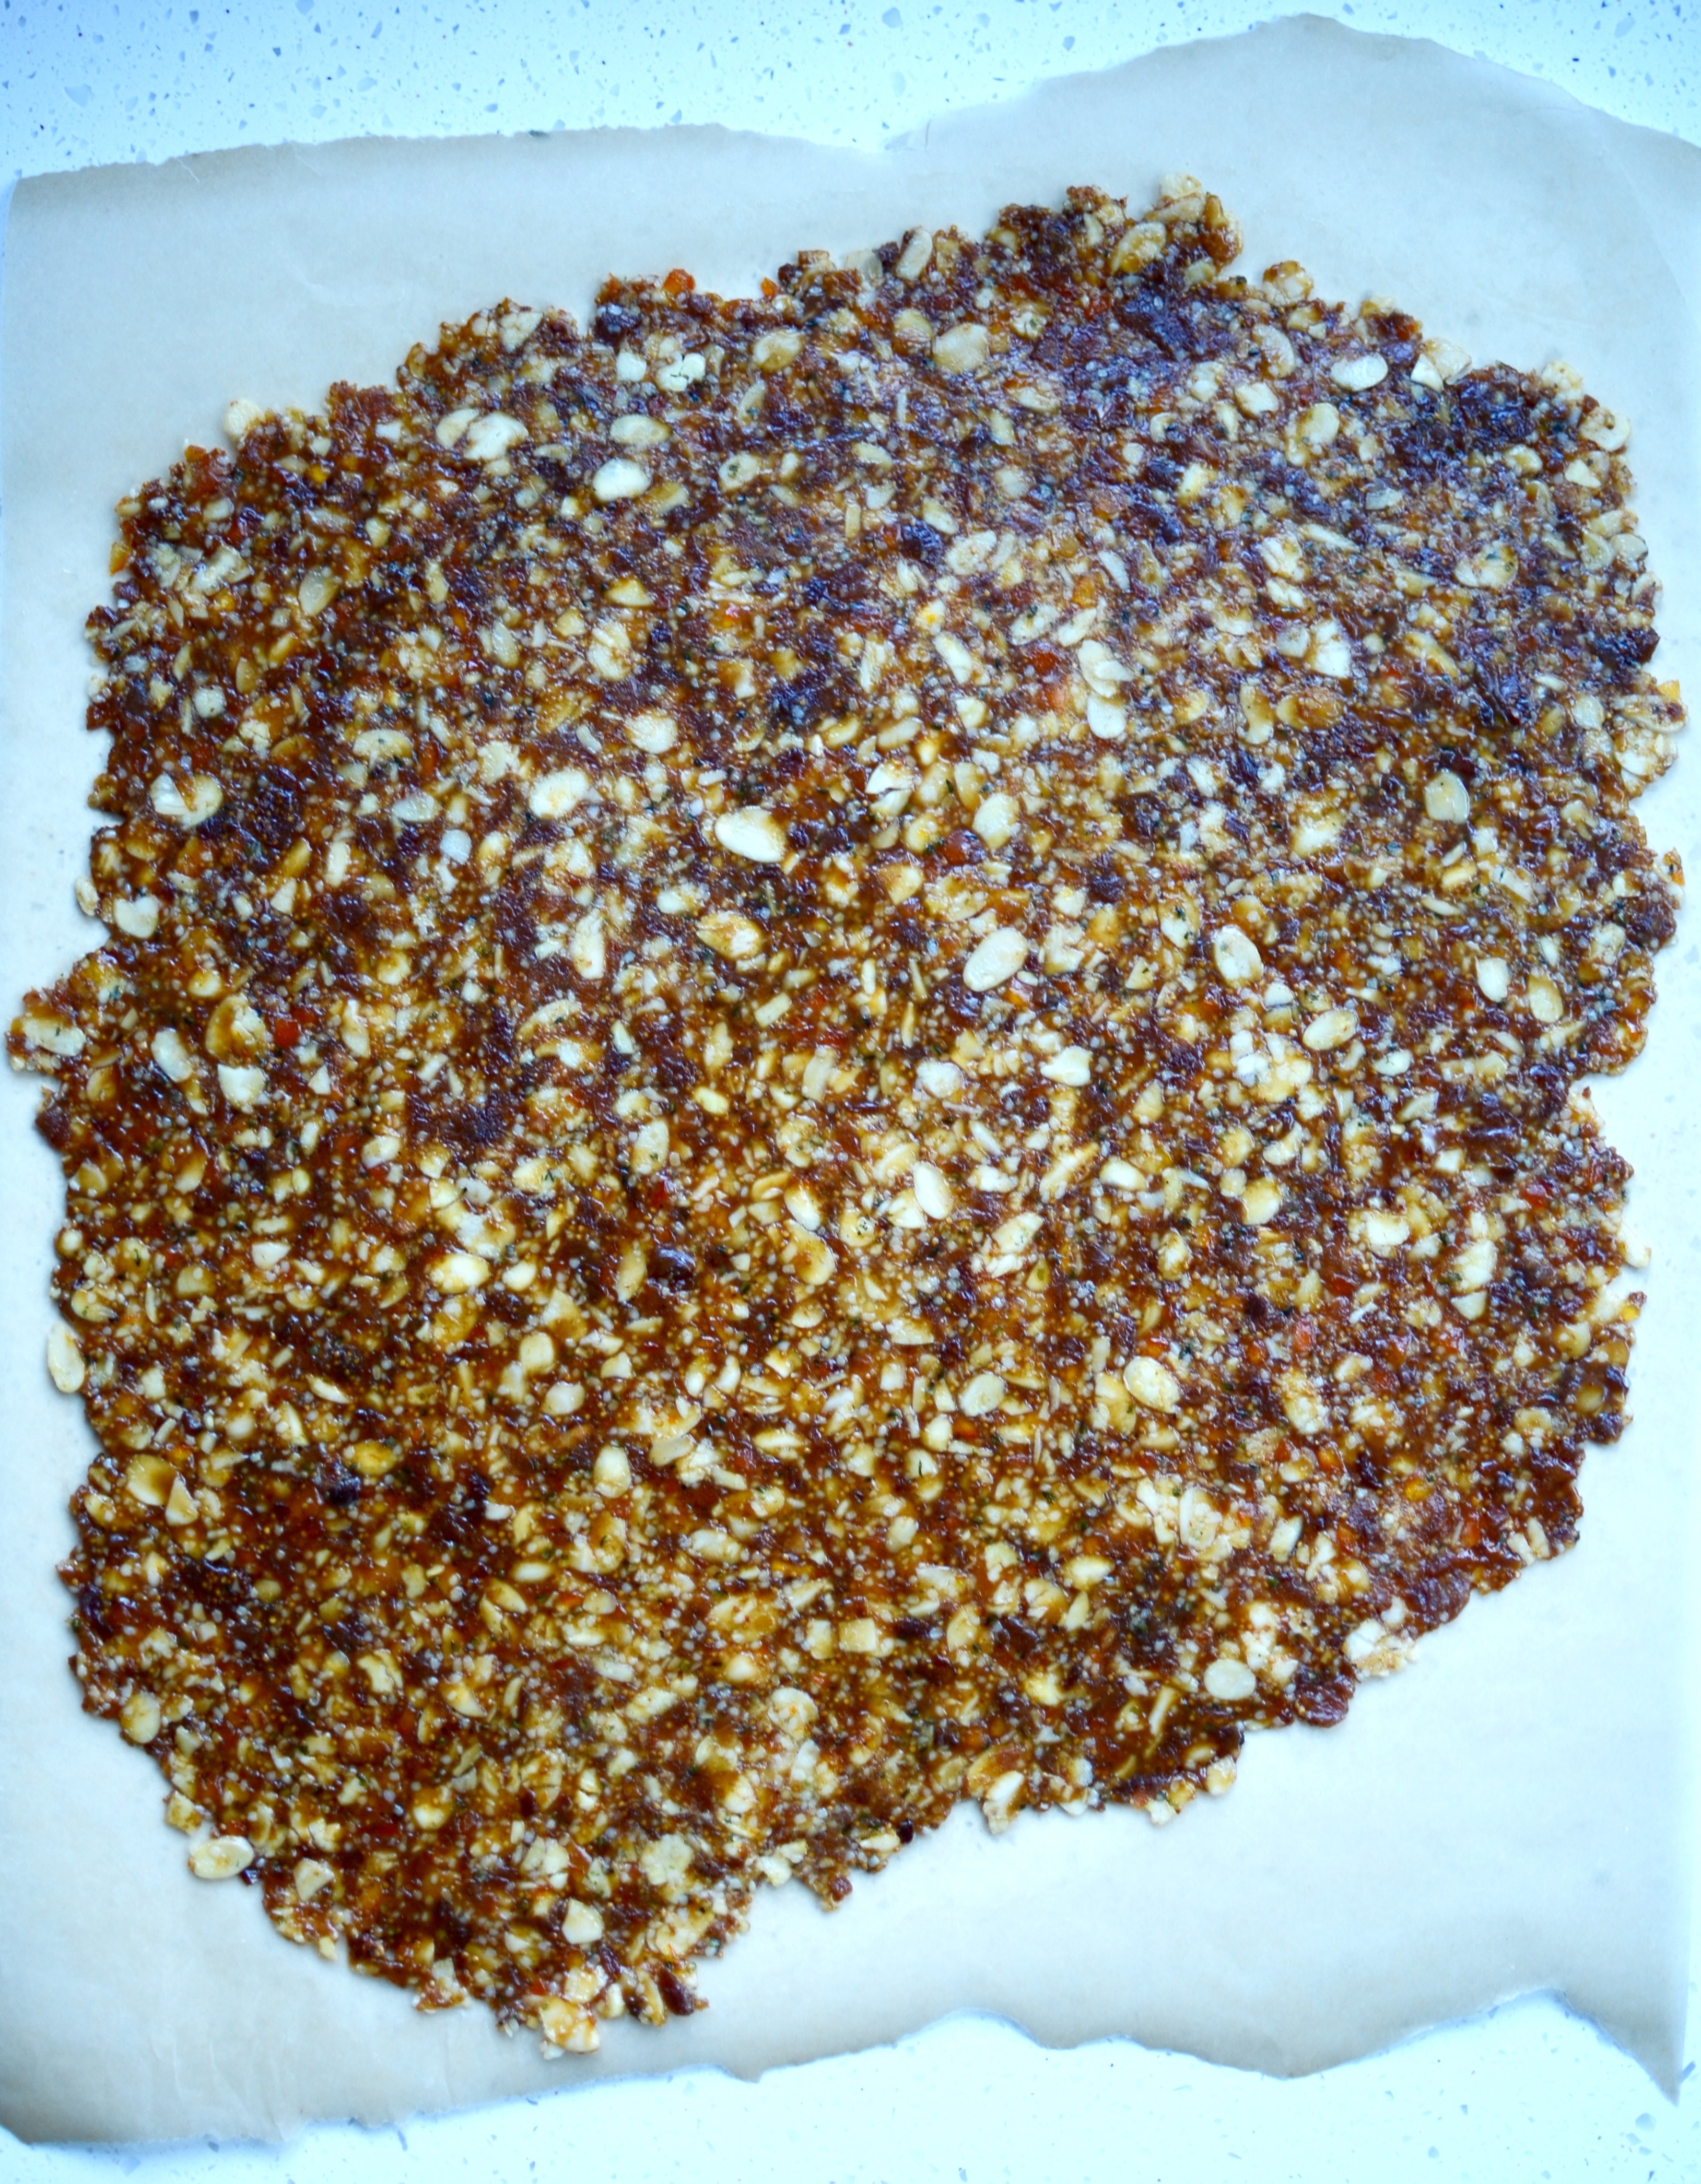
- Pre-heat the oven to 180°C/350°F and line two baking trays with parchment paper.
- Melt the butter and palm sugar in a small pan over a medium heat until the sugar is dissolved. Add the salt, give it a stir and set aside.
- Put the rest of the ingredients in a bowl and using a tablespoon, press everything against the sides to mix thoroughly and evenly distribute the flour. Add the butter and sugar mix and repeat the process until you have a lovely dark golden ball of deliciousness.
- Place this ball between two large pieces of parchment paper and roll it out until it is quite thin (how thin will depend on your preference, but I have found that 4mm is just about perfect). Slide onto a baking sheet and bake for about 10 minutes before removing from the oven.
- Now cut out shapes with a cookie cutter (press any offcuts together and roll them out again) or for a lot less effort, use a large knife to cut the cookie dough into rectangles. Place on the lined baking trays and return to the oven for another 8 – 10 minutes, rotating the trays half-way. Remove from the oven and transfer to a cooling rack to cool completely.
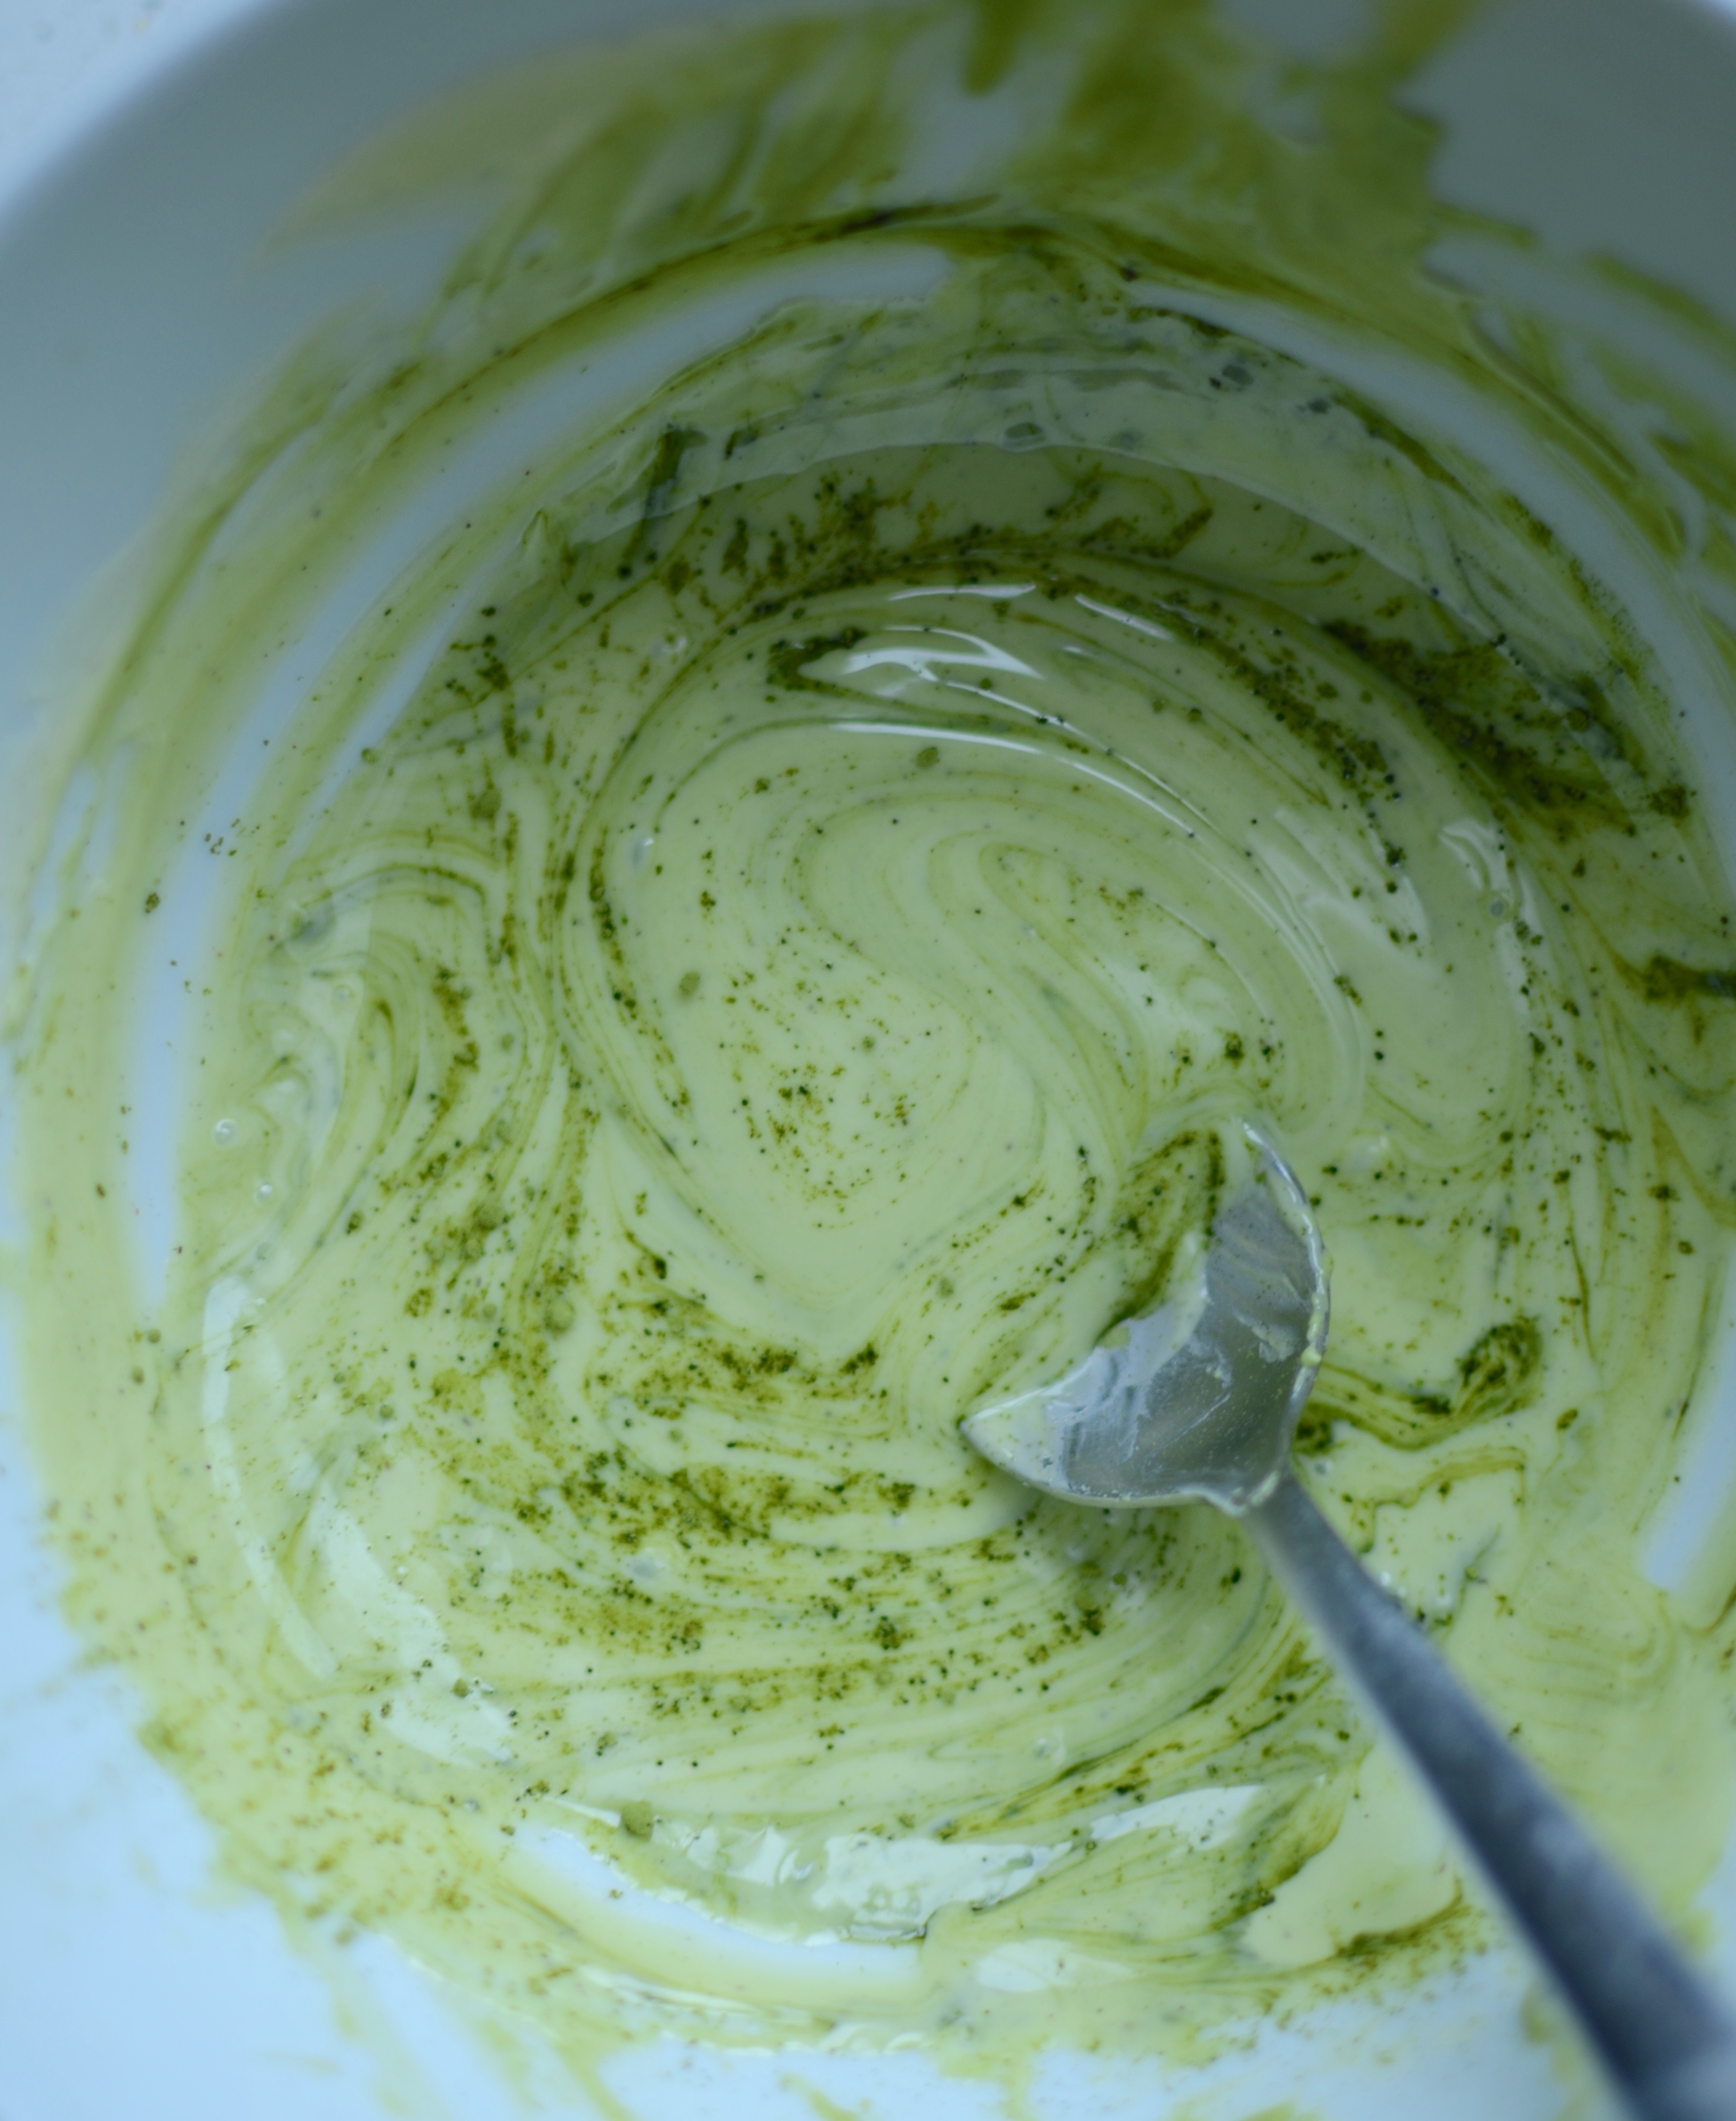
- When cool, melt the white chocolate in a double boiler or in a heatproof bowl set over a pan of simmering water (don’t let the bowl touch the water!) and stir every now and then. As soon as the chocolate has melted, add enough matcha powder for a lovely green hue.
- Dip each cookie in the melted chocolate half-way and sprinkle with freeze-dried raspberries or additional hemp hearts. return to the cooling racks and store in an air-tight container when set. You could also spread chocolate on the underside of each cookie and let it cool upside down. You will need more than 100g of chocolate, but it is more traditional. And reeeeeally good.
Note: If you are not a fan of white chocolate, feel free to use dark chocolate instead.