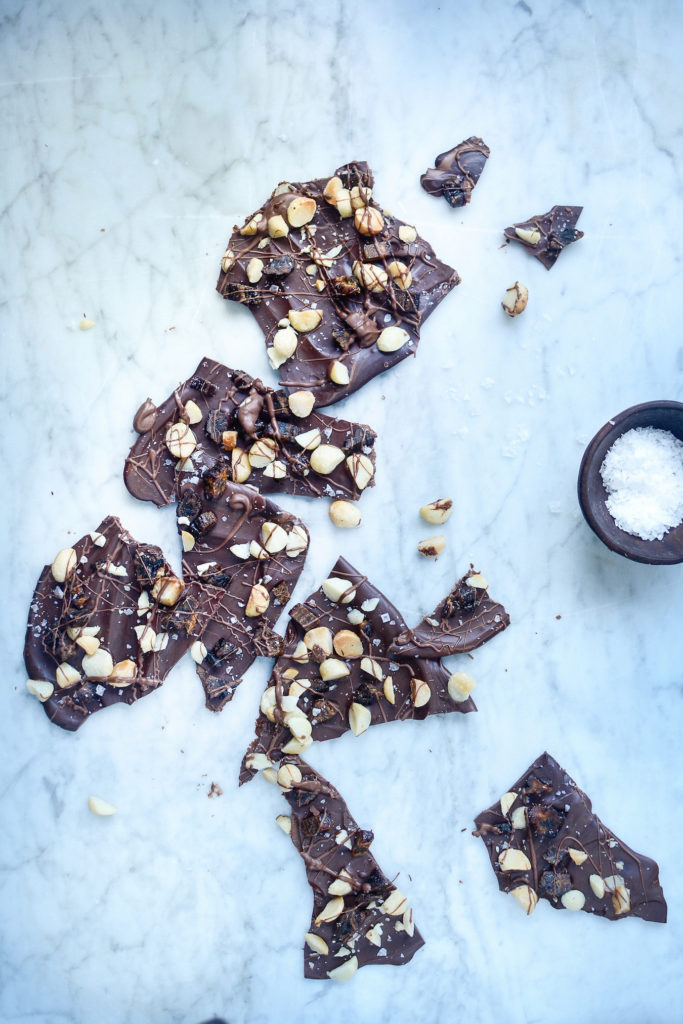
Chocolate bark with macadamia nuts, dried banana and sea salt
Another delicious topping for chocolate bark is a combination of toasted macadamia nuts, dried bananas and flaked sea salt. Drizzle everything with melted milk chocolate and ta-dah!
Chocolate bark with macadamia nuts, dried banana and sea salt
Makes enough for 2 – 4 little bags
Ingredients
150g dark chocolate (minimum 60% cocoa solids)
large pinch of sea salt flakes
30g (1/4 cup) macadamia nuts, toasted for 5 minutes at 180˚C pre-heated
30g dried bananas, finely chopped
5g popped quinoa, optional
20g milk chocolate
Method
- Melt 2/3 of the dark chocolate in a double boiler until just melted, stirring continuously. As soon as it has melted, stir in the rest of the chocolate until all has melted. You could also melt the chocolate in a microwave in 15 second bursts, stirring after each, until just melted. Do not let the chocolate get warm.
- Pour the melted chocolate onto a large piece of greaseproof paper and quickly spread out to about 1/4” thickness with a spatula.
- Quickly scatter over all the toppings evenly.
- While the bark is cooling, melt the milk chocolate in the same way as the dark chocolate. Either drizzle this over the bark with a spoon or use a small sandwich bag (or piping bag) to pipe the melted chocolate onto the bark. Set aside to cool completely.
- Peel away the paper and snap into pieces.
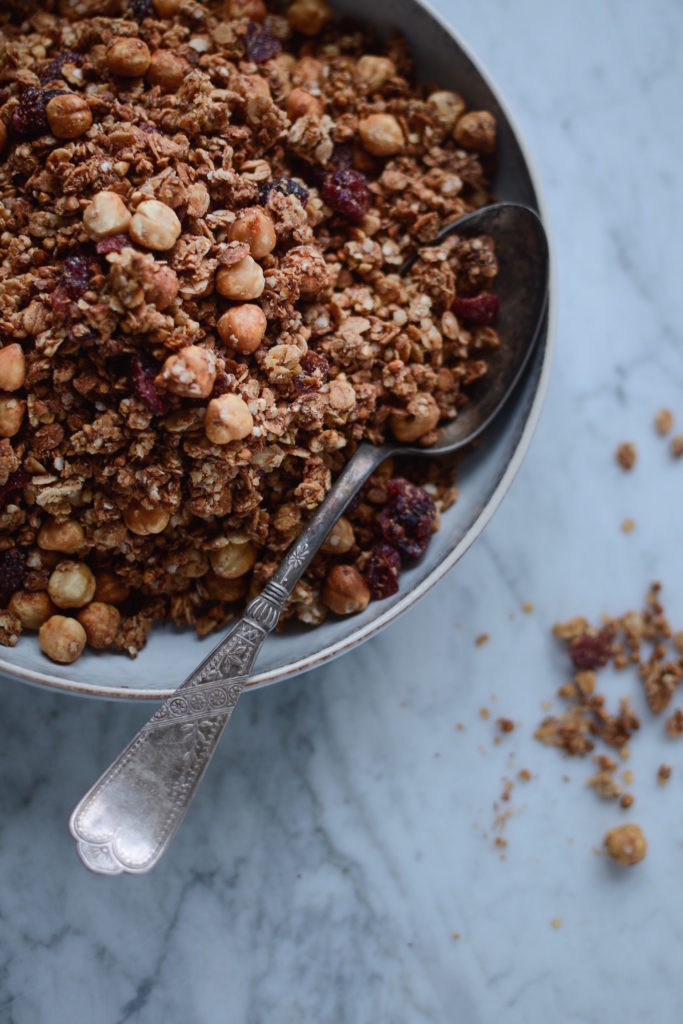
Gluten-free buckwheat and oat granola
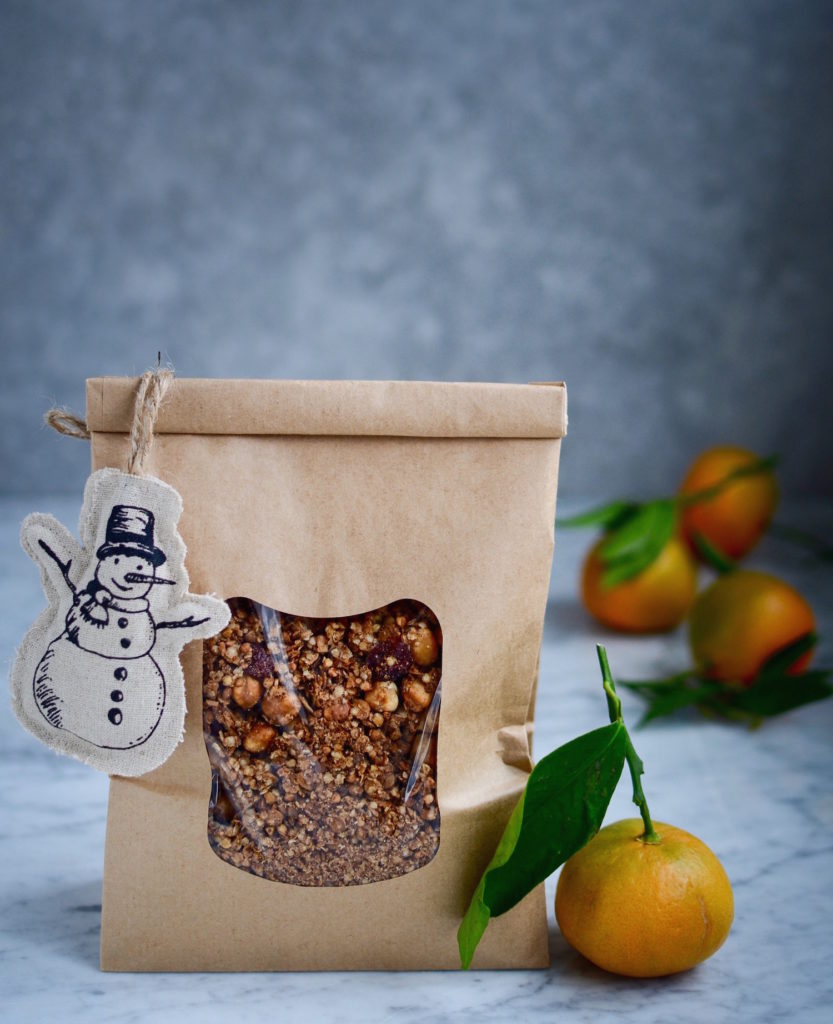
Home-made granola is one of the loveliest gifts to give! It doesn’t have to be eaten straight away, you can add many different spices and ingredients to suit the occasion or mood (here I’ve added a gingerbread spice mix and tangerine zest to my gluten-free granola to give it that Christmas vibe), and it can be packaged beautifully.
In this recipe for gluten-free buckwheat granola I suggest soaking the buckwheat groats overnight, to increase digestibility. Grains, pulses, legumes, nuts and seeds generally contain phytic acid, which binds to minerals in the gastrointestinal tract and may lead to mineral deficiencies. By soaking in warm water with added Lactobacilli cultures (found in yoghurt, kefir, whey etc) or an acid, the digestive enzyme (phytase) is activated that helps to break down the phytic acid in as little as 12 hours.
Gluten-free buckwheat and oat granola
Makes 6 cups
Ingredients
100g (1 cup) raw buckwheat groats
300g (3 cups) rolled oats
100g (1 cup) quinoa flakes
70g (1/2 cup) blanched hazelnuts
80ml (1/3 cup) melted coconut oil or butter
80ml (1/3 cup) honey or maple syrup
1/4 teaspoon fine grain sea salt
1 teaspoon ground cinnamon
1/2 teaspoon ground cloves
1/2 teaspoon ground ginger
heaped 1/2 teaspoon ground nutmeg
zest from 4 tangerines
70-80g (1/2 cup) dried cranberries
Method
- Rinse the buckwheat groats, then soak overnight in enough water to cover with an inch. Add a tablespoon of apple cider vinegar, yoghurt, kefir or lemon juice, as an acidic solution. The next morning drain the buckwheat and tip into a large mixing bowl.
- Preheat oven to 160°C.
- Add the oats, quinoa and roughly chopped hazelnuts to the bowl with the buckwheat.
- Whisk the melted coconut oil (or butter) with the maple syrup (or honey), salt, spices and citrus zest.
- Pour this over the dry ingredients and mix well to coat.
- Spread the granola mixture out in an even layer on two lined baking sheets. Use a spatula or a large metal spoon to compress the mixture, then bake for 30 to 40 minutes. Carefully flip pieces over half-way through baking time, as the bits on the edges may burn otherwise.
- Allow to cool completely before mixing in the cranberries and storing in an airtight container. Will keep for several weeks.
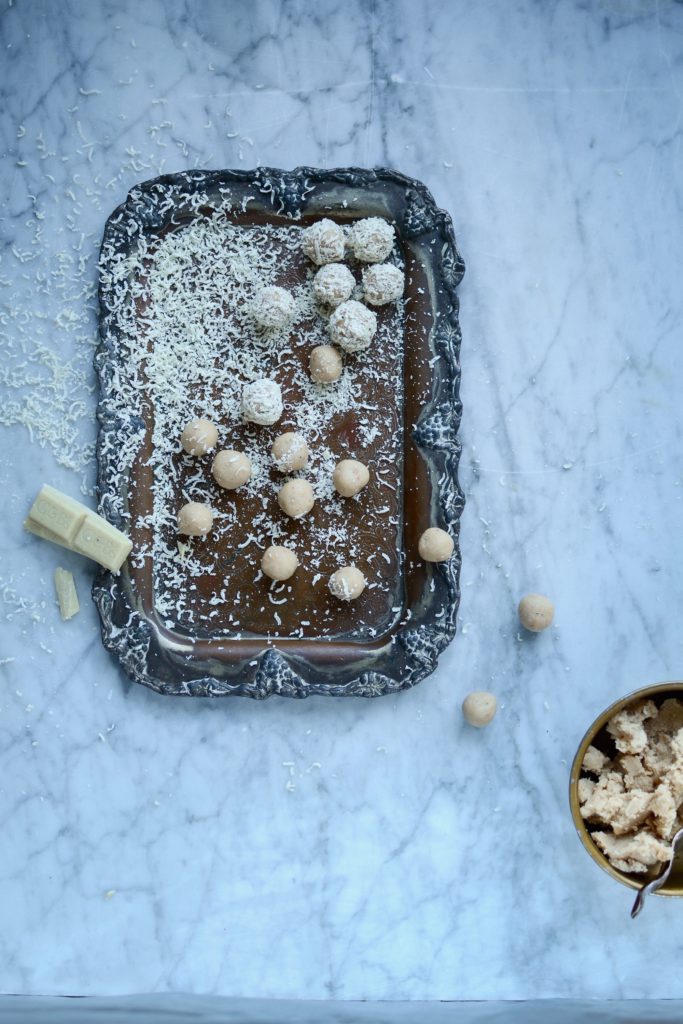
Cashew butter truffles
After a rather busy year (yes, sorry, I know…) the last thing you need is someone suggesting you actually MAKE your Christmas presents from scratch. Except… taking the time to create a gift for someone you love (like these cashew butter truffles or perhaps matcha and cacao pinwheels) is wonderfully festive, therapeutic, and probably also a lot more meaningful than anything store-bought.
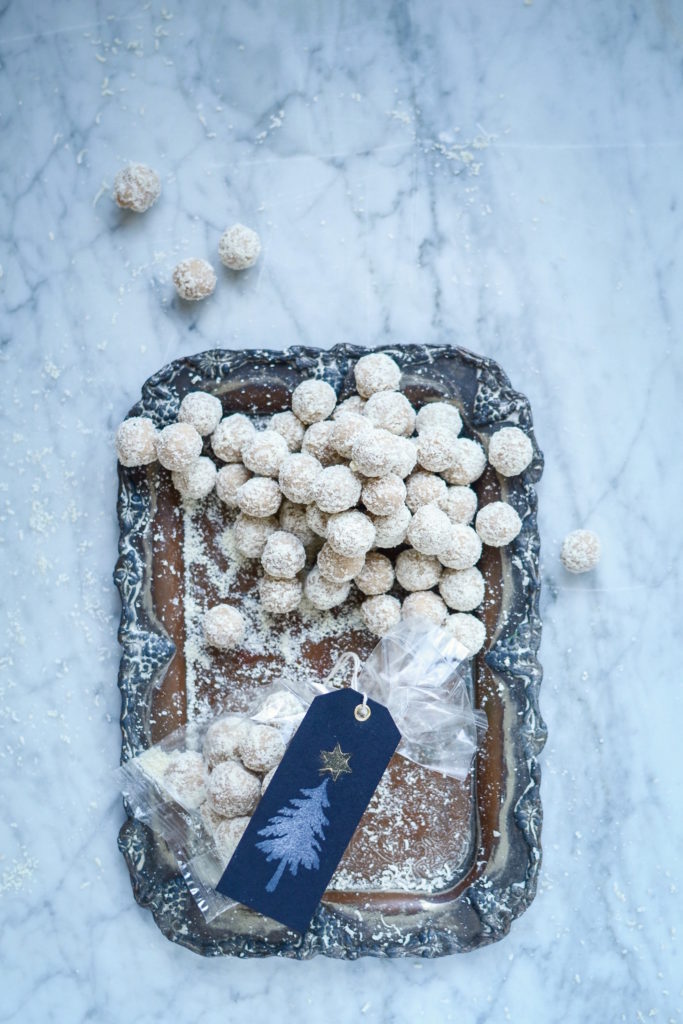
I encourage my children to make their own cards and find ways to bring joy without spending a penny in a shop and they love the challenge of coming up with the perfect gift. They also love making chocolate truffles with me – ha! These are so easy – cashew butter, melted cacao butter, honey and salt – and keep very well for several weeks.
Cacao Butter is the edible fat extracted from the raw cacao bean. It looks like white chocolate in solid form (at room temperature or colder) and turns into a beautiful amber liquid when heated. The higher the cacao butter content in a chocolate, the more luxurious and smooth it will be. You can buy it from most leading supermarkets and specialist confectioners these days. If you want to keep the truffles vegan, use maple syrup instead of honey, and be sure to use a vegan white chocolate or pure cacao powder for coating.
Cashew butter truffles
Makes 80 very small truffles
Ingredients
110g (1/2 cup) raw cacao butter
75g (1/4 cup) raw honey or maple syrup
80g (1/4 cup plus one heaped tablespoon) crunchy cashew nut butter
1/4 teaspoon fine grain rock salt
30g good quality white chocolate, grated for coating
Method
- Melt the cacao butter in a small saucepan over a gentle heat.
- Whisk the melted fat, honey, cashew nut butter and sea salt until well mixed.
- Set aside to firm up at cool room temperature for a few hours, or in the fridge for an hour or so.
- Roll half teaspoons full between your palms until round, then roll in the grated white chocolate. Repeat until you’ve used up all your mixture.
- If you do refrigerate it, it will have to stand at room temperature for a while, before you are able to roll it.
Note: If you can’t find crunchy cashew butter, use smooth and add a handful of chopped roasted cashew nuts.
Puffed quinoa squares
A relative unknown a few years ago, South American-born Quinoa has since crept into our hearts and is unlikely to disappear anytime soon. This little pseudo-grain is very nutritious, rich in protein and gluten-free to boot, making it an ideal addition to any meal. It is most often cooked and prepared in the same way as rice, but I love grinding and making a delicious breakfast porridge with it. You can also make puffed quinoa as if you were making popcorn. Heat a large heavy bottomed pot (cast iron ones work best) and add about half a cup of quinoa. Keep shaking the pot until most of the seeds have popped. If your pot is deep enough, you won’t need a lid to keep the little nippers at bay. Tip them out onto a baking sheet to cool and use in muesli, as a topping on yoghurt or in recipes such as these squares below.

Puffed quinoa squares
The squares make an excellent after-school snack, as they are a mini version of a complete meal.
Makes about 40
Ingredients
200g (1 1/2 loosely packed cups) soft, dried prunes
125ml coconut water, at room temperature and preferably raw (i.e. unpasteurised)
150ml (125g or 1/2 cup plus 2 tablespoons) liquid coconut oil
125ml (1/2 cup) raw honey
Pinch of sea salt
5 cups puffed quinoa (home-made or store-bought)
90g (1 cup) toasted desiccated coconut
70g (1/2 cup) shelled hemp seeds
70g (1/2 cup) shelled sunflower seeds
Method
- Soak the prunes in the coconut water whilst you get your other ingredients together.
- In a powerful blender, blend the prunes, coconut water and enough of the coconut oil to give you a smooth paste. Scrape into a bowl.
- Add the rest of the oil, honey, salt, quinoa, desiccated coconut and seeds, and stir until well combined. Your mixture needs to be sticky and hold together when pressed.
- Line a 34cm x 26cm (9” x 13”) tin or oven dish with greaseproof paper, then press the mixture into the tin and refrigerate until set (at least a couple of hours).
- Turn out onto a chopping board and cut into squares. They will keep a week or so in the fridge, and freeze really well.
Chewy almond and fig thins
It doesn’t really matter when you make these, but you should! They are rather easy to throw together and definitely hit the spot when you need a little something to cheer up your darling (or yourself!). If you can’t find matcha powder, use a few drops of beetroot juice instead, to colour the chocolate pink.
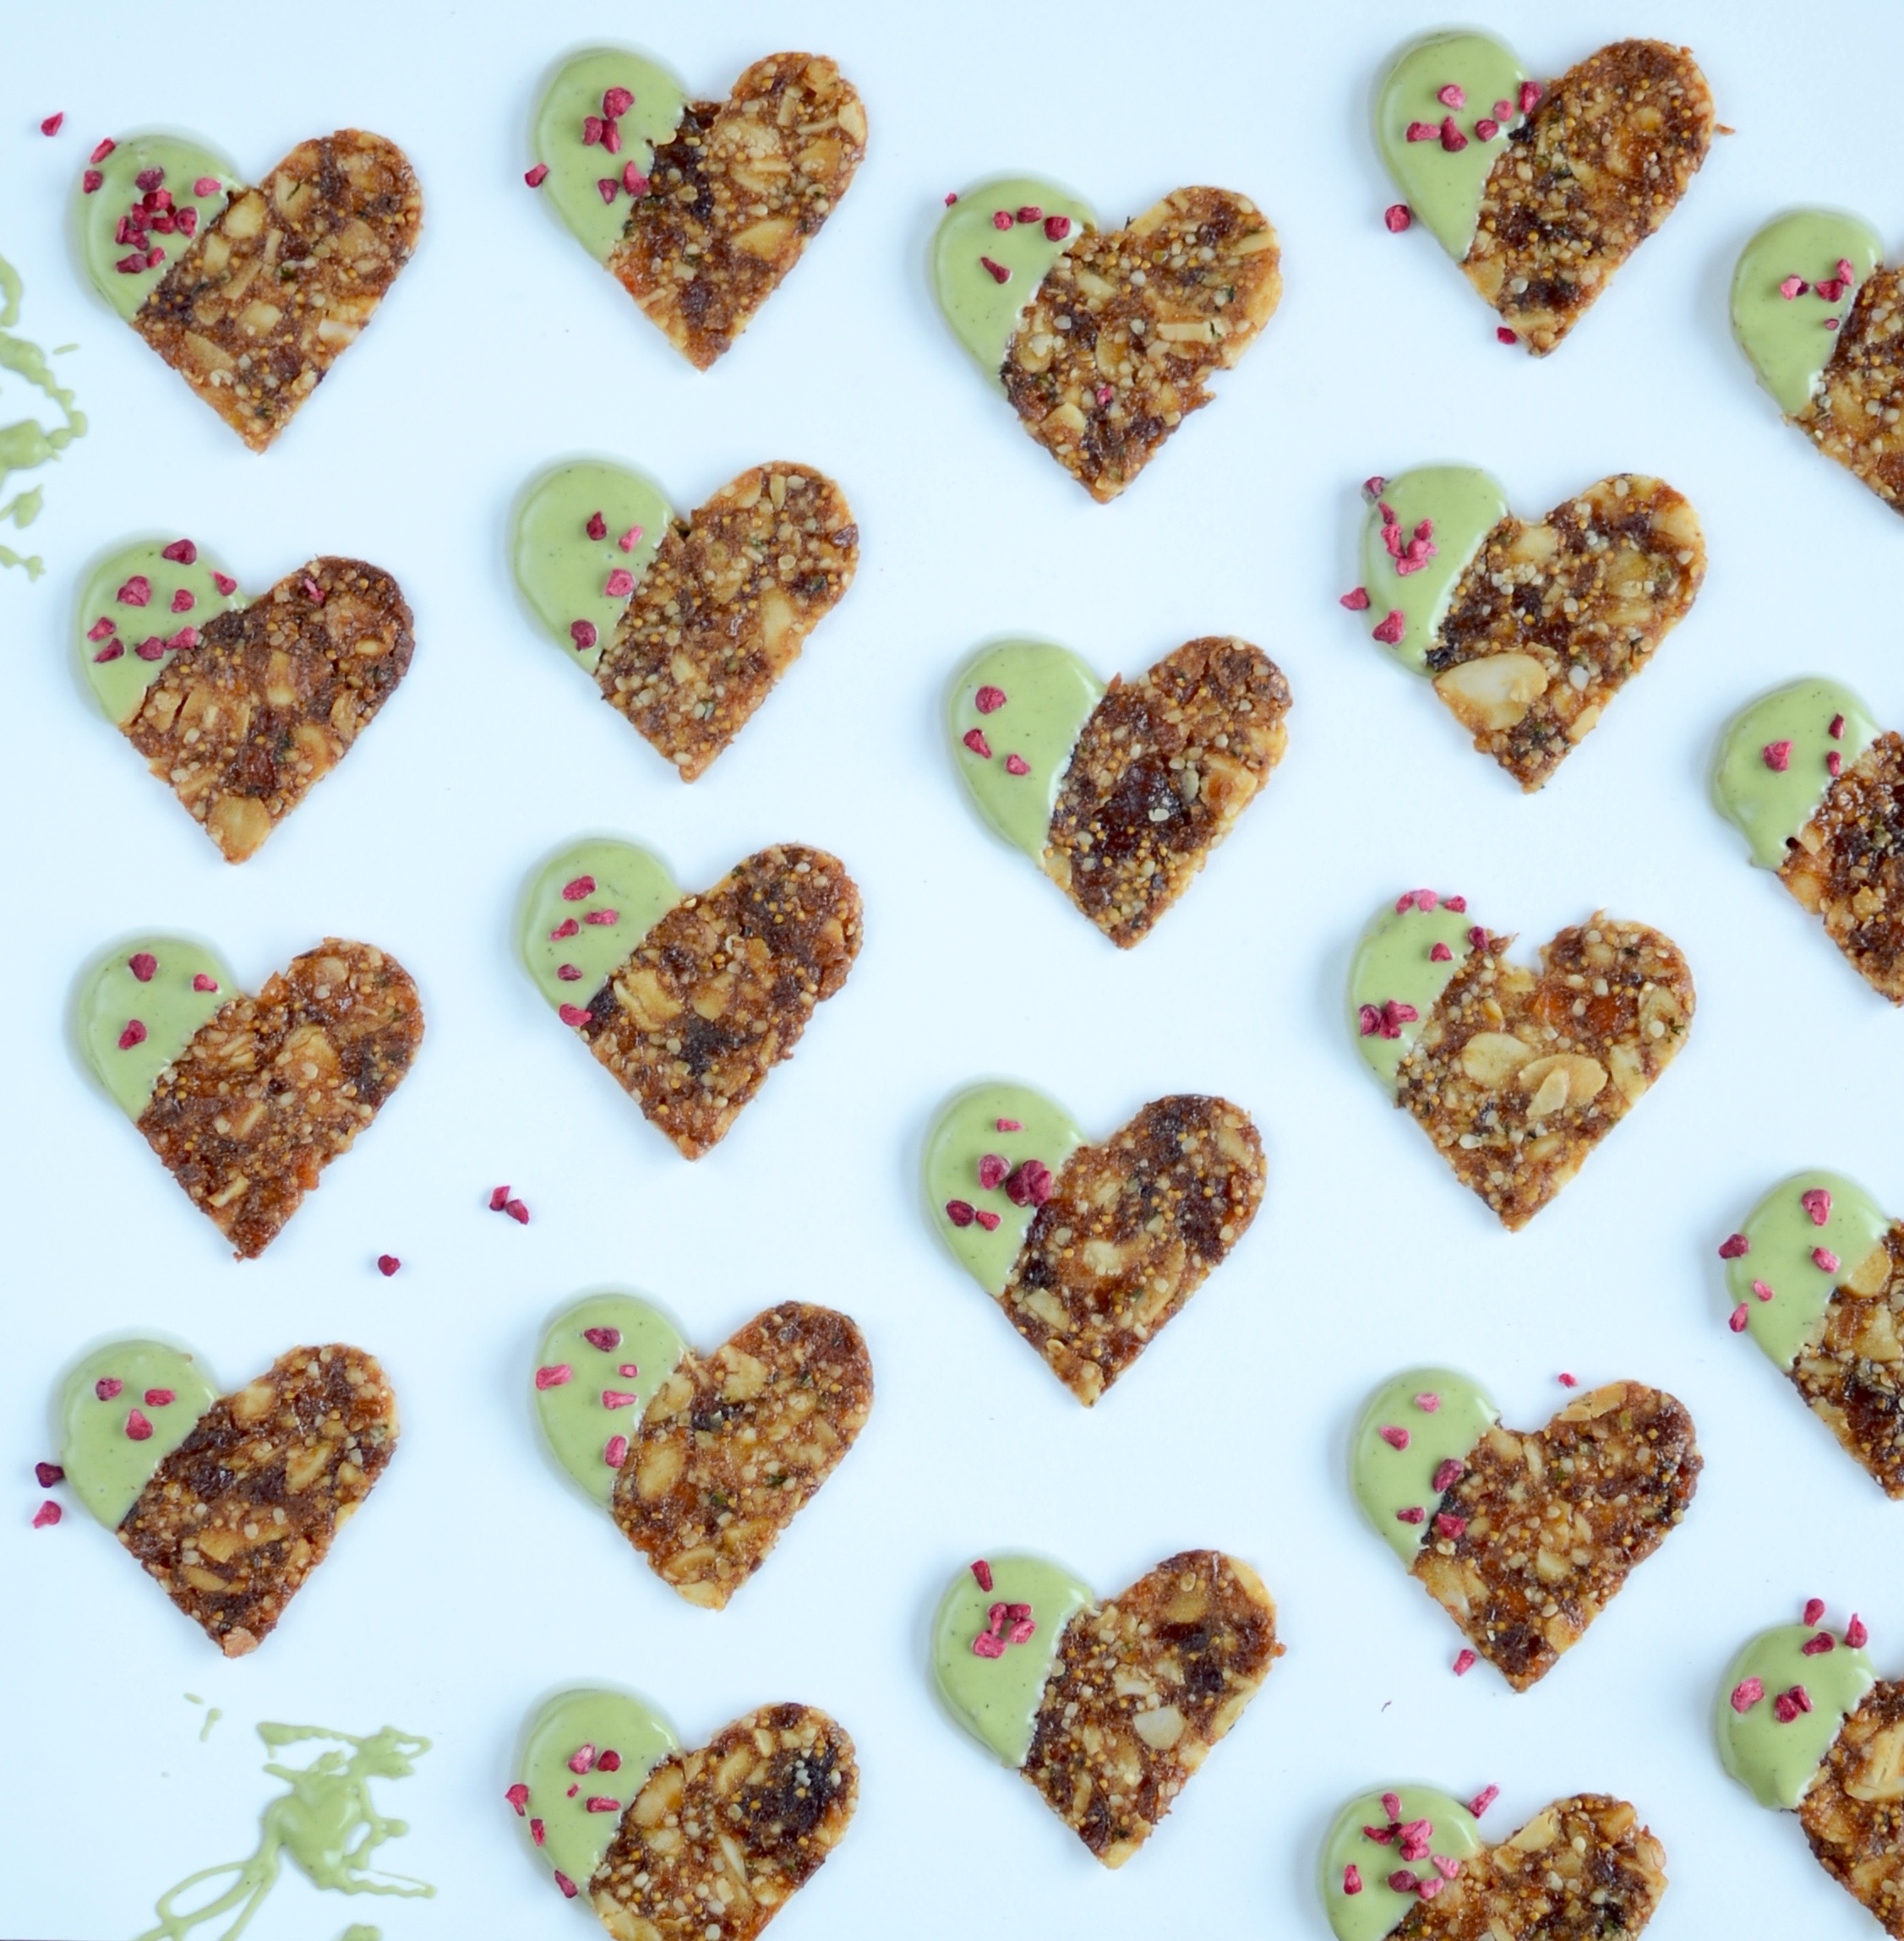
Chewy almond and fig thins
Ingredients
50g unsalted organic butter (or coconut oil)
50g coconut palm sugar (or you could use demarara sugar)
Pinch of sea salt
65g orange marmalade, very finely chopped
100g soft dried figs, finely chopped
80g flaked blanched almonds
30g shelled hemp seeds (also called hemp hearts)
25g brown rice flour
For the chocolate drizzle
100g organic white chocolate, broken into pieces
matcha powder (roughly 1 teaspoon)
freeze-dried raspberries or additional hemp hearts
Method
- Pre-heat the oven to 180°C/350°F and line two baking trays with parchment paper.
- Melt the butter and palm sugar in a small pan over a medium heat until the sugar is dissolved. Add the salt, give it a stir and set aside.
- Put the rest of the ingredients in a bowl and using a tablespoon, press everything against the sides to mix thoroughly and evenly distribute the flour. Add the butter and sugar mix and repeat the process until you have a lovely dark golden ball of deliciousness.
- Place this ball between two large pieces of parchment paper and roll it out until it is quite thin (how thin will depend on your preference, but I have found that 4mm is just about perfect). Slide onto a baking sheet and bake for about 10 minutes before removing from the oven.
- Now cut out shapes with a cookie cutter (press any offcuts together and roll them out again) or for a lot less effort, use a large knife to cut the cookie dough into rectangles. Place on the lined baking trays and return to the oven for another 8 – 10 minutes, rotating the trays half-way. Remove from the oven and transfer to a cooling rack to cool completely.
- When cool, melt the white chocolate in a double boiler or in a heatproof bowl set over a pan of simmering water (don’t let the bowl touch the water!) and stir every now and then. As soon as the chocolate has melted, add enough matcha powder for a lovely green hue.
- Dip each cookie in the melted chocolate half-way and sprinkle with freeze-dried raspberries or additional hemp hearts. return to the cooling racks and store in an air-tight container when set. You could also spread chocolate on the underside of each cookie and let it cool upside down. You will need more than 100g of chocolate, but it is more traditional. And reeeeeally good.
Note: If you are not a fan of white chocolate, feel free to use dark chocolate instead.

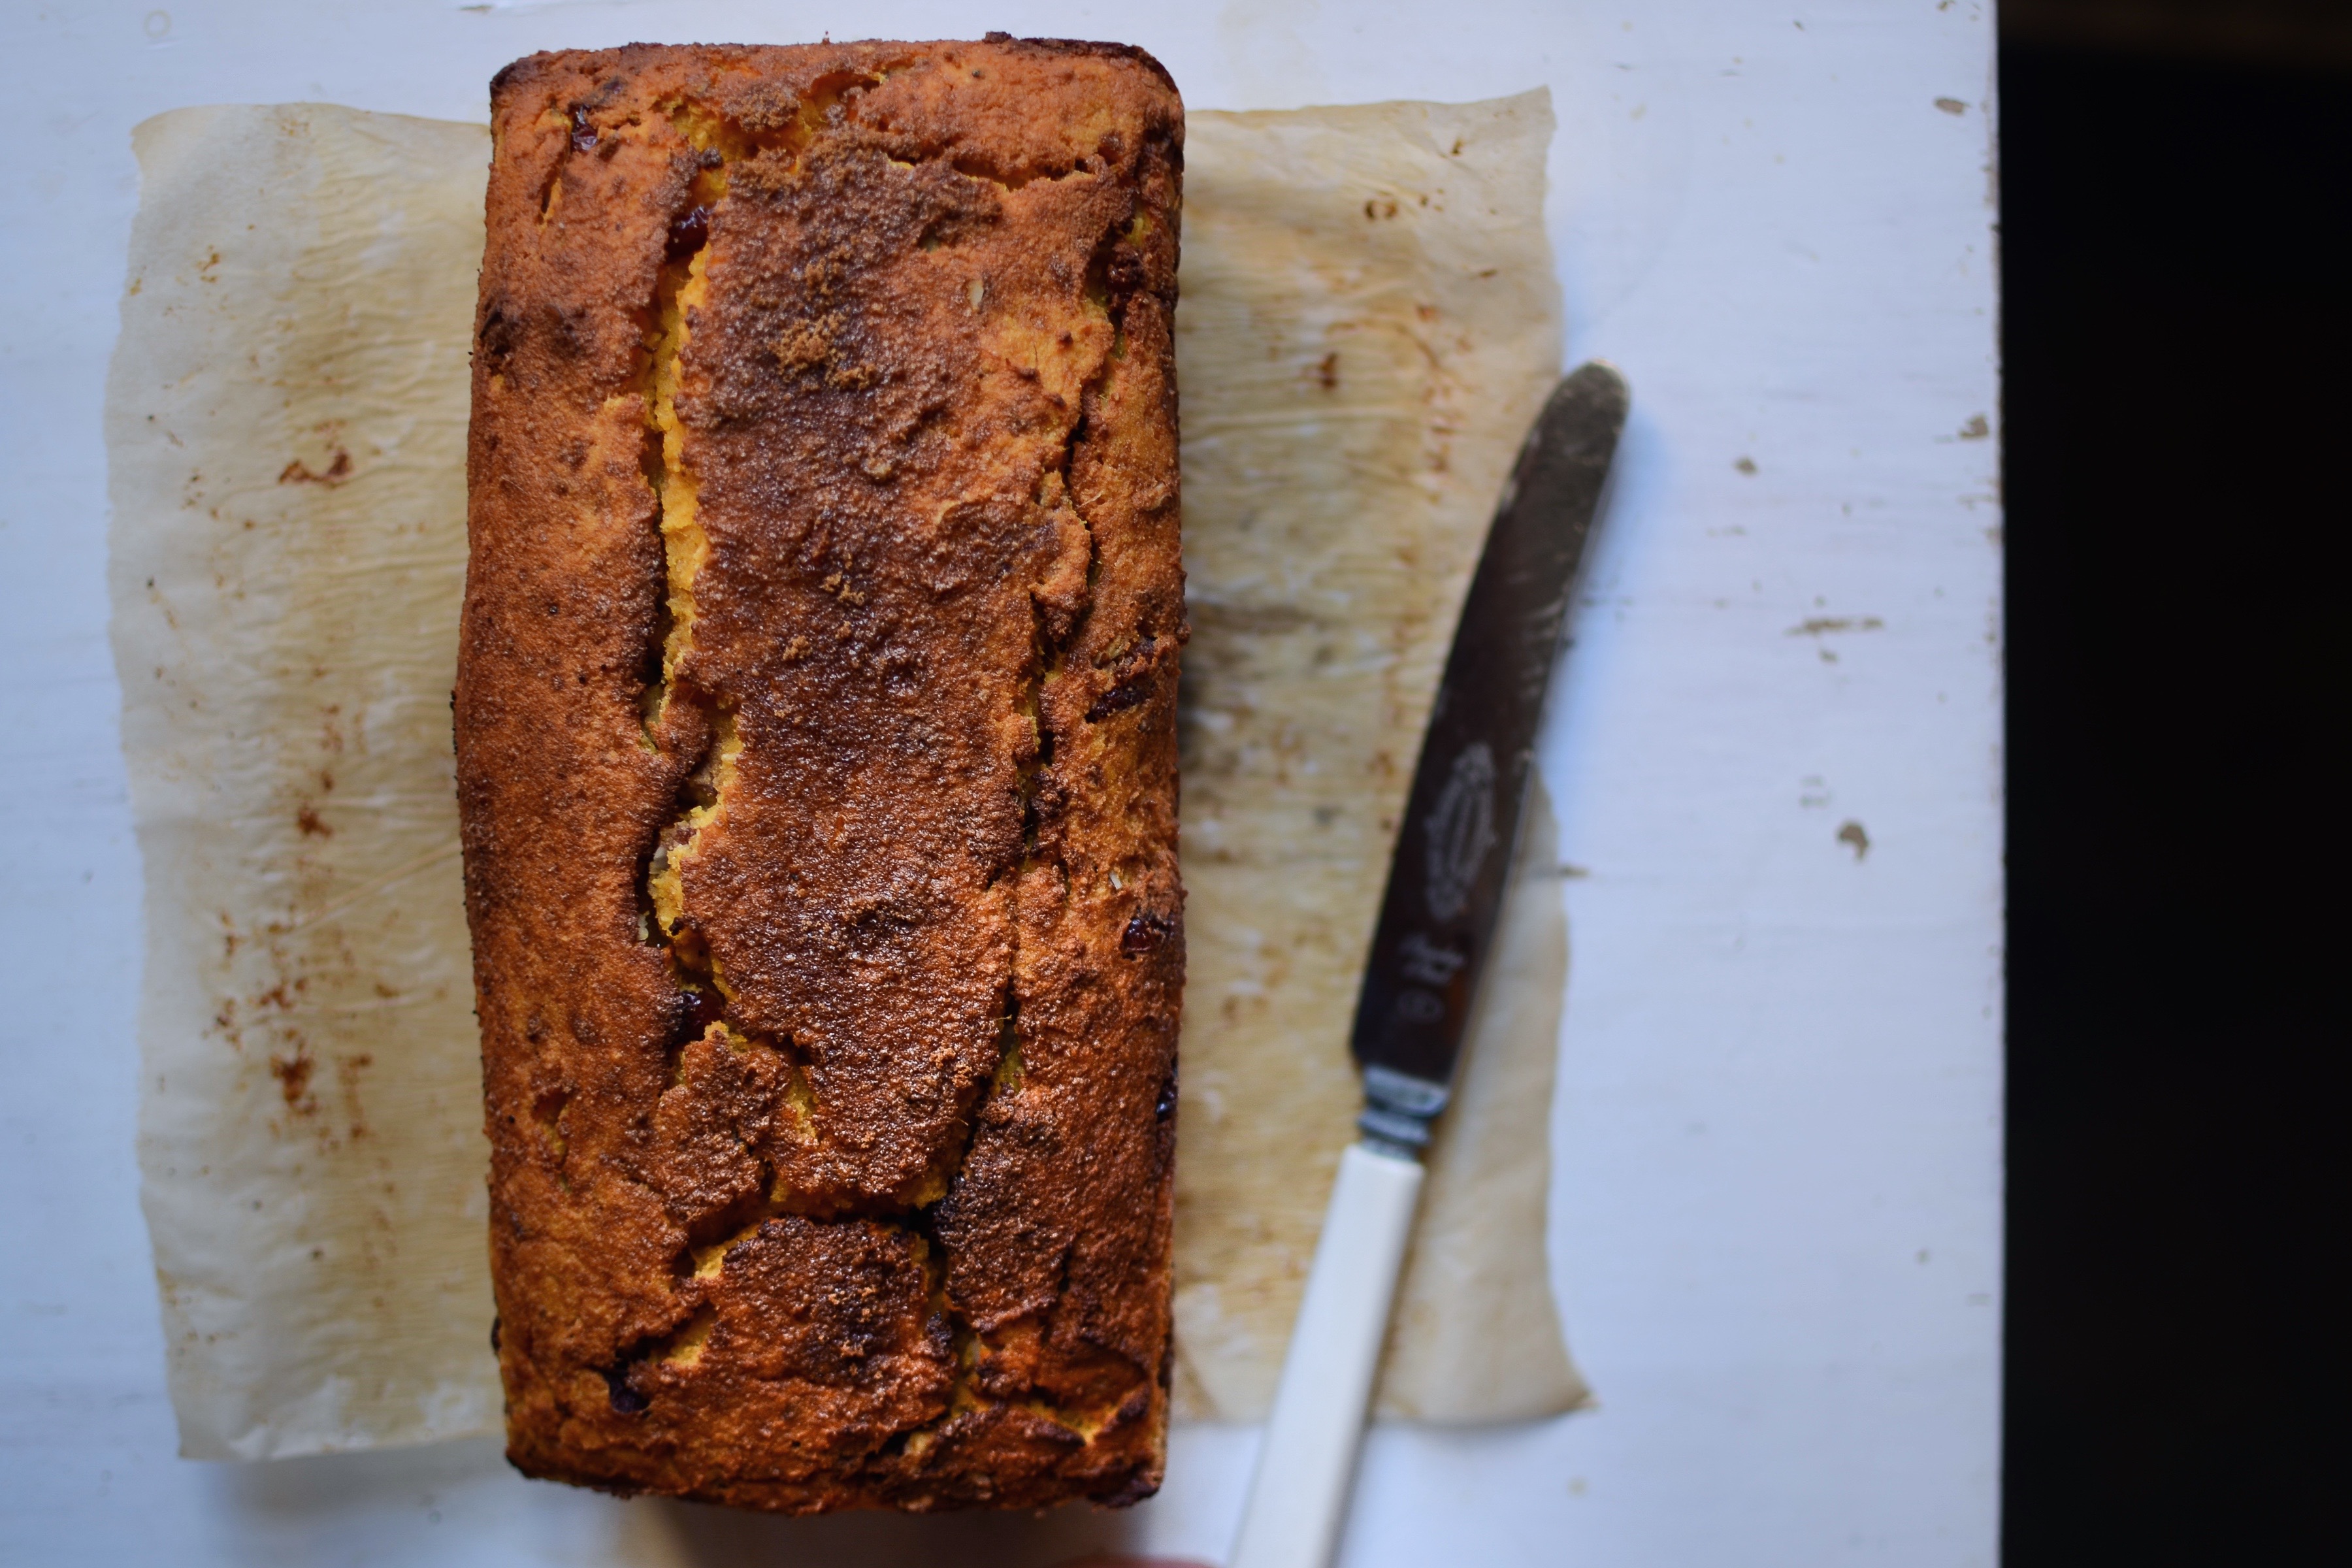
Sweet potato loaf with apple butter
Some mornings I just need things to happen a little quicker than usual. Avocado on a slice of rye sourdough will always be a favourite, but for something different try baking this loaf the day before. It was born out of my eternal quest to incorporate more vegetables into our daily eating and the kids love it with raw lightly salted butter. As a special treat (and to keep it dairy-free), slather it with the apple coconut butter below. This gorgeous spread keeps well in the fridge for a week or so and is equally delicious stirred into hot porridge, as a topping on pancakes, or on crunchy toast.
Sweet potato loaf
Ingredients
5 medium organic free range eggs, lightly beaten
520g (about 2 cups) mashed cooked sweet potato
1 1/2 teaspoons baking powder
1 teaspoon salt
100g (just over 3/4 cup) coconut flour
1 tablespoon grated fresh ginger
50g (about 1/3 cup) dried cranberries, soaked in juice from 1/2 an orange for at least 2 hours
60g (1/2 cup) pecan nuts, roughly chopped
some coconut sugar to sprinkle over, optional
Method
- Preheat the oven to 180°C / 350°F (or 160°C in a fan oven).
- Grease a medium sized loaf tin and line with parchment paper, allowing the paper to overhang on the long sides.
- Beat together the mashed sweet potato and the eggs until smooth, light and fluffy.
- Sift in the baking powder, add the salt, coconut flour and grated ginger, and mix well.
- Stir in the soaked and softened cranberries, any remaining orange juice and chopped nuts.
- Let the batter sit for 10 minutes to give the coconut flour time to absorb the liquids.
- Pour the batter into the prepared tin, sprinkle over a little coconut palm sugar if using, and bake for 50 minutes or until the top begins to brown and a toothpick inserted in the centre of the bread comes out clean.
- Remove from the oven and allow to cool completely before slicing. Store covered for a couple of days at room temperature or in the fridge for several days. You could also freeze it. Like most gluten-free breads, it is quite fragile and can’t really be slotted into a toaster, but I do sometimes toast it in a medium hot pan in some butter or coconut oil.
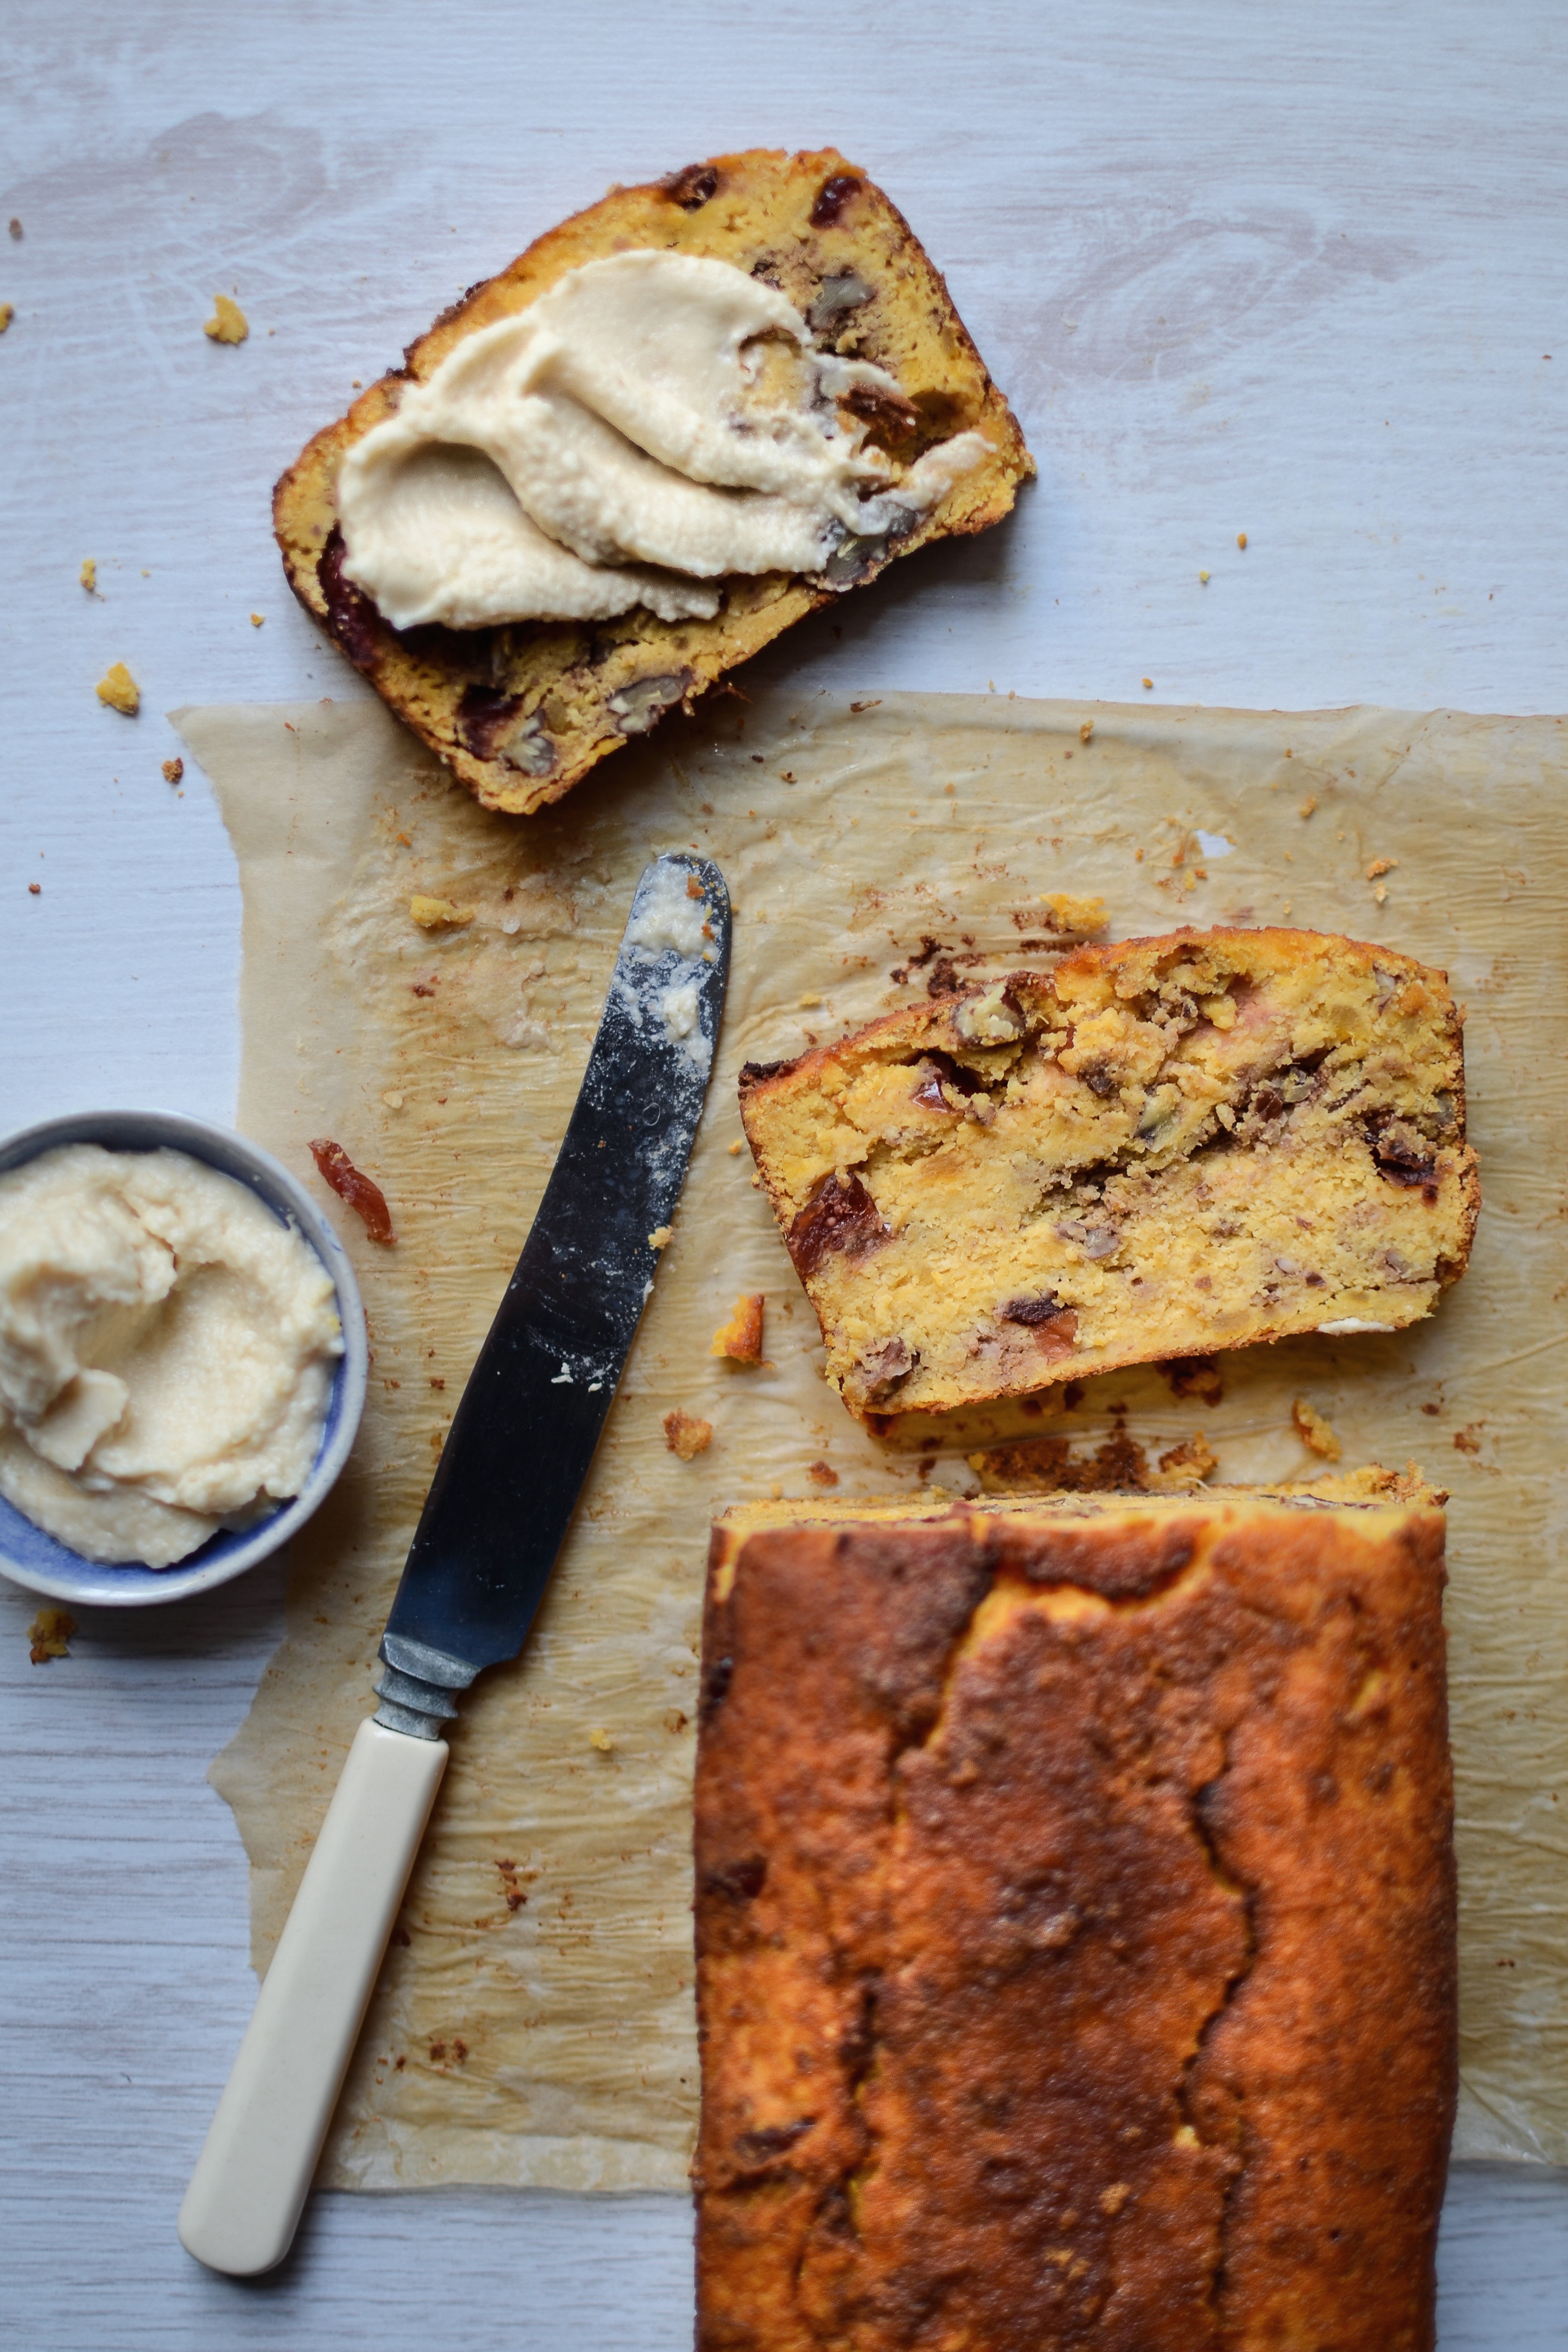
Apple and coconut butter
This will only really work if you have a high-speed blender, as the coconut butter is quite solid in anything other than very hot weather and you will end up with a lumpy mess. But if you don’t own one, try gently heating the coconut butter and then stirring in the apple sauce. It won’t be as spreadable, but still pretty darn delicious as a topping.
Ingredients
160ml (2/3 cups) home-made or store-bought apple sauce
70g coconut butter (also called coconut manna or creamed coconut) at room temperature
squeeze of lemon juice
Method
- Pour the apple sauce into the blender, then cut the coconut butter into small chunks and add. If the fat has separated and formed a layer on top of the more crumbly coconut component, make sure you include some of the fat when adding to the apple sauce.
- Blend until smooth. Scrape down the sides once or twice.
- Add lemon juice to taste, blending in between additions.

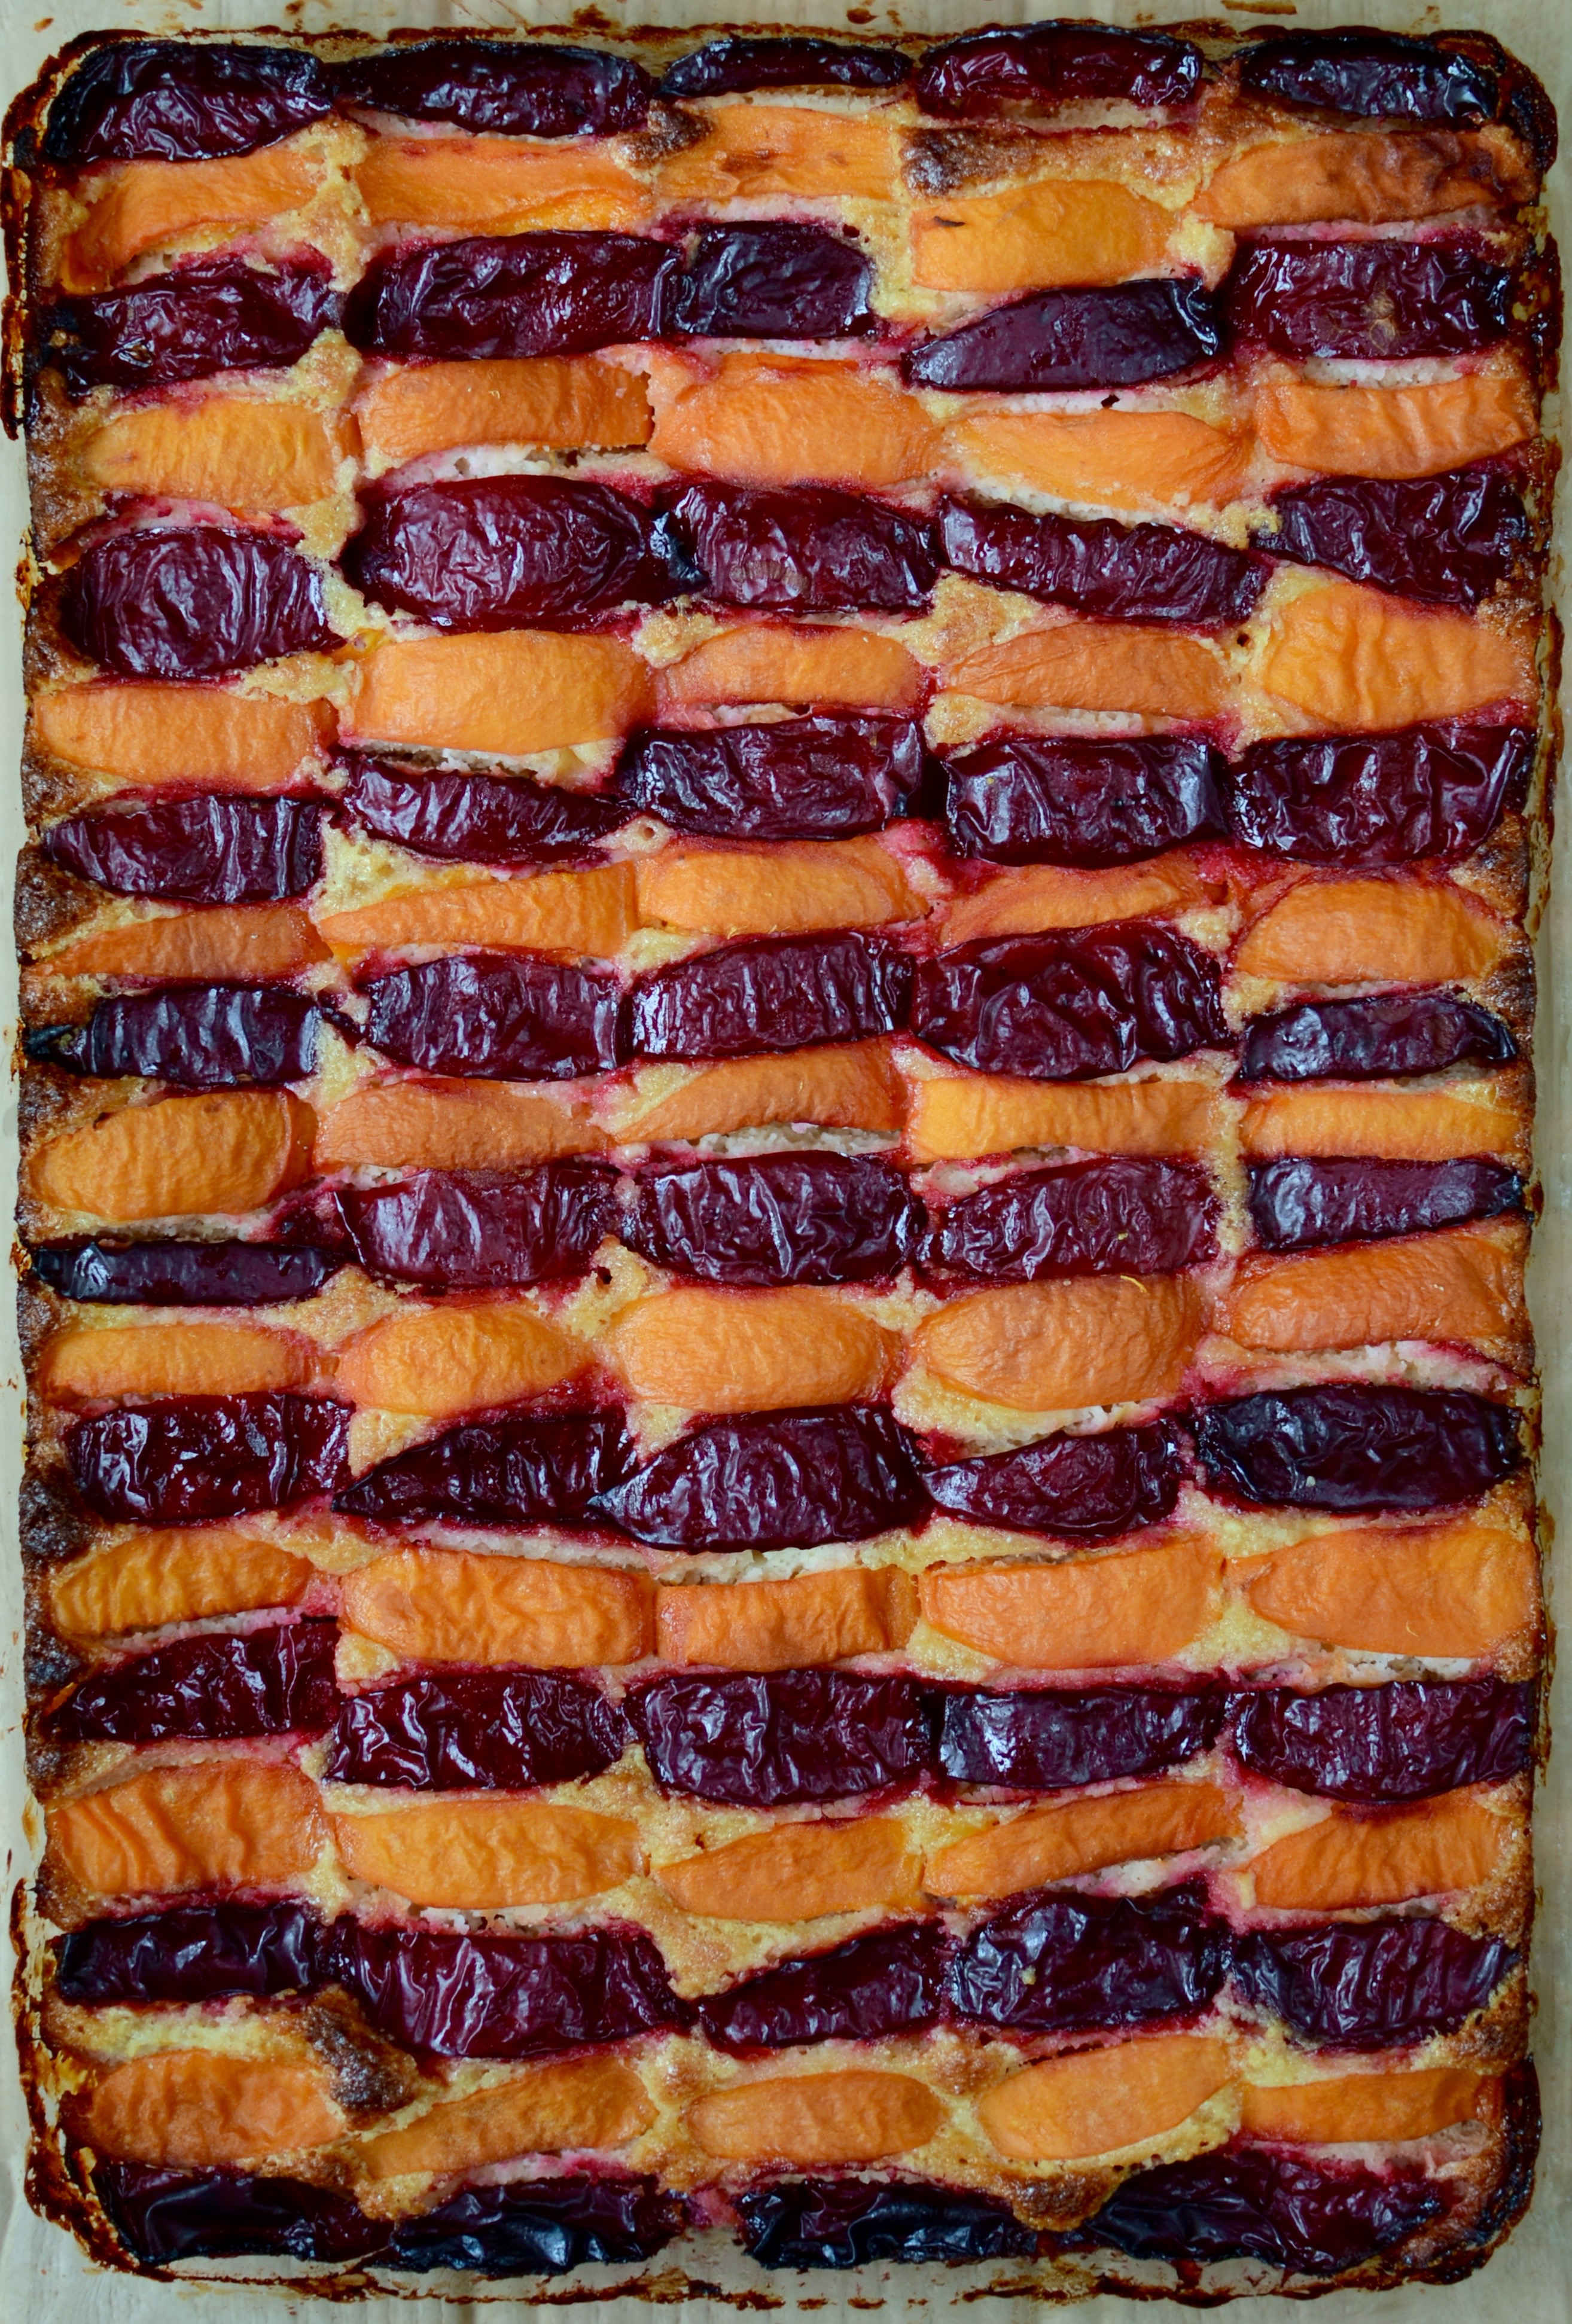
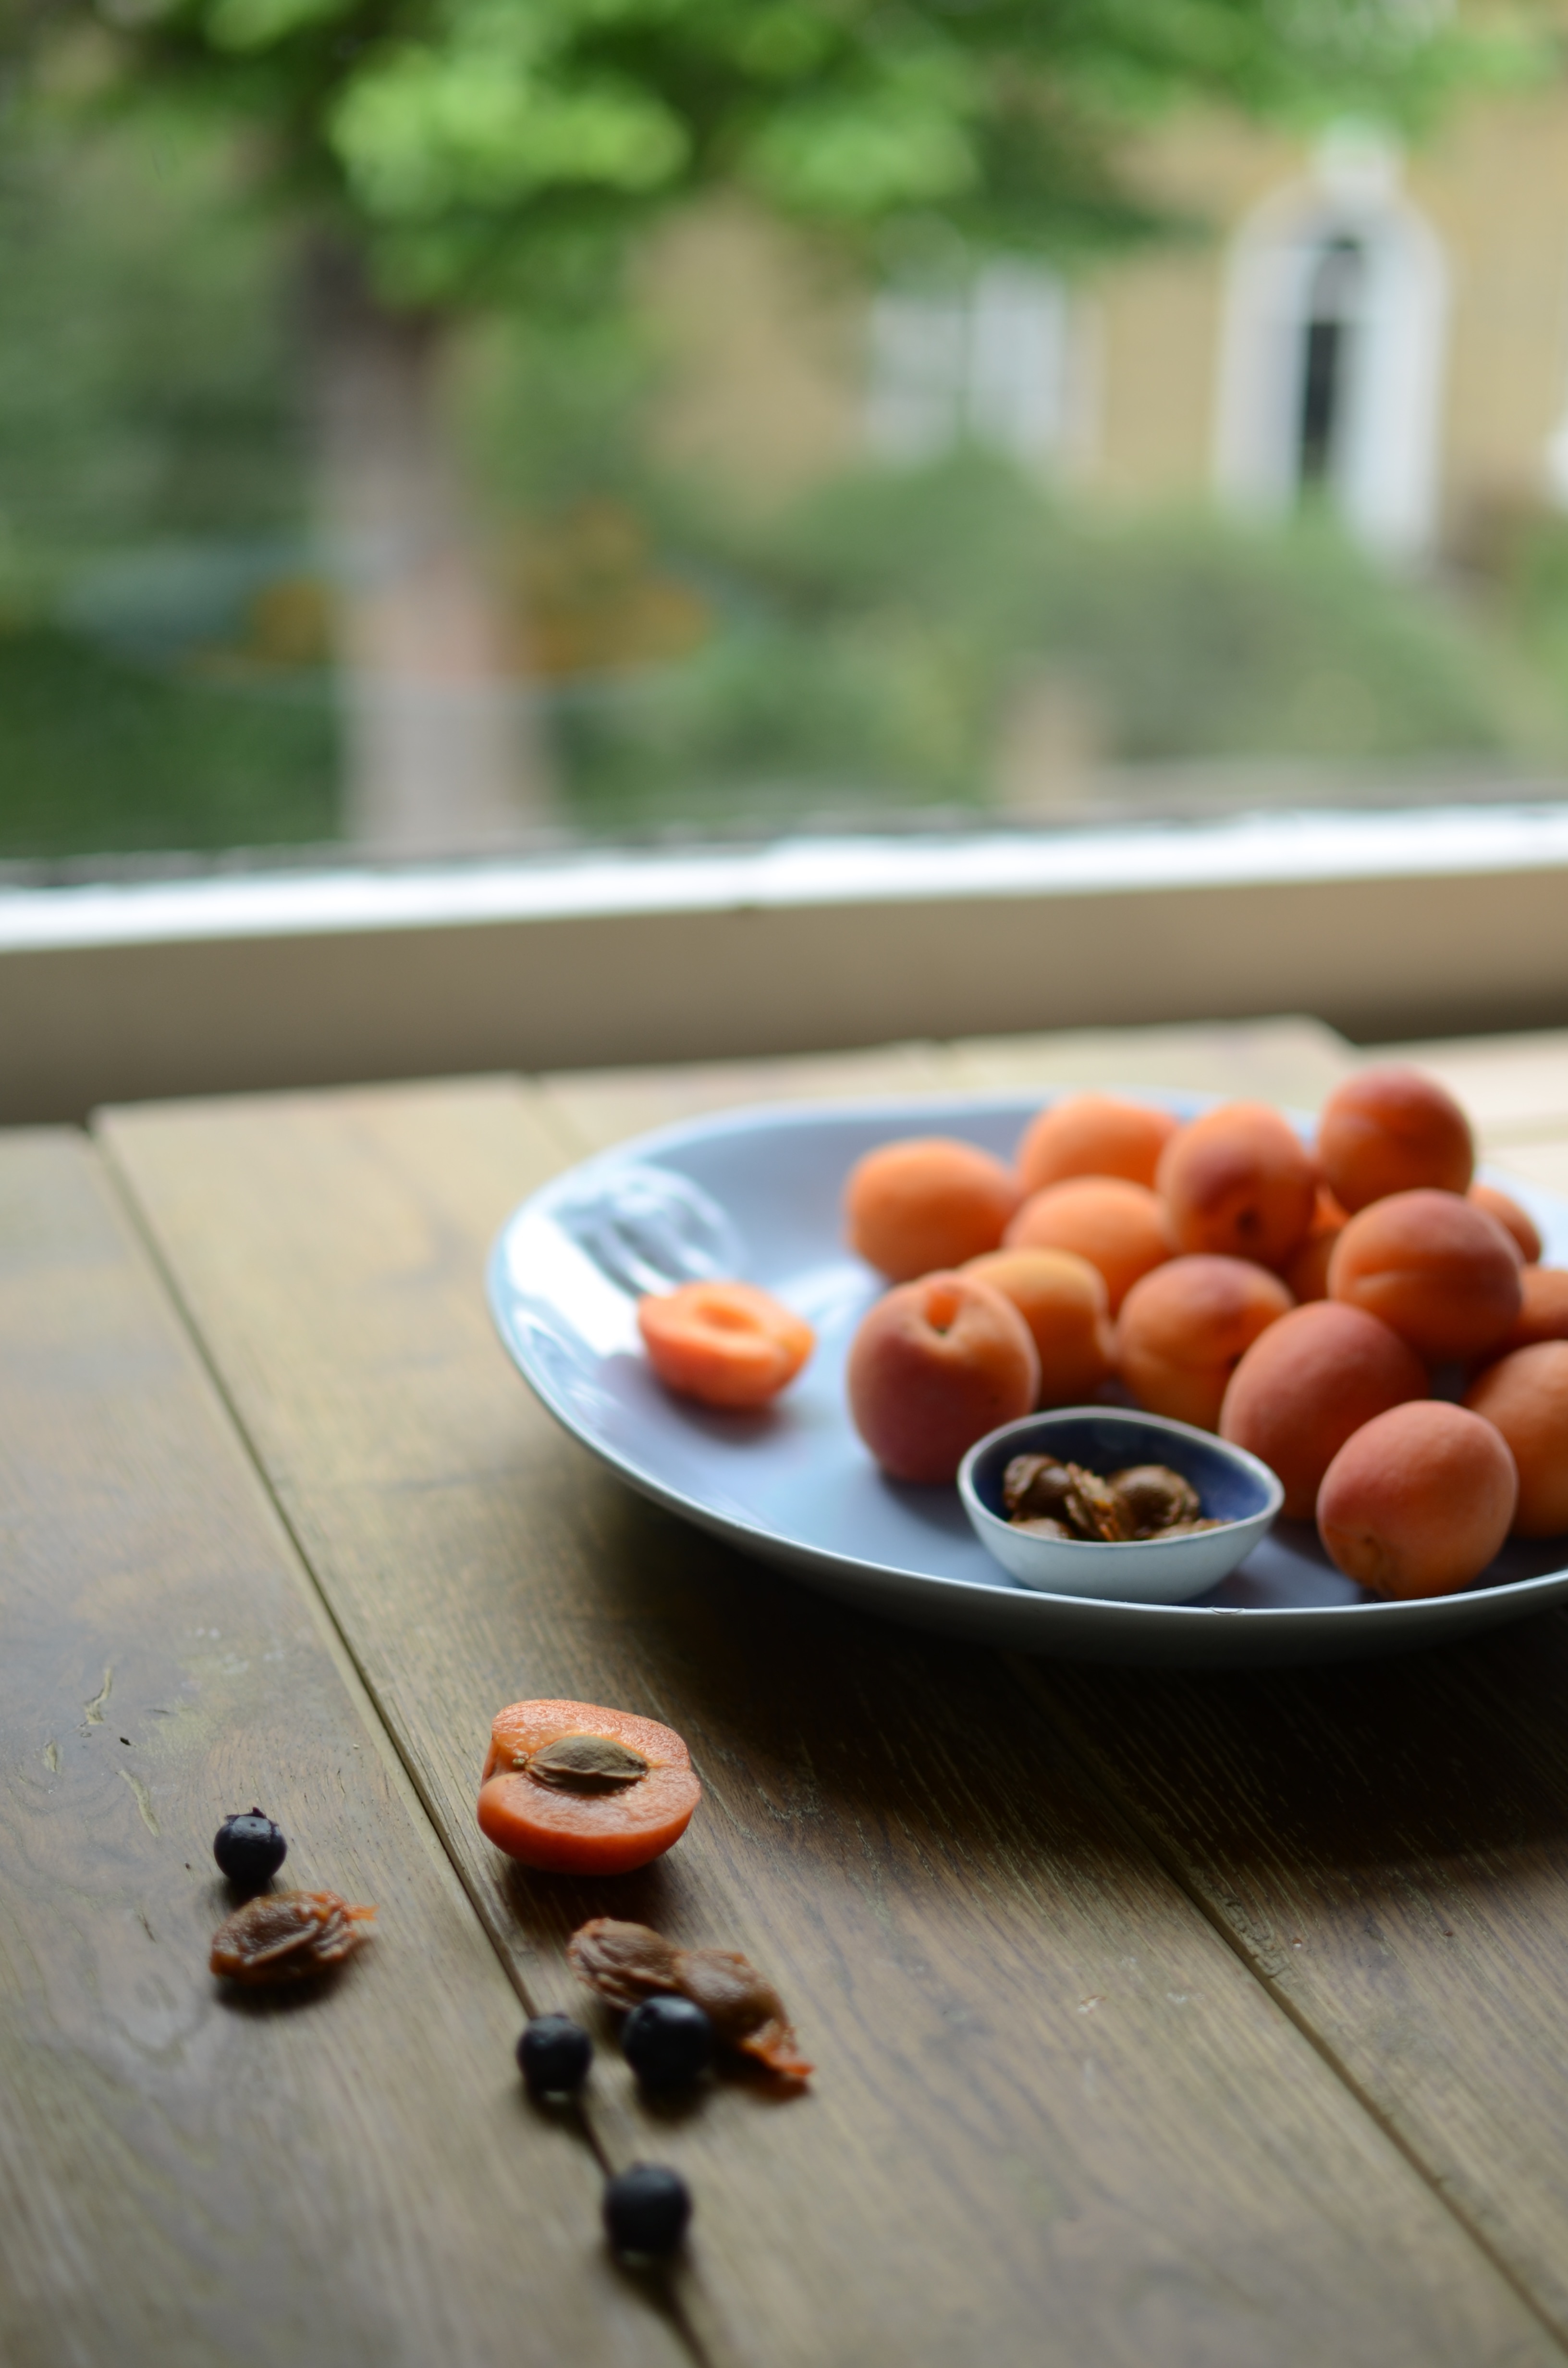
Stone fruit slices
The memories of my primary school years are punctuated by gloriously colourful events, much-loved traditions, lessons learnt the hard way, meaningful moments… And Maike’s mum’s weekly apricot tray bake. It will forever crop up in my mind as the most delicious treat anyone could wish for. It perfectly captured the balance between soft and chewy, tart and sweet. And it looked and tasted like the summer sun.
Rather than being a cake, this recipe really is more of a nutritious snack that I happily give my children after school and help myself to during busy mornings catching up on admin and work. The end result relies to a large extent on the taste and quality of your fruit, but even so, it is a good way to use up over-ripe, squooshy apricots and plums.

Stone fruit slices
Ingredients
3 medium eggs, at room temperature and separated
80ml (1/3 cup) oil (coconut oil, macadamia nut oil or melted butter)
80ml (1/3 cup) honey
1/2 teaspoon good quality almond extract
pinch of sea salt
finely grated zest of 1 lemon
230g (about 2 1/3 cups) ground almonds / almond flour
750g large apricots and small’ish plums (about 6 of each), halved, stones removed and sliced into eighths
Method
- Whisk together the egg yolks, oil, honey, almond extract, salt and lemon zest.
- Stir in the ground almonds and set aside.
- Preheat the oven to 180°C/360°F.
- Whisk the egg whites to firm (but not stiff) peaks, and gently fold into the almond mixture.
- Spread this mixture out in an even layer in a greased ovenproof baking dish (about 30 x 20 cm).
- Place the fruit slices skin-side up as close together as possible in the thin layer of batter – alternating the fruit as you go along. You could also use apricot halves only, which would be much quicker and easier, but not as pretty.
- Bake in the oven for 30 minutes, then turn the oven off and leave the cake in the oven for another 15 minutes, before removing and allowing to cool.
- Cut the cake into squares in the dish, then carefully slide an offset spatula under each row to carefully lift them out.
- Store in the fridge for several days or freeze.
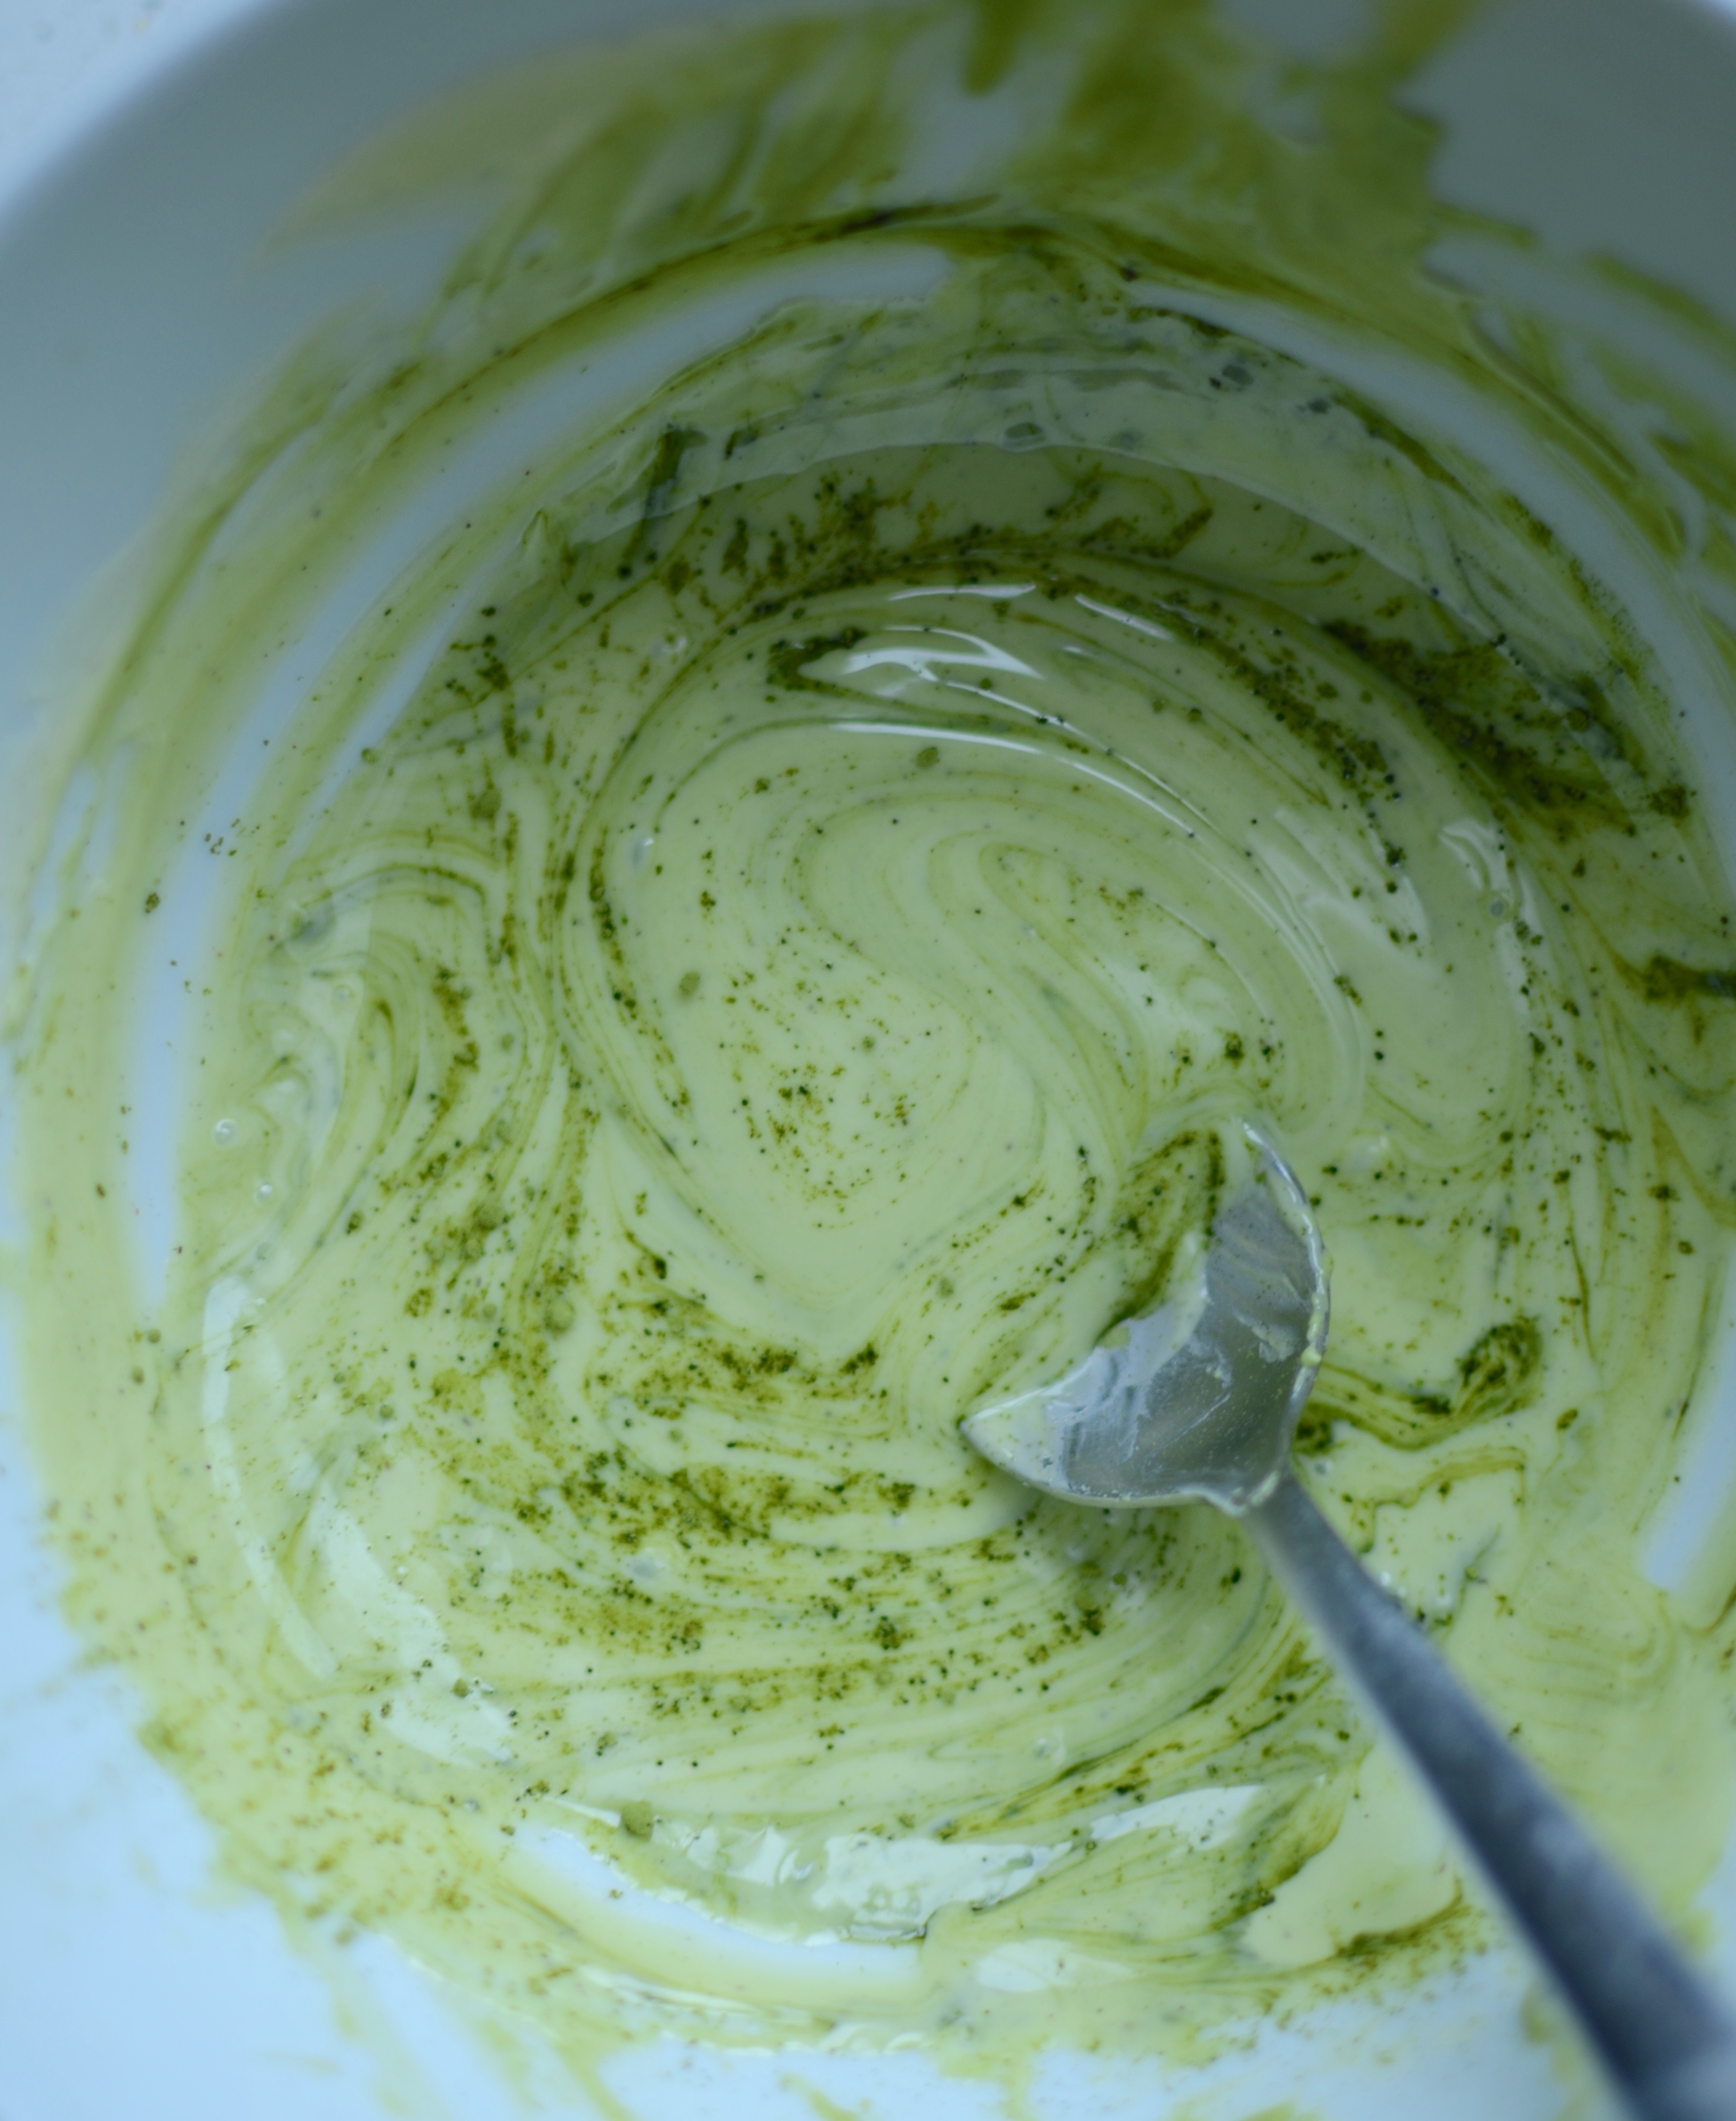
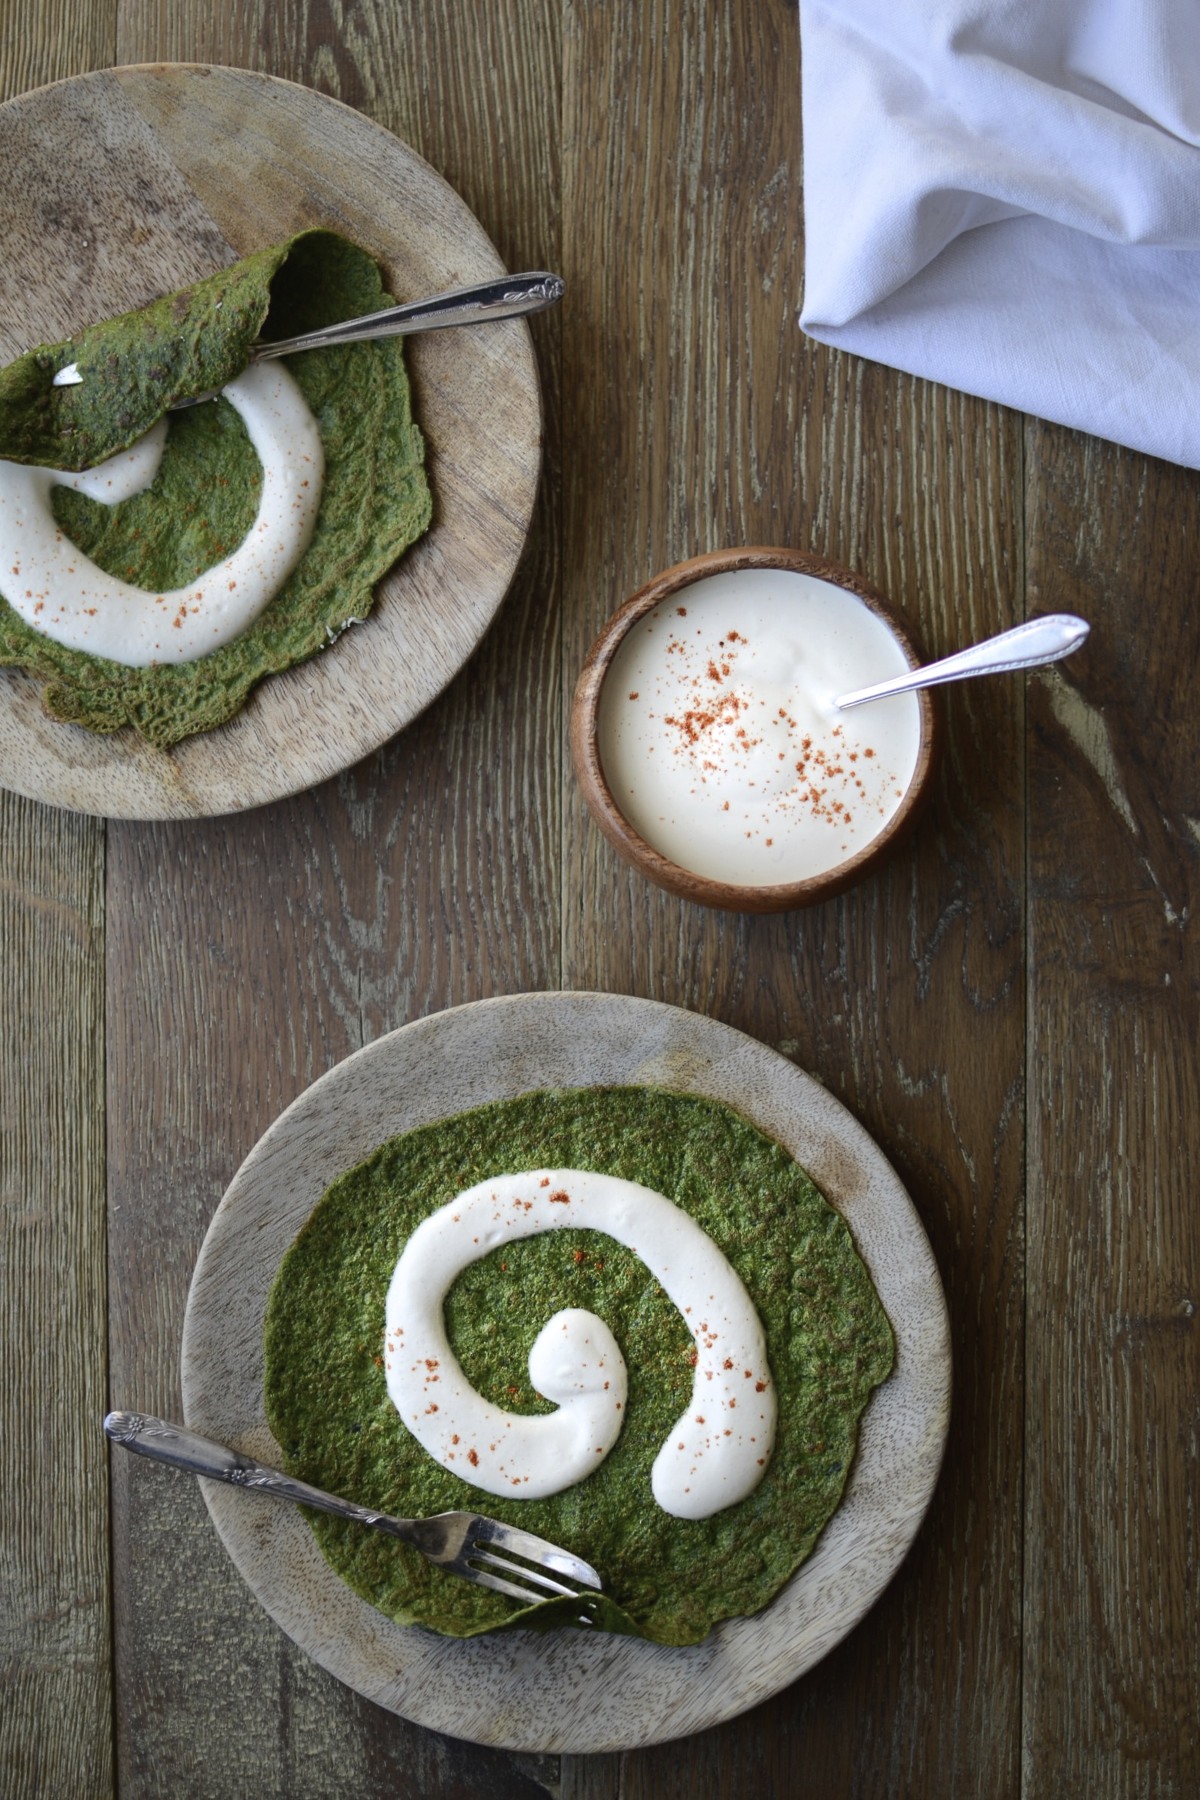
Green crêpes with cayenne cashew cream
We love pancakes in any shape and size. And it is one of the easiest way to serve vegetables to your family – either mixed straight into the batter or as a filling. These Tuscan kale crêpes, a.k.a. dragon slayer pancakes, are delicious with a savoury cashew cream, but you could also serve them with grated (preferably unpasteurised) cheddar cheese or goat milk feta. And I usually reserve some of the batter to make a few plain ones to have with honey and lemon as a special Pancake Day dessert.
Ingredients for the crêpe batter
5 medium eggs
240g (2 cups) wholemeal spelt flour
500ml (2 cups) water
large pinch of sea salt
200g Tuscan kale (also known as cavolo nero, dinosaur or lacinato kale), thick cores discarded, roughly chopped
Method
- Steam (or briefly blanch) the kale until wilted, then refresh under ice cold running water.
- Put all the ingredients in a blender and blend until well mixed.
- Set aside for at least 1 hour.
- To make the crêpes, heat a little ghee or coconut oil in crêpe pan until hot, but not smoking. Pour a ladleful of the batter into the pan, turning it while you pour to ensure you cover the base.
- As soon as the edges have browned (after a few minutes), carefully slide a spatula under the crêpe and flip it over for another couple of minutes. Repeat until all the batter has been used up.
Ingredients for the cashew cream
125g (about 1 cup) cashew nuts, soaked for 2 – 4 hours in fresh cold water
100 – 125ml (about 1/2 cup) water
large pinch of sea salt
1 teaspoon nutritional yeast flakes
generous squeeze of lemon
large pinch of cayenne pepper
Method
- Rinse the soaked cashews thoroughly, then place in a blender with just under half a cup of water (about 100ml), salt, nutritional yeast, lemon juice and cayenne, and blend until creamy.
- If you don’t have access to a high speed blender, the resultant cream will have a coarser texture.
- Adjust seasoning and spoon onto a green crêpe before rolling up.
Picnic à deux
Ok, full disclosure: I don’t really celebrate Valentine’s Day.
I used to, but that was before I married another Capricorn at the end of January. By the time Christmas, New Year’s Eve, our respective birthdays and our wedding anniversary have been duly celebrated, we are usually ready for a break.
I am a HUGE fan of romantic dates, however. Any time, any place. And if Valentine’s Day happens to be the next available opportunity to spoil your sweetheart, then make the most of it with this easy peasy, super sexy stay-at-home picnic for two. Open fires and games of scrabble optional.

The Ruby Noir
Makes 2 cocktails
Ingredients
60ml (1/4 cup) 100% pomegranate juice, chilled
30ml (2 tablespoons) damson, plum, blackberry or sloe vodka
1 teaspoon sweetened lime juice (squeeze out half a lime and stir in 1 teaspoon honey)
Champagne or sparkling wine, chilled
1 teaspoon pomegranate seeds
2 small and fine rosemary twigs (optional)
Method
- Mix the pomegranate juice, vodka and lime juice, then divide between two champagne flutes, pouring through a funnel if you want to keep it extra neat.
- Top up with Champagne, by carefully pouring the bubbly into the glass over the back of a metal spoon to “float” it on top of the pomegranate mix.
- Carefully float a few pomegranate seeds on top and finish with a rosemary twig, if you like.
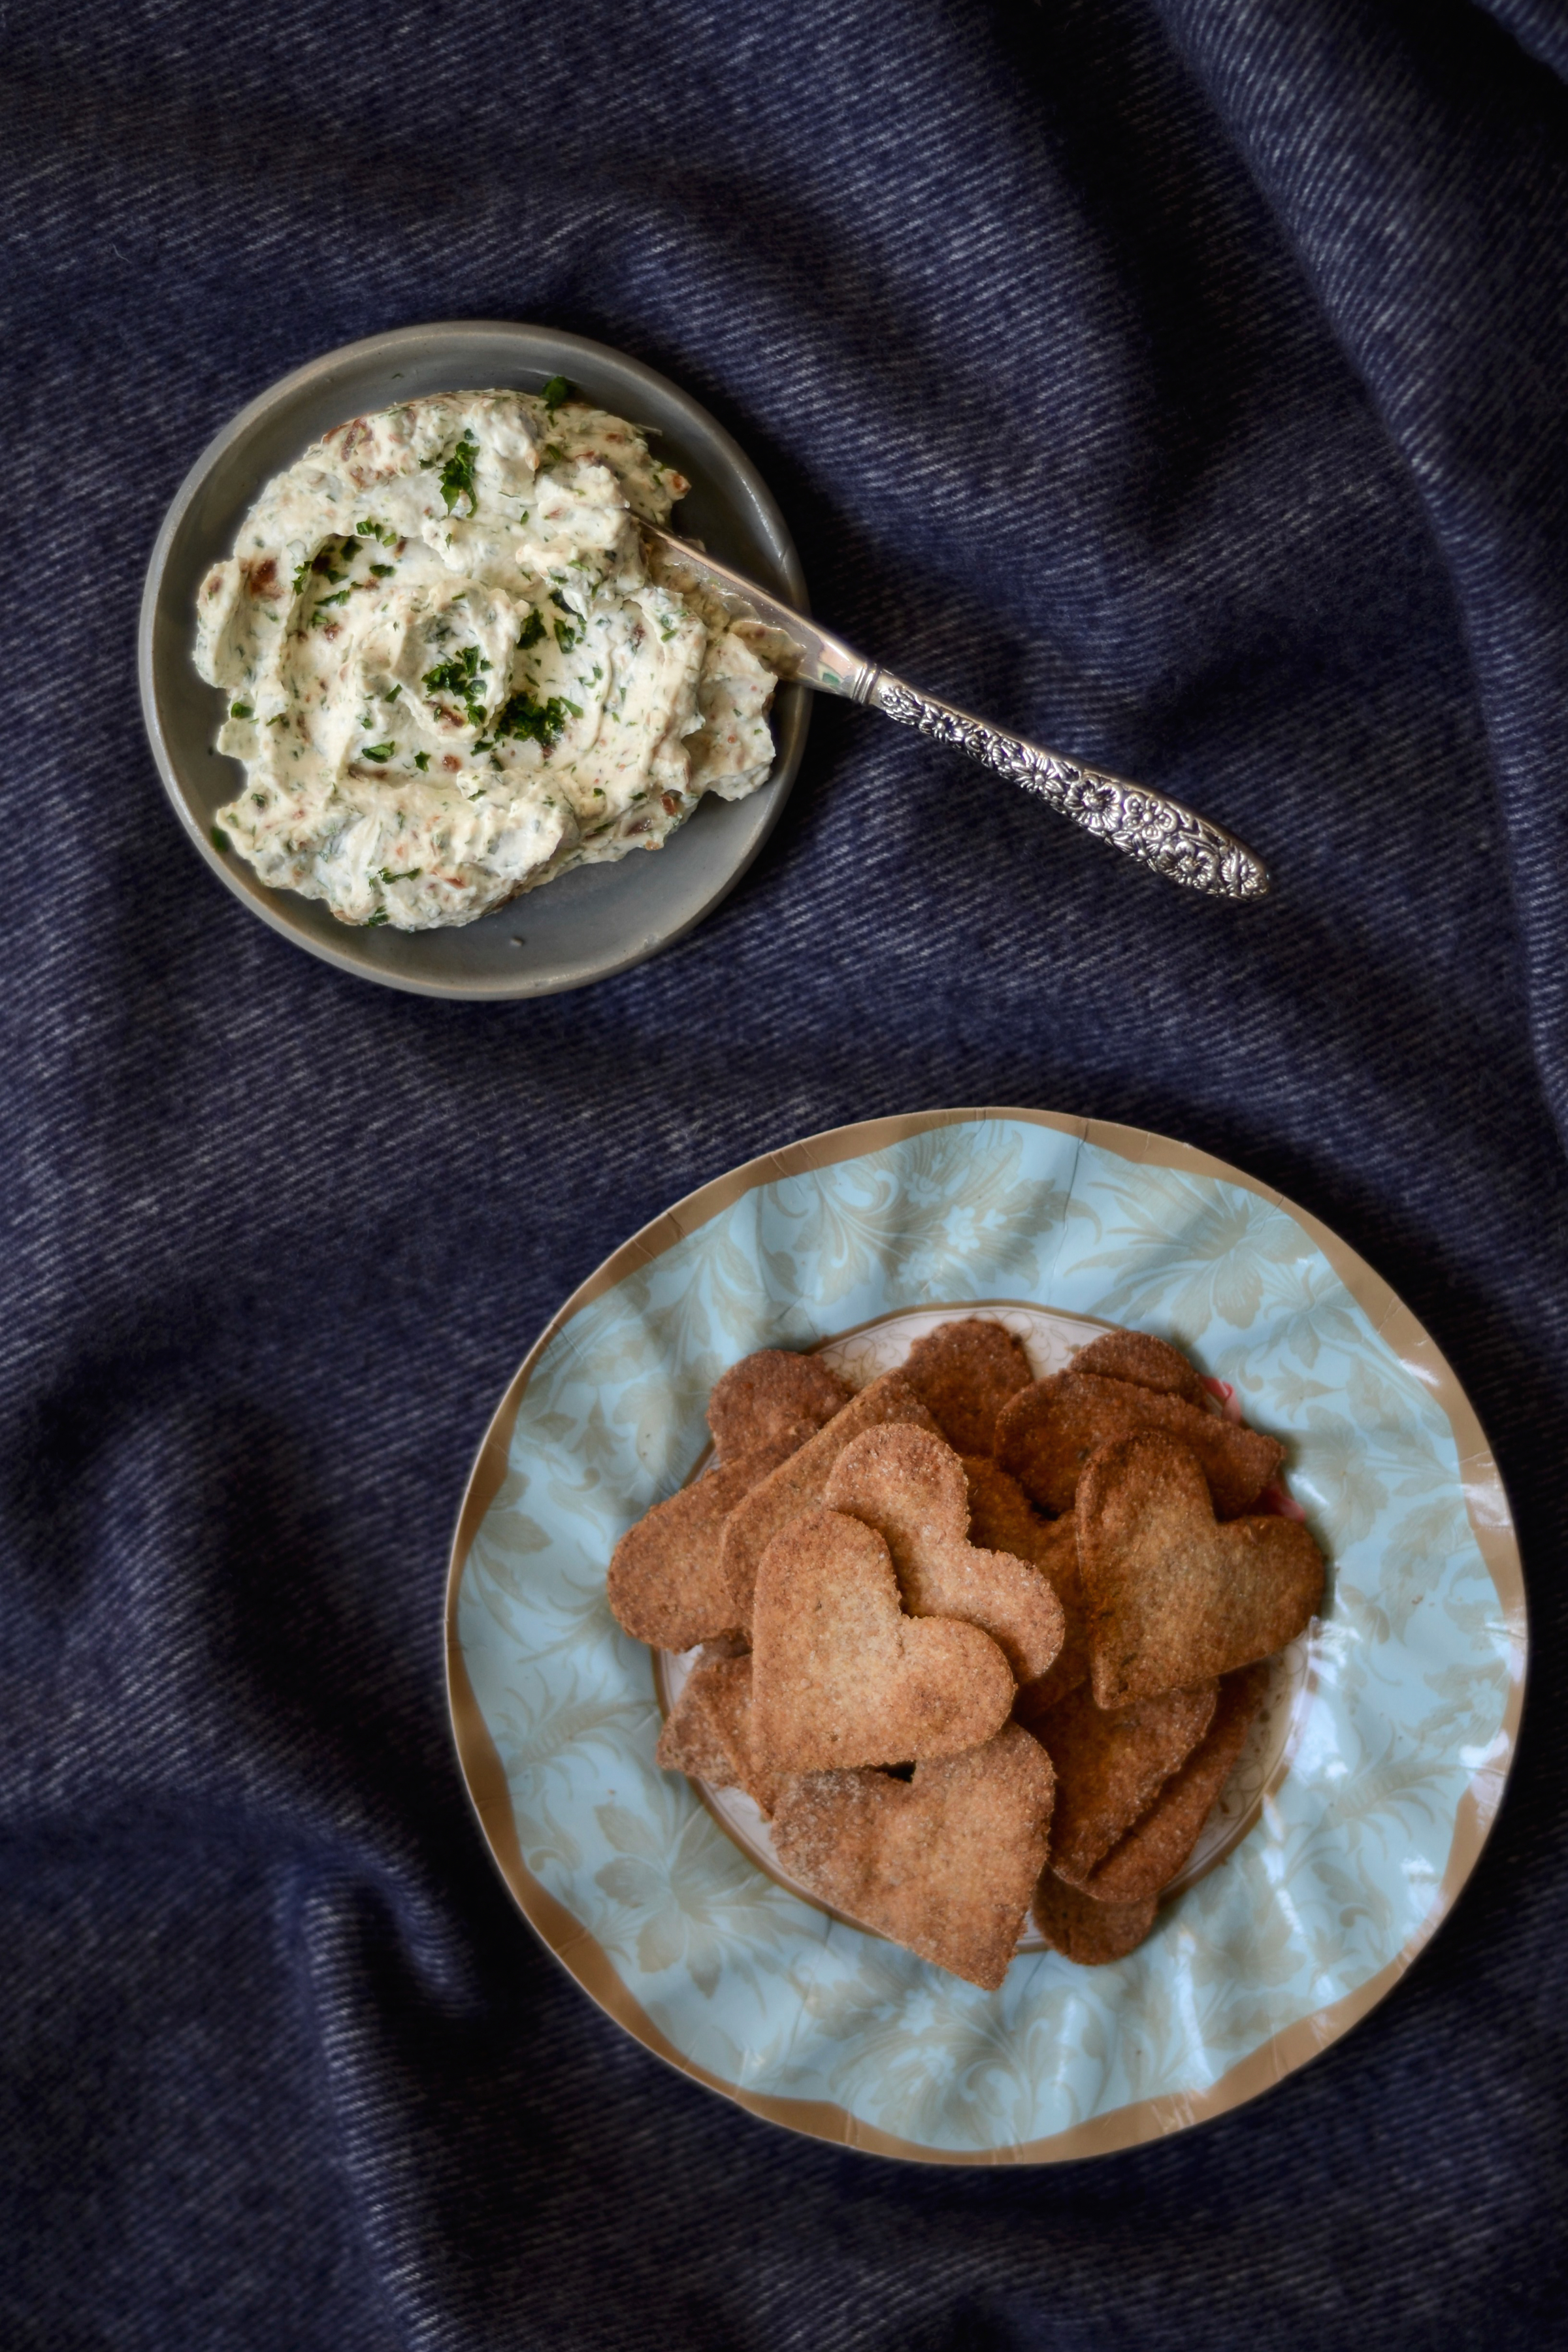
Spiced rye crackers with figgy goat’s cheese
Ingredients for the crackers
Makes about 18 small crackers, but feel free to double or triple the recipe – they keep well
50g (1/3 cup) stoneground rye flour
pinch of salt
pinch each of caraway seed, aniseed and cumin
10g (about 2 teaspoons) cold butter, cut into small cubes
15ml (1 tablespoon) or thereabouts milk of your choice (I used almond milk)
Ingredients for the figgy goat cheese
Enough for 2 people
70g (1/3 cup) soft goat cheese
1 large soft dried fig, finely chopped
1 teaspoon finely chopped parsley, leaves only
sea salt and freshly ground black pepper
aged Balsamic vinegar to serve (optional)
Method
- For the crackers: preheat the oven to 220°C / 420°F. Line a small baking sheet with parchment paper.
- Whisk together the flour, spices and salt. Using your finger tips, rub the butter into the flour until it resembles fine bread crumbs.
- Add the milk and knead the dough until it comes together in a soft ball – not too sticky, and not crumbly.
- Roll the dough out thinly and use a cookie cutter to cut out shapes. Place these on the prepared sheet.
- Bake for roughly 10 minutes, or until the edges have turned golden, then remove from the oven and allow to cool on a cooling rack.
- For the goat cheese: while the crackers are baking, mix all the ingredients for the cheese in a bowl, adjust seasoning and set aside.

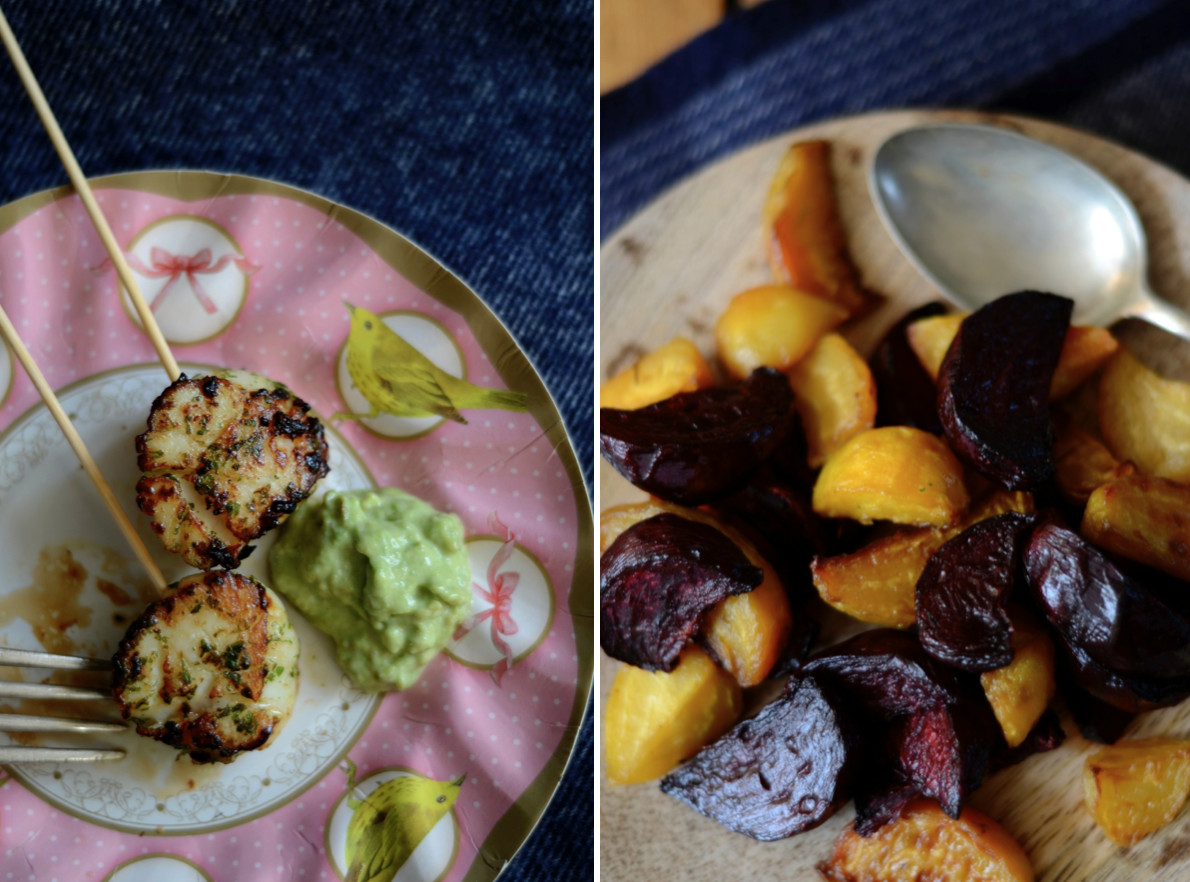
Scallop pops with avocado aïoli
What can be more seductive than nibbling on a sizzling scallop lollipop? These guys are the perfect mess-free picnic food and add just the right amount of spice to wake up the senses. Serve with a plate of gorgeous roasted mixed beets.
Ingredients for the marinade
handful of fresh coriander (cilantro), finely chopped
1 small red chilli, finely chopped (deseeded and membranes removed if you prefer it milder)
1 large garlic clove, thinly sliced
splash of olive oil
For the pops
6 large or 8 small scallops
knob of butter, preferably organic
4 to 6 wooden skewers
Ingredients for the avocado aïoli
1 small ripe avocado, mashed
1 – 2 tablespoons garlic aïoli or mayonnaise, preferably home-made
squeeze of lemon
sea salt
Method
- Mix all the ingredients for the marinade and rub it into the scallops. Set aside for at least half an hour.
- While the scallops are marinating, mix together the ingredients for the avocado aïoli and refrigerate.
- When you are ready to fry the scallops, pick out the garlic slices, as they burn too easily, and heat the butter in a heavy bottomed skillet or pan over a medium heat.
- Fry the scallops for a minute or two on each side – do not overcook them! – then slide one to two onto each skewer. Season with sea salt and serve with the avocado aïoli.
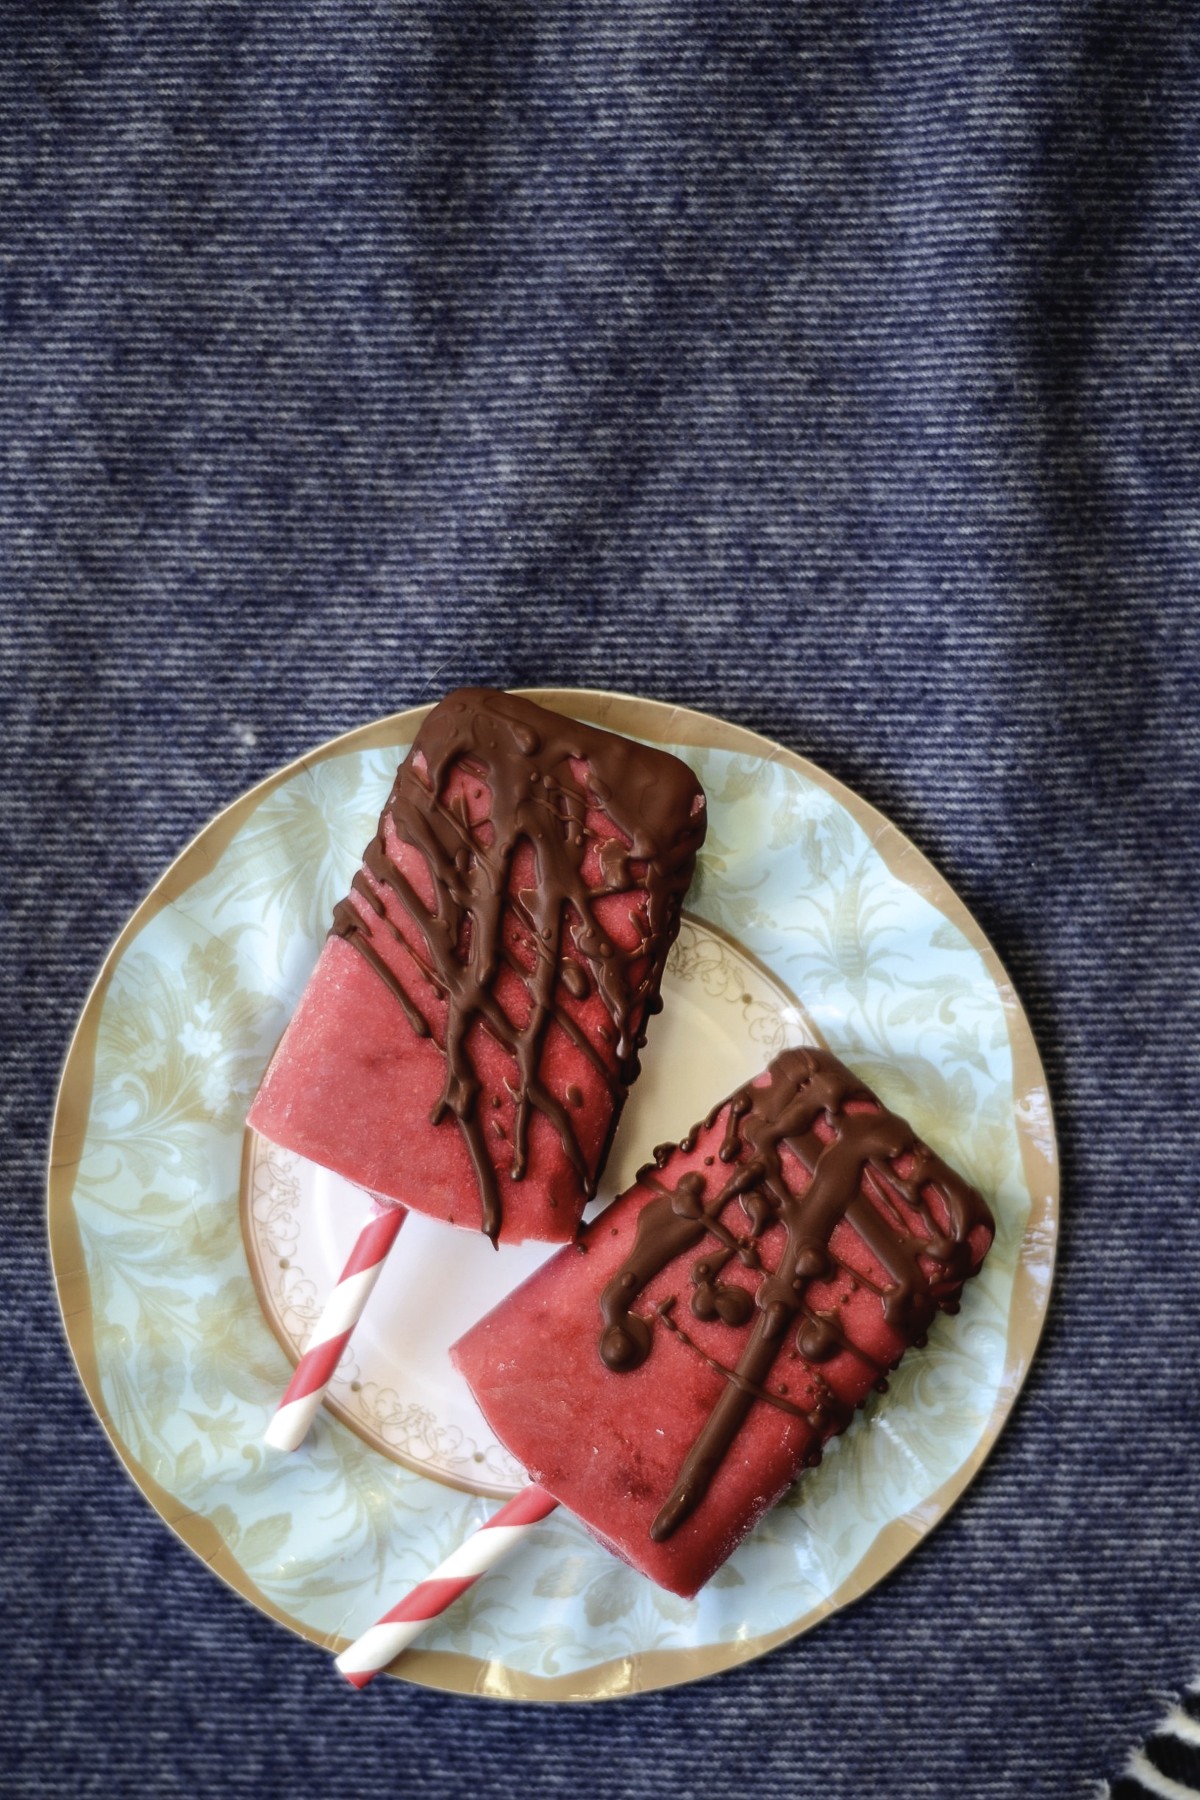
Chocolate-drizzled pear and raspberry lollies
For me, a romantic dinner has to be delicious, yes, but definitely not too filling. Who wants to feel stuffed and uncomfortable on a date? These refreshing, yet luscious lollies will hit the spot.
Makes 4 small or 2 large lollies
Ingredients for the lollies
teaspoon of coconut oil
2 pears, peeled, cored and quartered
1 teaspoon molasses sugar or dark brown muscovado sugar
80g (1/2 cup) frozen or fresh raspberries, plus a few extra
60ml (1/4 cup) milk of your choice (I used almond milk)
Ingredients for the chocolate drizzle
10g / 10ml (2 teaspoons) coconut oil
20g (about 6 squares) dark chocolate, broken into small pieces
Method
- For the lollies: heat the coconut oil in a heavy based saucepan until hot, then lay the pear quarters down, sprinkle over the sugar and do not turn until they’ve developed a lovely golden colour and the sugar has melted (about 5 to 10 minutes).
- Turn over and fry on the other side for another 5 minutes.
- Now blend the pears, raspberries and milk until smooth. Stir in the remaining raspberries (crush them if they are frozen) and fill the ice lolly moulds.
- Freeze for at least 4 to 5 hours.
- For the chocolate drizzle: put them coconut oil in a small saucepan and heat over a low heat until melted.
- Add the bits of chocolate and continue to warm over a medium heat until melted.
- Give it a quick whisk, then set aside to cool slightly.
- Run hot water over the moulds to remove the lollies. Using a spoon, drizzle some chocolate sauce over each and give it half a minute or so to set.
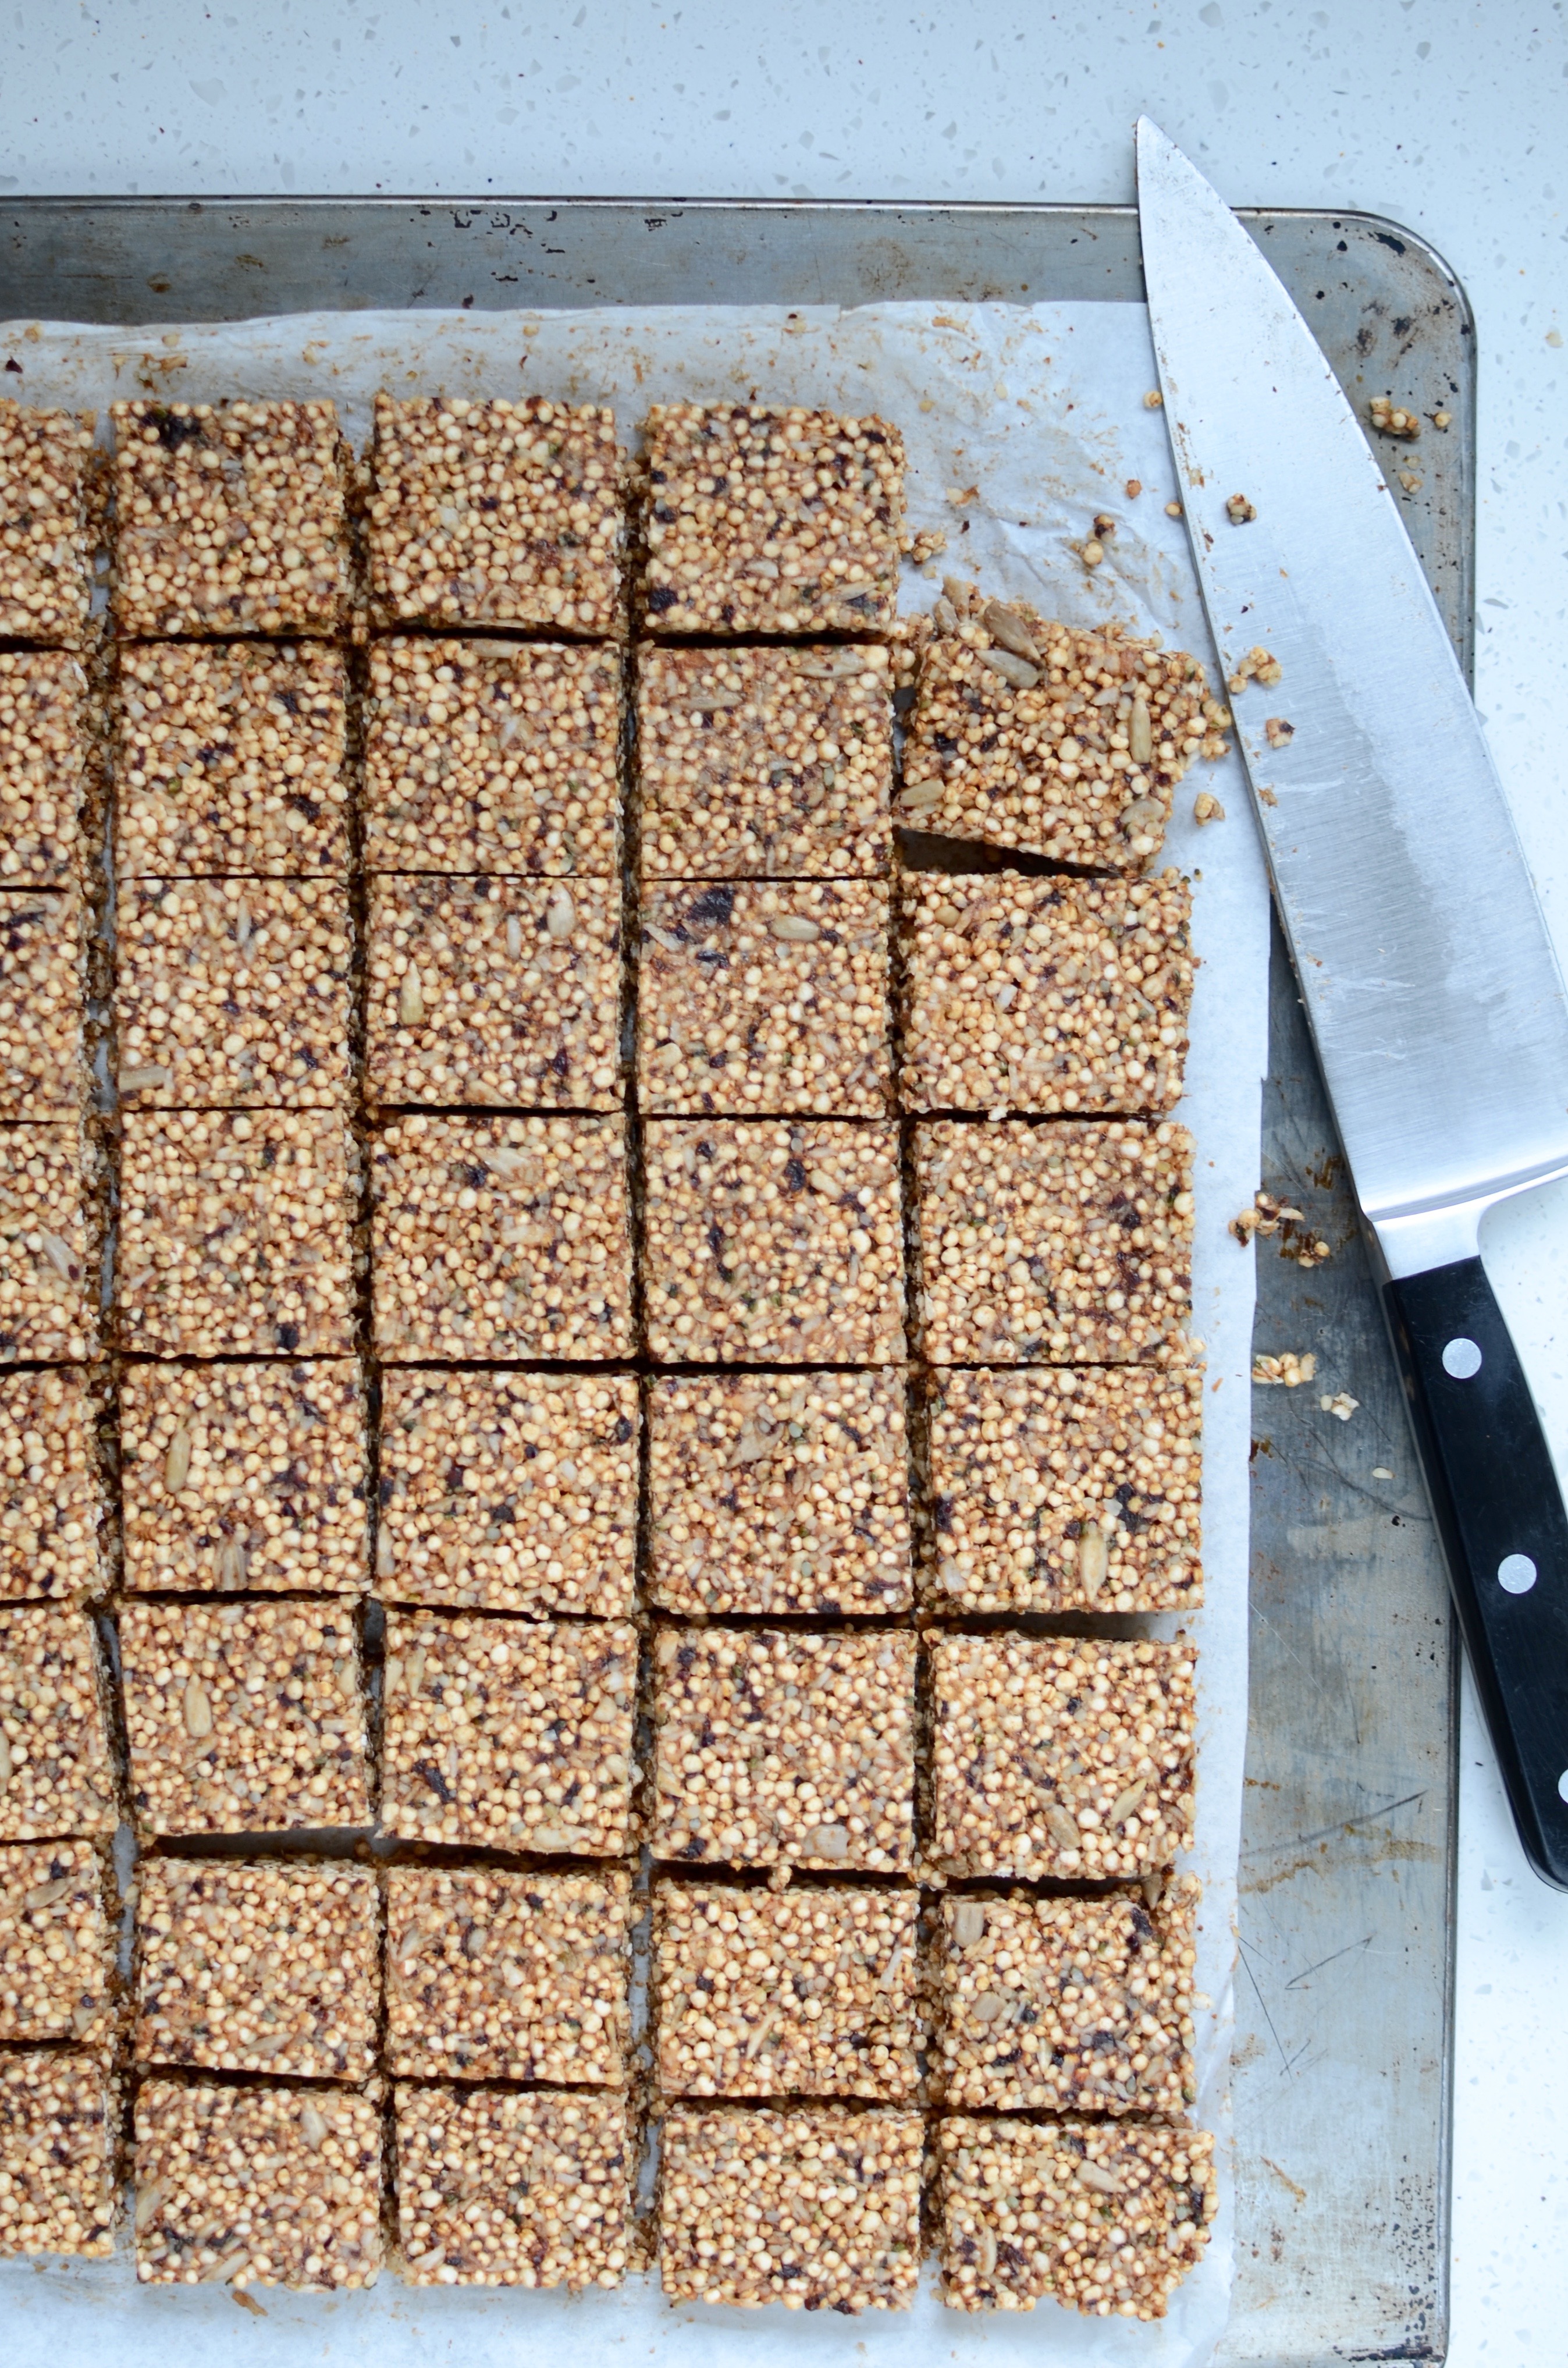
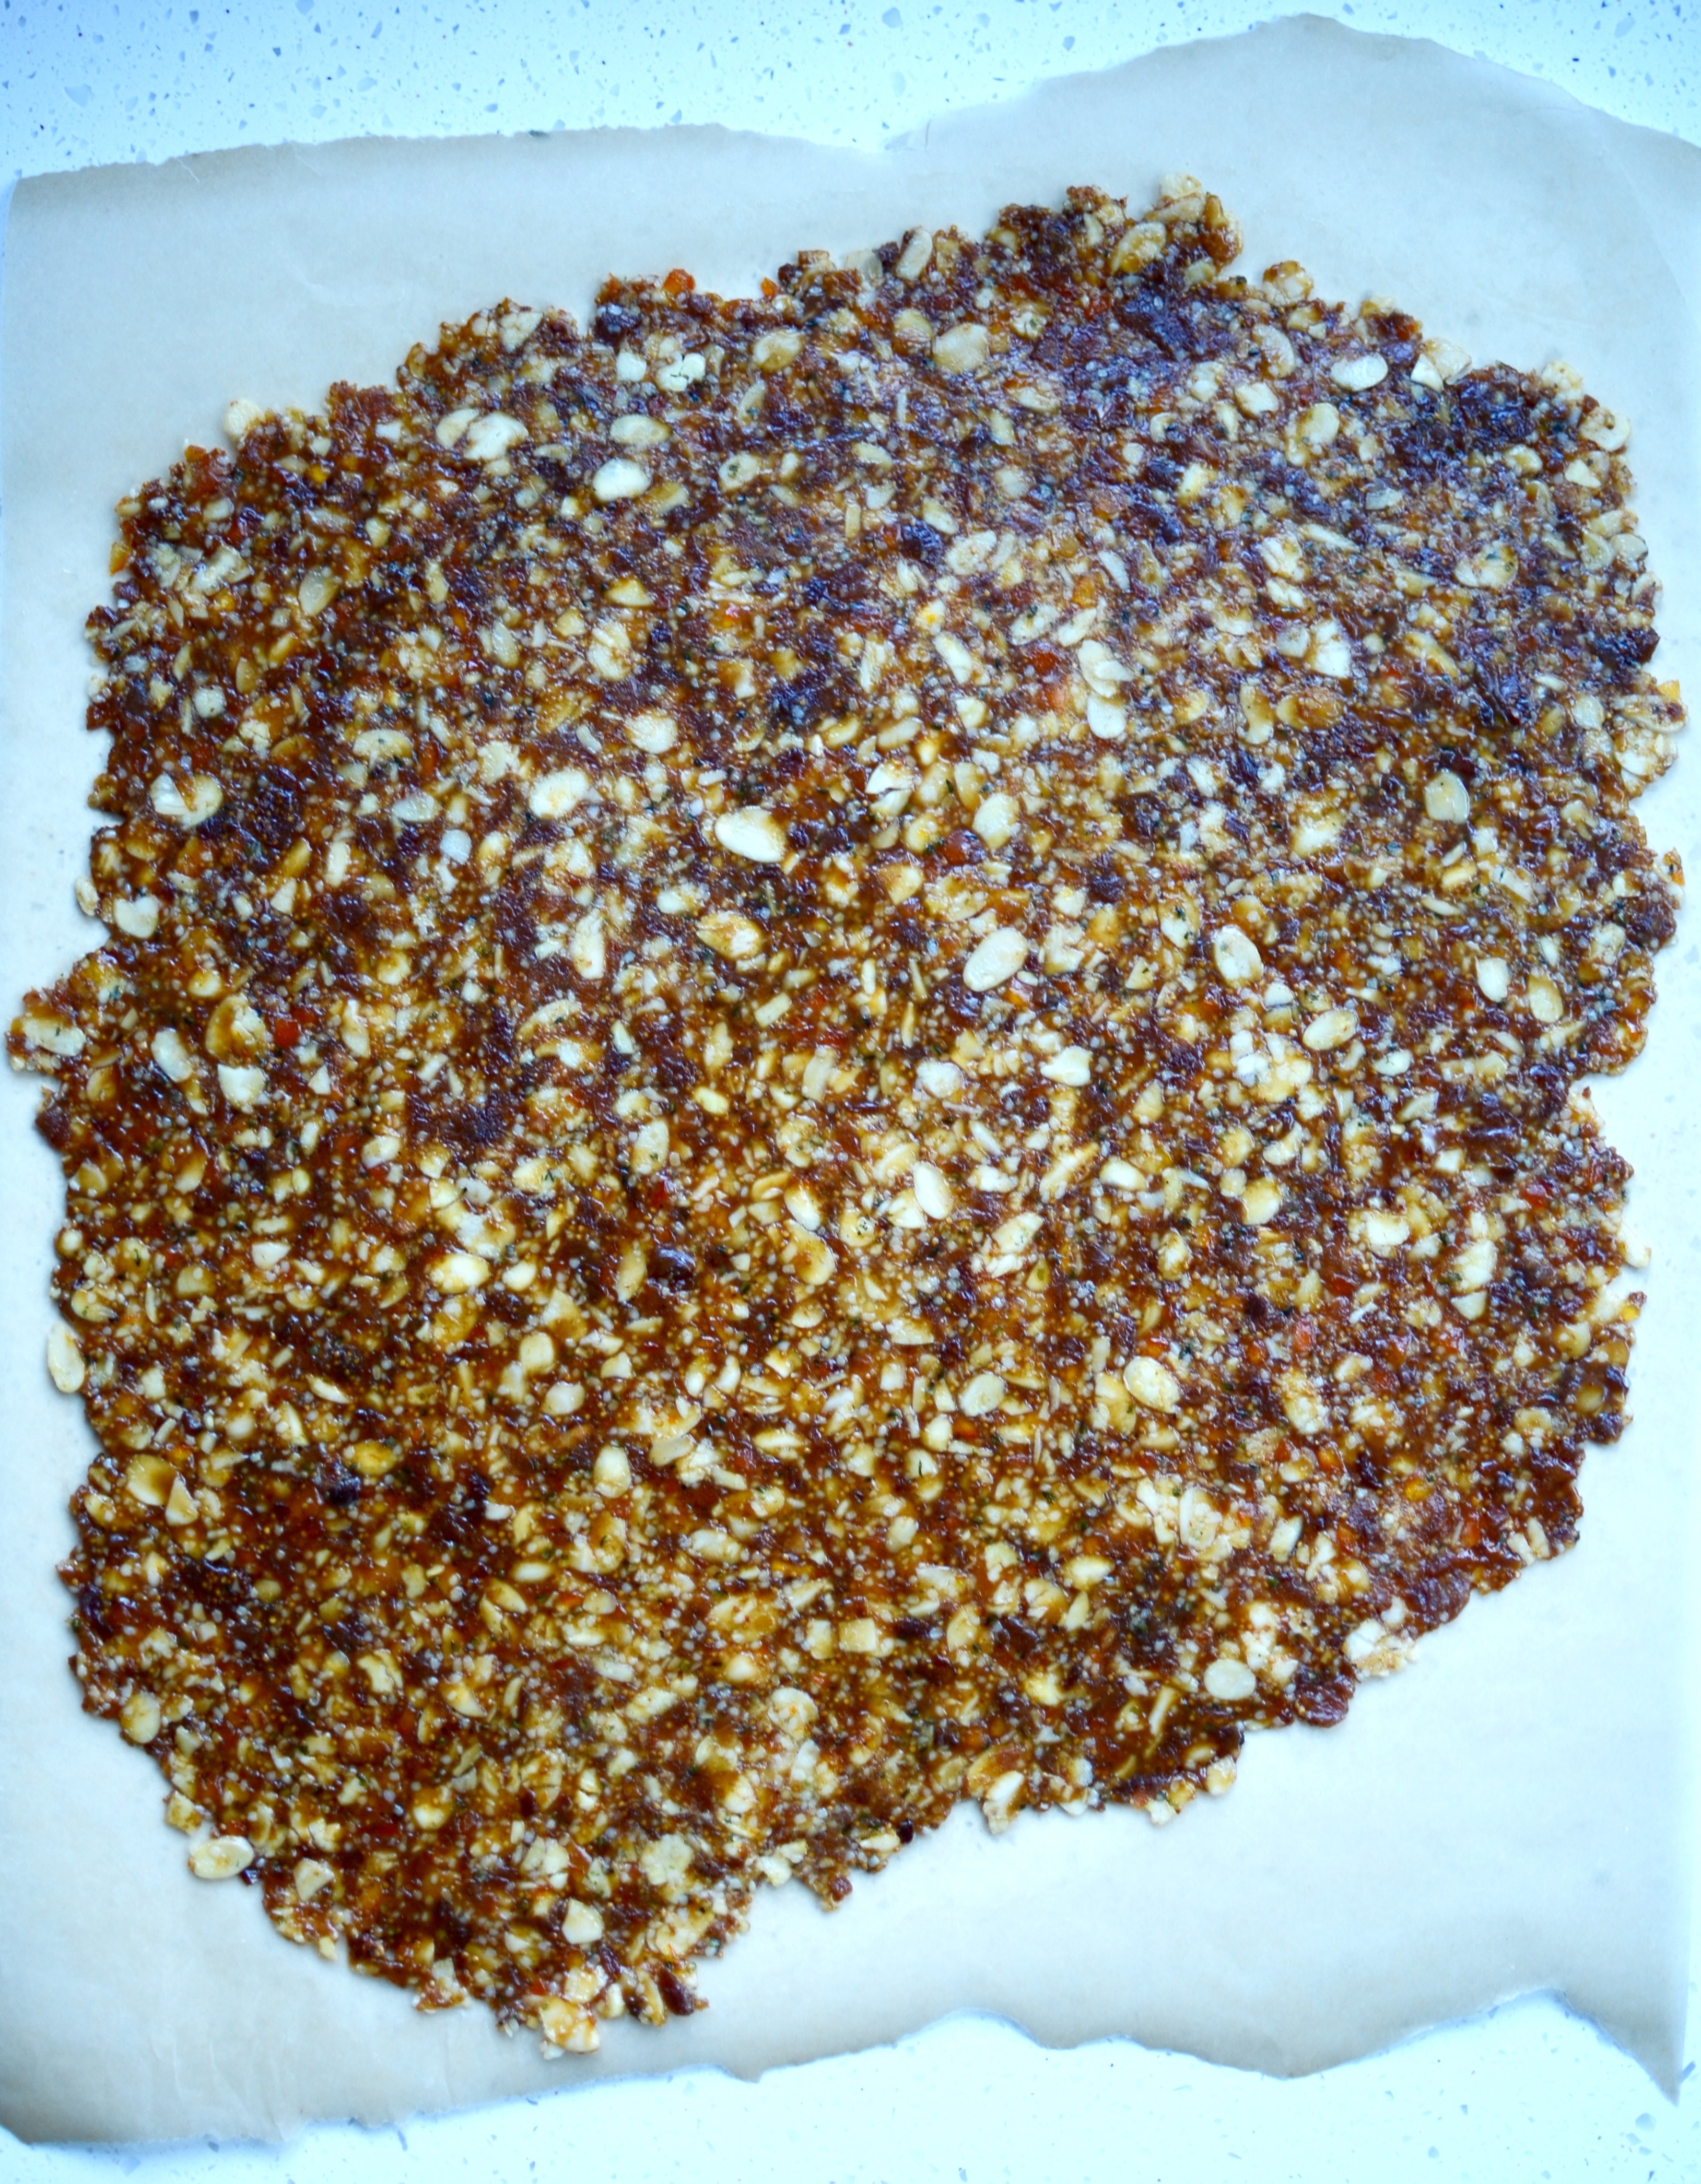
Oat and buckwheat crispie fridge bars
The moment you start changing your eating habits by steering clear of processed foods, refined sugar and white flour, your taste buds begin to transform. Suddenly, overly salty or super sweet food does not do it for you anymore, and you automatically adjust the way you cook, like adding less sugar to cake batters because you know it will still be sweet enough… Anyone who has discovered the joy of dark chocolate will know what I mean. Milk chocolate will never again be your first choice.
Every now and then, however, even I can appreciate the pleasure of a toe-curlingly sweet treat. After a long park run on a cold morning, or with a gorgeous cup of tea and your favourite book. It is for moments such as these that I usually keep a few of the buckwheat crispie bars in the freezer. They are crunchy and syrupy, and a honey bee’s dream.

Ingredients
80ml (⅓ cup) liquid coconut oil
125ml (½ cup) organic smooth peanut butter
125ml (½ cup) runny honey, preferably raw
large pinch fine grain sea salt
2 teaspoons cinnamon
1 1/2 teaspoon ground ginger
zest of 2 medium organic oranges
200g (about 2 cups) rolled oats
140g (about 1 cup) sprouted buckwheat groats* (dehydrated or dried in low temp oven)
100g walnuts, chopped (yields about 1 cup)
160g dried organic apricots, chopped into small chunks (yields about 1 cup) dried sour cherries for a less sweet bar
60 – 80g (about ½ cup) mixed seeds (chia, sunflower, pumpkin, sesame, hemp)
30g melted dark chocolate to garnish (optional)
Method
- Ensure all the ingredients are at room temperature.
- Whisk together the peanut butter, honey, coconut oil, salt, cinnamon, ginger and orange zest until well mixed.
- In a large bowl combine the oats, buckwheat, walnuts, apricots or cherries, and seeds. Ensure the apricot pieces are separated and coated in oats. buckwheat and / or seeds – use your fingers to do this.
- Pour the dry ingredients into the peanut butter mixture and stir well.
- Line a Swiss roll pan with greaseproof paper, allowing for an overhang on the long side of the tin.
- Spoon the mixture into the pan, pressing down firmly with the back of the spoon or your fingers until it is very tightly packed all the way into the corners.
- Now refrigerate the tray for at least 2 to 3 hours or place in the freezer for roughly 1 hour.
- When firm, lift the granola mixture out of the tin and onto a chopping board by grabbing hold of the greaseproof paper.
- Cut the slab into small bars or squares. If you are using chocolate, place the sheet with the bars back in the Swiss roll tin.
- Spoon the melted, slightly cooled, chocolate into a small sandwich bag. Twist the top and then snip off one tiny corner. Use like a piping bag to drizzle chocolate over the bars.
- Return the bars to the fridge until the chocolate has set, then store in an airtight container, preferably in the fridge or freezer.
Note: *To sprout raw, un-roasted buckwheat (not kasha), soak 2 cups of groats in three times the amount of fresh water for 12 to 18 hours, changing the slimy water once during this time. Then drain, rinse off any sliminess, and leave in a sprouting jar, mesh bag or sieve, loosely covered with a kitchen towel or cloth for a day or two, rinsing well twice a day. Once most of the grains have started sprouting (you will see a little tail forming), spread them all out on a tray or baking sheet and dry in a dehydrator or at a very low temperature (about 65°C) in the oven until crisp (usually this takes 12 to 24 hours). This low temperature is essential to preserve the enzymes in the sprouts, but if you are pressed for time, you could increase the temperature, thereby reducing the baking time.