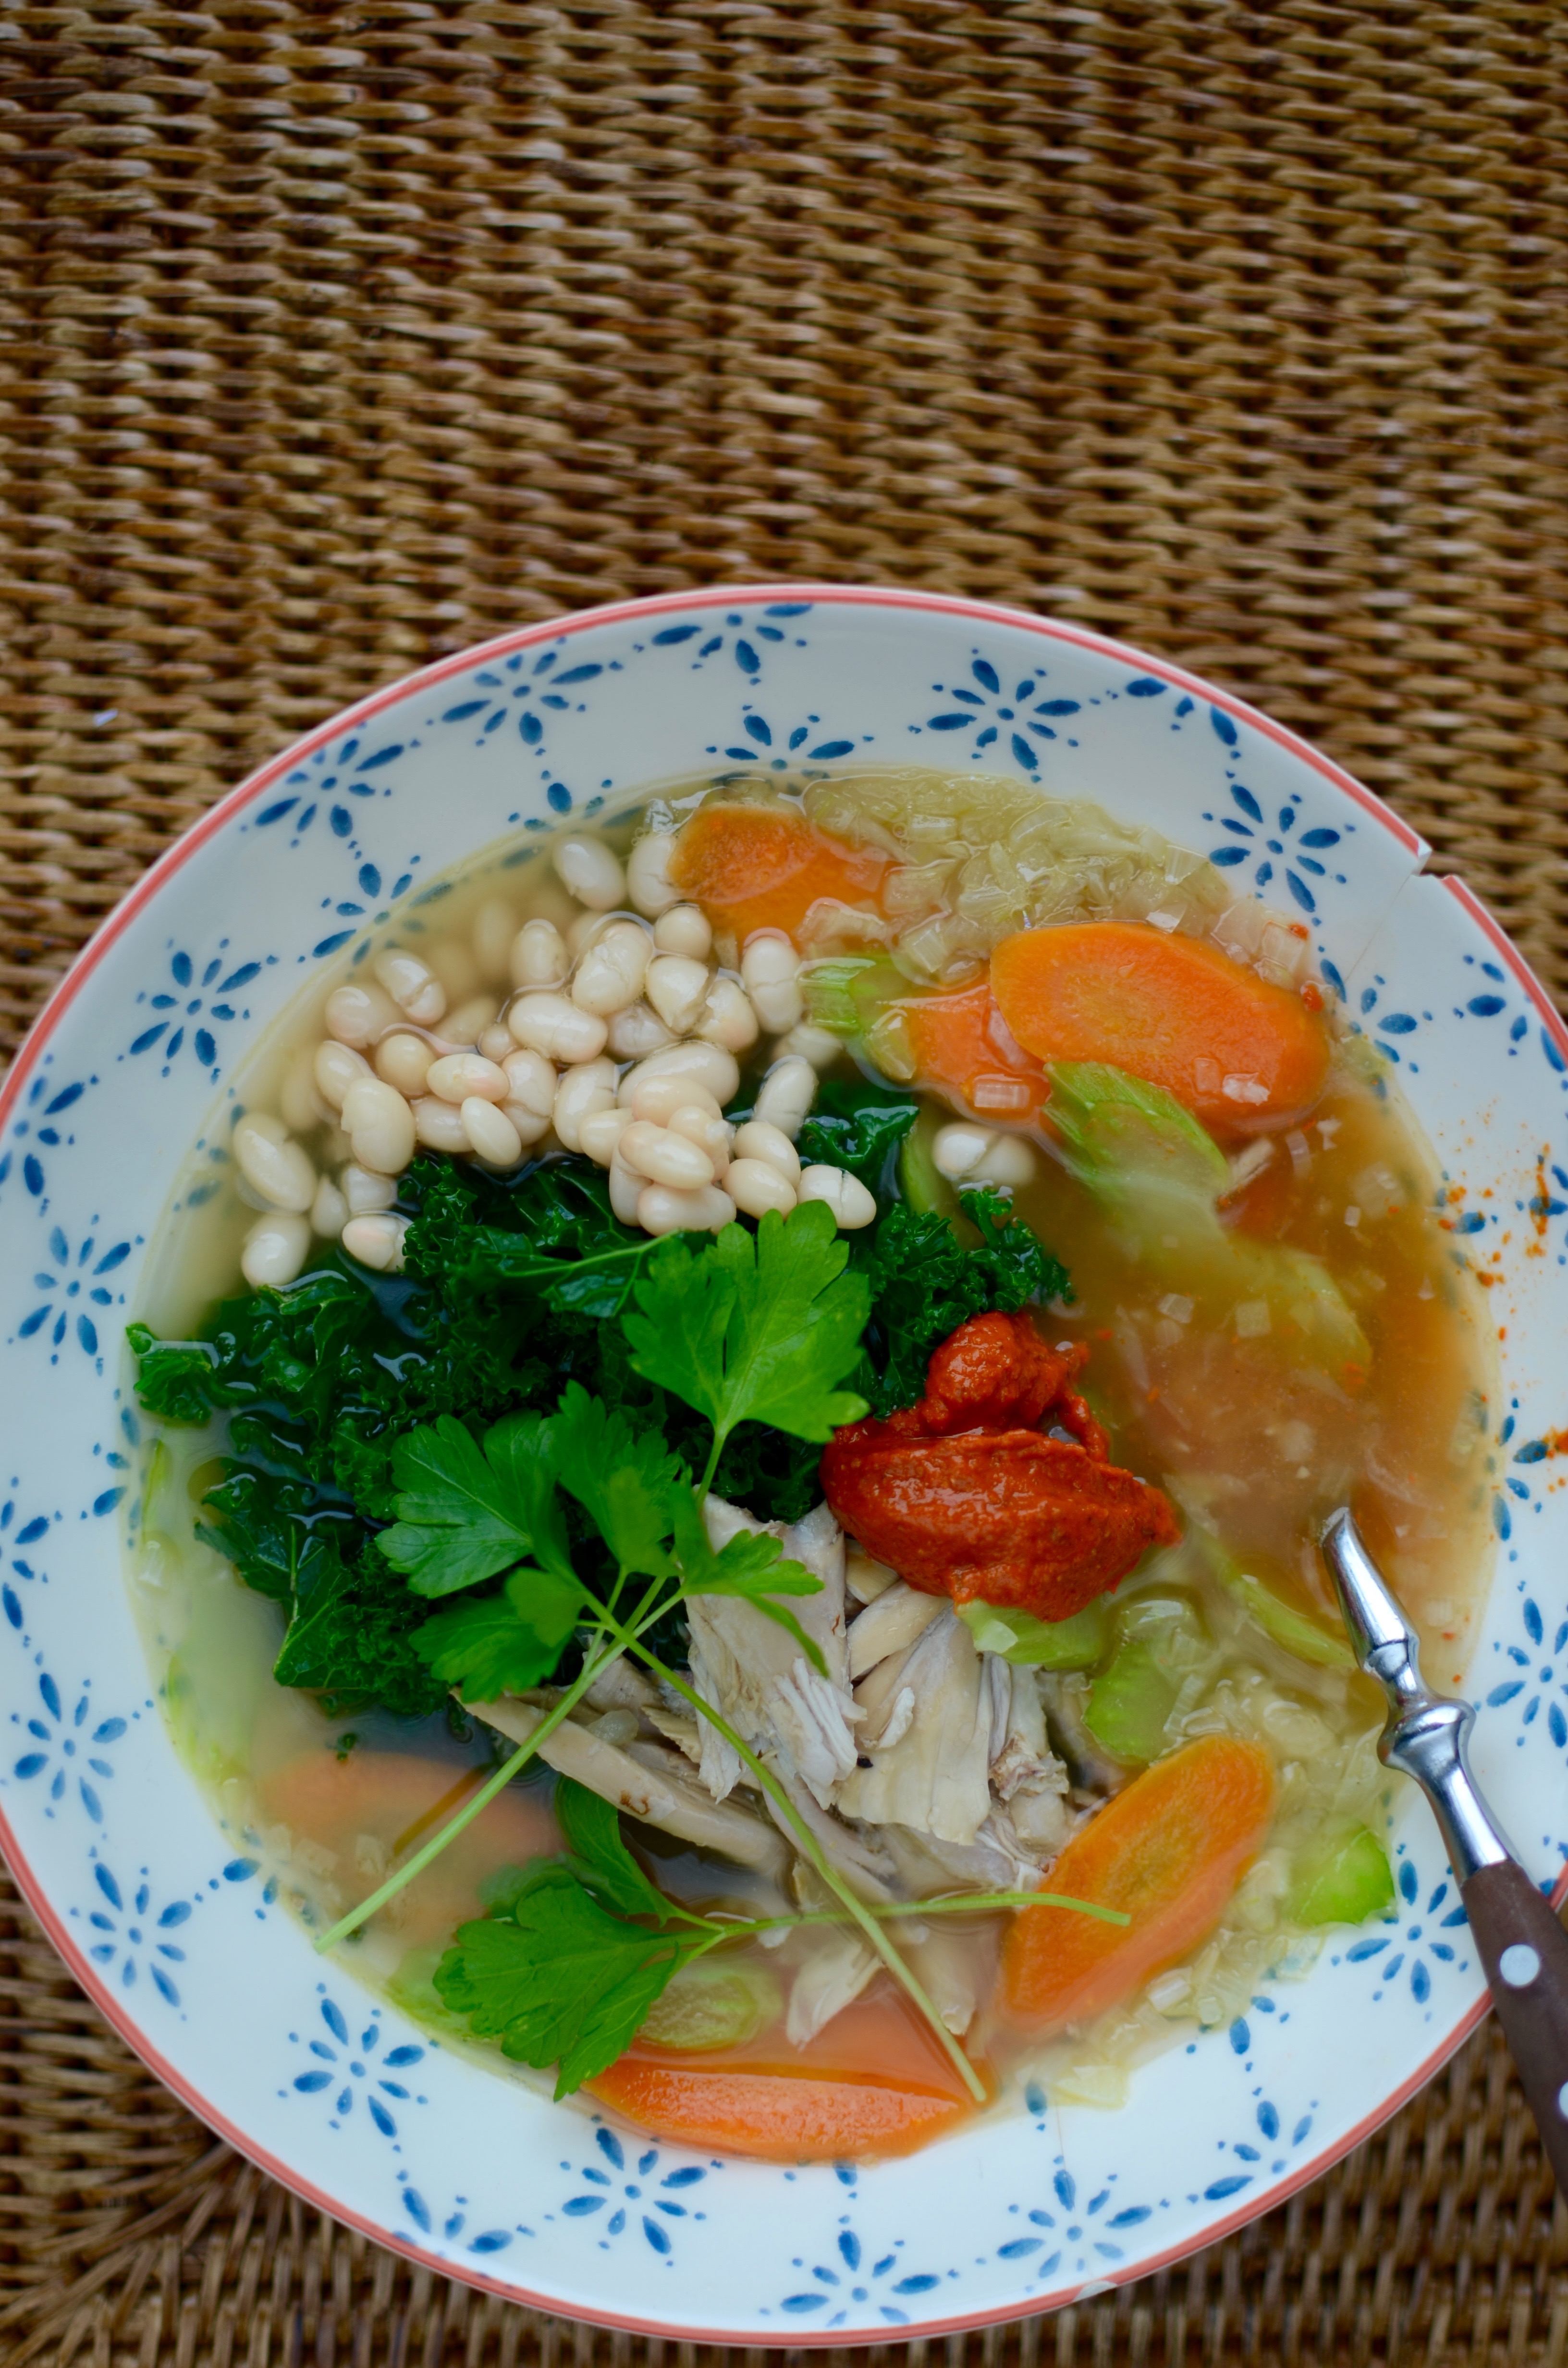
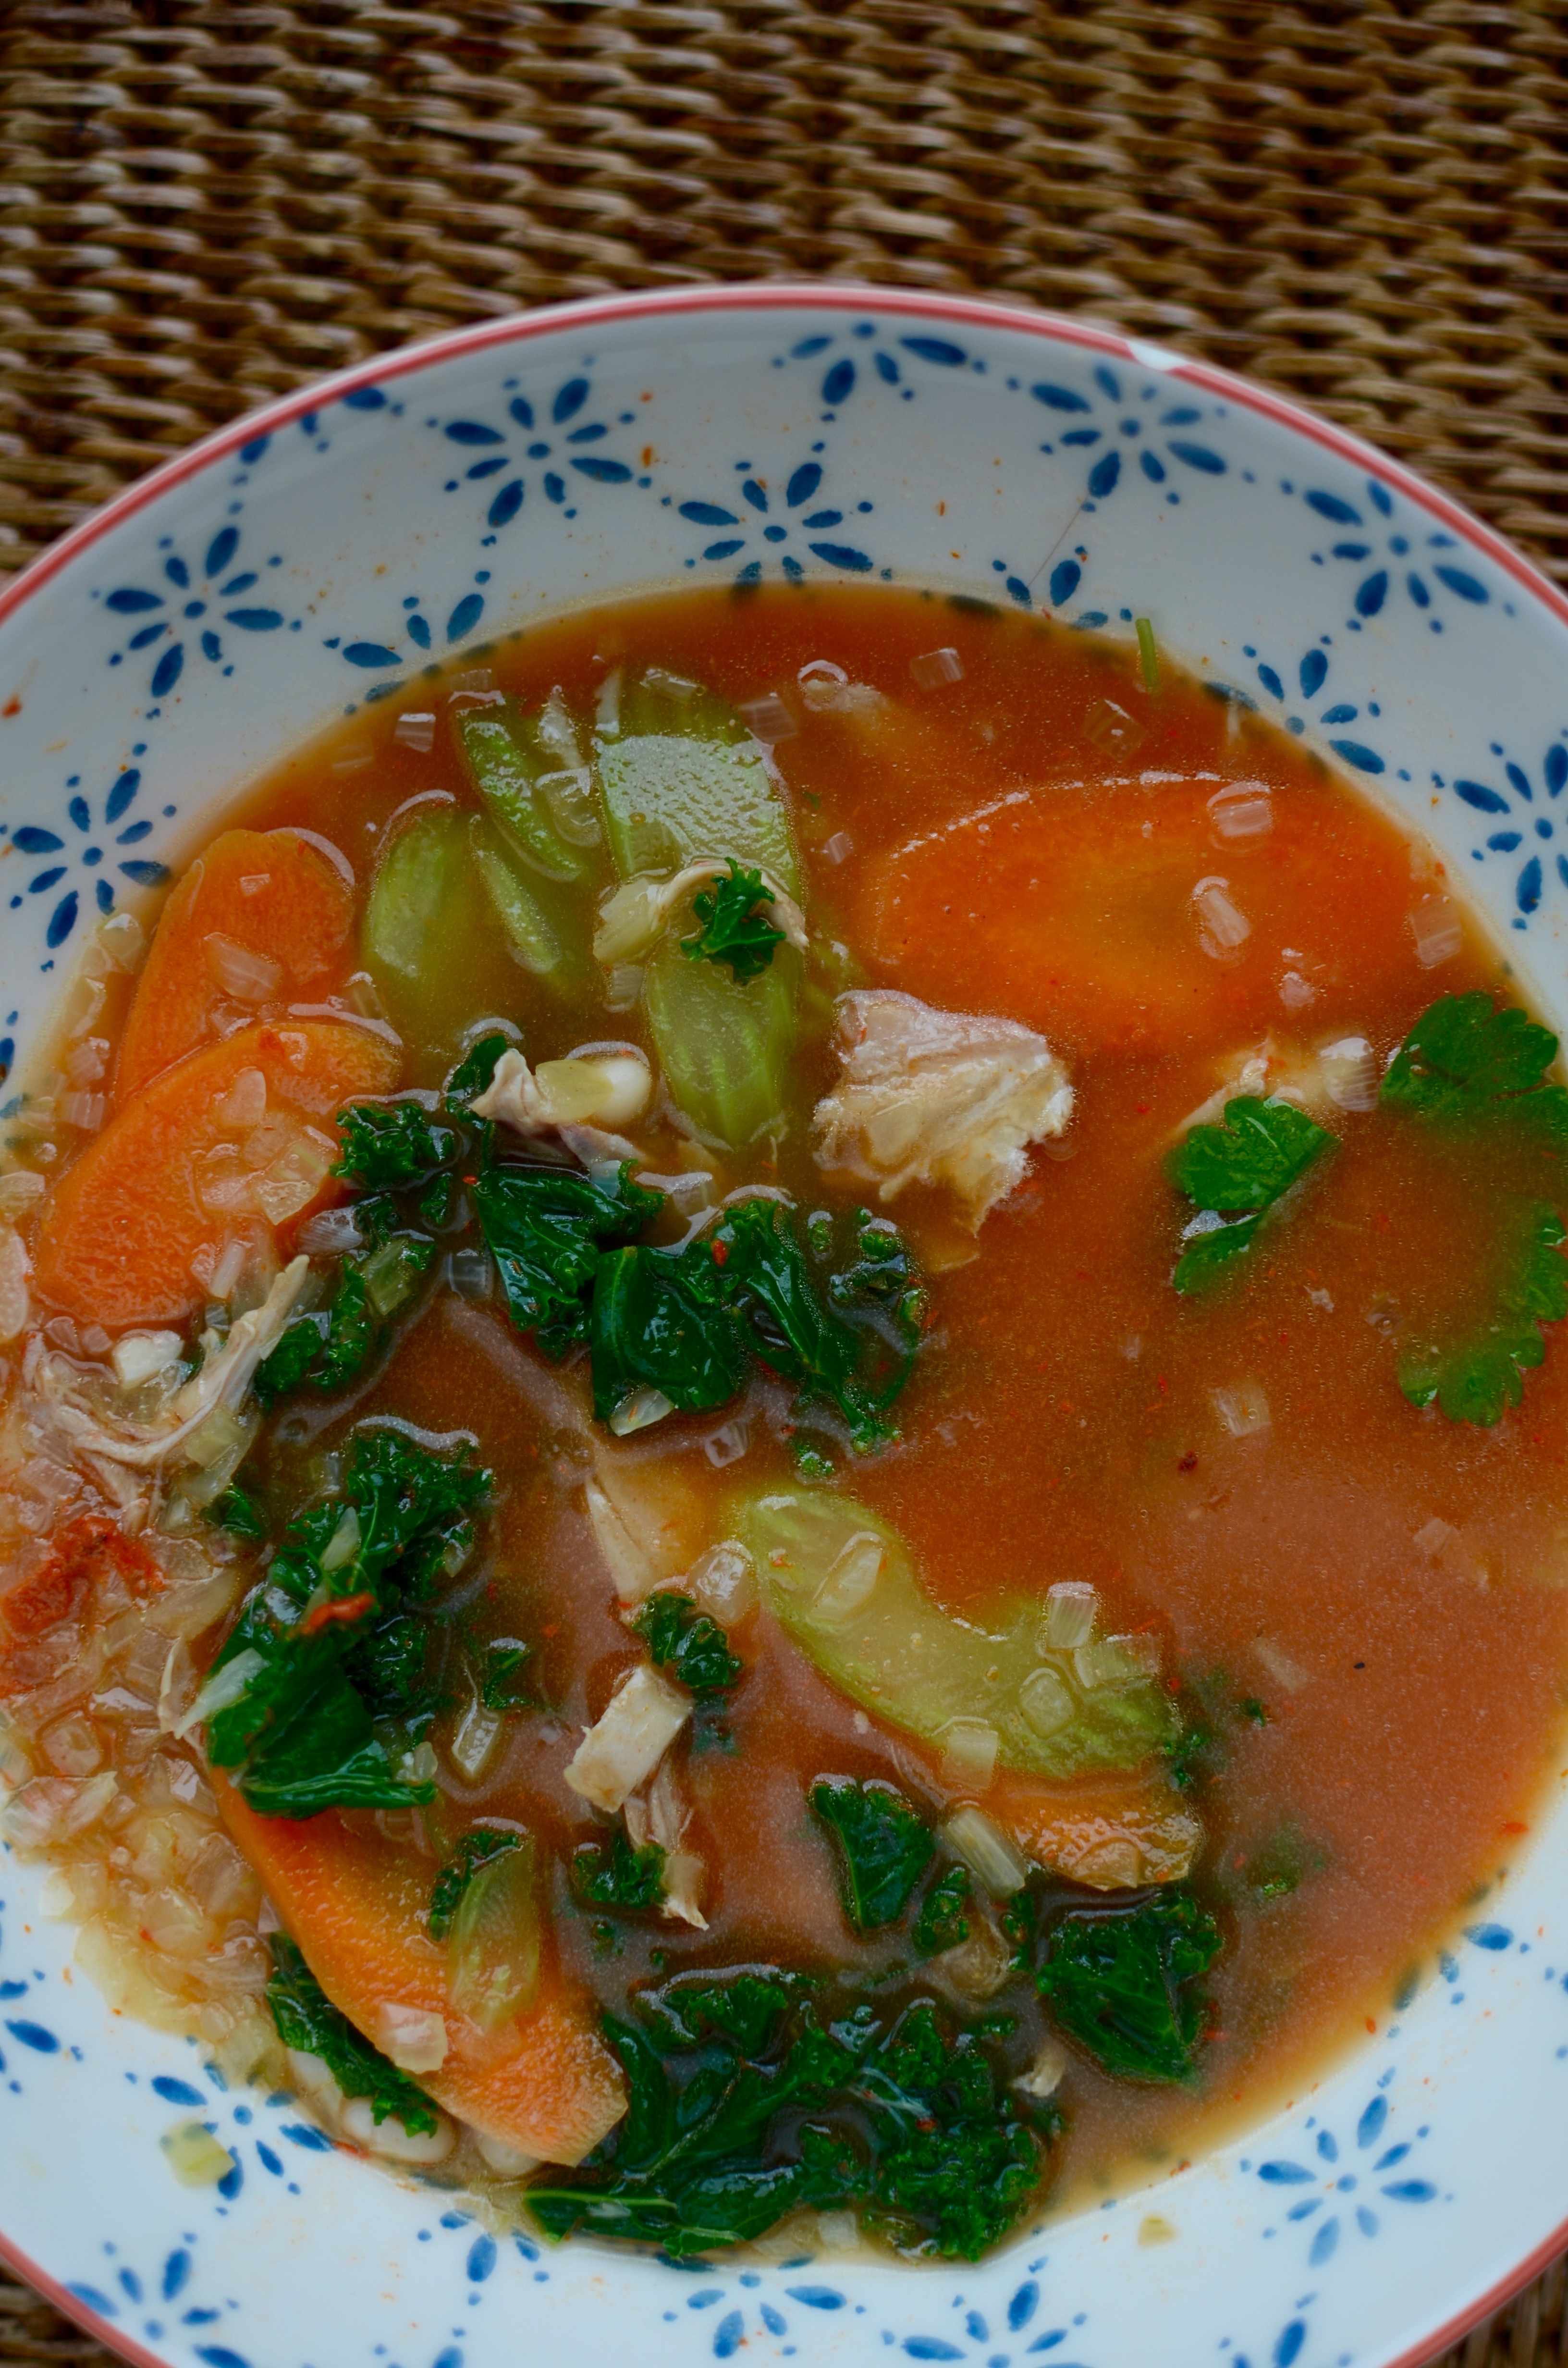
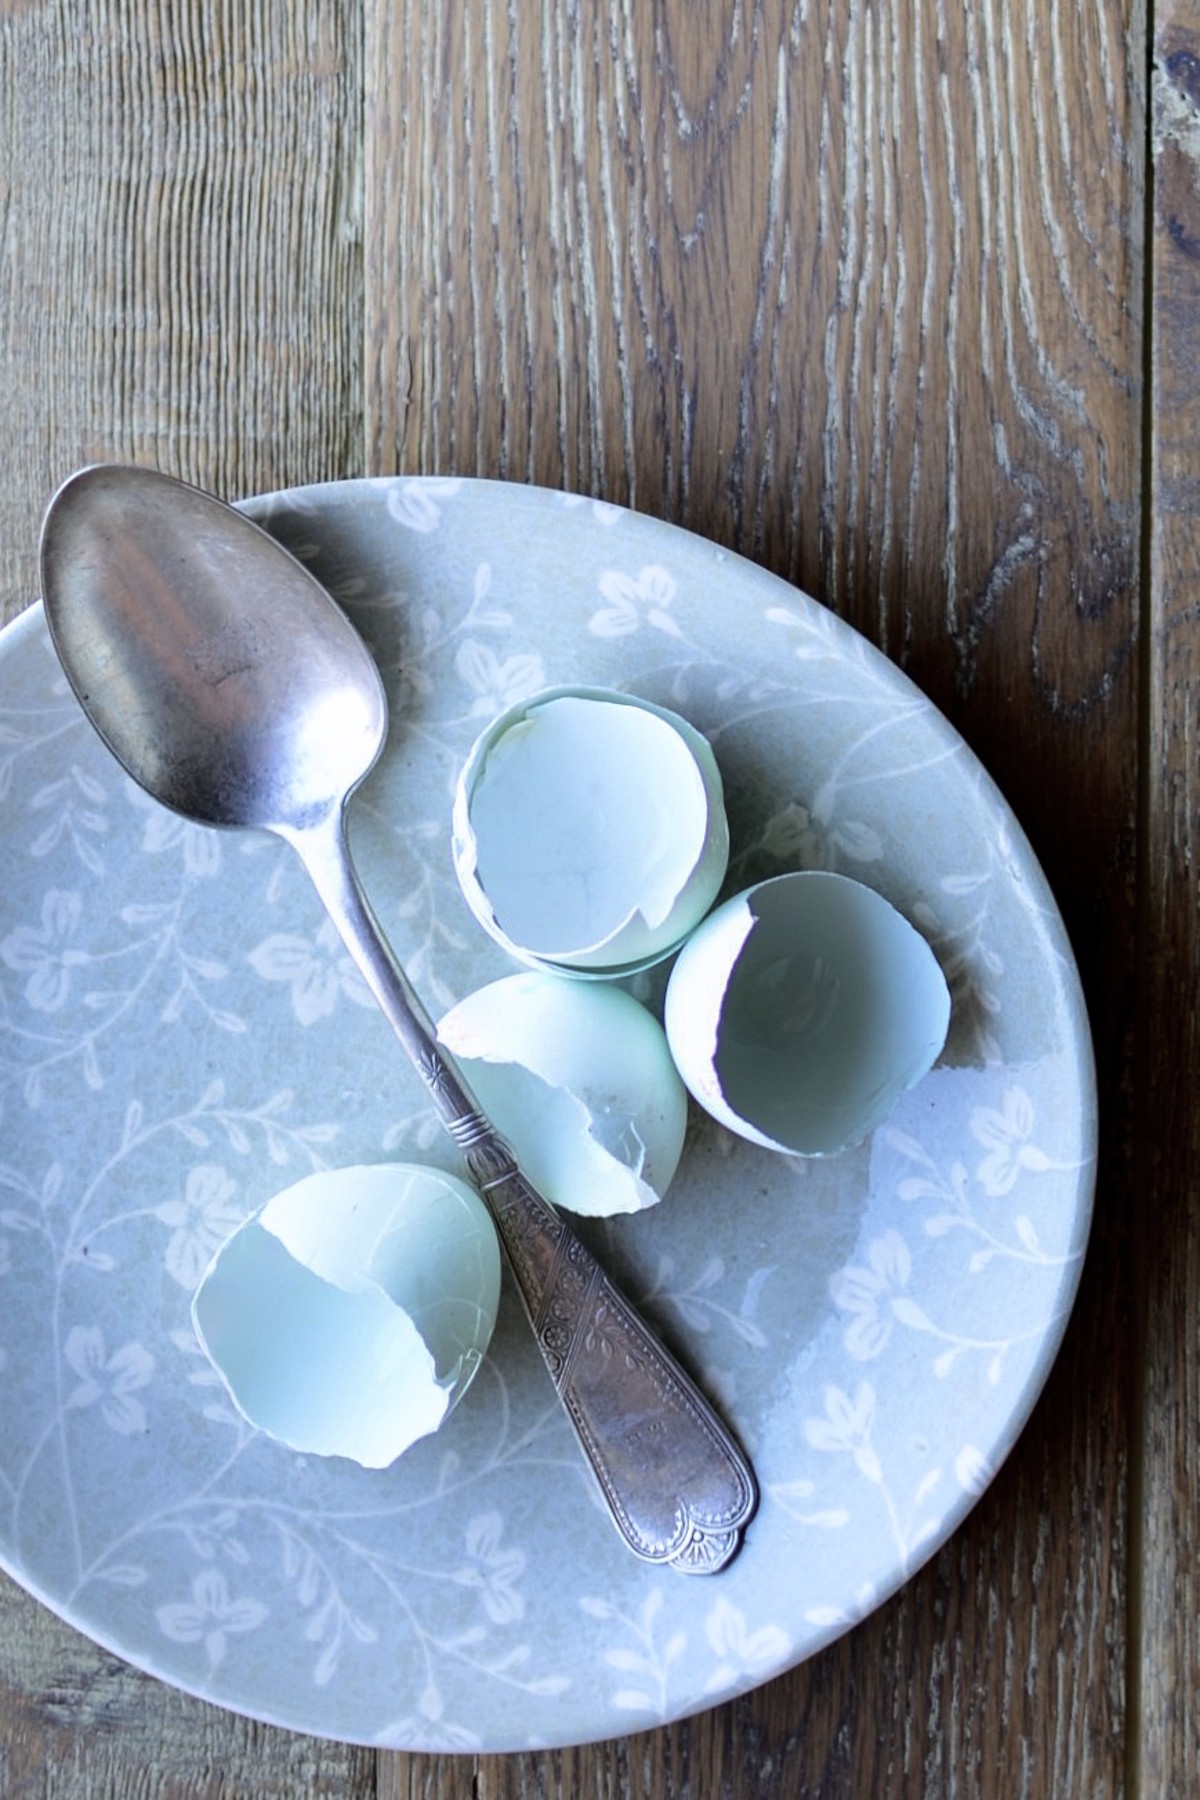
Harissa chicken soup
It suddenly got really cold. I had the privilege of spending the weekend in the Cotswolds with some girlfriends, where the icy polar wind whipped around our ears and brought tears to my eyes. All we could think of was the warm barn and lovingly cupping some warm(ing) drinks. I returned to London rejuvenated, and in the mood for soup. Not just any old soup, though – a slightly spicy chicken soup!
Serves 4
Ingredients for the spice paste (makes about 200ml)
2 red bell peppers, halved and seeds removed
1 teaspoon caraway seeds
2 teaspoons coriander seeds
2 teaspoons cumin seeds
pinch of dried chilli flakes, to taste
1/2 teaspoon sea salt
1 large or 2 small garlic cloves, peeled
1 teaspoon sweet paprika powder
50g (about 10 halves) sun-dried tomatoes marinated in olive oil
1 – 2 tsp lemon juice
Ingredients for the soup
some olive oil or coconut oil
2 small onions, peeled and finely diced
2 cloves garlic, peeled and finely sliced
bay leaf
4 medium carrots, thinly sliced
2 large celery stalks, thinly sliced
4 large handfuls shredded kale, thick stalks discarded and blanched in boiling water
1.25l good-quality chicken stock, preferably home-made using bones from pastured animals
sea salt
To serve
Parsley sprigs
Small handful shredded roast chicken per person
Cooked beans such as haricot or cannellini
Method
- For the peppers, roast cut sides up in a moderate oven (180°C/360°F) for about 1 hour, or until tender and caramelised around the edges. You could also use good quality ready-roasted red peppers from the deli counter.
- In the meantime, dry roast the seeds in a medium hot pan until fragrant. Tip into a mortar and once cooled, grind into a powder.
- Put all the ingredients for the spice paste into a blender and blend until smooth. Adjust seasoning and set aside.
- For the soup, heat the oil over a moderate heat and sweat the onions and garlic until soft. Add the bay leaf, carrots and celery, and gently cook for another few minutes until just tender.
- Add the blanched kale and the chicken stock and simmer for a few minutes.
- Adjust seasoning, and serve with shredded chicken, cooked beans and lots of spice paste.
Sweet potato loaf with apple butter
Some mornings I just need things to happen a little quicker than usual. Avocado on a slice of rye sourdough will always be a favourite, but for something different try baking this loaf the day before. It was born out of my eternal quest to incorporate more vegetables into our daily eating and the kids love it with raw lightly salted butter. As a special treat (and to keep it dairy-free), slather it with the apple coconut butter below. This gorgeous spread keeps well in the fridge for a week or so and is equally delicious stirred into hot porridge, as a topping on pancakes, or on crunchy toast.
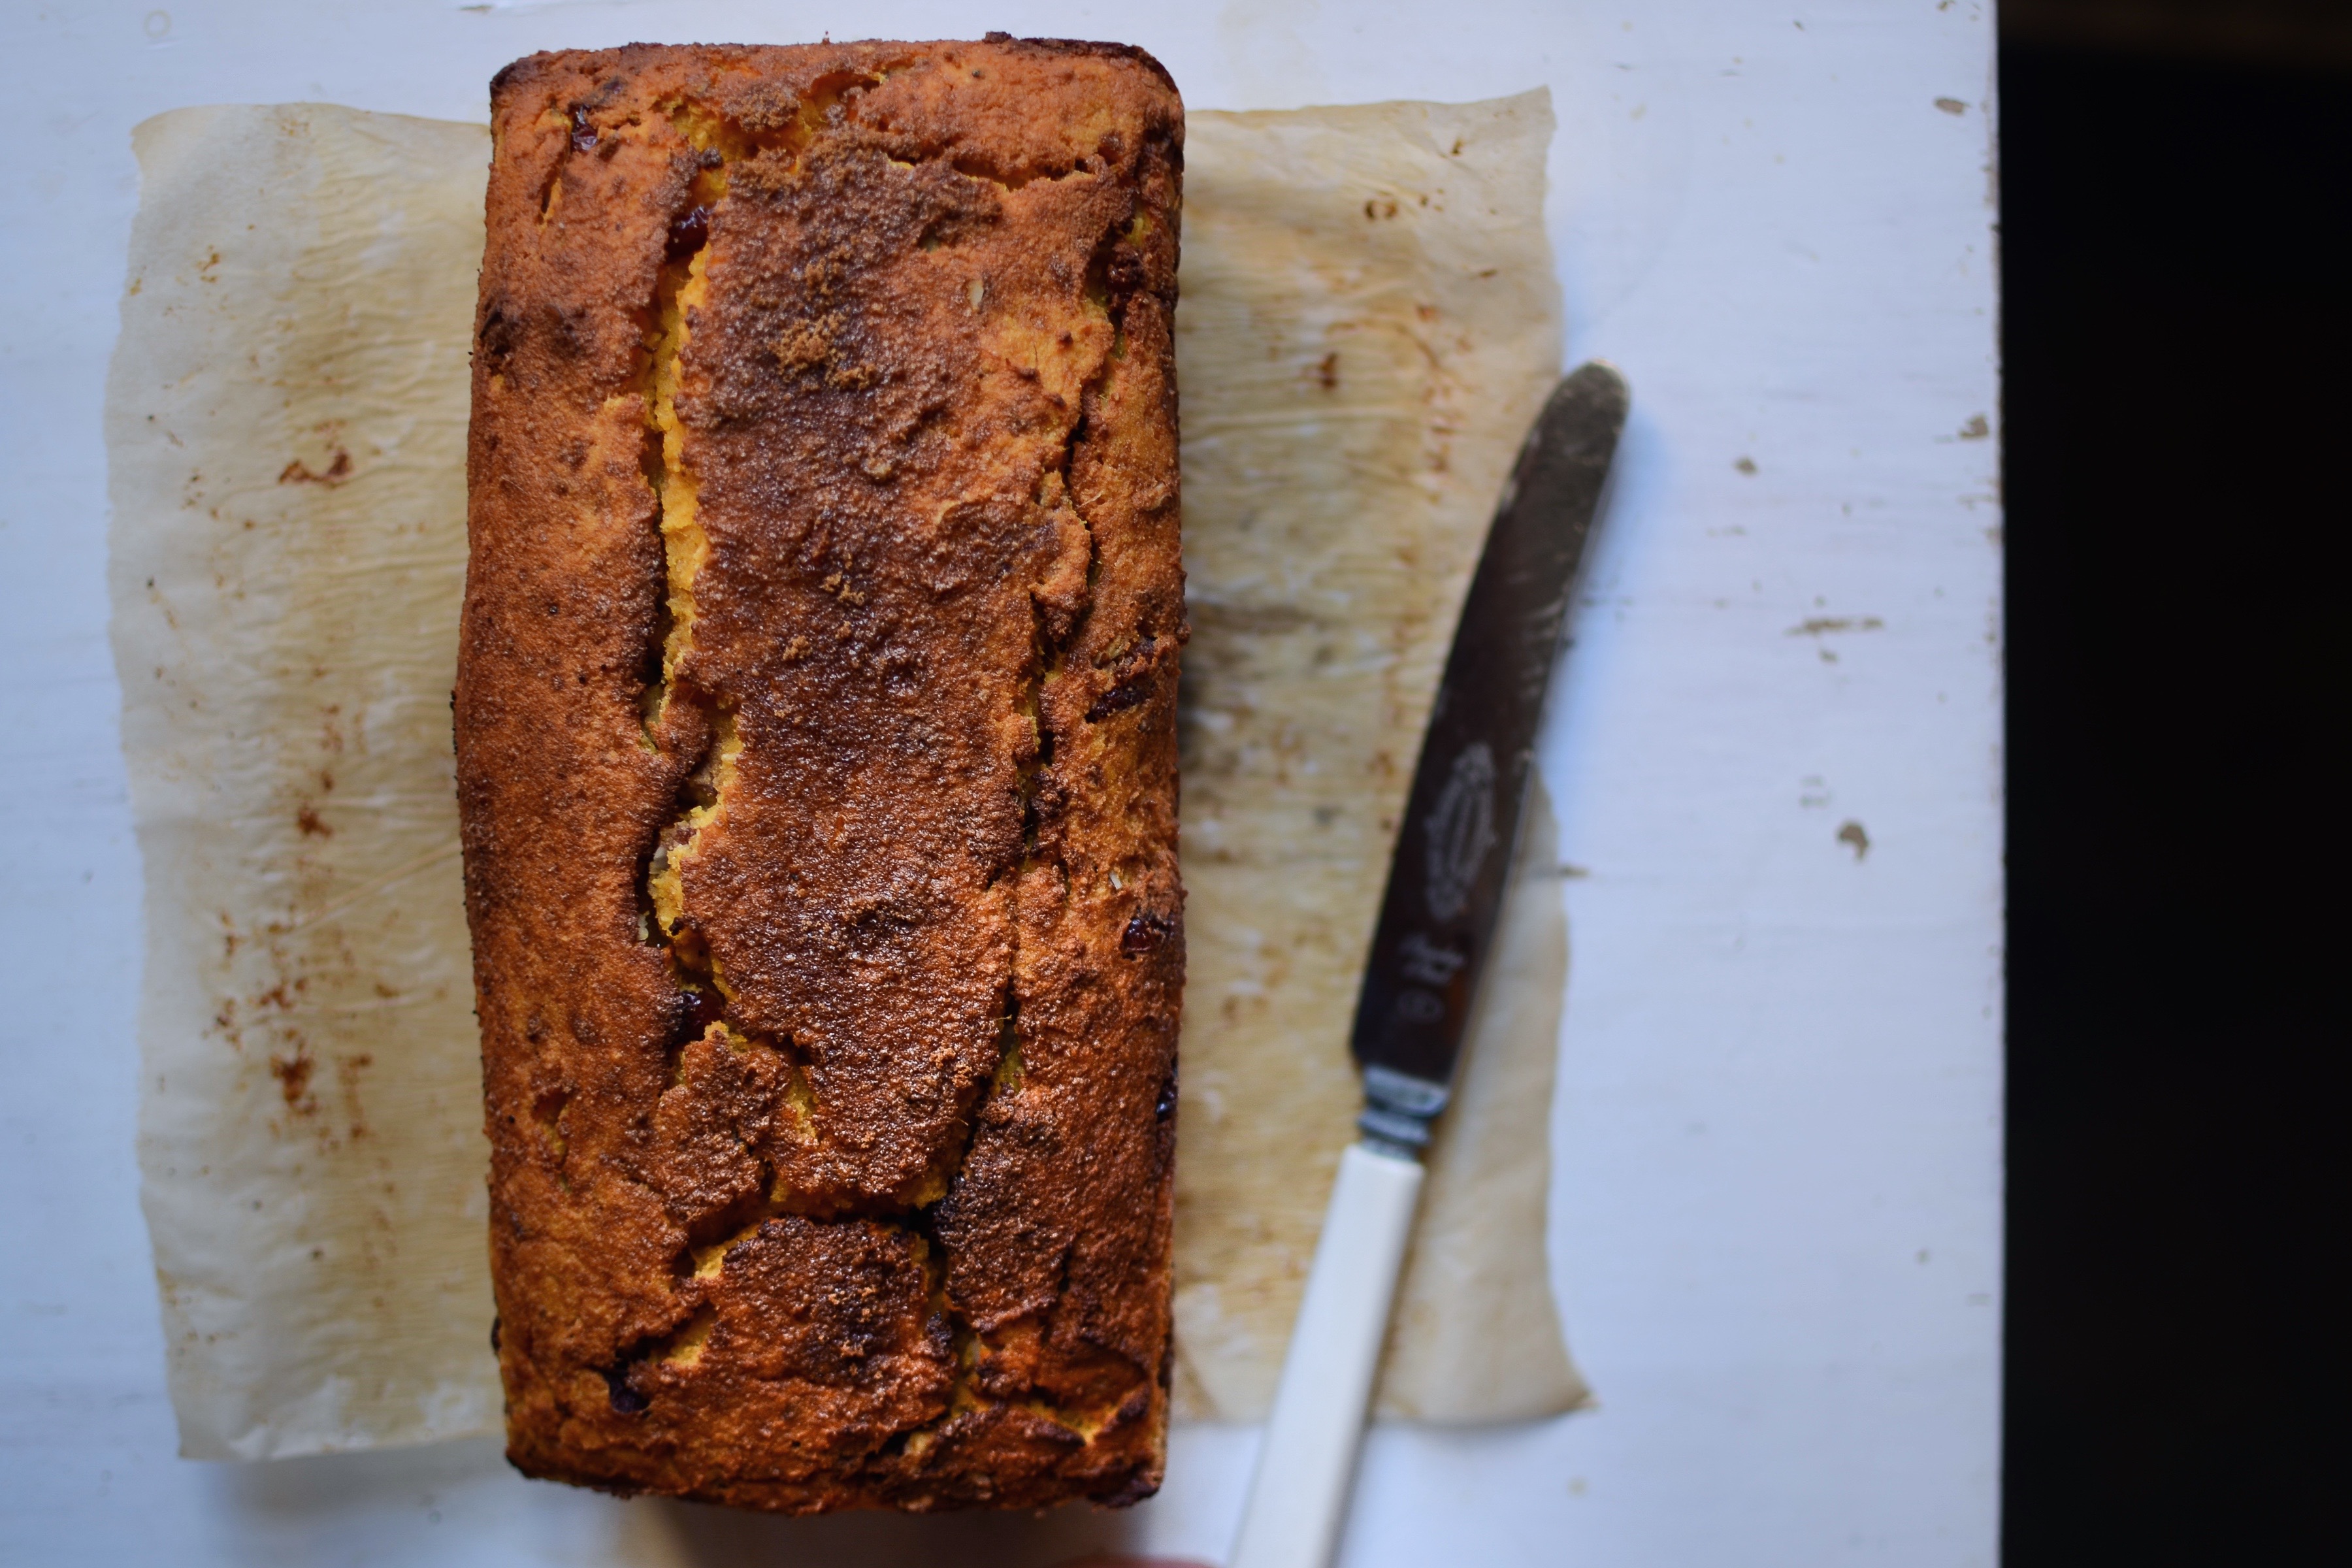
Sweet potato loaf
Ingredients
5 medium organic free range eggs, lightly beaten
520g (about 2 cups) mashed cooked sweet potato
1 1/2 teaspoons baking powder
1 teaspoon salt
100g (just over 3/4 cup) coconut flour
1 tablespoon grated fresh ginger
50g (about 1/3 cup) dried cranberries, soaked in juice from 1/2 an orange for at least 2 hours
60g (1/2 cup) pecan nuts, roughly chopped
some coconut sugar to sprinkle over, optional
Method
- Preheat the oven to 180°C / 350°F (or 160°C in a fan oven).
- Grease a medium sized loaf tin and line with parchment paper, allowing the paper to overhang on the long sides.
- Beat together the mashed sweet potato and the eggs until smooth, light and fluffy.
- Sift in the baking powder, add the salt, coconut flour and grated ginger, and mix well.
- Stir in the soaked and softened cranberries, any remaining orange juice and chopped nuts.
- Let the batter sit for 10 minutes to give the coconut flour time to absorb the liquids.
- Pour the batter into the prepared tin, sprinkle over a little coconut palm sugar if using, and bake for 50 minutes or until the top begins to brown and a toothpick inserted in the centre of the bread comes out clean.
- Remove from the oven and allow to cool completely before slicing. Store covered for a couple of days at room temperature or in the fridge for several days. You could also freeze it. Like most gluten-free breads, it is quite fragile and can’t really be slotted into a toaster, but I do sometimes toast it in a medium hot pan in some butter or coconut oil.
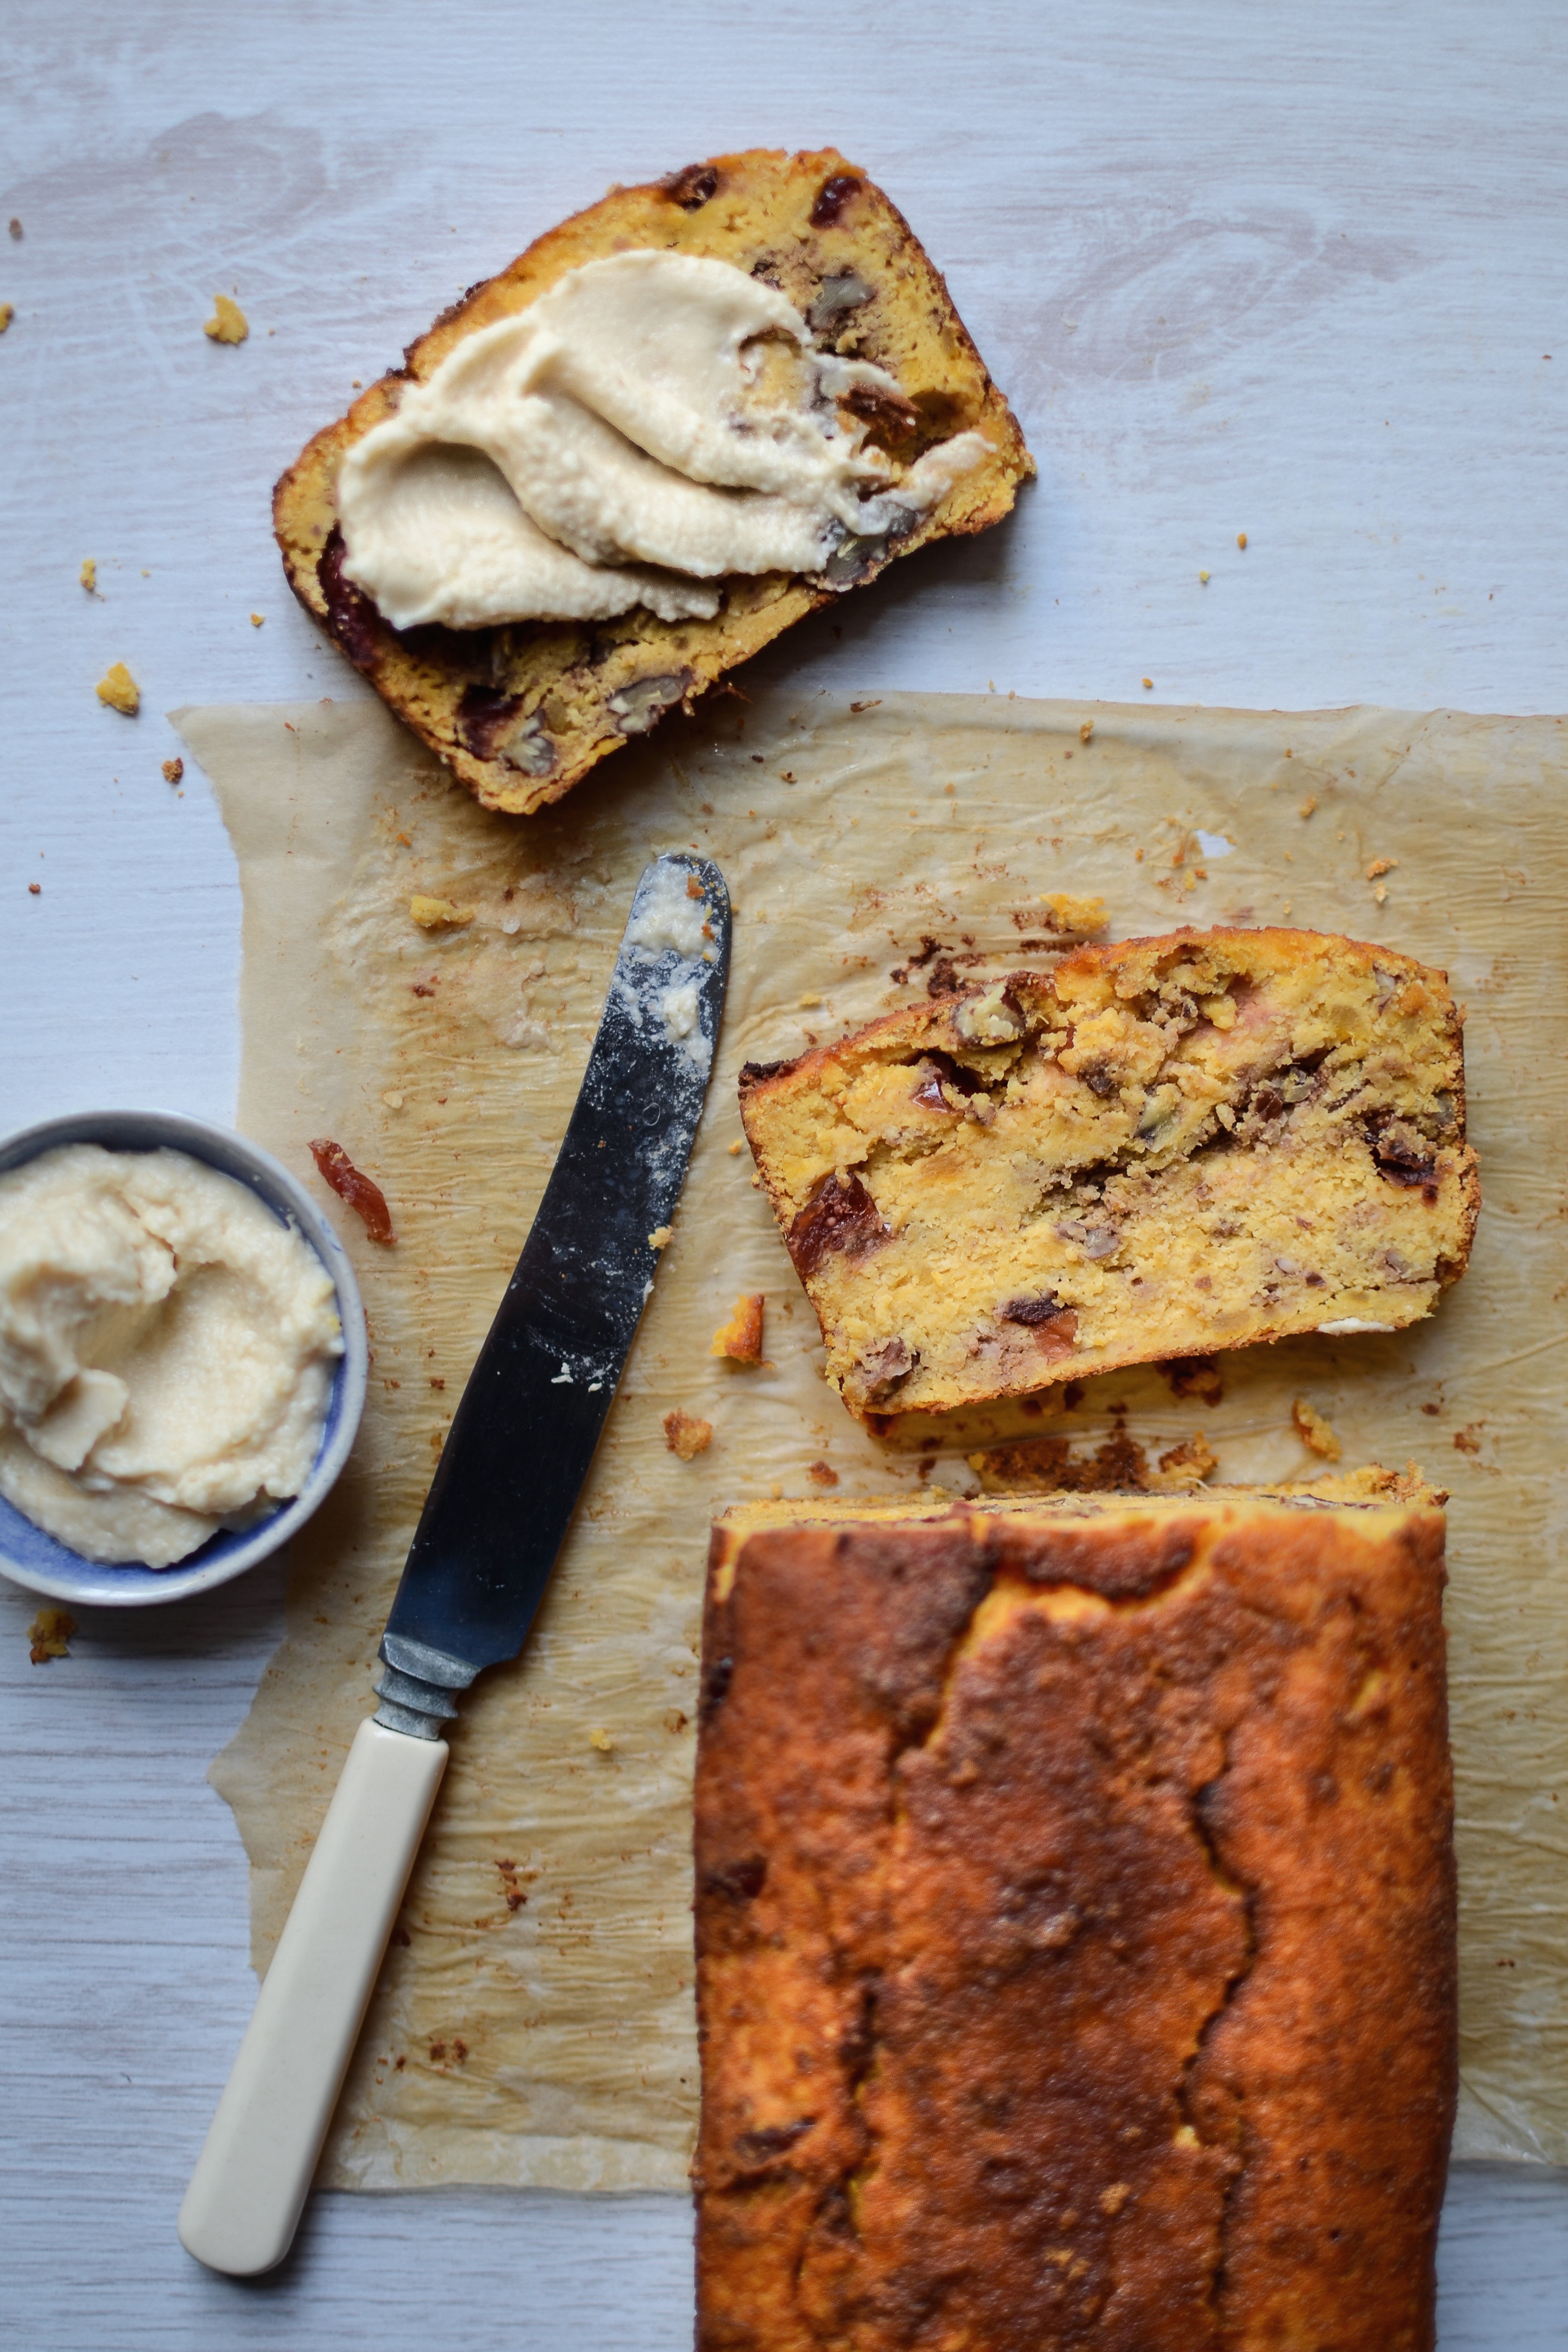
Apple and coconut butter
This will only really work if you have a high-speed blender, as the coconut butter is quite solid in anything other than very hot weather and you will end up with a lumpy mess. But if you don’t own one, try gently heating the coconut butter and then stirring in the apple sauce. It won’t be as spreadable, but still pretty darn delicious as a topping.
Ingredients
160ml (2/3 cups) home-made or store-bought apple sauce
70g coconut butter (also called coconut manna or creamed coconut) at room temperature
squeeze of lemon juice
Method
- Pour the apple sauce into the blender, then cut the coconut butter into small chunks and add. If the fat has separated and formed a layer on top of the more crumbly coconut component, make sure you include some of the fat when adding to the apple sauce.
- Blend until smooth. Scrape down the sides once or twice.
- Add lemon juice to taste, blending in between additions.

Gigante beans on toast
This is hands down one of my favourite brunch dishes! If you have cooked butter (gigante) beans handy – I usually have portions of cooked beans in the freezer – this is a cinch to make. Enjoy either on its own with a side of crunchy greens, or with a crispy fried egg.

Ingredients
1 small’ish red onion
large pinch of sea salt
pinch of dried chilli flakes, depending on your heat tolerance
1 teaspoon smoked paprika powder
1 tablespoon fresh thyme leaves
250g cherry tomatoes, halved
250ml chopped tomatoes with the juices (either use half a 400g can of tomatoes or chop fresh ones)
a few large spoonfuls of cooked beans
Method
- Gently sweat the onion in some olive oil or butter with the salt, chilli flakes and paprika.
- Add the thyme leaves and cherry tomatoes and cook over a medium heat until the tomatoes have softened.
- Add the chopped tomatoes and cook until the juices have reduced and thickened.
- Stir in the cooked butter beans and serve as soon as they are heated through.
Stuffed heirloom tomatoes
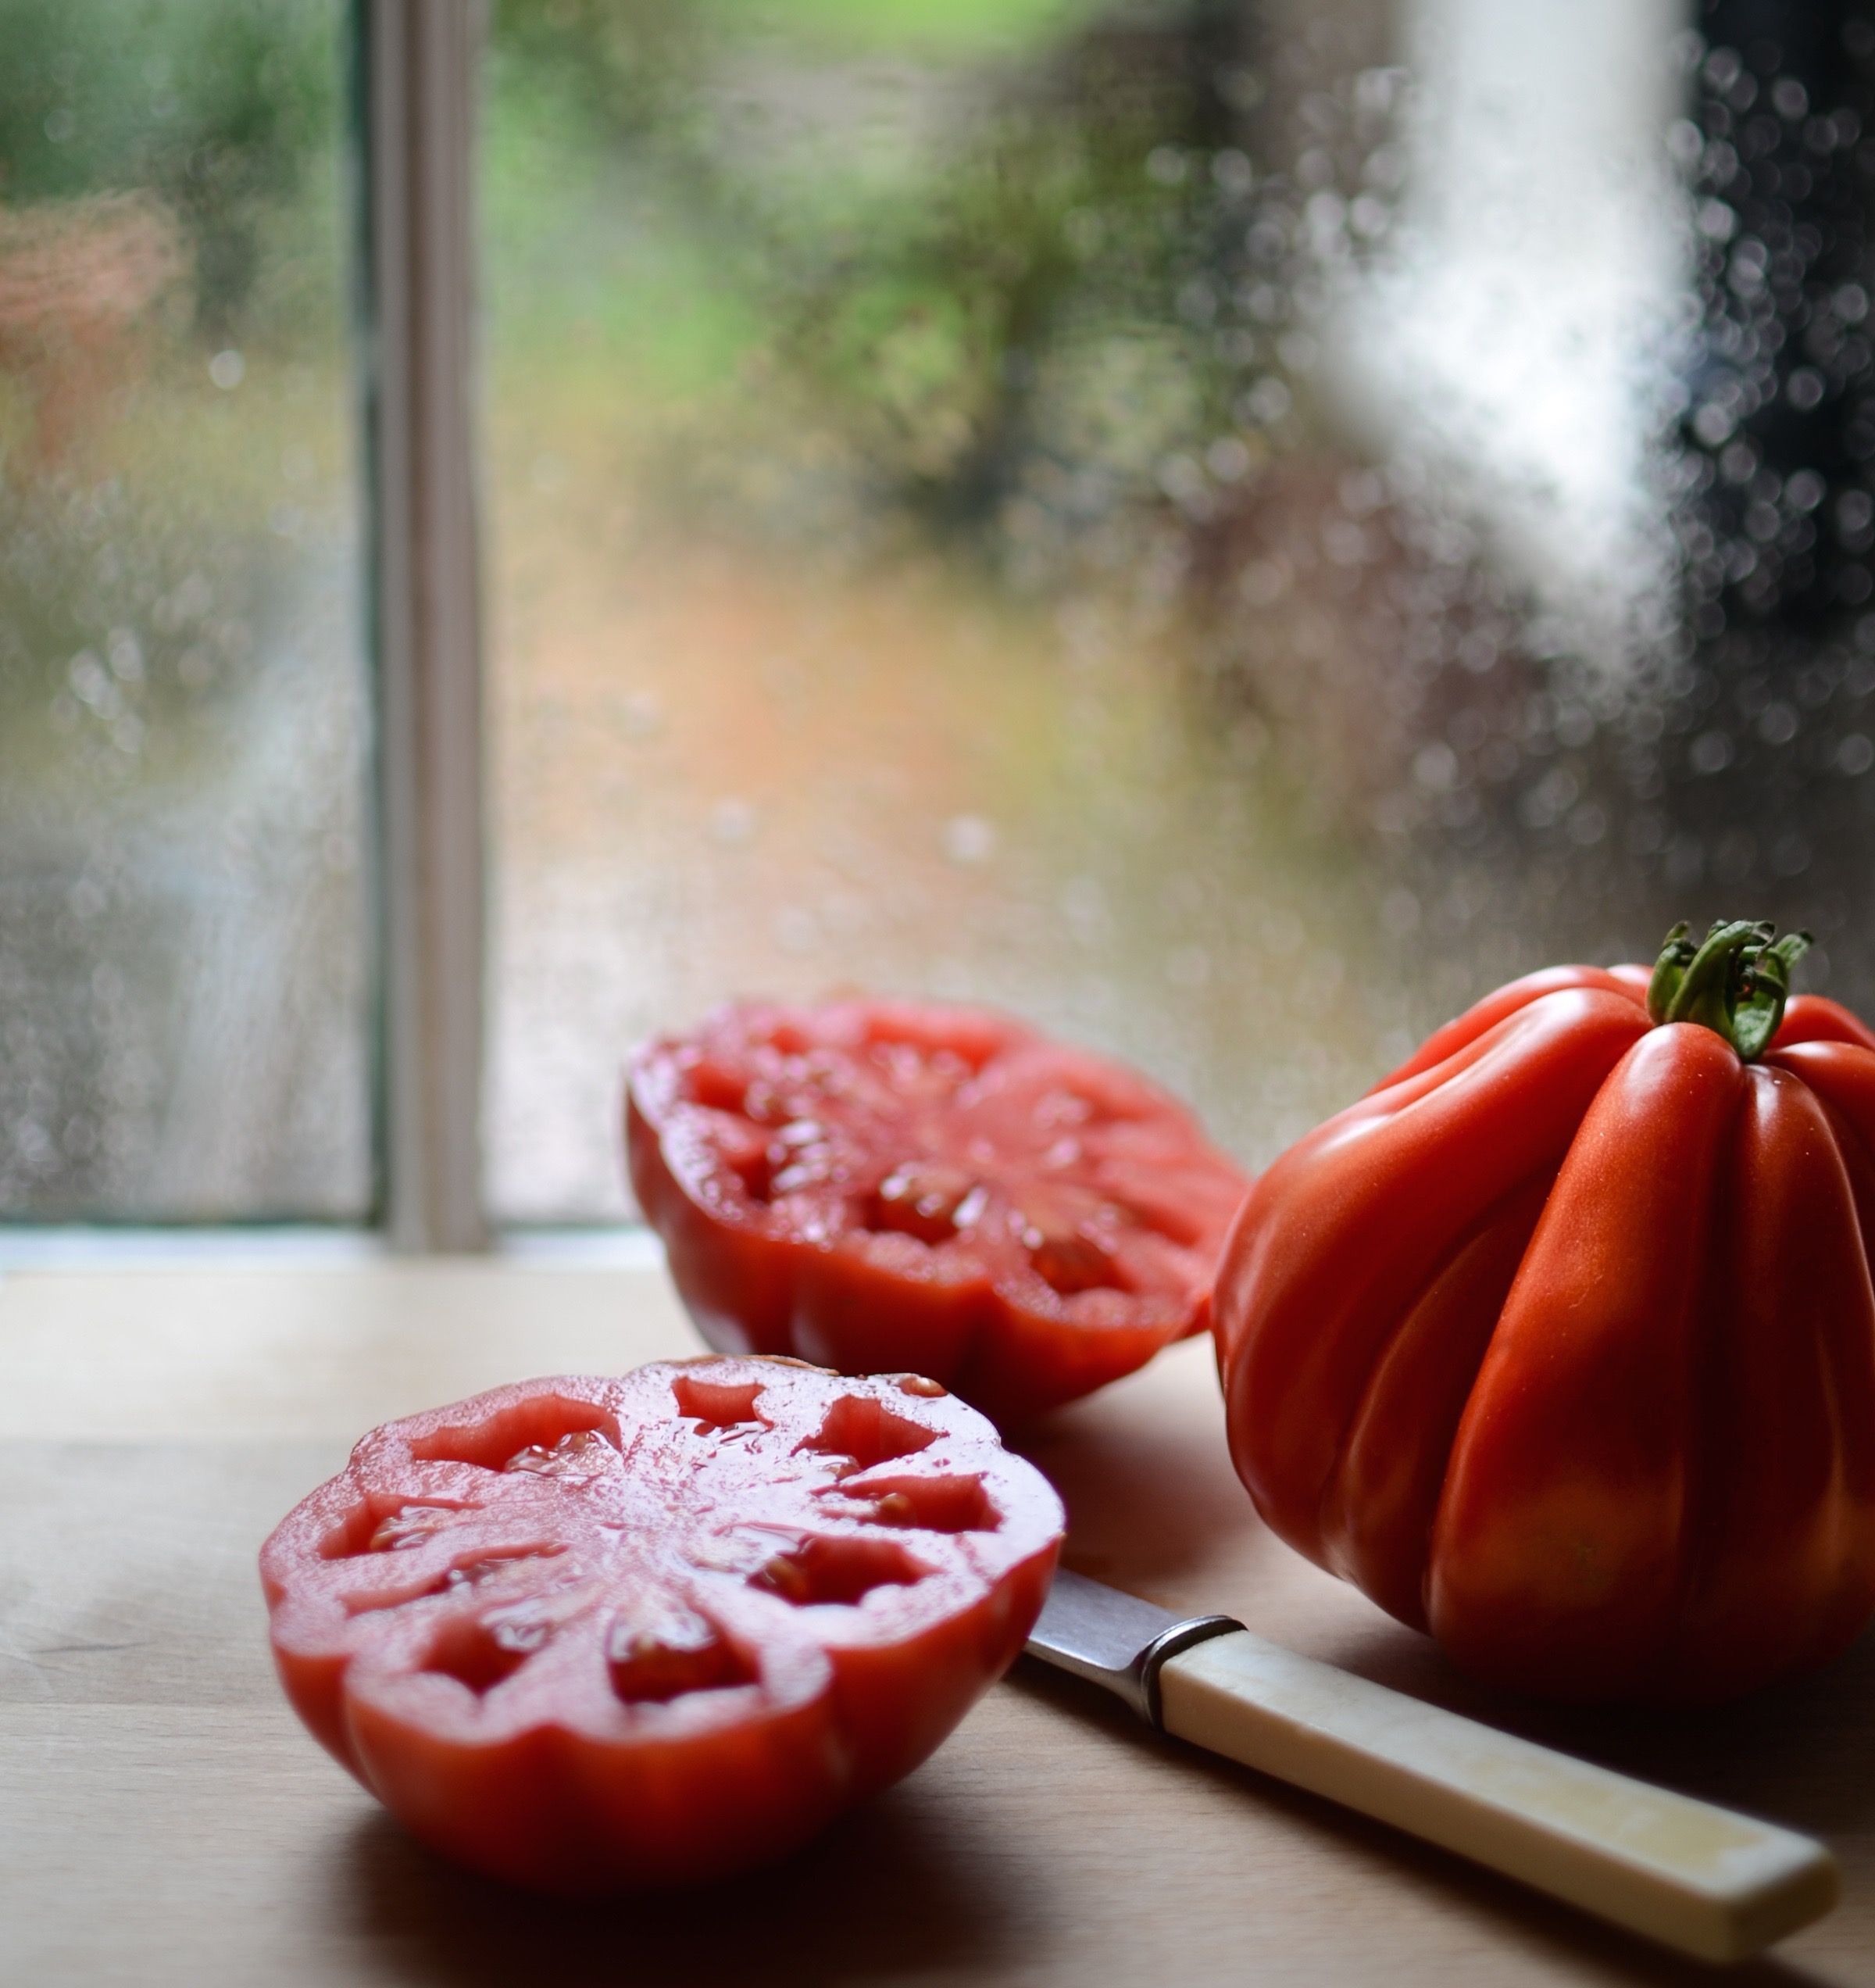
Do you often have a bite of a tomato and wonder why you even bother buying them? Although beautifully uniform and bright red, commercial tomato varieties often lack taste.
One of the reasons for this was the move by tomato growers in the 1930’s towards tomato mutations with a “uniform ripening” gene, which ensured the fruits would ripen evenly from stem to tip, without leaving a harder, green part around the stem, deemed undesirable by consumers at the time. Unfortunately this mutation has a side-effect: by disabling the gene that creates the darker green colour around the stem, the chlorophyll (or chloroplasts), which converts sunlight into sugars for the plant, is removed, leading to a less sweet and tasty fruit. Thankfully some families and growers have passed the seeds from older varieties down from generation to generation because of their valued characteristics and taste. These heirloom varieties – now available at most markets – are usually much more tasty, albeit a little more expensive.
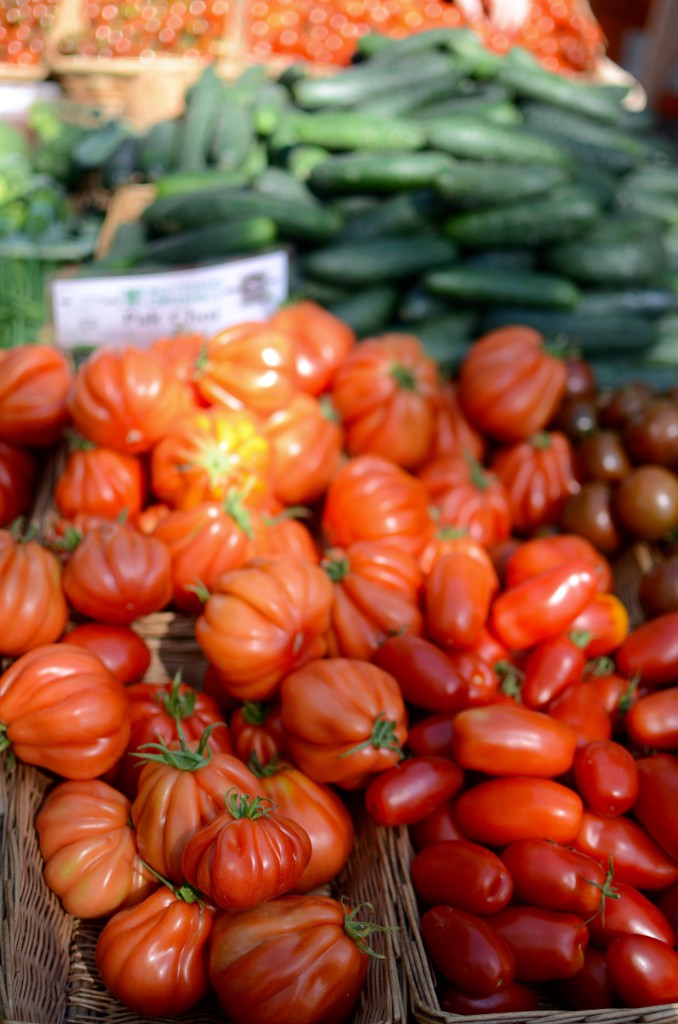 We’ve had a few very wet days lately, which meant the wonderful summer produce I bought at the market over the weekend had to find a rather more wintry purpose. I’ve always loved roasted tomatoes, but stuffing these beauties elevates them to the most perfect light meal imaginable.

 If you cannot find heirloom tomatoes for this recipe, use 4 large regular tomatoes. For the oven-roasted cherry tomatoes, cut 2 punnets of cherry tomatoes in half, toss in red wine vinegar and olive oil, season with salt and pepper, then roast cut sides up in a medium hot oven until caramelised (about 1 – 2 hours). I usually have a jar of these in my fridge, but you could also replace them with 60g of finely sliced marinated sun-dried tomatoes and increase the amount of rice slightly. Use the scooped out tomato flesh in your next batch of tomato soup or sauce, or blend with a pinch of salt and strain through a muslin cloth to make the most delicious tomato broth.
Serves 4
Ingredients
2 heirloom beef tomatoes (about 800g), cut in half horizontally and flesh scooped out carefully
Ingredients for the filling
extra virgin olive oil
1/2 large red onion, finely diced (about 1/2 cup)
1 stalk celery, finely diced
1 teaspoon sea salt
1 teaspoon mixed dried herbs (parsley, basil, tarragon, oregano etc.)
125g oven-roasted cherry tomatoes (about 1/2 cup firmly packed)
85g (1/2 cup) cooked brown long-grain rice
1 – 2 teaspoons lemon juice
100g tin sardines in brine or olive oil, drained and broken up slightly with a fork
3 tablespoons finely chopped parsley and dill
150g fresh ricotta cheese, preferably made with unpasteurised milk from grass-fed animals
Method
- Pre-heat the oven to 180°C/360°F.
- Heat a glug of olive oil in a saucepan over a medium heat. Add the onion, celery, salt and dried herbs, and cook until softened (about 5 to 10 minutes).
- Now mix together all the ingredients for the filling, except the ricotta, and allow to cool.
- Fold the ricotta into the filling briefly, leaving it in tact as much as possible.
- Spoon the filling into the tomato halves, place into an ovenproof dish that fits them snugly and bake at 180°C/360°F for about 30 to 40 minutes (or until the tomatoes are very tender). If the filling is starting to get too brown after about 20 minutes, cover with foil.
- Serve with a crisp green salad and green beans, or on toasted sourdough.

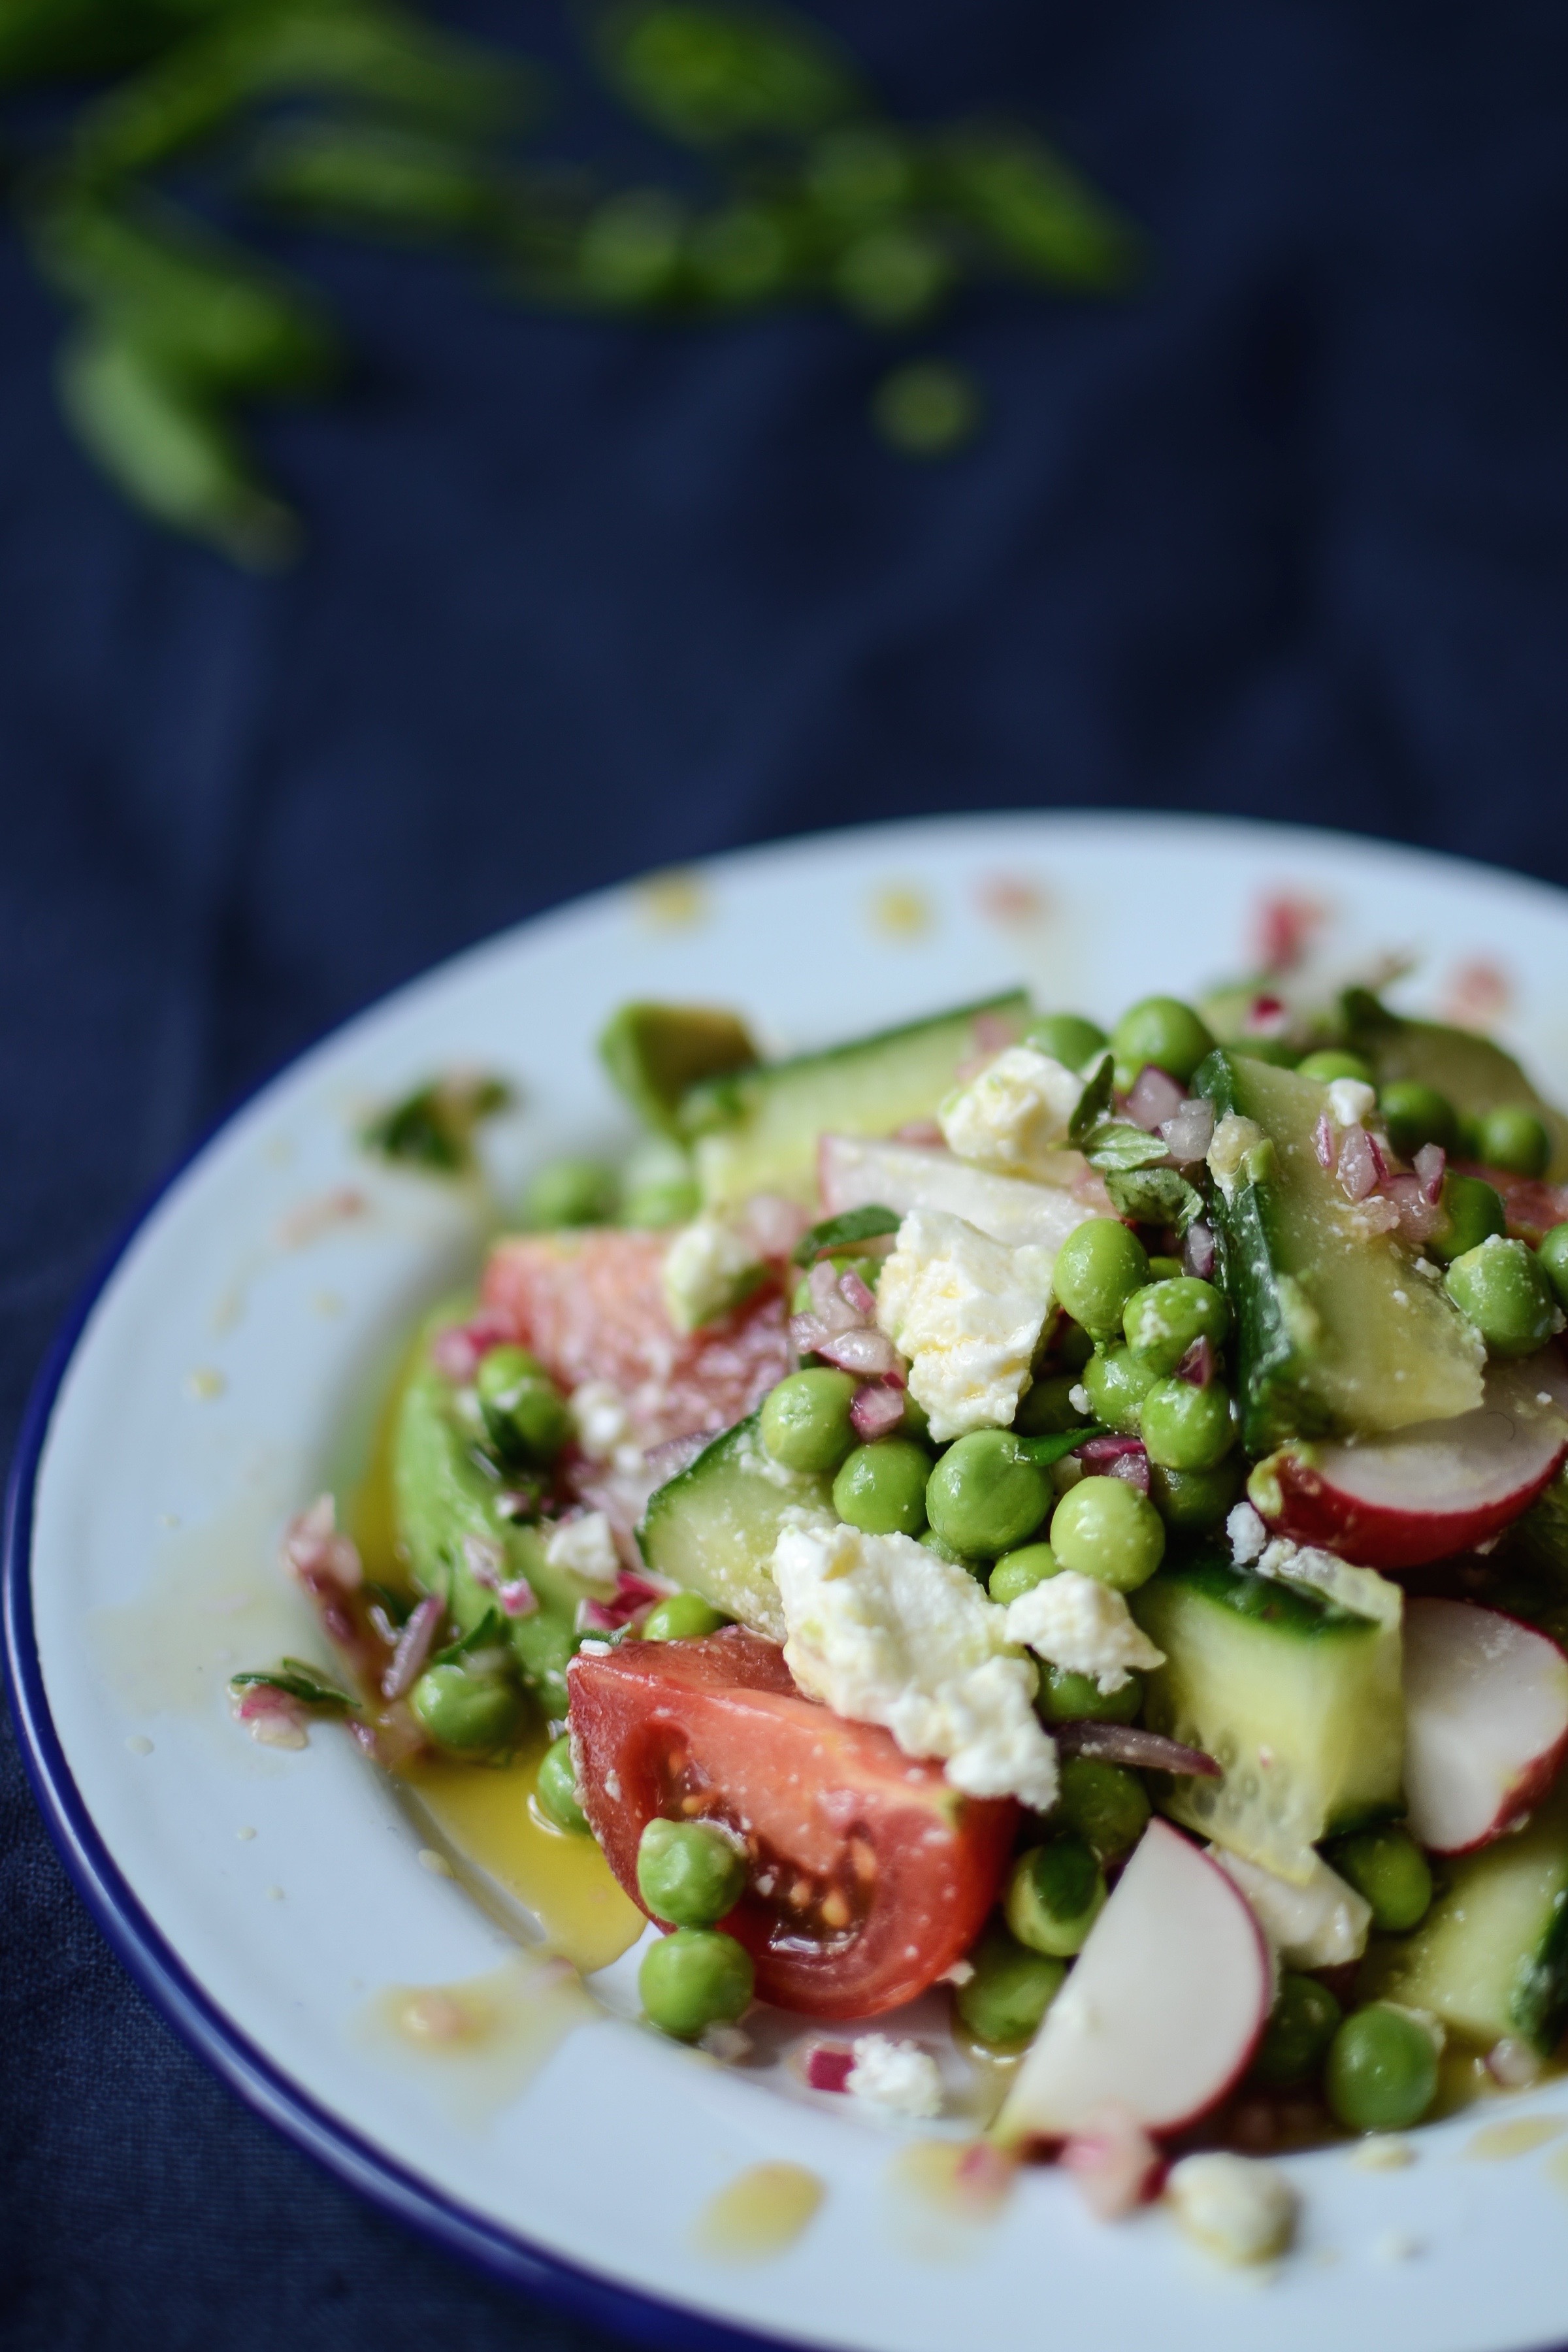
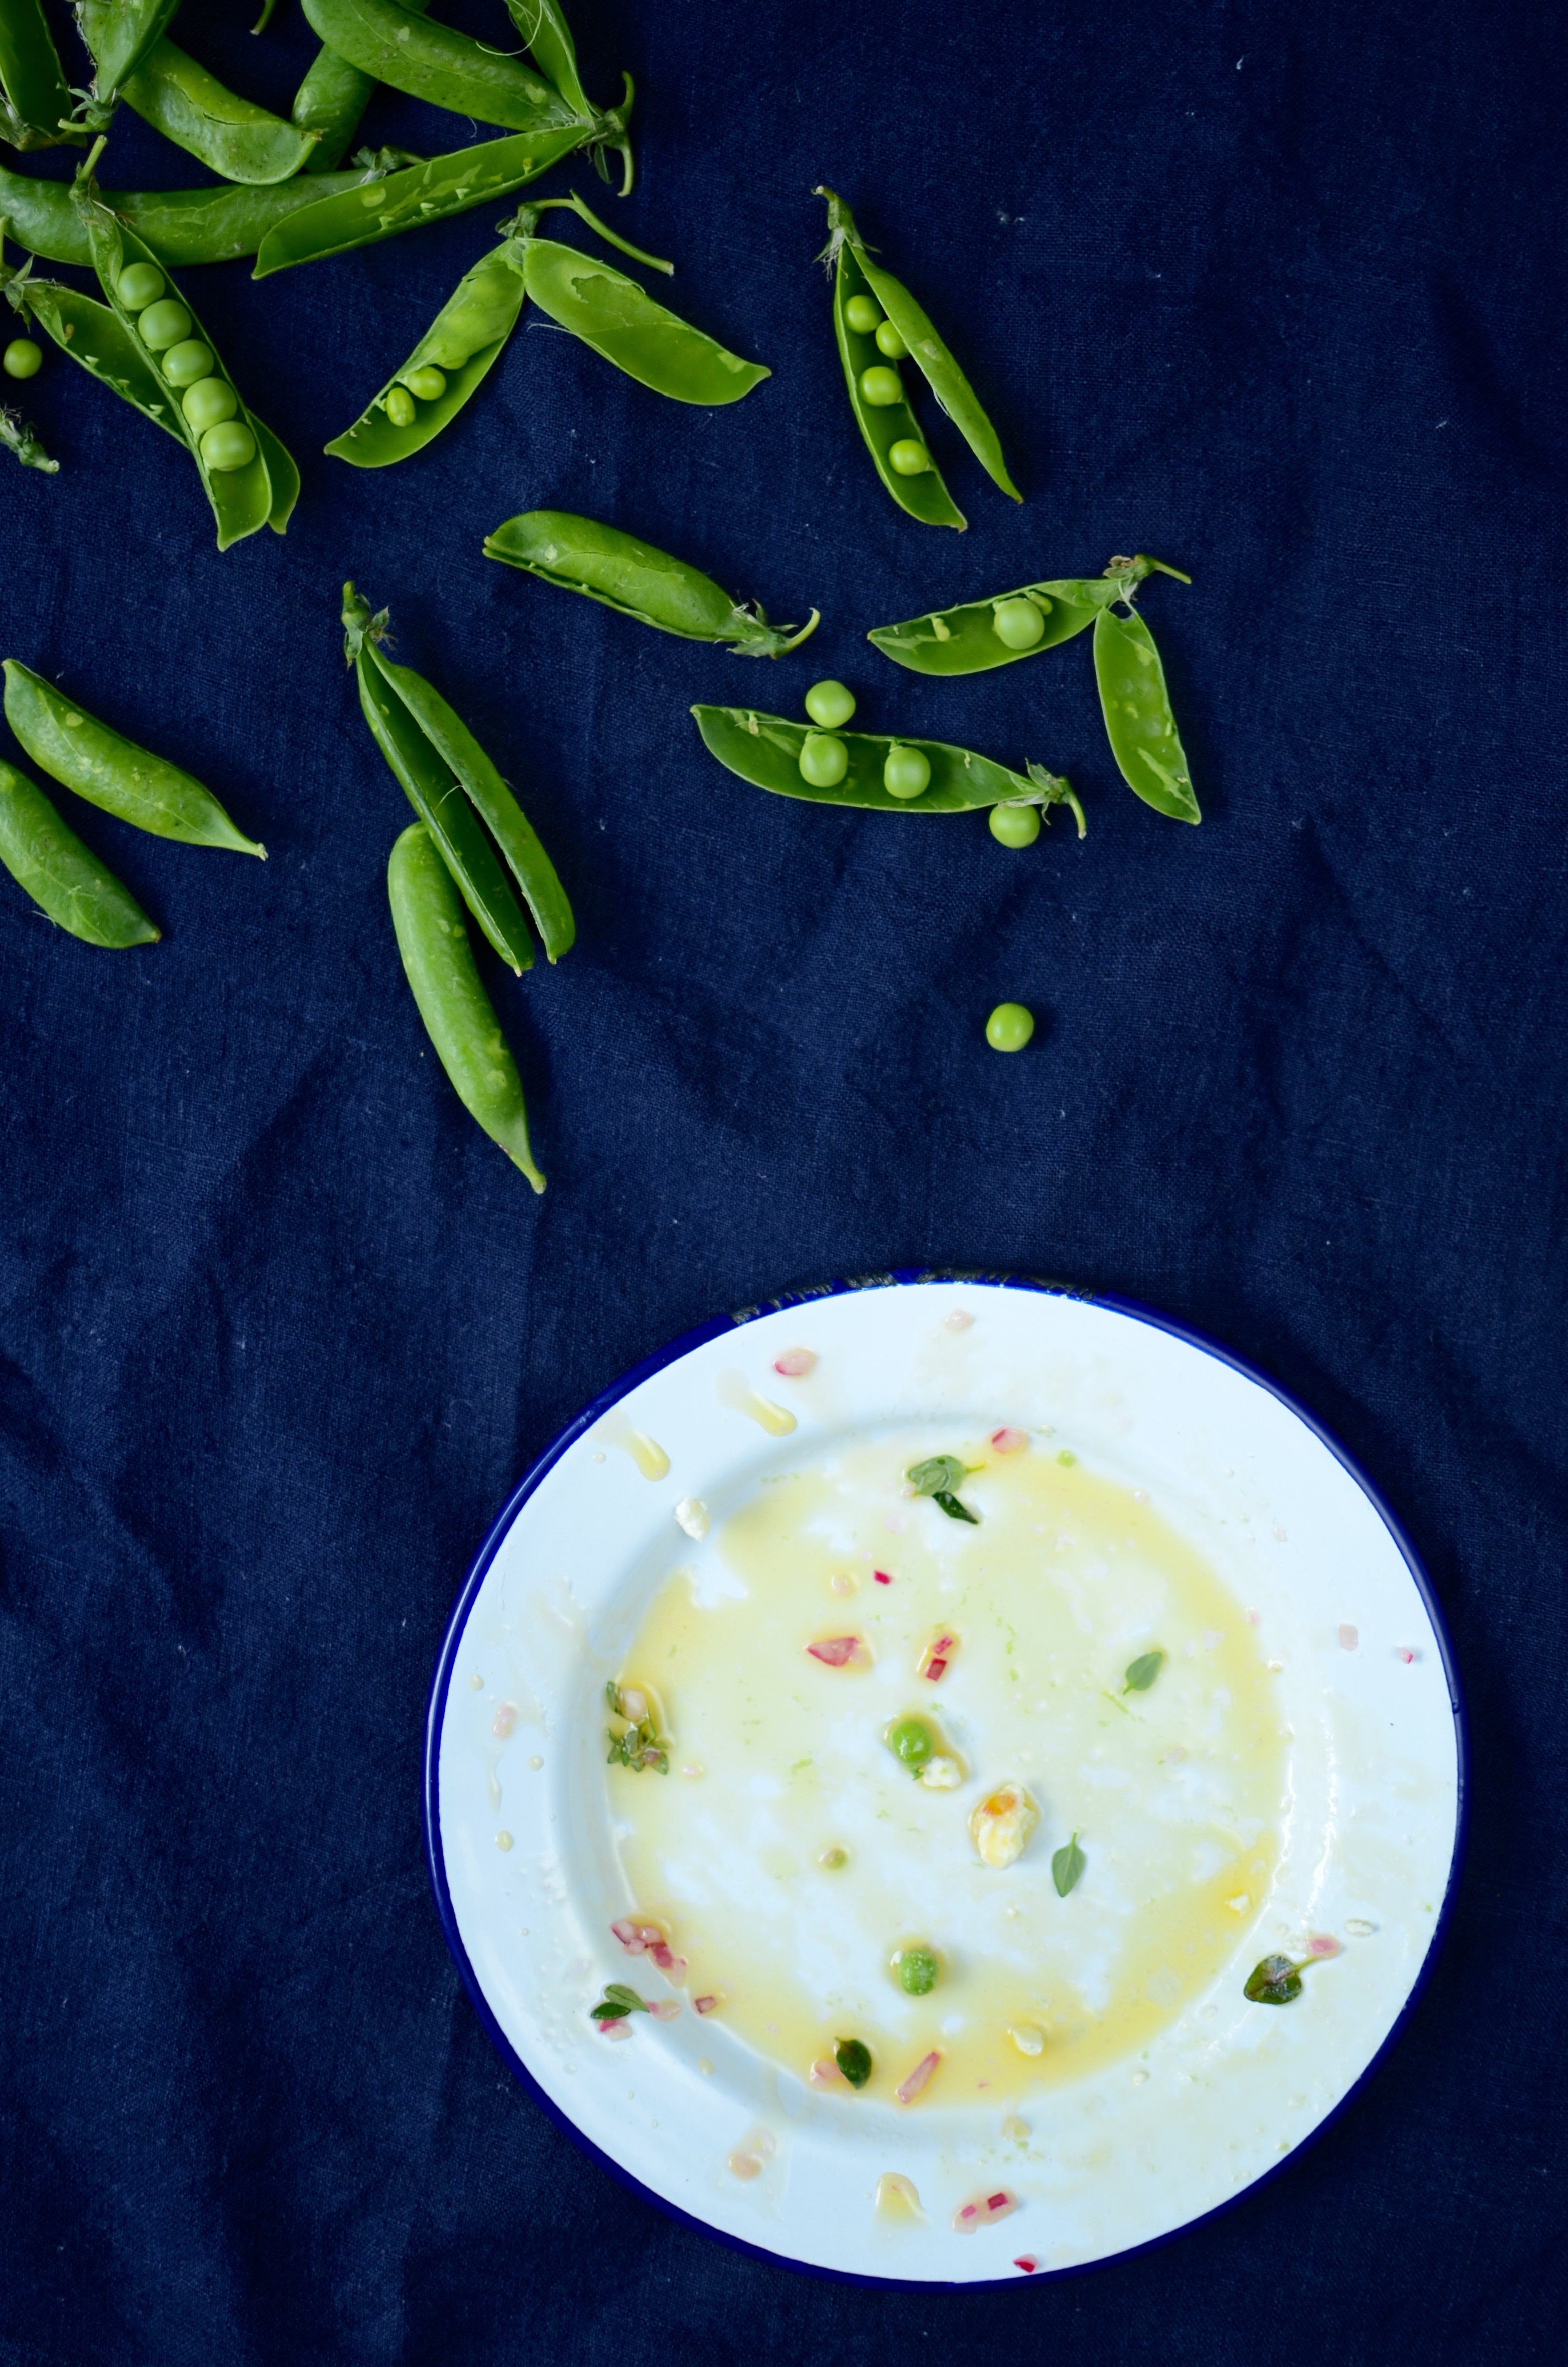
Freshly podded pea salad
There is nothing quite like freshly podded peas in the early summer months. They are sweet, crunchy and utterly delightful. My little ones adore the process of shelling the peas and then popping them in their mouths, one by one. But don’t let the taste and sensory delight be the only reason you add these tiny gems to your meals. Green peas are rich in protein, fibre, vitamins A, B, C, E & K, and anti-oxidants. They also contain a number of anti-inflammatory phytonutrients not found anywhere else. Later in the season the peas become bigger and starchier, so no longer ideal as a raw snack, but still a wonderfully tasty and nutritious ingredient in many cooked dishes such as minestrone or wilted lettuce.
Serves 2 – 4
Ingredients for the dressing
15ml (1 tablespoon) red wine vinegar
45ml (3 tablespoons) extra virgin olive oil
1 tablespoon finely chopped red onion
1 tablespoon tender thyme leaves
generous pinch of sea salt
Ingredients for the salad
140g (just under a cup) freshly podded peas (about 400g of peas in the pods)
4 vine-ripened capri tomatoes, quartered
1/4 English cucumber, cut into chunks and then sliced
4 large radishes, quartered
1 small ripe avocado, sliced
60g sheep or goat milk feta, crumbled
Method
- For the dressing: put all the ingredients into a small jar, screw on the lid and give it a good shake. Set aside.
- Combine all the ingredients for the salad in a medium mixing bowl, sprinkle a little sea salt on the avocado slices, then pour over about half to 2/3 of the dressing and toss gently. Serve immediately.
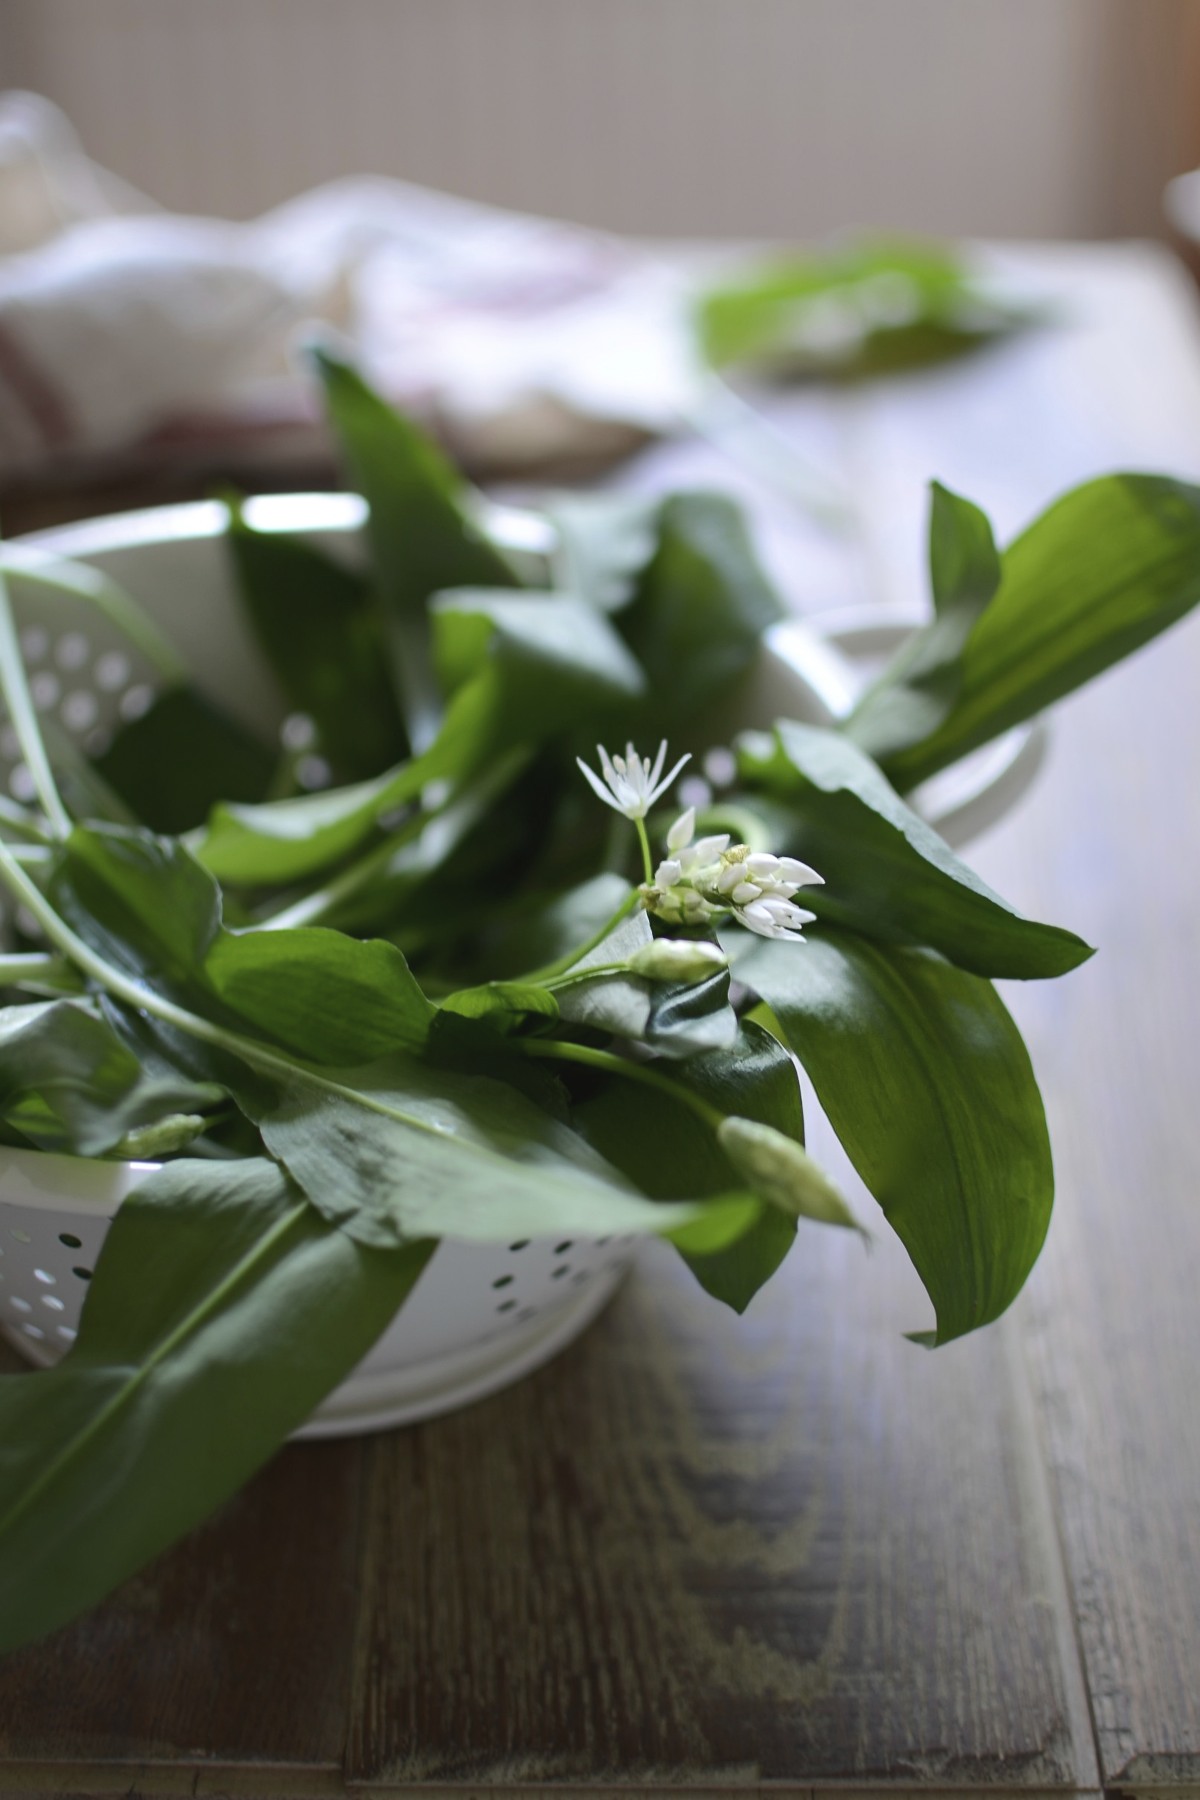
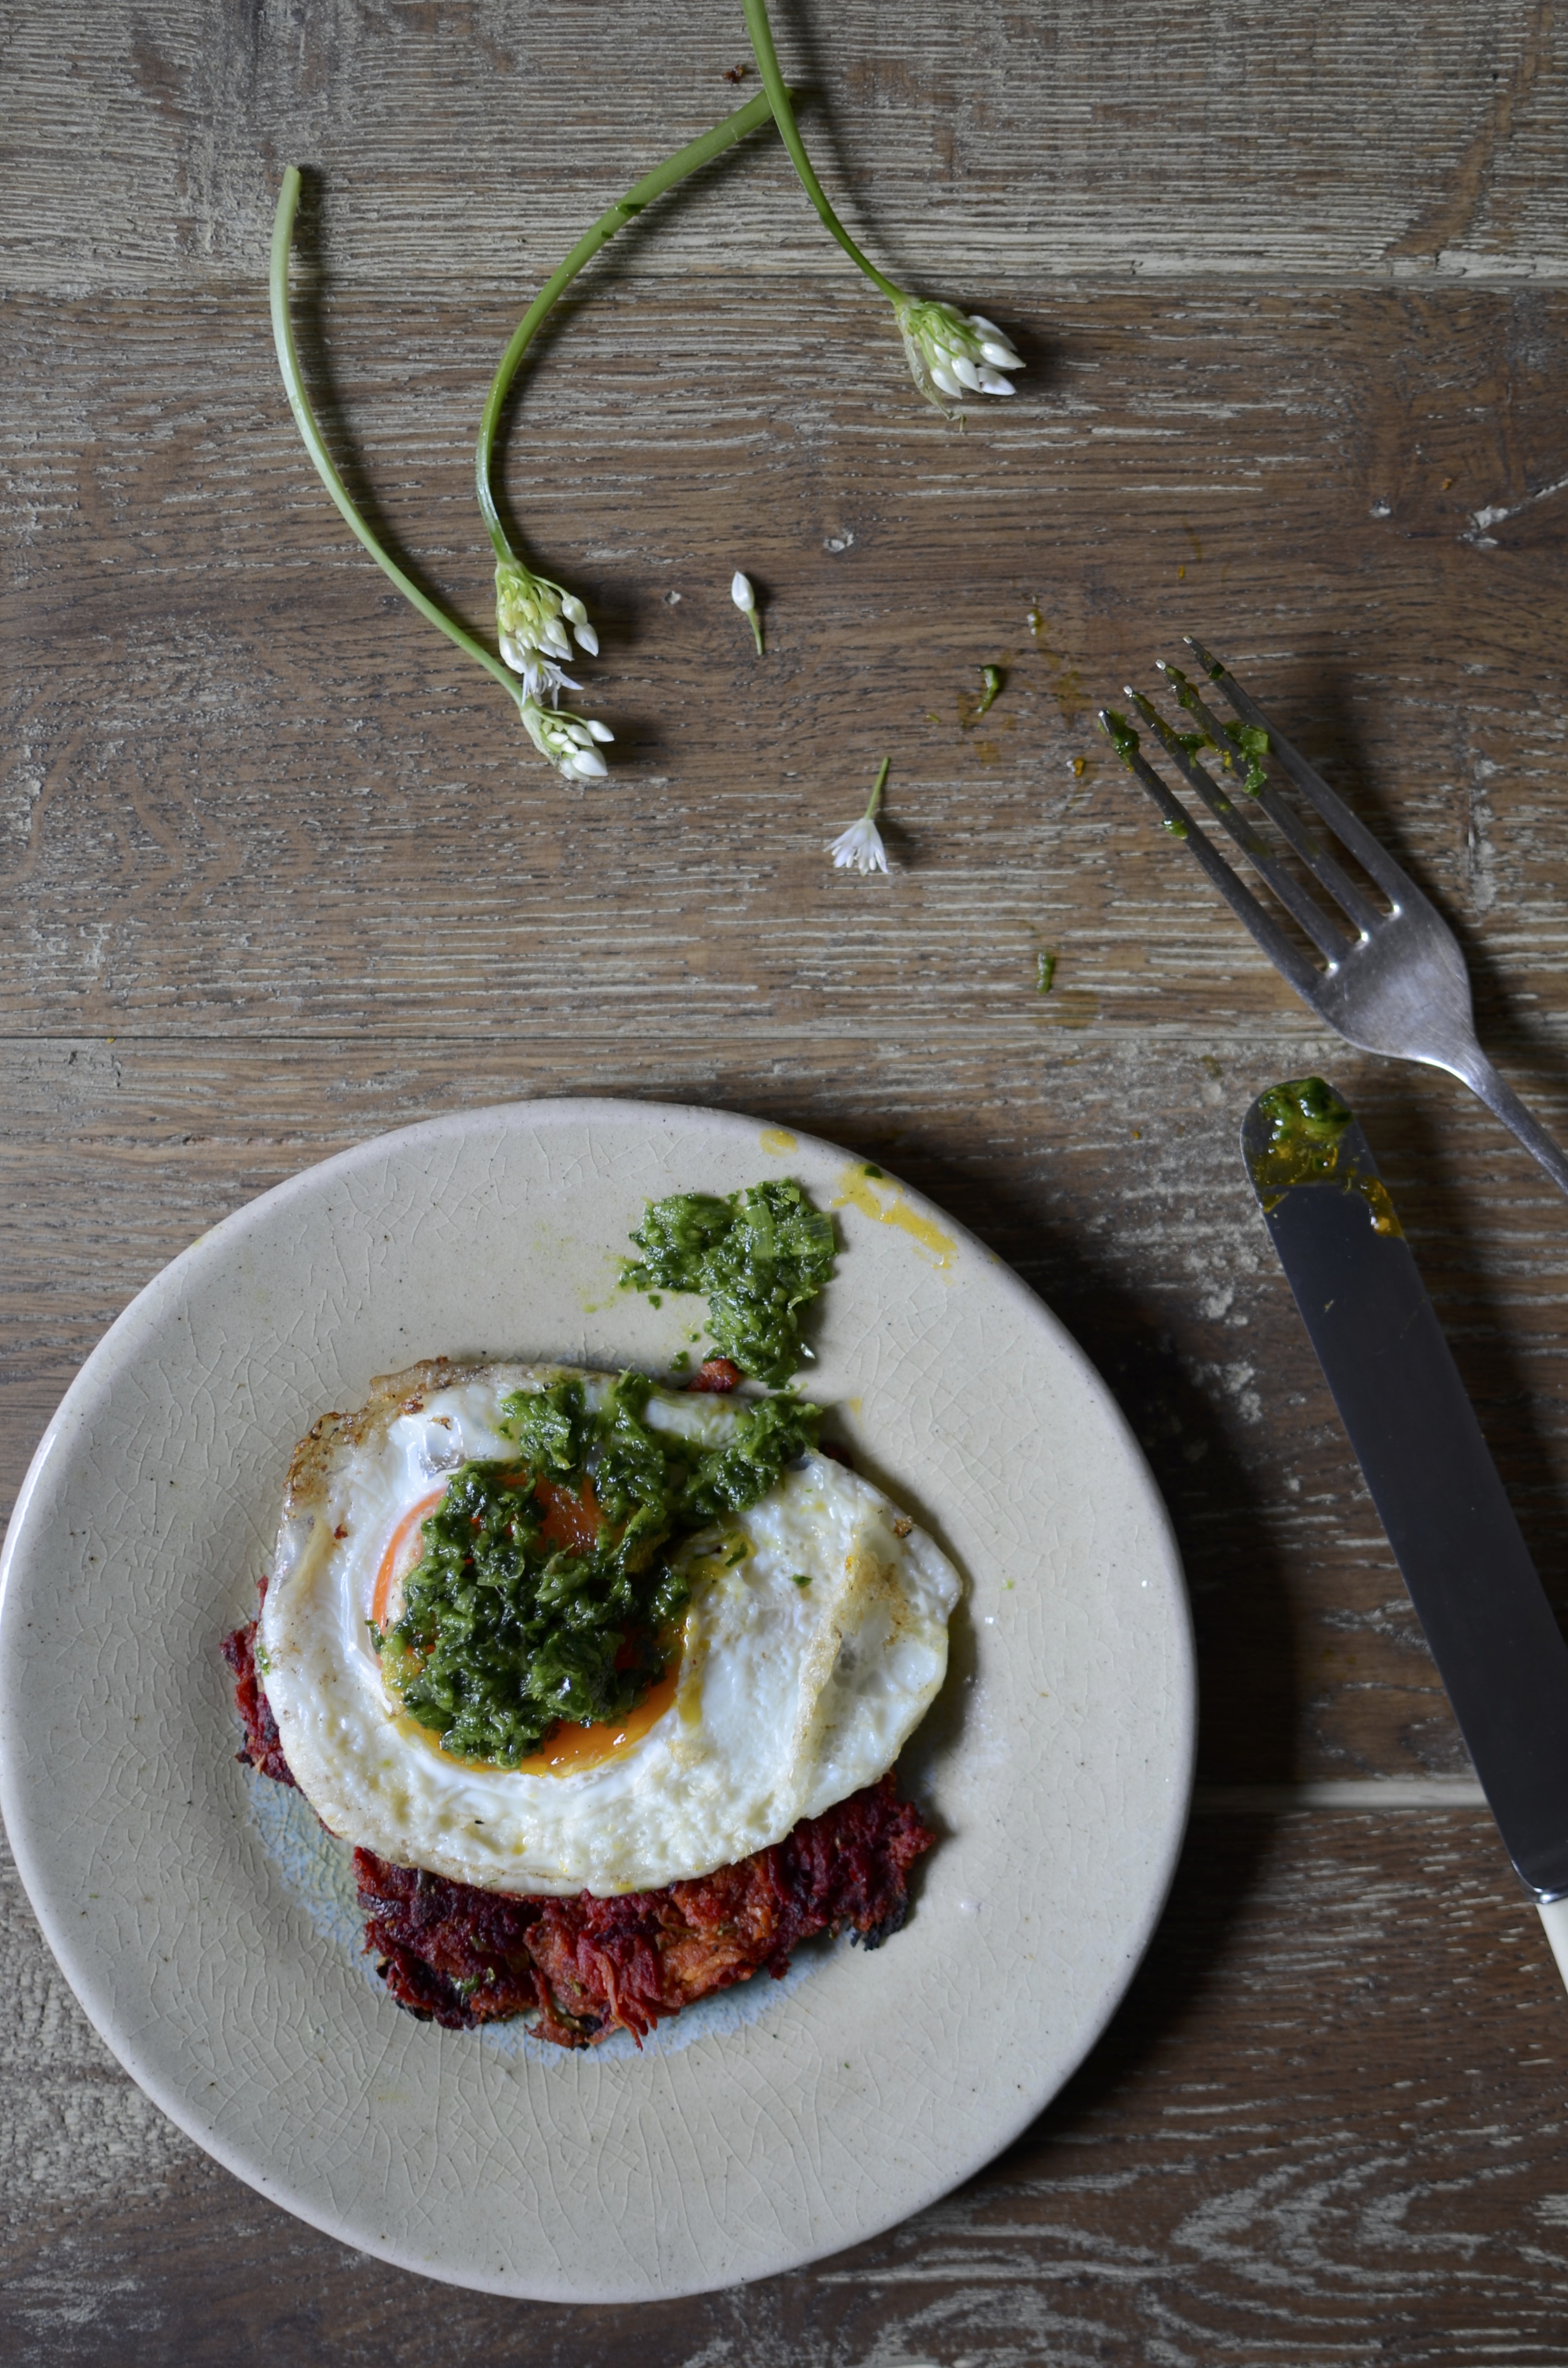
Wild garlic and leek sauce
I love greens and the spear-shaped wild garlic leaves (or ramsons and ramps) are no exception. This pungent member of the allium ursinum family is a wonderful combination of onion, garlic, spring onion and chives, with the added bonus of growing quite abundantly in woods and hedges during the spring months. The leaves can be quite stringy, so I often chop them up finely or process them, cooked or raw. The tiny white flowers are edible too and make for a beautiful garnish. This sauce will surprise you with its complexity, yet comforting more’ishness. Enjoy it with egg dishes (such as the fried egg and beetroot rösti below), stirred through pasta or risotto, and with any combination of cheese and carbs you can think of.
 Makes 1 large jar
Ingredients
1 medium to large leek (about 200g), trimmed, cut in half lengthwise, sliced and washed
1 – 2 medium cloves garlic, roughly chopped
1 bunch wild garlic (about 100g)
1 medium bunch parsley (about 50g), thickest part of stalks discarded
sea salt
125ml (1/2 cup) extra virgin olive oil
squeeze of lemon juice to stir through just before serving
Method
- Fry the leek and garlic in a little butter (or olive oil, if you keep the temperature nice and low) until tender and caramelised.
- Add the wild garlic and stir until wilted. Remove from heat.
- In a food processor, blitz all the leek mix and the parsley until finely chopped.
- With the motor running, add the olive oil in a steady stream through the chute. Add salt (and perhaps some freshly ground black pepper) and taste.
- At this stage I usually divide the sauce between two jars and freeze one of them. Add a squeeze of lemon juice to the other and have with pasta, egg dishes, mashed potatoes or anything cheesy.
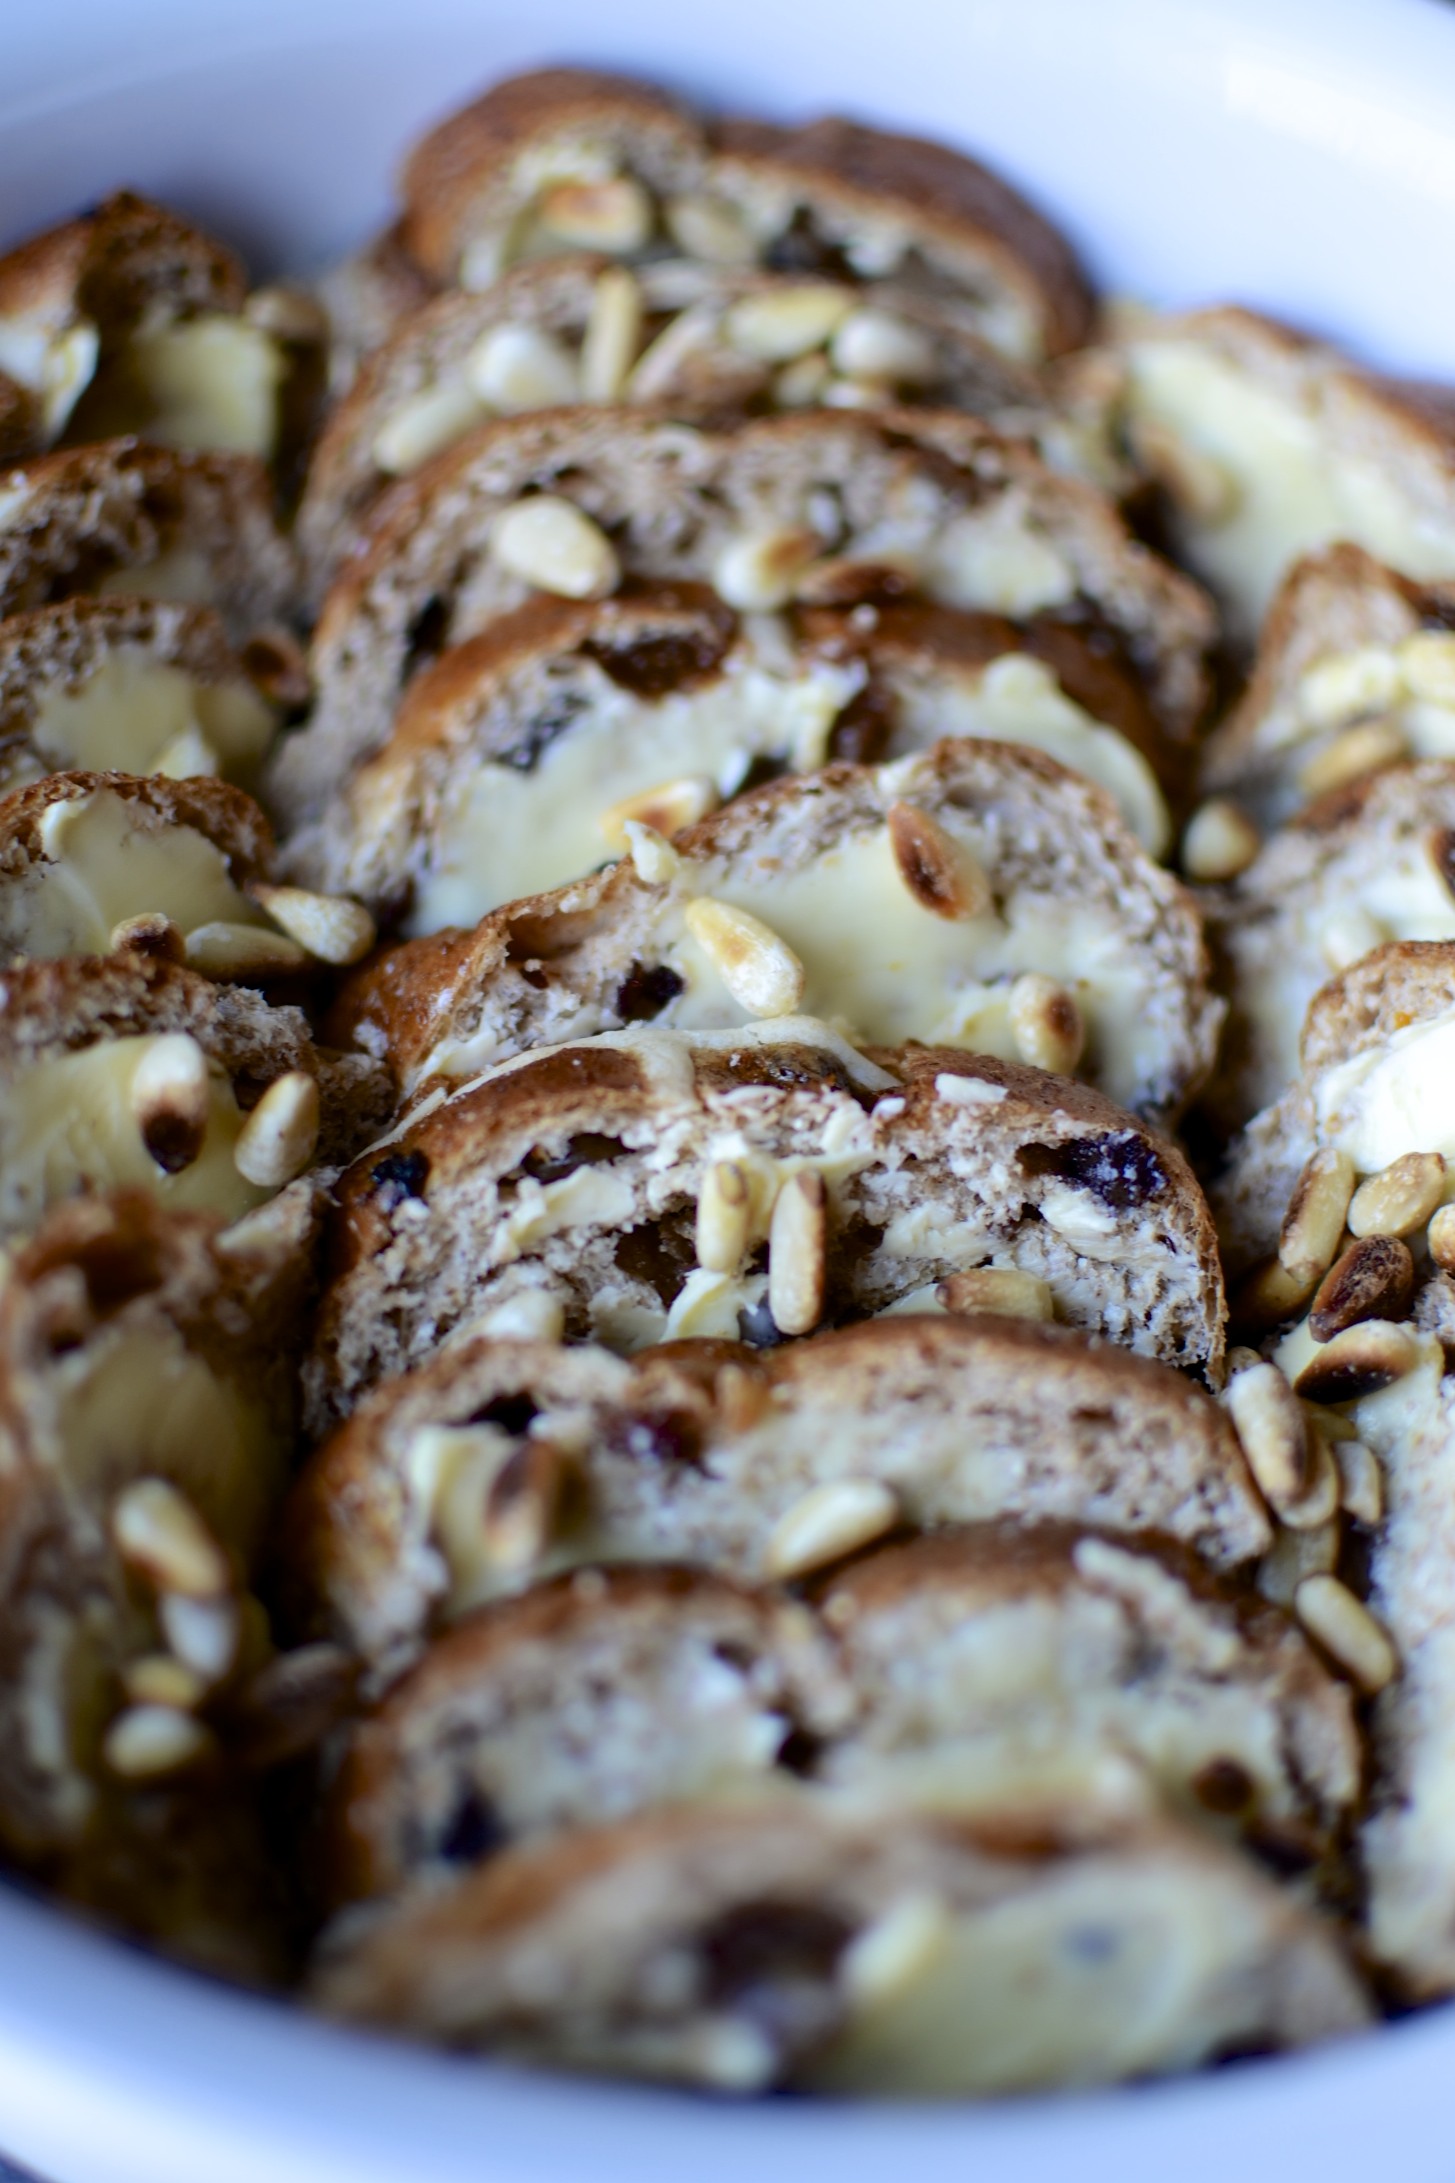
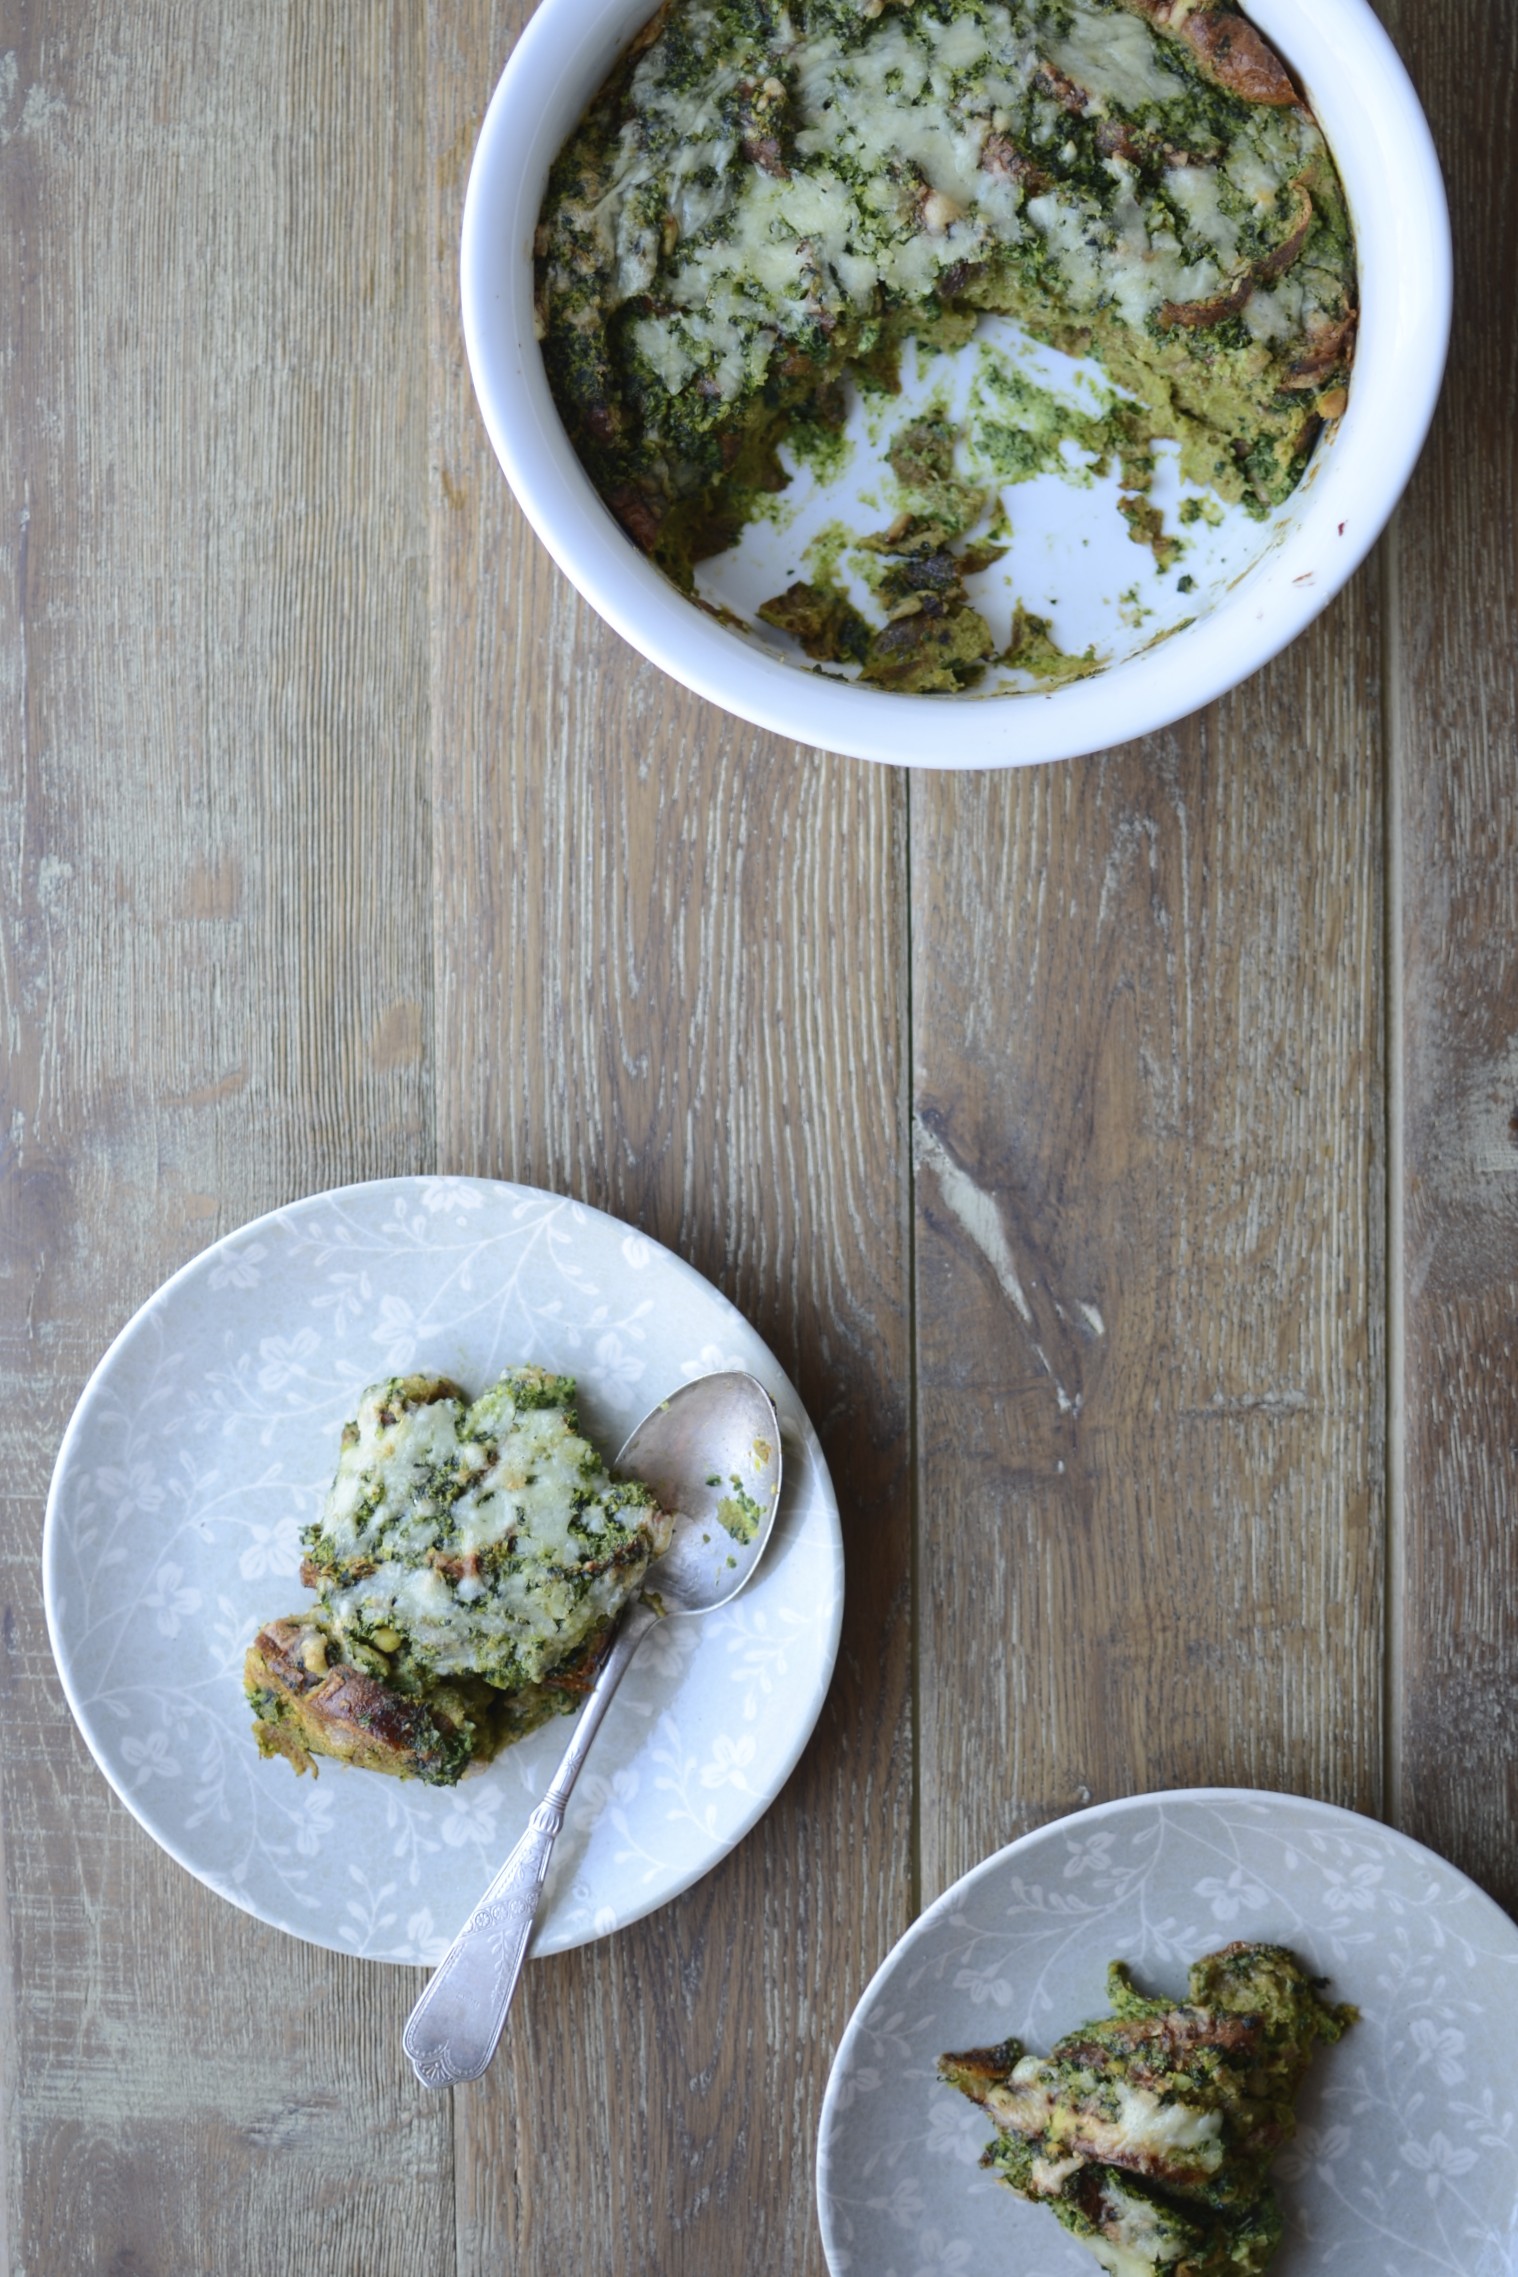
Hot cross breakfast bake
I have an issue with Christmas decorations appearing in September. And hot cross buns being for sale all year long. They are such a treat precisely because they are usually only available during Easter – and, like fragrant strawberries in summer and nutty-sweet Jerusalem artichokes in winter, I so look forward to indulging in them for a brief period every year. Here is a recipe idea for a savoury dish making use of these little spiced buns and one of my favourite greens – cavolo nero.
Wishing you all a blessed Easter!

Hot cross breakfast bake
Serves 4
Ingredients
1 large onion, finely chopped
large knob of organic butter
50g (small handful) Tuscan kale / cavolo nero, leaves stripped from stems and roughly chopped
4 wholewheat, preferably organic, hot cross buns, sliced into 5 slices each (they can be a few days old)
3 pastured organic eggs
200ml (1/2 plus 1/3 cup) milk of your choice
small handful (about 20g) pine nuts, toasted in a heavy based pan until golden
large handful (about 40g) grated strong cheddar cheese
Method
- Preheat the oven to 180°C/350°F.
- Heat the butter, add the onion and cook over a medium heat until soft and translucent. Now turn up the heat and cook for another 20 minutes, stirring regularly to avoid the edges catching.
- While the onion is caramelising, “steam” the kale briefly in a little water until bright green and wilted. Refresh under cold running water and squeeze out any excess liquid.
- As soon as the onions are golden and sweet, set aside to cool slightly.
- Butter each of the hot cross bun slices with butter and stack in an ovenproof dish. Scatter over the toasted pine nuts.
- Now place the onion, kale, eggs and milk in a blender and blend briefly until the kale is finely chopped (but not completely liquidised). Carefully pour this mixture over the hot cross buns and leave to stand for at least 20 minutes.
- Sprinkle over the grated cheese and bake for 30 to 35 minutes or until golden and set.
- Remove from the oven and allow to cool slightly before serving.
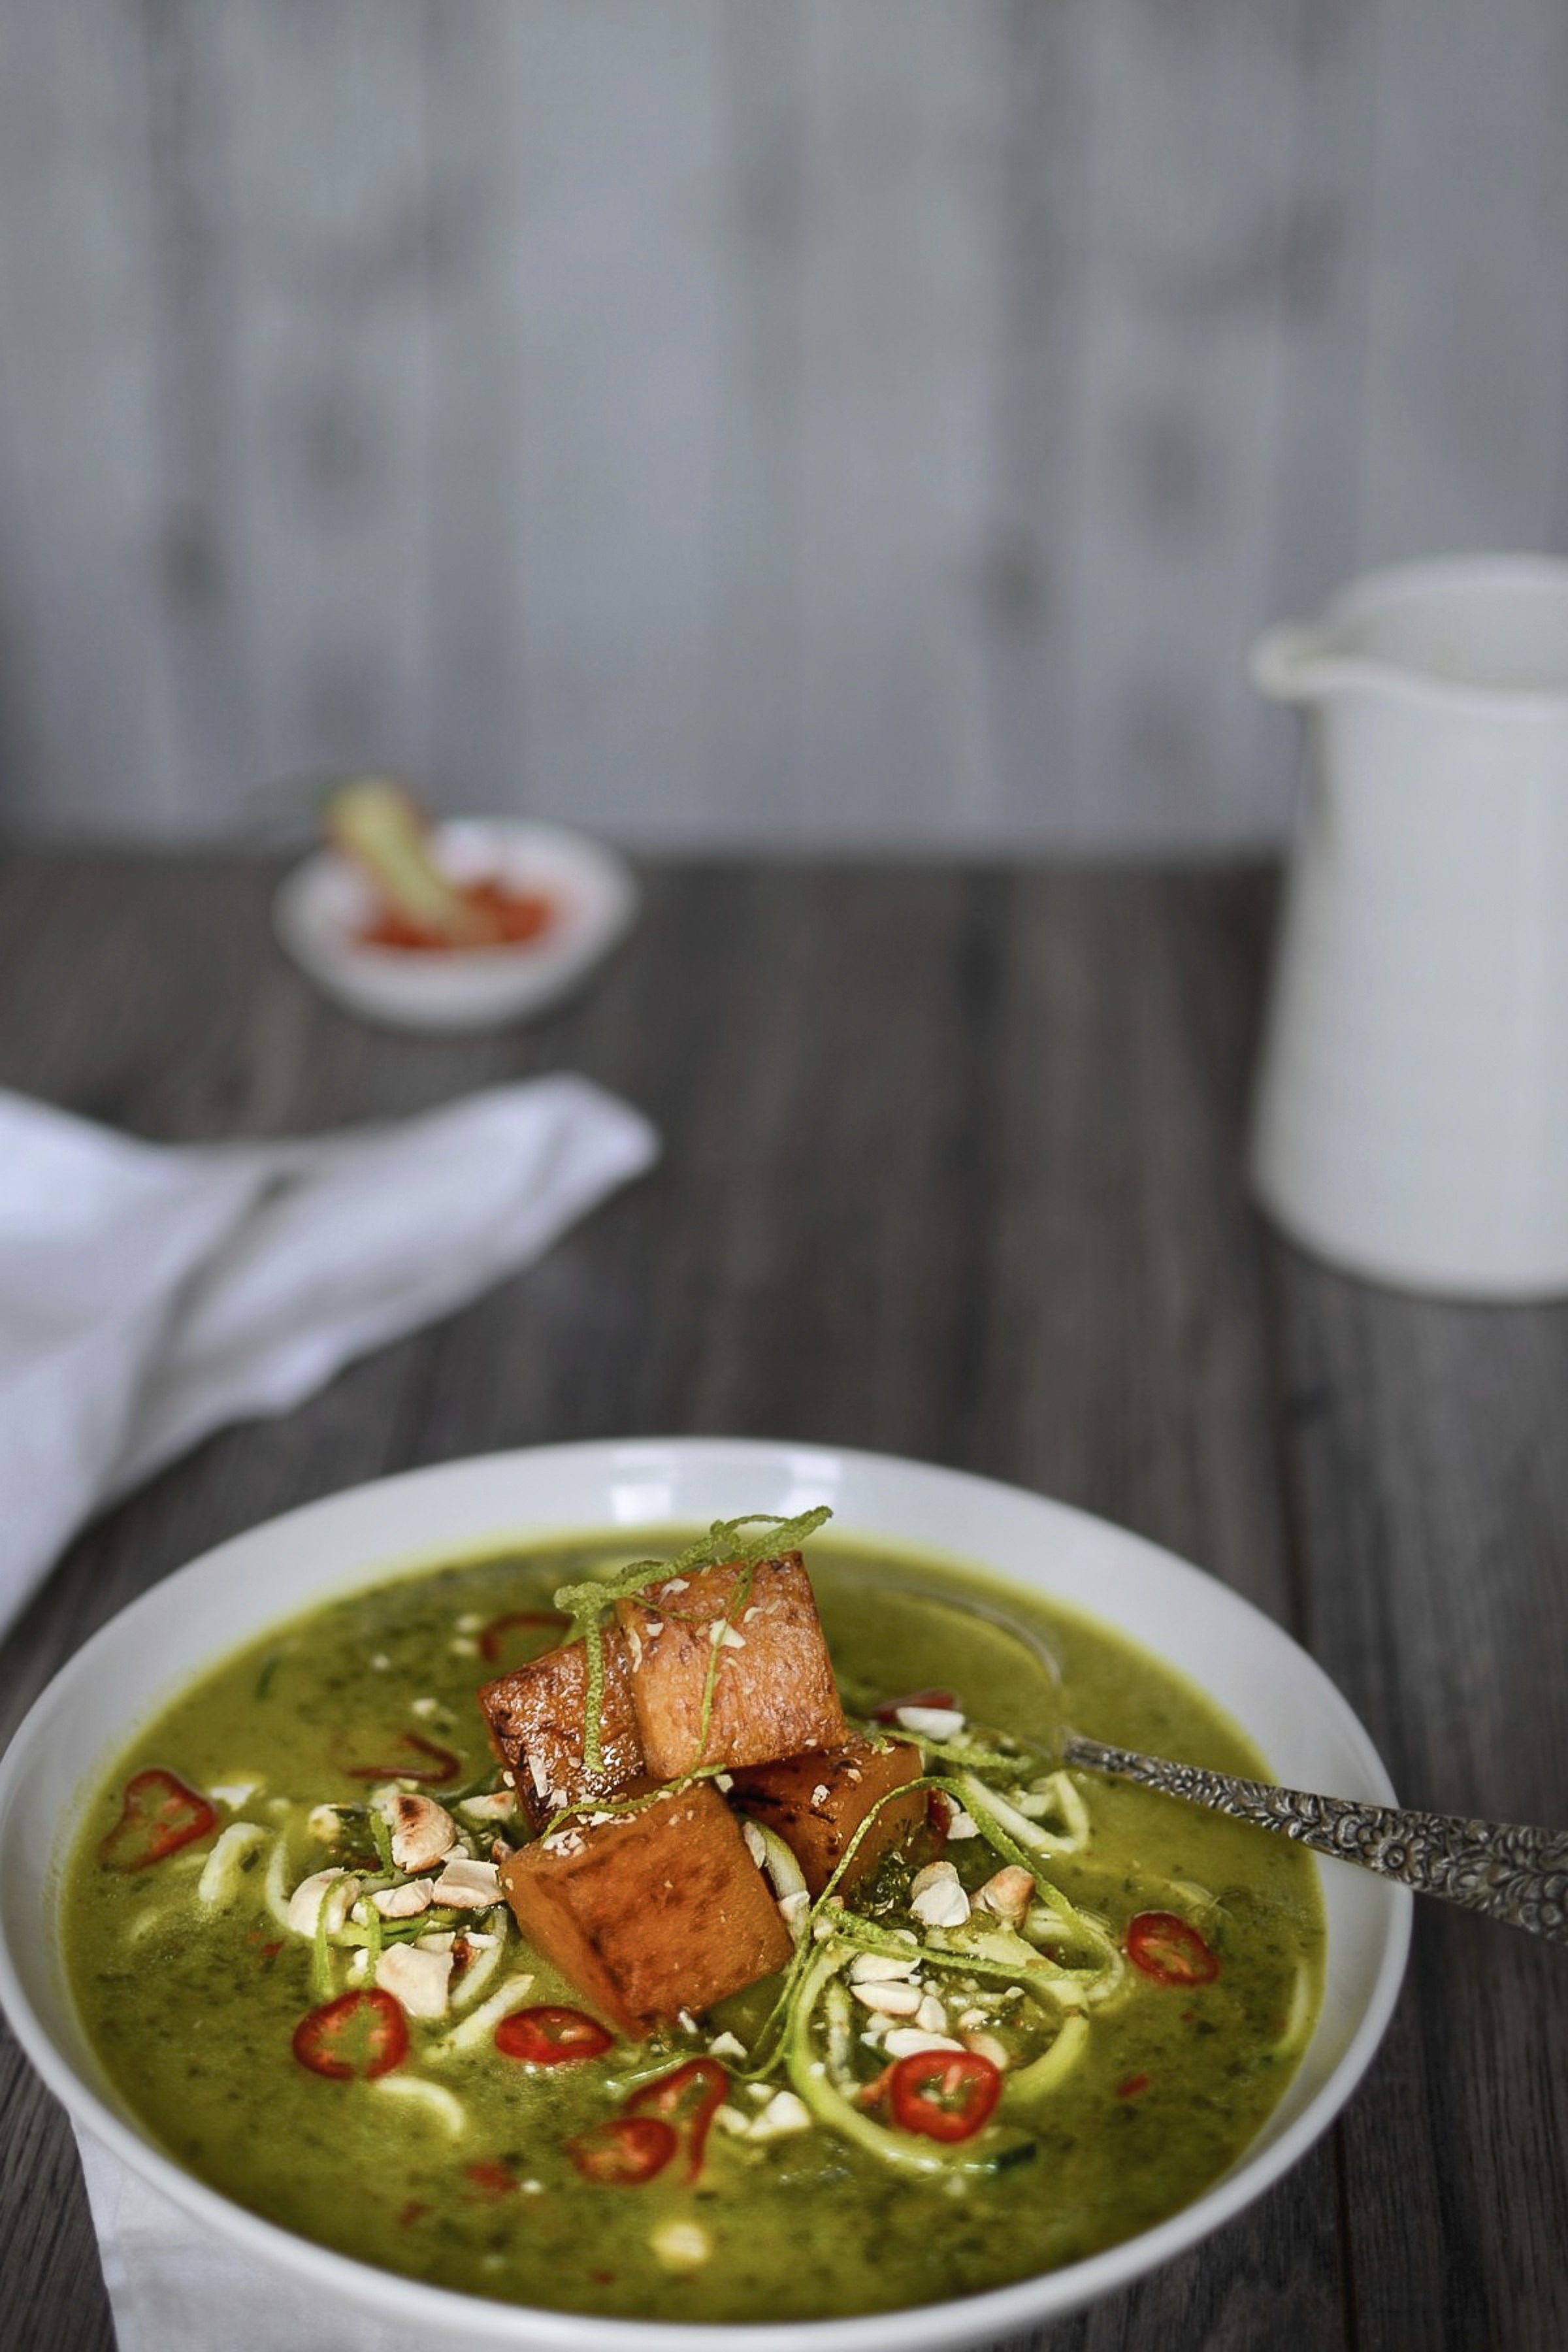
Zingy zucchini and butternut squash laksa
Monday the 23rd of March heralds the start of the first ever Meat Free Week in the UK. This initiative was launched a few years ago in Australia by a team of ethically-minded individuals who wanted to draw attention to the huge amounts of meat eaten in some countries (as a nation, Britain consumes more than double the world average) and the impact this has on human health, animal welfare and sustainability. What great motivation to try out new and exciting meat-free dishes, such as this laksa!
Serves 4
Ingredients for the herb bomb
2 – 4 red chillies, membranes and seeds discarded if you prefer it milder
2 large garlic cloves
3 echalion (banana) shallots, roughly chopped
1 large knob of galangal, peeled and finely grated
one 8cm (or 3 inch) piece of fresh turmeric root, cleaned and chopped (or 2 teaspoons ground turmeric)
large bunch (about 100g) of coriander (cilantro), washed and roughly chopped
3 – 4 kaffir lime leaves, shredded
juice of 1 lime (about 30ml or 2 tablespoons), zest reserved for serving
Ingredients for the broth
400ml (1 can) full-fat organic coconut milk
800ml organic vegetable stock
pinch of kelp
sea salt
1 large courgette (zucchini), sliced into noodles with one of these or even one of these
To serve
1 butternut squash, peeled and cut into medium cubes
1 red chilli, thinly sliced (or halved and deseeded if you prefer it milder)
large handful of toasted cashew nuts
lime zest
Method
- Either toss the butternut squash cubes in some coconut oil and salt before roasting in a hot oven for 30 to 45 minutes (depending on their size), until caramelised and tender. Or heat some coconut oil in a saucepan and brown the butternut on all sides before adding some water and “steaming” with the lid on until tender.
- While the squash is cooking, put the ingredients for the herb bomb and some of the coconut milk for the broth in a blender, and blend until everything is finely chopped. Set aside.
- Gently heat the rest of the coconut milk and the stock with a pinch of kelp and a very large pinch of sea salt. Once hot, give it a whisk, then add the zucchini noodles and allow to heat through, to soften.
- Next, stir through the herb mixture. All of it if you dare, or most of it, reserving some to add to the next batch of salad dressing you make.
- Divide the noodles between 4 bowls, top with cooked butternut squash and ladle over the hot broth. Finally scatter over the chilli slices, nuts and lime zest.
Two ways with roasted cauliflower
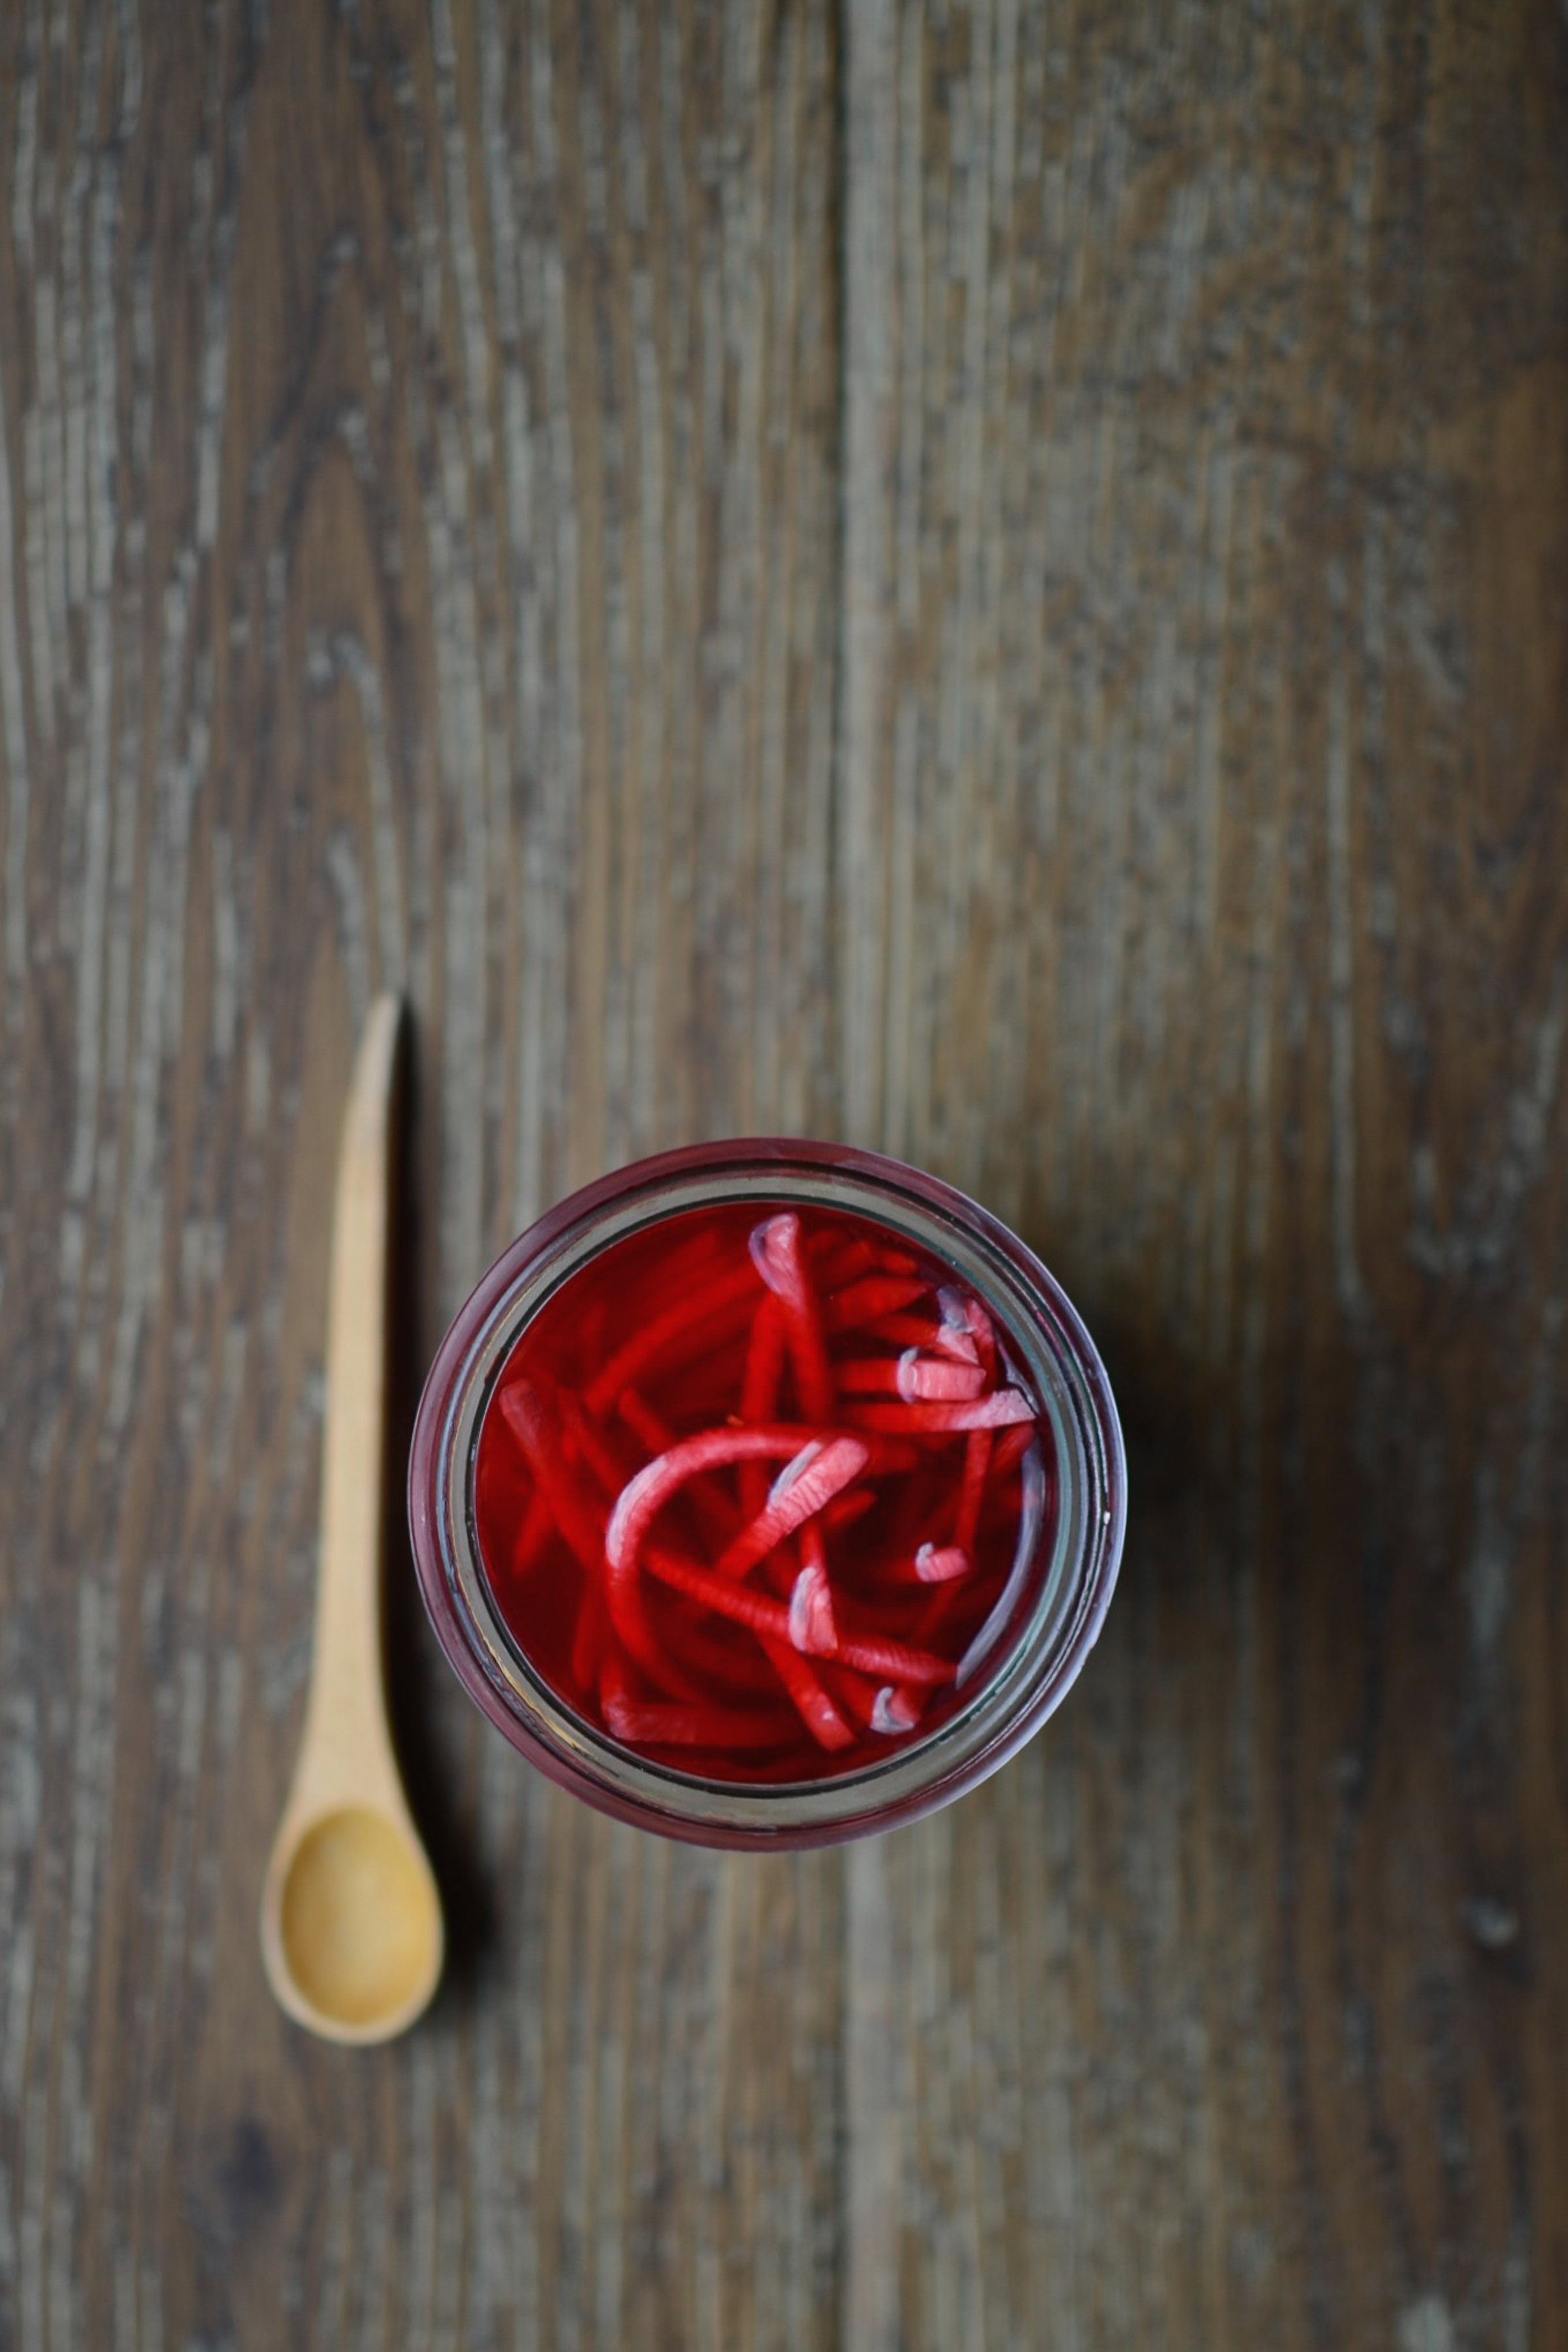
For Mother’s Day last year, my eldest son completed the sentence “I love my mummy because…” in the communal class card with “she makes me roasted cauliflower – my favourite!” – a statement that was endearing and cringe-worthy in equal measure. I could just imagine other parents rolling their eyes and wanting to gag, but the truth of the matter is that roasted cauliflower really IS his favourite food, and I am happy to indulge his love often. Here are two easy ways to enjoy this delicious brassica: with pickles or with pasta.

Raw pickled watermelon radishes
Ingredients
2 medium watermelon (also known as roseheart or red meat) radishes, scrubbed and sliced into thin discs or matchsticks
125ml (1/2 cup) water, preferably filtered
125ml (1/2 cup) apple cider vinegar, preferably unpasteurised such as this one or this one
30ml (2 tablespoons) honey, preferably raw
1 heaped teaspoon sea salt
large pinch of red chilli flakes
1/2 teaspoon black peppercorns
Method
- Pack the radish slices or matchsticks into a medium canning jar or glass container with lid, that you have either washed in the dishwasher or rinsed with boiling water.
- Whisk together the rest of the ingredients until honey and salt are dissolved, and pour over the radishes. Seal with the lid and place in a cool place or the fridge for at least 24 hours before tasting.
- They will remain crunchy for only a few days, but keep well for several weeks in the fridge.
- Serve with roasted cauliflower or mixed into salads, on sandwiches and with cheese.
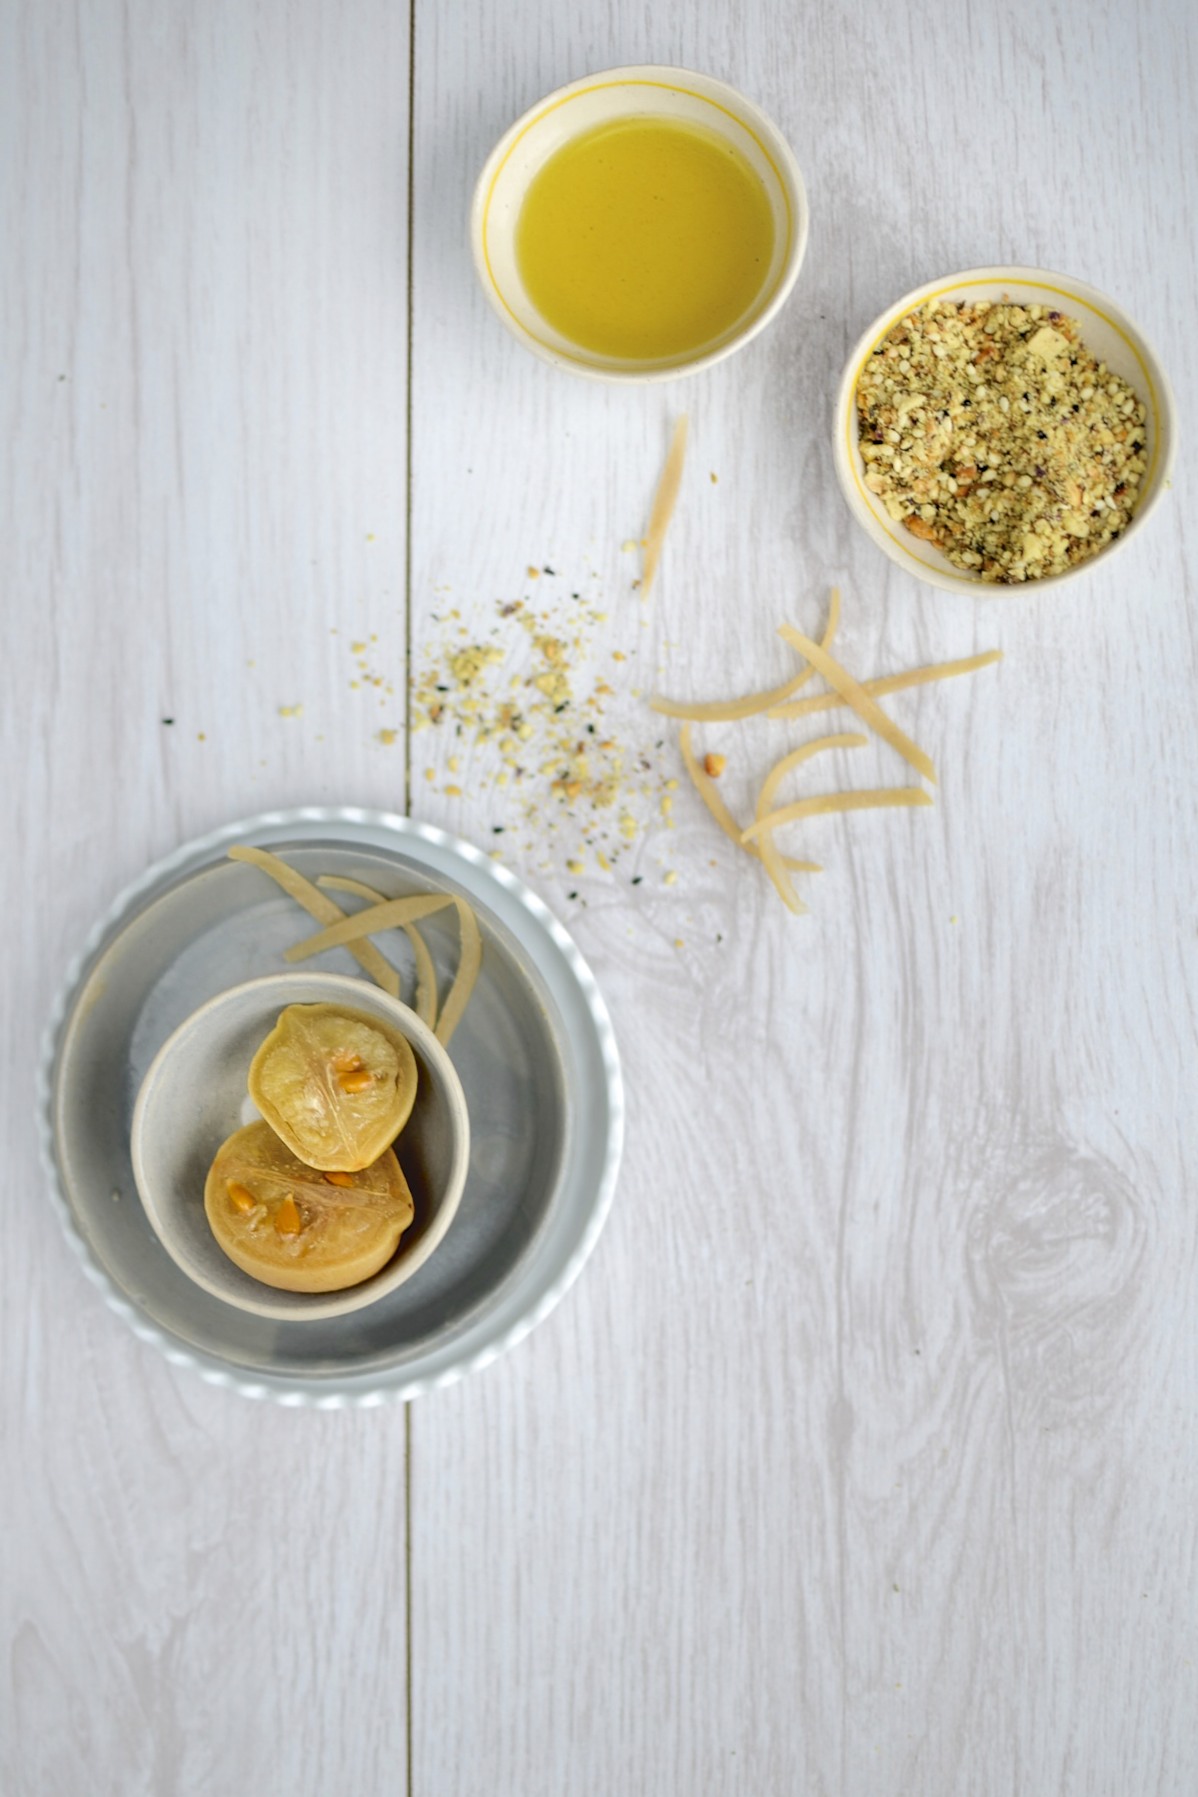
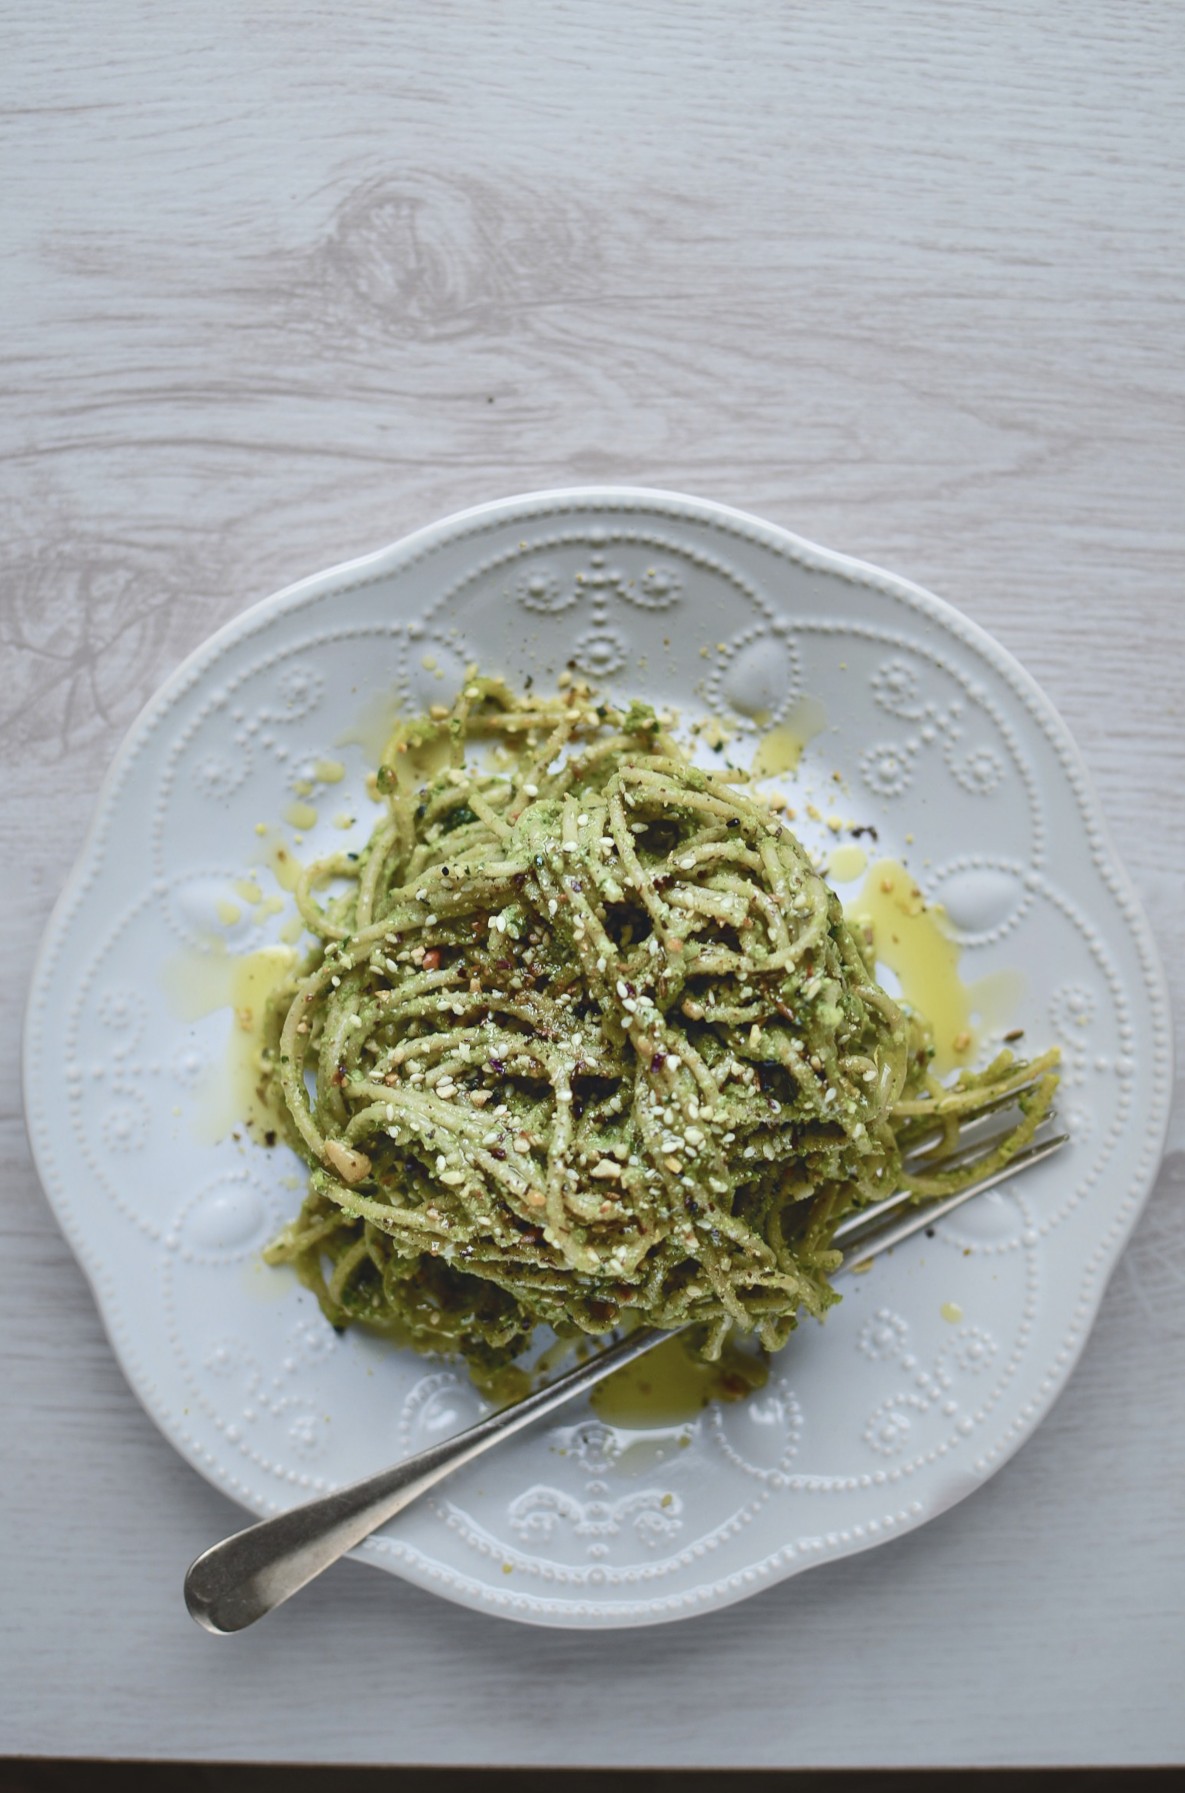
Roasted cauliflower and chard pasta
Serves 6
Ingredients
1 small head cauliflower, trimmed and separated into florets
1 medium onion, chopped
200g Swiss chard, trimmed, stalks finely chopped and leaves roughly chopped
2 cloves garlic, chopped
2 – 3 preserved lemons (depending on their size), flesh discarded and finely chopped
linguini or spaghetti for 6 people (I like wholemeal spelt or gluten-free quinoa pasta)
sea salt
black pepper
1 tablespoon hazelnut and chickpea dukkha per person to serve
extra virgin olive oil
Method
- Preheat the oven to 160°C/320°F. Toss the cauliflower florets with some salt and coconut or olive oil, and roast until golden and tender (about 50 minutes to an hour), turning at least once.
- While the cauliflower is roasting, bring a large pot of water to boil and add the pasta. Cook at a gentle simmer until just tender (al dente). Drain, reserving some of the cooking liquid for the sauce, and toss with sea salt and olive. Set aside.
- While the pasta is cooking, sweat the onion and the chard stalks with a large pinch of salt in some olive oil over a gentle heat. Once softened, add the garlic and a few minutes later the chard leaves. As soon as they have wilted, remove from heat and set aside.
- When the cauliflower is cooked, pour some of the pasta cooking liquid into a blender or food processor, then add the roasted cauliflower, chard mix and preserved lemon peels. Blend until smooth, adding a little more liquid as necessary. Adjust seasoning and stir into the cooked pasta with most of the dukkha. Add a generous glug of olive oil and divide between 6 pasta bowls. Sprinkle over the rest of the dukkha and serve hot.
Green crêpes with cayenne cashew cream
We love pancakes in any shape and size. And it is one of the easiest way to serve vegetables to your family – either mixed straight into the batter or as a filling. These Tuscan kale crêpes, a.k.a. dragon slayer pancakes, are delicious with a savoury cashew cream, but you could also serve them with grated (preferably unpasteurised) cheddar cheese or goat milk feta. And I usually reserve some of the batter to make a few plain ones to have with honey and lemon as a special Pancake Day dessert.
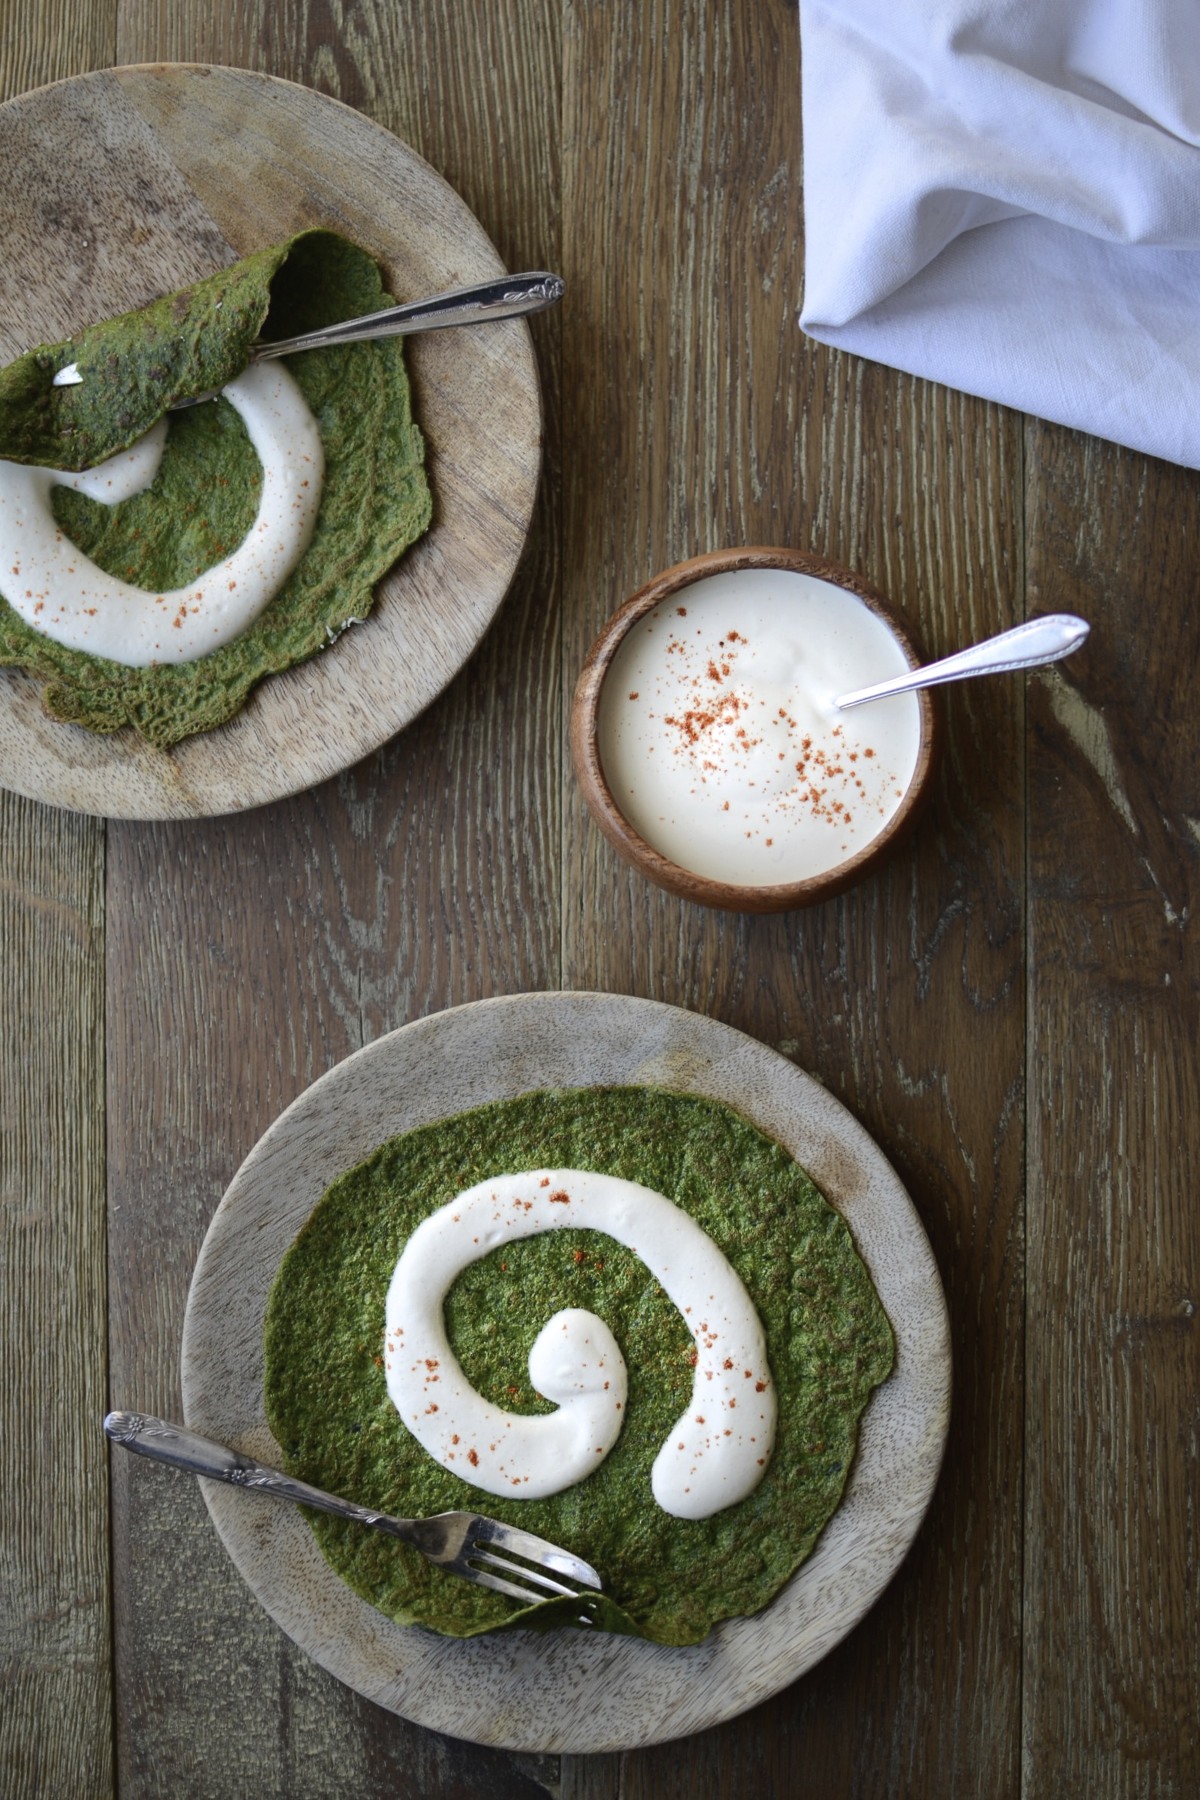
Ingredients for the crêpe batter
5 medium eggs
240g (2 cups) wholemeal spelt flour
500ml (2 cups) water
large pinch of sea salt
200g Tuscan kale (also known as cavolo nero, dinosaur or lacinato kale), thick cores discarded, roughly chopped
Method
- Steam (or briefly blanch) the kale until wilted, then refresh under ice cold running water.
- Put all the ingredients in a blender and blend until well mixed.
- Set aside for at least 1 hour.
- To make the crêpes, heat a little ghee or coconut oil in crêpe pan until hot, but not smoking. Pour a ladleful of the batter into the pan, turning it while you pour to ensure you cover the base.
- As soon as the edges have browned (after a few minutes), carefully slide a spatula under the crêpe and flip it over for another couple of minutes. Repeat until all the batter has been used up.
Ingredients for the cashew cream
125g (about 1 cup) cashew nuts, soaked for 2 – 4 hours in fresh cold water
100 – 125ml (about 1/2 cup) water
large pinch of sea salt
1 teaspoon nutritional yeast flakes
generous squeeze of lemon
large pinch of cayenne pepper
Method
- Rinse the soaked cashews thoroughly, then place in a blender with just under half a cup of water (about 100ml), salt, nutritional yeast, lemon juice and cayenne, and blend until creamy.
- If you don’t have access to a high speed blender, the resultant cream will have a coarser texture.
- Adjust seasoning and spoon onto a green crêpe before rolling up.