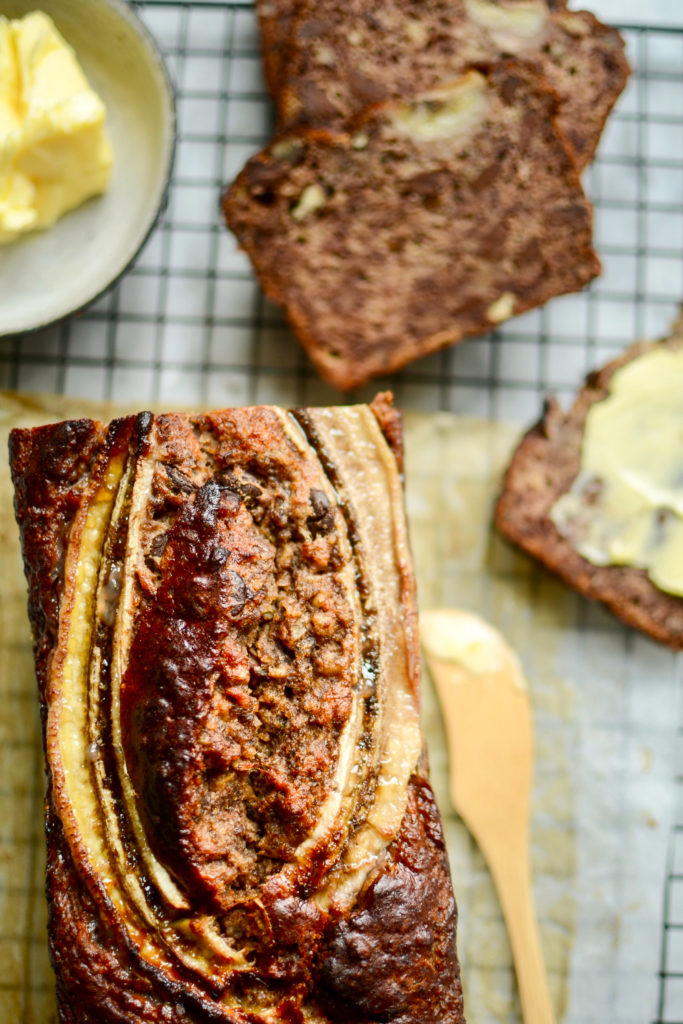
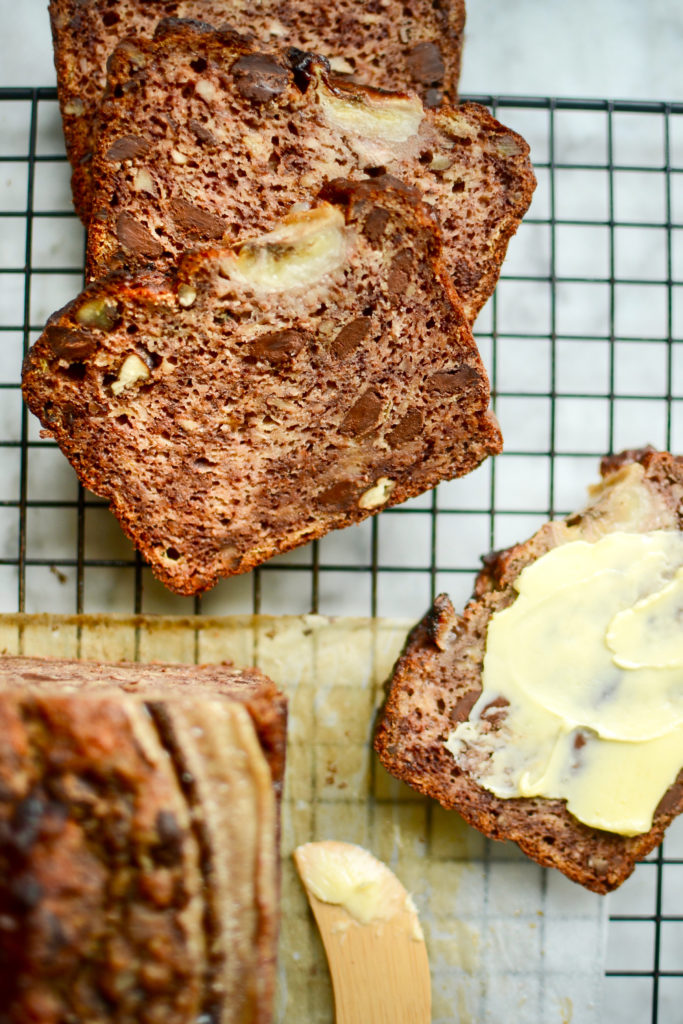
Banana bread (gluten-free, and no added sugar)
We all have our go-to banana bread recipe that we fall back on when the brown bananas start attracting fruit flies in the bowl. I have been playing around with different recipes for the longest time. I make a sugar-free, grain-free version with a dark chocolate ganache for all the kids’ parties. It’s very moist and very delicious. In fact, many children prefer this cake to the more traditional chocolate cake that is most often also on offer. But this recipe, with the addition of roast pecans and a little bit of flour (gluten-free in my case), is also really, really good. Again, with the sweetness from the bananas, there is no need for any added sugar, and it tastes like a real treat, especially if you decide to add dark chocolate chips.
Sugar-free banana bread
Makes one large’ish loaf
Ingredients
180g pecan nuts (or use walnuts)**
2 eggs (or replace with 2 chia eggs)
60ml (1/4 cup) olive oil or melted coconut oil
550g mashed bananas (about 6 large bananas)
150g flour of your choice (spelt and gluten-free mixes work well)
1 slightly heaped teaspoon baking soda
1/2 teaspoon salt
1 teaspoon ground cardamom
50g dark chocolate chips, optional
Method
- Preheat oven to 180˚C. Grease and line a medium-large bread loaf pan.
- Roast the pecan nuts on a baking sheet for 8 – 10 minutes or until lightly toasted. Set aside to cool.
- In a large mixing bowl whisk the eggs and oil into the mashed bananas. Stir in the flour, baking soda, salt and cardamom.
- Put just over half the roasted pecan nuts in a mini blender or food processor and grind into a flour. Roughly chop the rest by hand, but ensure there are no big pieces. Stir both of these into the mix together with the chocolate chips, if using, and scrape the mixture into the prepared loaf tin.
- Bake for 55 – 60 minutes, but cover with foil after 30 minutes to prevent the loaf from getting too dark on top. Test with a skewer for doneness.
- Remove from the oven and let cool for a few minutes before turning out. Allow to cool completely before cutting.
**Note: you could also use ground almonds instead of the 90g ground pecan or walnuts, and just roast and chop 90g of pecans.
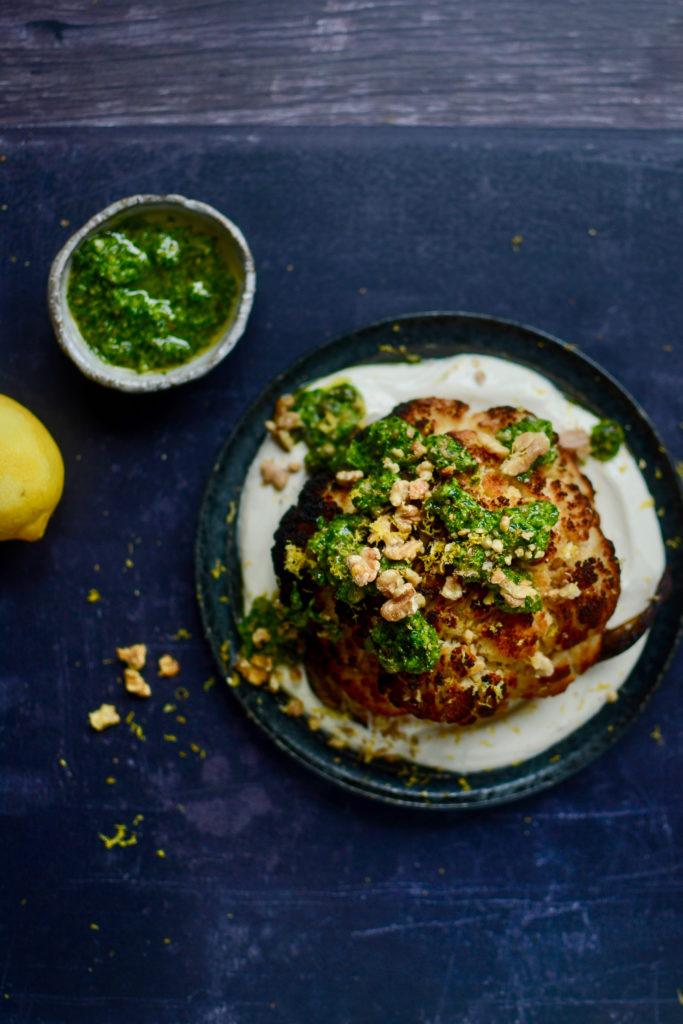
Roast cauliflower with green sauce
Cauliflower took over from kale as the “must eat” superfood a few years ago, and was then bumped up another notch when cauli rice became the new, well, rice. It was lent ever more glamour when caulifower steaks hit the vegan scene and whole roast cauliflower appeared on dinner tables instead of roast pork. It does all sound incredibly faddy… But here’s the thing – I really, really like cauliflower. Always have. Always will.
Sure, it can be a little bland and needs careful handling (NObody likes waterlogged cauliflower!), but it is soooo versatile and sooooo healthy and sooooo good with bold flavours. This is my version of the whole roast option. It seems like a lot of effort, but it’s really not too bad, considering the end result is so incredibly delicious. It’s very good with a bitter leaf salad and a few sliced oranges, or perhaps some roasted grapes.
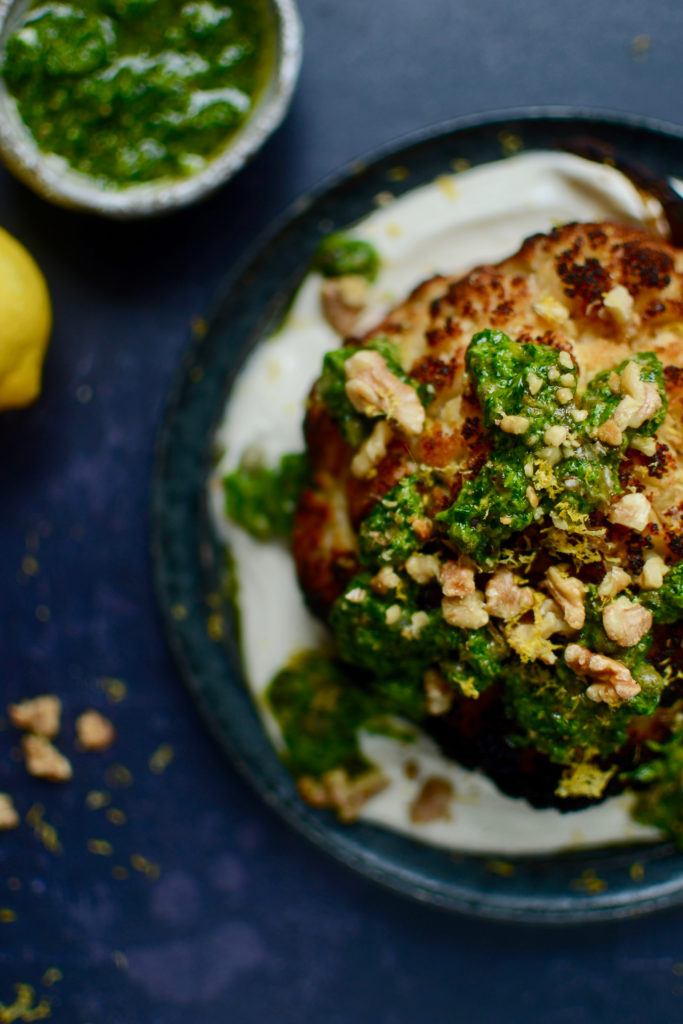
Whole roast cauliflower with green dressing
Serves 4 -6
Ingredients for the cauliflower
1 large whole cauliflower
butter and / or olive oil
salt & pepper
Ingredients for the dressing
60g walnuts, plus extra for serving
30g watercress
30g chives
30g parsley
30g coriander (cilantro)
1 clove garlic, chopped
2 tablespoons raisins
2 tablespoons capers
olive oil
salt & pepper
Ingredients for the yoghurt sauce
125g natural yoghurt (not Greek) of your choice
45ml (3 tablespoons) tahini
juice from half a lemon (reserve zest for serving)
salt & pepper
Method
- Trim the base of the cauliflower and remove most of the outer leaves, then place in a large pot on its base with 2cm (or an inch) of water, cover and steam for 10 minutes or until just tender, but not soft. Drain and replace the lid. Set aside for a few minutes.
- Preheat oven to 200˚C. Place the now dry, par-cooked cauliflower in an ovenproof dish, drizzle with olive oil (and dot with butter, if you like), and season with salt and pepper. Roast in the oven for 30 – 40 minutes or until completely, meltingly soft and golden all over.
- While the cauliflower is roasting, make the dressing. Place the walnuts on a small rimmed baking sheet and pop in the oven with the cauliflower for five minutes, or until fragrant. Be careful not to let them burn. Set aside to cool.
- Roughly chop all the herbs, then place in a food processor and pulse a few times to chop. Add the chopped garlic, toasted walnuts, raisins and capers, season well. With the motor running, pour olive oil through the chute until you reach the desired consistency. You are aiming for a chunky, spoonable sauce. Taste and adjust seasoning if necessary.
- For the yoghurt sauce, stir all the ingredients together. If the sauce seizes a little because of the tahini, add a little room temperature water to loosen it. Adjust seasoning and spread on the serving plate.
- Carefully place the roasted cauliflower on the yoghurt sauce using a large spatula. Serve, drizzled with green sauce and some additional chopped nuts.
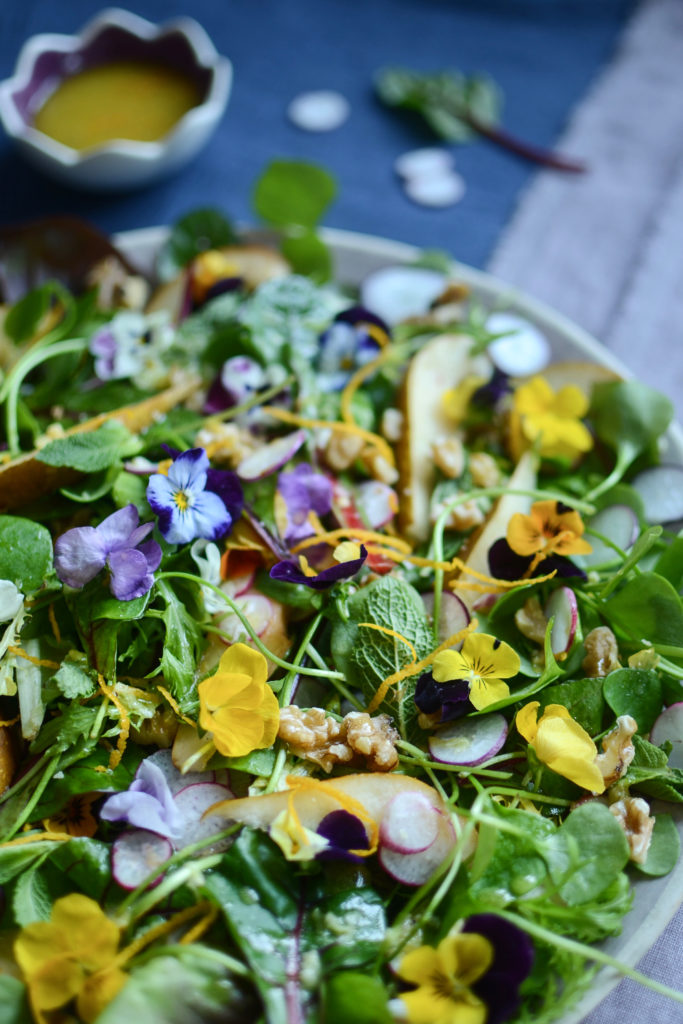
Winter salad with pears and edible flowers
I love a good winter salad, especially a really pretty one (ever tried edible flowers?), with hits of sweetness (like pear, citrus fruit or apple), bitter undertones and something crunchy, aka toasted nuts or seeds. And they come into sharp focus in my life around the middle of January every year, when my jeans start feeling a little too tight and my energy levels drop. Usually I try to stick to a plant-heavy whole foods and gluten-free diet – because my autoimmune issues flare up if I don’t – but during the Christmas holidays, it is nigh impossible. That is where winter salads come in. Add a well balanced, sharp dressing and a few herbs, and you’ve got yourself an awesome post-indulgence feelgood dish.
In fact, it is the dressing that can take a salad into the realm of superfood stardom. Your body needs the fat in the dressing to absorb the fat-soluable vitamins in the fresh vegetables and fruit – without it you may as well be eating cardboard (well, you know what I mean). Monounsaturated fat, like olive oil and avocado oil, is the most efficient at supporting carotenoid absorption in the body.
Don’t be tempted to buy ready-made dressings – making your own is so easy, quick and delicious. Plus, by making your own you are avoiding lots of additives, gums, thickeners, colours, flavours and preservatives that commercial dressing often contain. Try your hand at the dressing below, or replace the orange juice with apple cider vinegar and add a touch of honey or maple syrup. Lipsmacking.
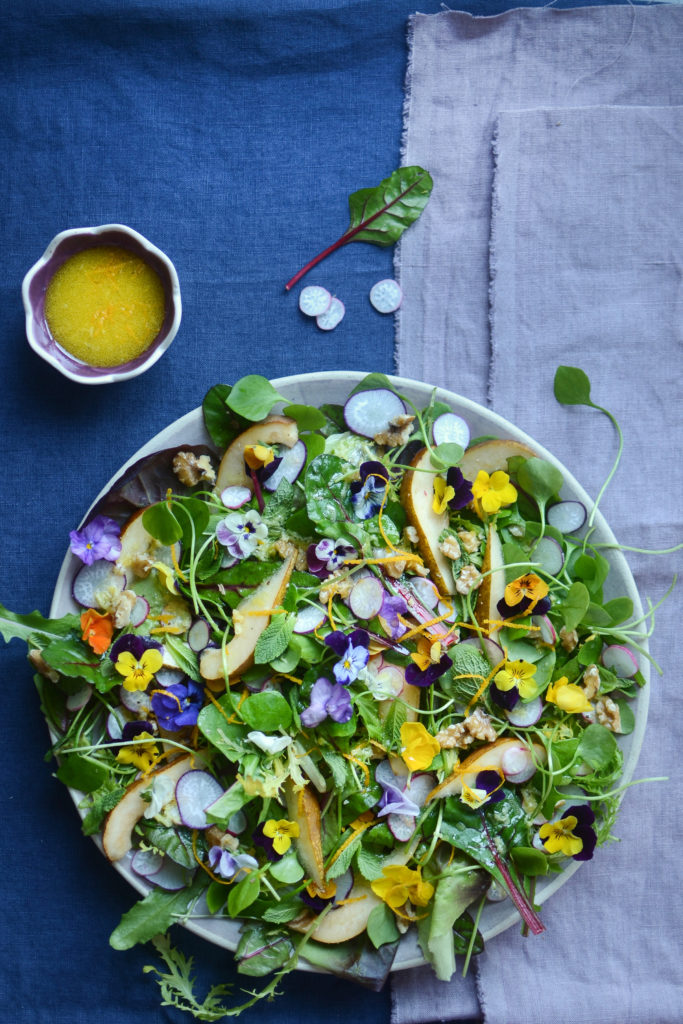
Winter salad with pears and edible flowers
Serves 4 – 6
Ingredients for the dressing
zest and juice from one large orange – should yield 60ml (1/4 cup) orange juice
1/2 teaspoon salt
grinding of black pepper
1 teaspoon Dijon mustard
heaped teaspoon grated ginger
Ingredients for the salad
1 large packet baby leaves
3 small perfectly ripe pears, thinly sliced
handful of walnuts (raw or lightly roasted), roughly chopped
small bunch of mint
5 radishes, thinly sliced
edible flowers
crumbled blue cheese, optional
Method
- Put all the ingredients for the dressing in a jar, screw the lid on tightly and shake well.
- For the salad, arrange all the ingredients on a large plate, then scatter over the edible flowers and crumbled cheese, if using.
- Dress shortly before serving.
Healthy lunch box ideas
Lunch boxes take me back to my school days and the AMAZING lunches my mum used to pack for us whenever we had after school activities, and couldn’t eat lunch at home. When I moved out, first to study, then to live and work abroad, I adopted the all too common approach of regularly skipping breakfasts, grabbing something quick and ready-made for lunch, and ending the day with a very late, and very large dinner. But the traditional saying “breakfast like a king and dinner like a pauper” is proving rather accurate, as the mounting research† in favour of intermittent fasting shows.
Frontloading your calory intake to the first half of the day reduces risk factors for heart disease, cancer, obesity and diabetes. People who don’t eat large meals in the latter half of the day also tend to sleep better, suffer less digestive issues and show less signs of ageing. This, and all the research I have been reading about children performing better at school, being better behaved and less prone to falling ill when they have a healthy breakfast and nutritious lunch, has convinced me to start making an effort to pack my family some decent lunches. Here are some ideas, which I put together for the team at Compass Fostering to help inspire parents to pack a punch on the lunch box front.
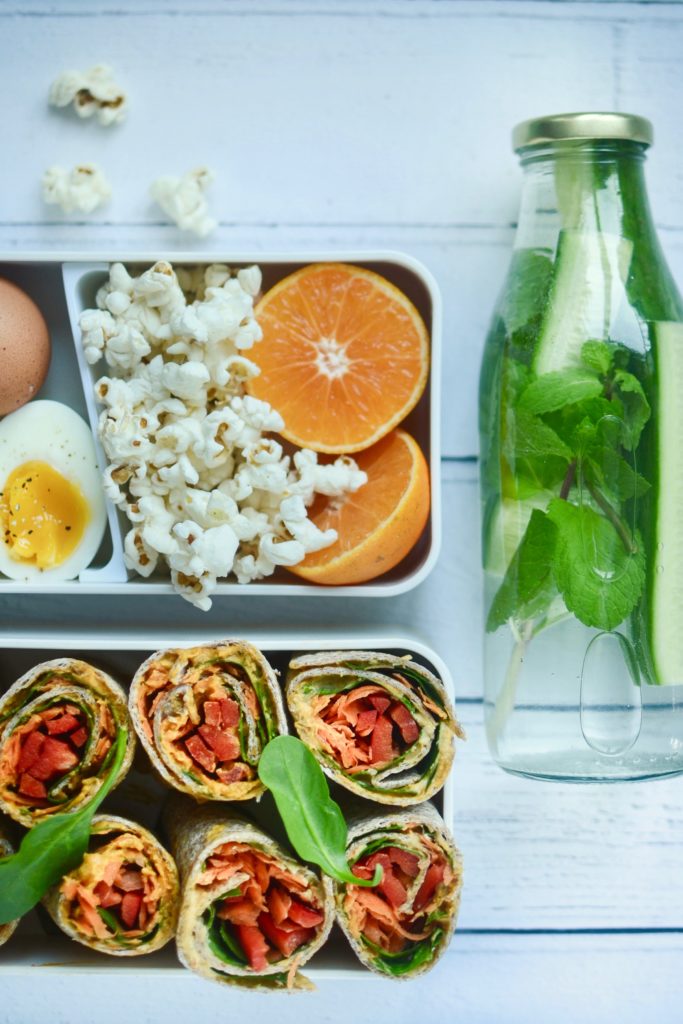
Lunch box 1
Fruit water (cucumber and mint)
Tangerine
Lightly salted popcorn
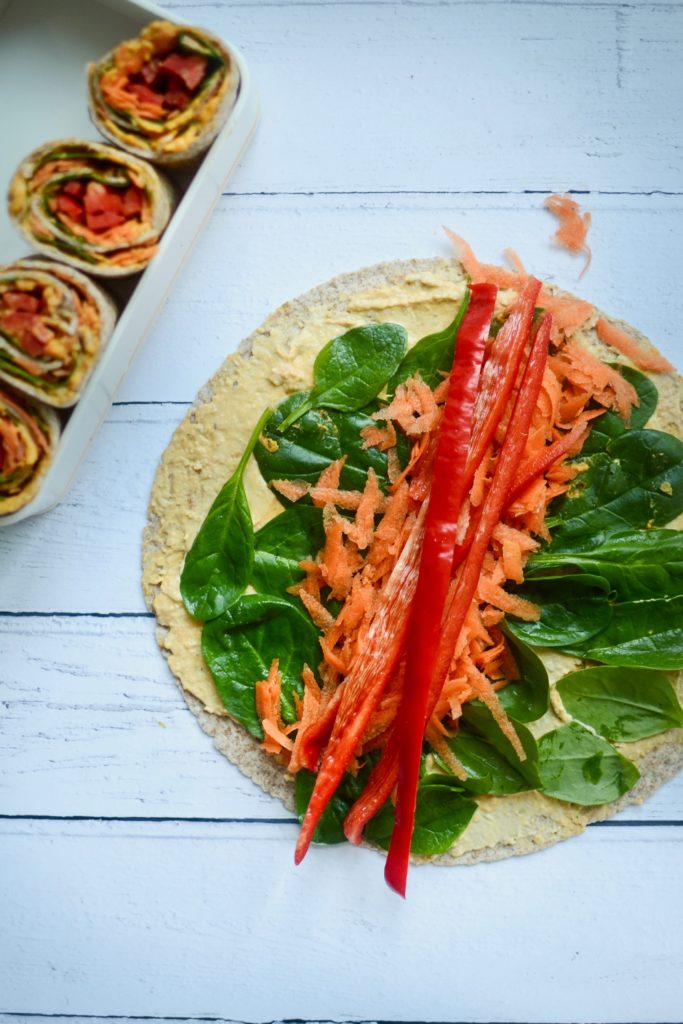
Rainbow wrap
Boiled egg
Ingredients for the rainbow wrap
wholemeal wrap or flatbread
1 – 2 tablespoons hummus or red pepper hummus
small handful baby leaf spinach
1 small carrot, coarsely grated
1/4 red pepper, cut into long strips (the long Romano variety works well here)
Method
1. Spread the hummus evenly onto the wrap, leaving a border along the top end.
2. Place the spinach leaves down in a single layer, pile grated carrot into the centre and lay pepper sticks across.
3. Fold the bottom half over the fillings, ensuring you have a tight roll, then roll upward towards the top end. Cut in half or slice into thirds.
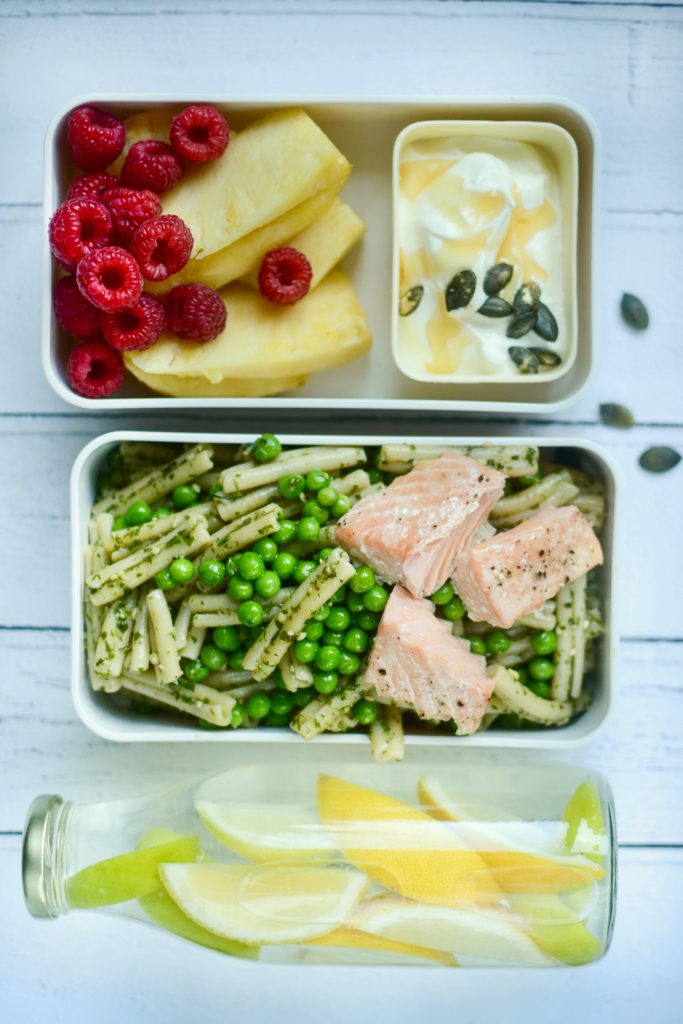
Fruit water (lemon and lime)
Pineapple wedges, raspberries
Wholemeal pesto pasta salad with salmon and peas
Natural Greek yoghurt with pumpkin seeds and raw honey
Ingredients for the pasta
medium bunch basil
small bunch dill, thickest part of stems discarded
medium bunch parsley, thickest part of stems discarded
1 small garlic clove, peeled
salt and pepper
about 80ml (1/3 cup) extra virgin olive oil
cooked salmon (left-overs work well here)
cooked wholemeal pasta (save some of the cooking liquid)
handful of frozen peas
Method
- Put the herbs, garlic, pinch of salt and black pepper in a food processor and blitz until roughly chopped.
- With the motor running, slowly add the olive oil until you reach your desired consistency (the green “pesto” sauce should be loose enough to fold into cooked pasta).
Combine the pesto with cooked pasta, cooked salmon or deboned trout, and defrosted frozen peas. - Add a little more olive oil and pasta cooking liquid if it needs it.
Lunch box 3
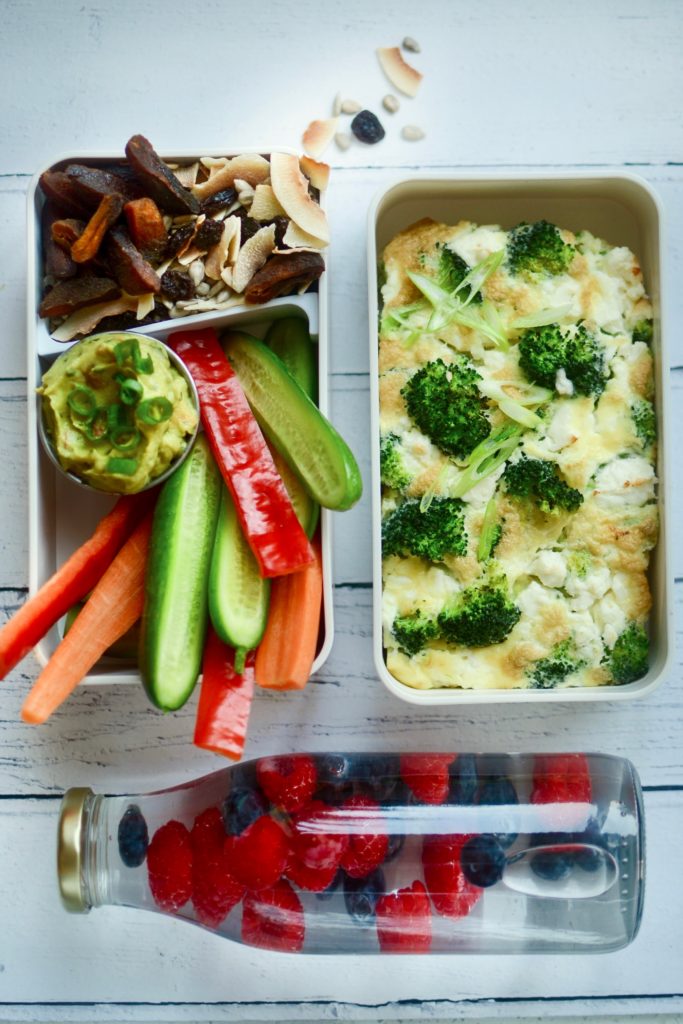
Fruit water (raspberries and blueberries)
Cucumber and carrot sticks with guacamole
Trail mix (sunflower seeds, coconut chips, chopped dates)
Mini frittata with broccoli and feta
Ingredients for the frittata
2 eggs
1 tablespoon water
small pinch of salt
freshly ground black pepper
2 spring onions, thinly sliced
small knob of butter
handful of steamed broccoli florets (left-overs are great for this) 25g crumbled feta
Method
- Whisk the eggs with the water, salt and pepper. Stir in the sliced spring onions.
- Heat the butter in a small ovenproof skillet or pan over a medium heat until sizzling, then pour the egg mix into the pan, and scatter over the broccoli and feta cheese.
- Cover the pan, turn the heat down and cook for 5 to 10 minutes or until the egg has just set.
- Pop the pan under a hot grill for half a minute if you’d like, to add some colour. Cool, turn out and slice to serve.
This post was written in collaboration with Compass Fostering. All opinions, words and images are my own.
†Intermittent Fasting: the surprising update
†Fasting: Molecular Mechanisms and Clinical Applications
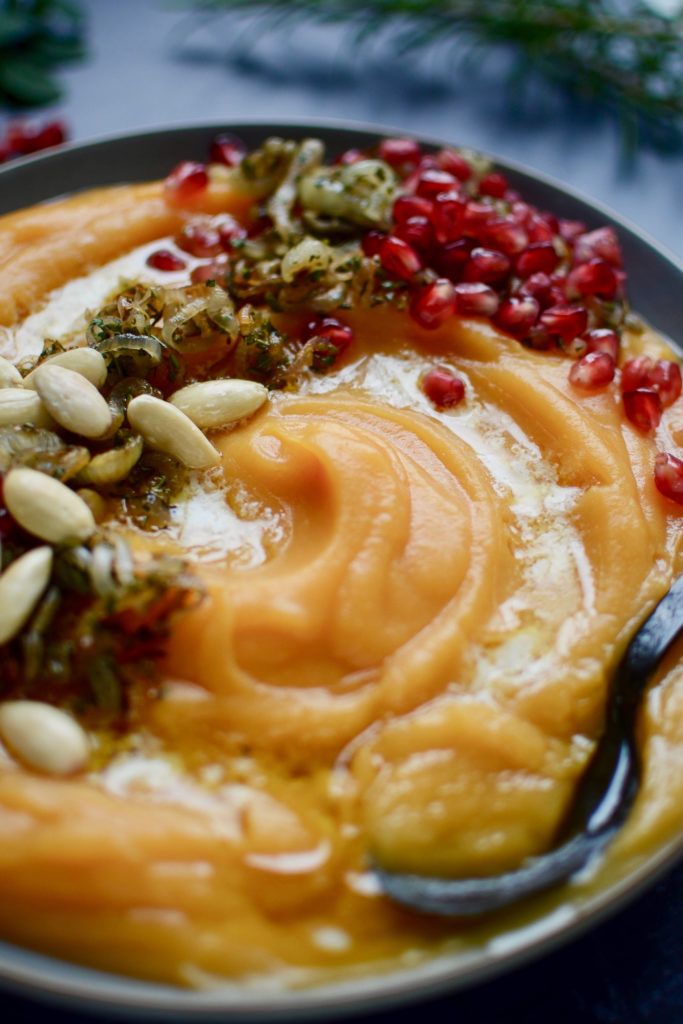
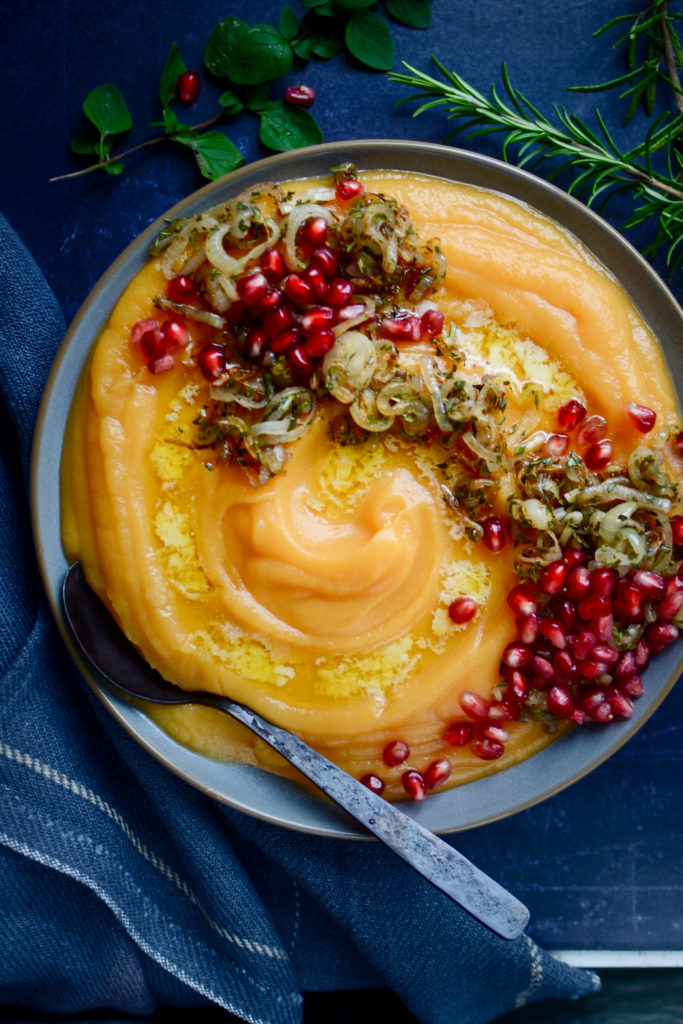
Swede and sweet potato mash
The tree in our front garden is by now completely bare (although the neighbour’s tree is still haemorrhaging leaves) and my American friends are all preparing for their Thanksgiving feasts. I have yet to be invited to one, but am a huge fan of the traditional menu of sides that is usually served at these gatherings: cranberries in some shape or form, spiced pumpkin, sweet potatoes, sprouts, mashed potatoes and squashes. When I made this swede and sweet potato mash to go alongside our chilli last week, we all agreed that it would make an excellent addition to any festive meal.
Swede and sweet potato mash
Serves 4 – 6
Ingredients
1 swede, peeled and roughly chopped
2 large sweet potatoes, peeled and roughly chopped
glug of olive oil
1 tablespoon butter (or more olive oil to keep it vegan)
6 shallots, finely chopped
1 teaspoon very finely chopped rosemary
1 tablespoon finely chopped fresh oregano (or use 1 teaspoon dried)
salt and freshly ground pepper
To serve
pomegranate seeds
blanched almonds, lightly roasted
butter
Method
- Toss the swede and sweet potato with a little olive oil, salt and pepper, spread out on a baking sheet and roast in the oven at 180˚C for 40 mutes or until tender and lightly coloured. You will need to toss the pieces halfway through.
- While the veg are roasting, gently cook the chopped shallots and chopped rosemary in the butter until the shallots start to colour. Turn up the heat a little and caramelise for a further 5 to 10 minutes until nicely golden. Add the chopped oregano and set aside.
- When the vegetables are tender, place in a food processor and blitz until you have a lovely smooth consistency. Spread out on a plate, top with caramelised onions, pomegranate seeds, roasted almonds and more butter if required.
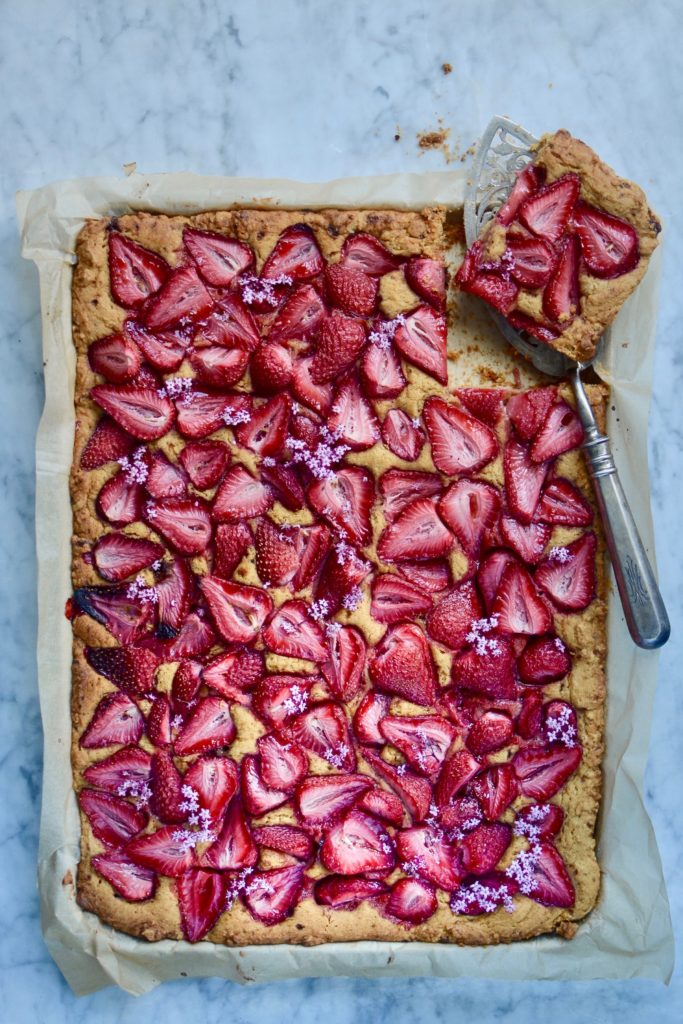
Gluten free strawberry and elderflower tart
I have been so busy getting into the rhythm with my new teaching job (which I love, btw), that I have not shared a new recipe since August last year!!! And here I am posting a strawberry and elderflower recipe with both strawberry and elderflower season just about done for this year. Boo! But it is so delicious, that I thought it would be worthwhile adding anyway. Hope you will have a chance to make it!
Gluten free strawberry and elderflower tart
Serves 8
Ingredients
185g flour (you can use gluten-free)
75g soft brown sugar
1/4 teaspoon salt
1 teaspoon baking powder
1 teaspoon vanilla paste or seeds from 1 pod
120g unsalted butter, chilled and diced
1 medium egg, lightly whisked
40ml double (heavy whipping) cream, chilled
1.2 kg delicious sweet strawberries, hulled and halved
elderflower syrup for drizzling
Method
- Preheat oven to 190˚C and line an lipped baking sheet with parchment paper.
- Combine the dry ingredients and mix. Rub or cut the cubed butter into the flour for 1 to 2 minutes, or until the pastry resembles wet sand (you could use a food processor for this). Set aside.
- Whisk the vanilla, egg and cream until blended, then drizzle over the flour mixture and mix until it just comes together. Do not over-mix!!!!
- Spoon the pastry onto the baking sheet in dollops and spread out evenly with a spatula or the back of a large metal spoon. You might need an extra pair of hands to hold the paper in place.
- Scatter over the halved strawberries, pressing them into the pastry slightly, and bake for 20 – 30 min, or until the pastry has risen and is golden and crunchy around the edges. Remove from the oven and serve with whipped cream and a drizzle of elderflower syrup.
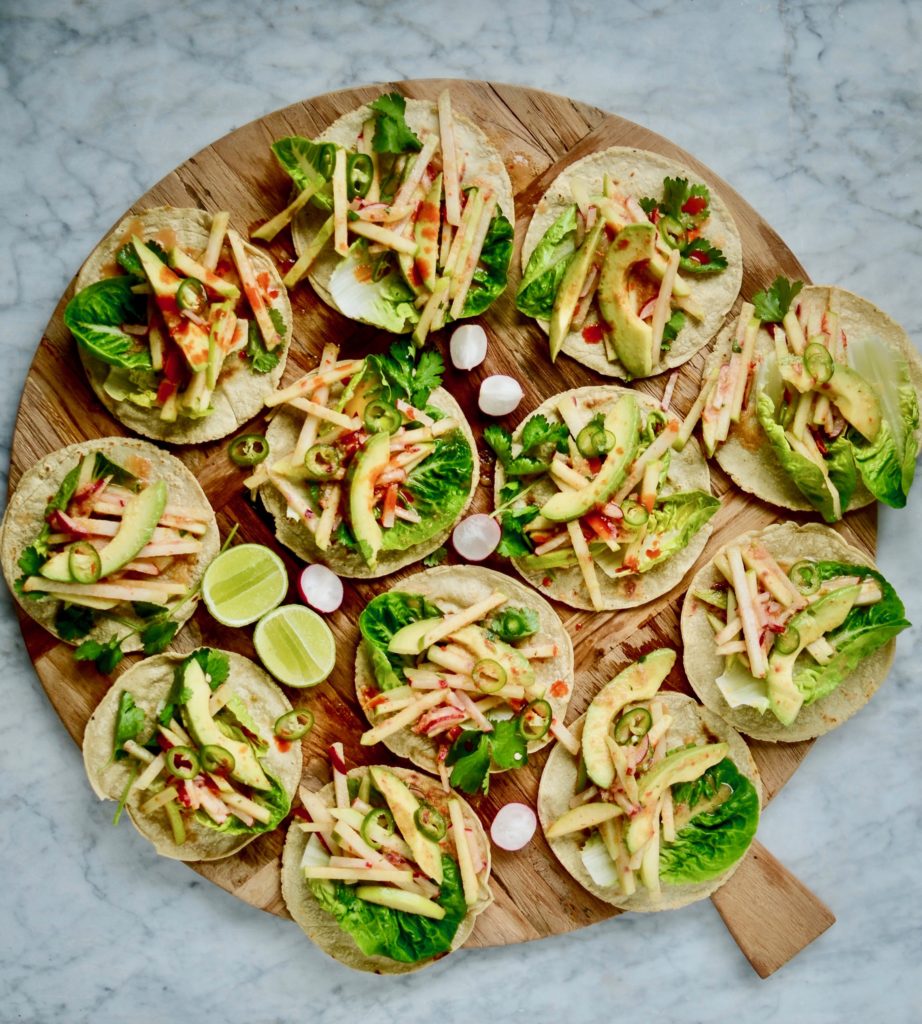
Kohlrabi, radish and avocado “ceviche” on corn tortillas
I recently took the plunge and bought a tortilla press. I’m so annoyed with myself that I didn’t do it sooner… I LOVE fresh home-made tortillas. They are super versatile, taste amazing and are gluten-free. The only hassle in the UK is finding the masa harina*, but these days many online stores carry this flour. If you can’t be bothered making them yourself (you could use two heavy frying pans to press them), you can just as easily buy them ready made. The zesty kohlrabi and avocado “ceviche” is a delicious topping, but there are so many other options like Korean BBQ chicken or tofu with sautéed veggies and spicy chimichurri dressing.
*Masa harina is a very finely ground corn flour made from corn (usually white, but can also be blue corn) that’s dried, cooked in water with slaked lime (which gives it a distinctive flavour and increases its calcium content), ground, and dried again. Mixed with water (or sometimes oil), it forms the dough called “masa” that is used to make corn tortillas.
Kohlrabi, radish and avocado “ceviche” on corn tortillas
Makes 16 tortillas
Ingredients for the tortillas
2 cups masa harina
1/2 tsp salt
1 1/2 cup hot water
Ingredients for the dressing
15ml (1 Tbsp) extra virgin olive oil
1 small or 1/2 large red onion, finely chopped
1/2 teaspoon salt
3 garlic cloves, roughly chopped
1 – 2 medium hot red chillies, finely chopped (deseed first if you prefer less heat)
small knob ginger, roughly chopped
small handful fresh coriander, finely chopped
125ml (1/2 cup) lime juice (about 5 – 7 limes), plus extra to taste
Ingredients to serve
1 kohlrabi, cut into julienne
1 large apple, cut into julienne
handful of radishes, cut into julienne
1 large ripe avocado, sliced
masa tortillas or tostada (toasted tortillas)
Method
- For the tortillas: in a bowl mix the masa harina, salt and 1 cup of hot water with a spoon. Now incrementally add the rest of the warm water a tablespoon at a time until you can form a soft dough ball with your hands. You may not need all the water. If the dough isn’t forming a cohesive ball, add a bit more water. But I have found that a too wet or sticky dough doesn’t make for a good tortilla, so rather err on the dry side.
- Now pinch off golf ball sized chunks of dough, rolling each between your hands to form a smooth ball. Press them between two pieces of parchment paper in your tortilla press, between two heavy skillets or with a glass baking dish on your kitchen counter.
- When you are ready to cook them, heat a heavy-based pan or skillet to medium-high heat. Add a tortilla and flip after 10 seconds, then cook on each side for 1-2 minutes or until brown spots form on each side. Once you’ve flipped the tortilla the second time, it should puff up. This is a good sign, as it means there is a build up of steam on the inside, which will help cook it. Keep your stack of tortillas warm by covering with a clean tea towel and keeping in a warming drawer, but they are definately best eaten immediately.
- For the ceviche: heat the oil in a frying pan and fry the onion with a large pinch of salt over a medium heat until soft (5 to 10 minutes). Add the chopped chilli and two of the three chopped garlic cloves, and fry for another couple of minutes. Adjust seasoning and set aside to cool.
- In the meantime, grate the ginger and remaining garlic clove, then add this to the chopped coriander and lime juice, and leave to infuse for at least ten minutes.
- Just before serving, combine the fried onion mix, lime juice, kohlrabi, apple, radish and avocado slices, and adjust seasoning. Let each person fill their own tortillas with the mix and enjoy!
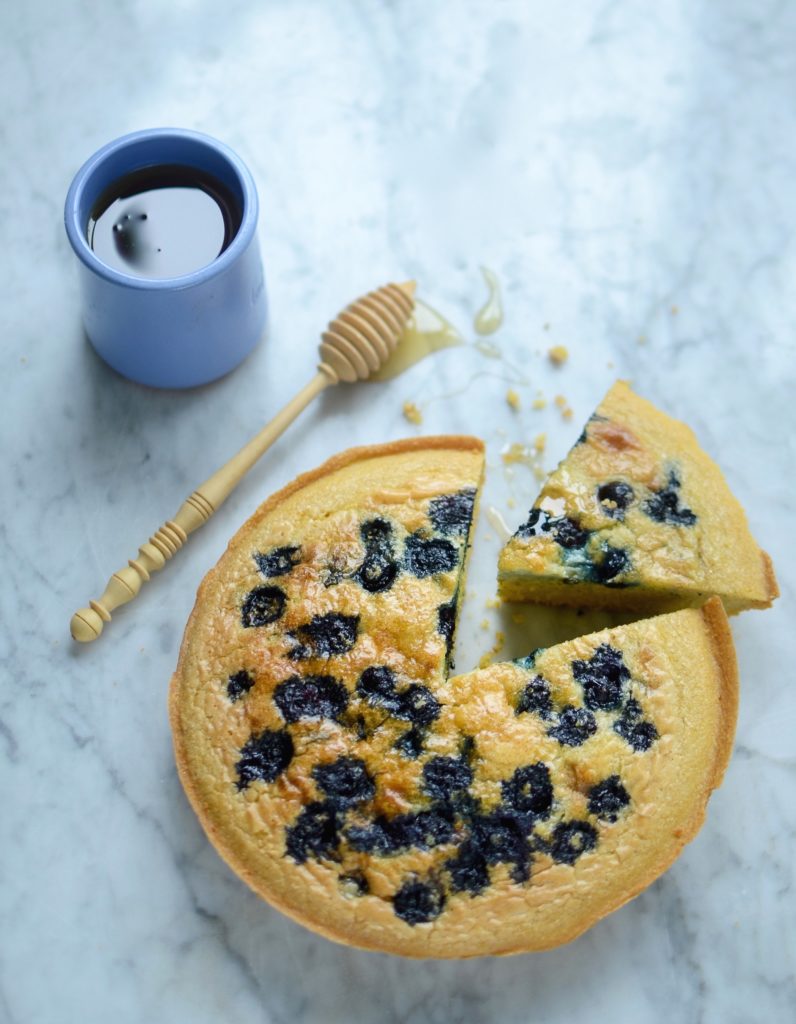
Cornbread for breakfast
I often get asked by exhausted and slightly fed-up parents what they should serve their kids for breakfast. I find it so hard to answer that, as my children have had spinach soup, dhal and left-over stew for breakfast… but how do you compress your entire food philosophy into an answer to the simple question: “What’s for breakfast?” The way I’ve explained it to my family is that ANYthing that breaks the fast in the morning qualifies, and if you look at the myriad of breakfasts served around the globe every day, there really are no rules.
A well-balanced meal is your best bet, whatever you choose to serve. In other words it contains enough protein to keep you full for a few hours and prevent cravings, enough carbohydrates to get you going, and enough healthy fat to slow down the absorption of glucose in the bloodstream, providing satiation while helping to avoid major insulin spikes.
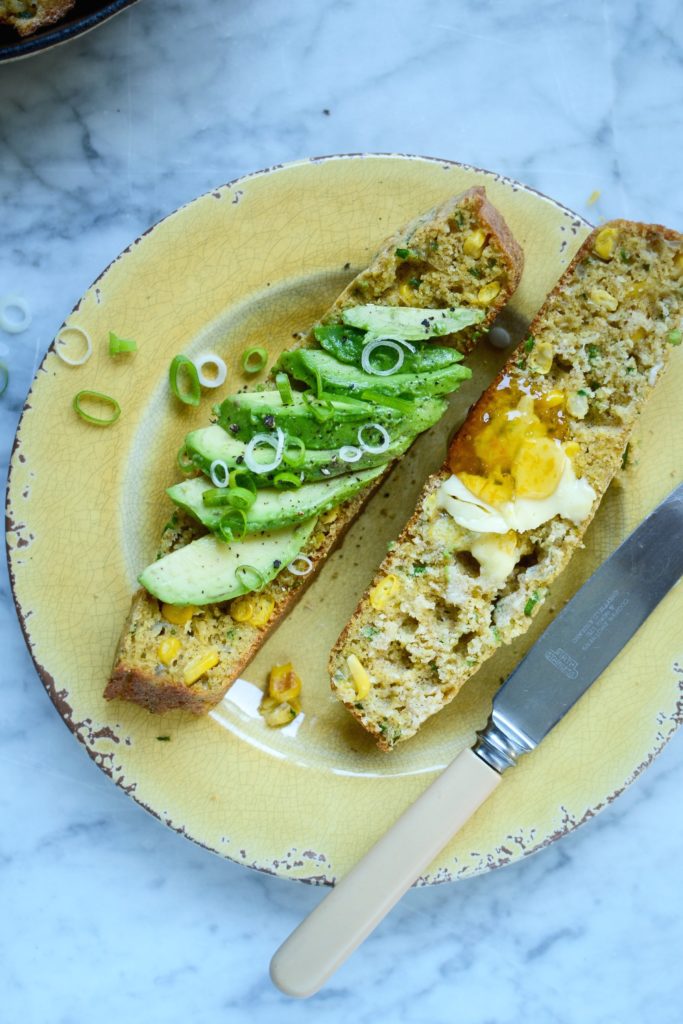
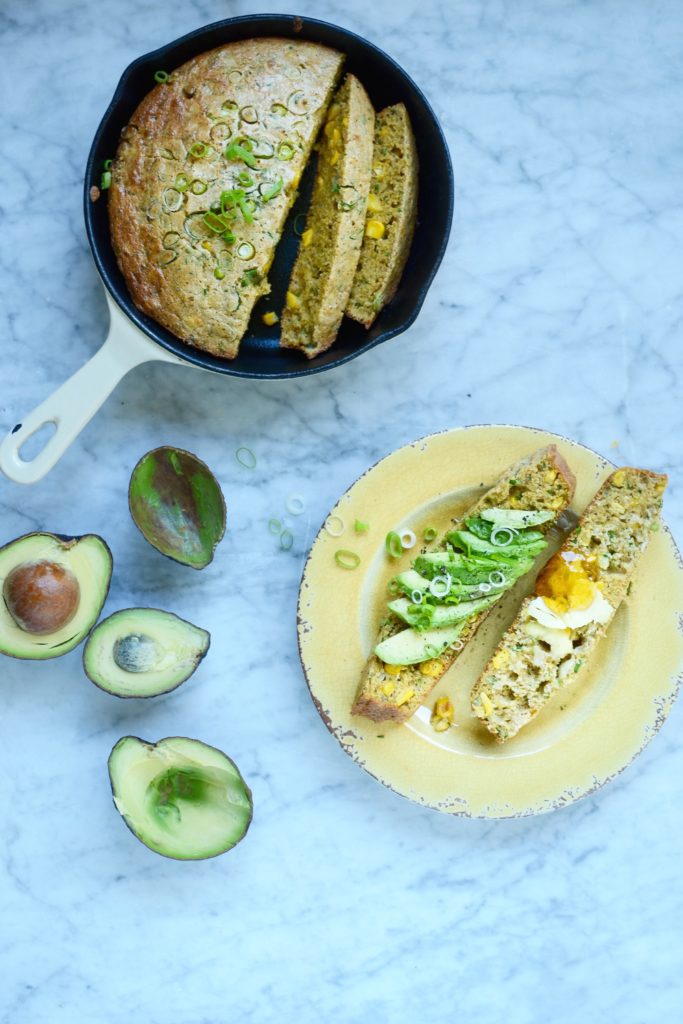
This cornbread is a delicious alternative to boxed cereal or toast when served with avocado, chilli jam and eggs, or these delicious homemade baked beans on the savoury version, or nut butter and honey on the blueberry version. It’s easy to prepare the batter the night before – remember to add the baking soda and baking powder only just before baking! – and needs only 20 – 25 minutes or so in a hot oven. There are so many versions of recipes for cornbread, but I have played around for a long time with the proportions and this is one of my favourite end results. Now, this cornbread is certainly not only a breakfast food in our house (in fact, I most often make it as a side dish when we have friends over for a BBQ), so hopefully you will get a chance to try it out soon, morning, noon or night!
Cornbread
Makes two 8” or 20cm skillet cornbreads, or one large bread
Ingredients
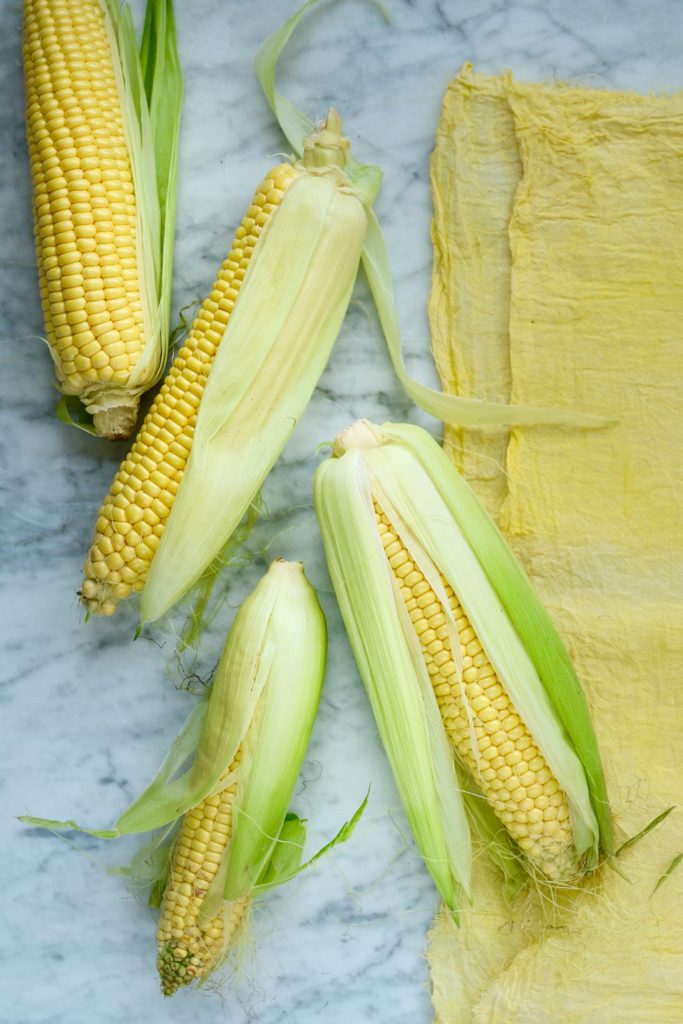
230 – 250g (about 1 1/4 cup) cornmeal or polenta bramata (the exact amount depends on how coarsely the cornmeal is ground and the water content of the coconut milk – you are aiming for a wet, but not runny, mixture)
120g (about 1 cup) wholemeal spelt flour (you can also use your favourite gluten-free flour, although the bread won’t be as crispy)
20g (about 2 tablespoons) coconut palm sugar (or use muscovado)
1/2 teaspoon salt
1 tsp baking powder
1/2 tsp baking soda
1 x 400g can coconut milk (full fat and preferably organic)
3 eggs, lightly whisked
15ml (1 tablespoons) apple cider vinegar
Method
- Preheat oven to 200°C.
- Combine the polenta, flour, sugar, salt, baking powder and baking soda in a medium bowl and set aside.
- Place the can of coconut milk in a small heatproof bowl and cover with hot water from the tap for a couple of minutes (this will not be necessary if you live in a hot country!).
- Pour the coconut milk and vinegar into the beaten eggs in a thin stream, constantly whisking.
- Pour the liquid ingredients into the dry ingredients, whisking as you do so.
- Heat some coconut oil in a cast iron skillet(s) or other pan with a heavy base on the hob until hot (but not smoking). Or if you are using a small roasting tin / baking sheet with a heavy bottom, heat it in the oven with the oil.
- Scrape the cornbread mixture into the hot pan(s) and bake for 20 – 25 minutes or until browned on top and the centre springs back when lightly pressed.
- Remove from the oven and allow to cool for a few minutes before turning out and serving hot. (You could also re-heat the bread in a medium hot oven the next day.)
- For a savoury version, add caramelised onions, corn kernels (about 1 1/2 cups of fresh or frozen), chilli flakes and chopped coriander to the batter before baking and scatter some sliced spring onions on top. For a sweet version add a punnet of blueberries and vanilla powder to the batter, then sprinkle some brown sugar on top before baking.
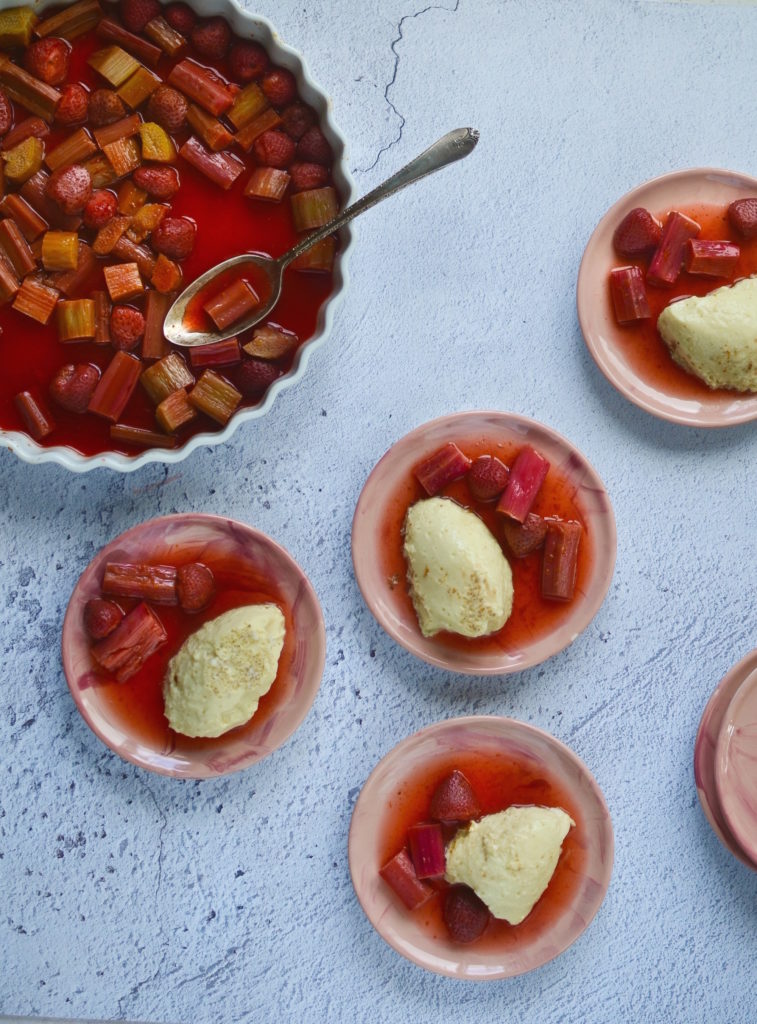
Slow-roasted strawberries & rhubarb with baked custard
This is the most perfect summer dessert when you have gorgeous, sweet strawberries that need eating and a few sticks of rhubarb searching for a purpose. The baked custard is only ever so slightly sweetened with maple syrup and a few drops of orange oil, so the flavours of the fruit really have the last word.
Slow-roasted strawberries & rhubarb with baked custard
Ingredients
For the roasted fruit
600g small, sweet strawberries, hulled
5 – 6 sticks of rhubarb, trimmed and cut into 2 cm pieces
1 orange, zest and juice
45ml (3 tablespoons) honey or maple syrup (or more to taste – I like things super tart!)
For the baked custard
1 litre milk of your choice (the fattier the milk, the more delicious the custard)
pinch of salt
7 medium free-range eggs
30ml (2 tablespoons) honey or maple syrup
1/2 teaspoon good quality orange oil, optional
Method
- Gently toss all the ingredients for fruit in a medium, shallow ovenproof dish and roast at 140˚C for 20 – 30 minutes, or until the rhubarb is tender when tested with a small sharp knife. Try not to disturb the fruit too much once cooked, as it will be very soft. Set aside.
- While the fruit is roasting, prepare the custard. Heat the milk in a saucepan until it starts to froth around the edges (don’t let it boil!). Remove from heat.
- Briefly whisk the eggs and maple syrup in a large heatproof bowl, then carefully pour the hot milk onto the egg mixture, continuing to whisk gently.
- Once the fruit has been removed, turn the oven up to 160°C and boil a full kettle of water.
- Place a clean cotton or terry cloth in the base of a roasting tin – this will prevent the dish from sliding around. Grease a medium ovenproof dish and place on the cloth. Pour the custard mixture into the dish and put the roasting tin in the oven.
- Pour the boiled water around the dish – it should come about halfway up the sides, so you might need to boil a second kettle, depending on the size of your tin.
- Bake for 45-50 minutes, or until just set. Don’t be alarmed if it still looks rather wobbly, as it will continue to set even after you’ve removed the dish from its water bath.
- Serve warm or refrigerate and serve chilled with the roasted fruit.
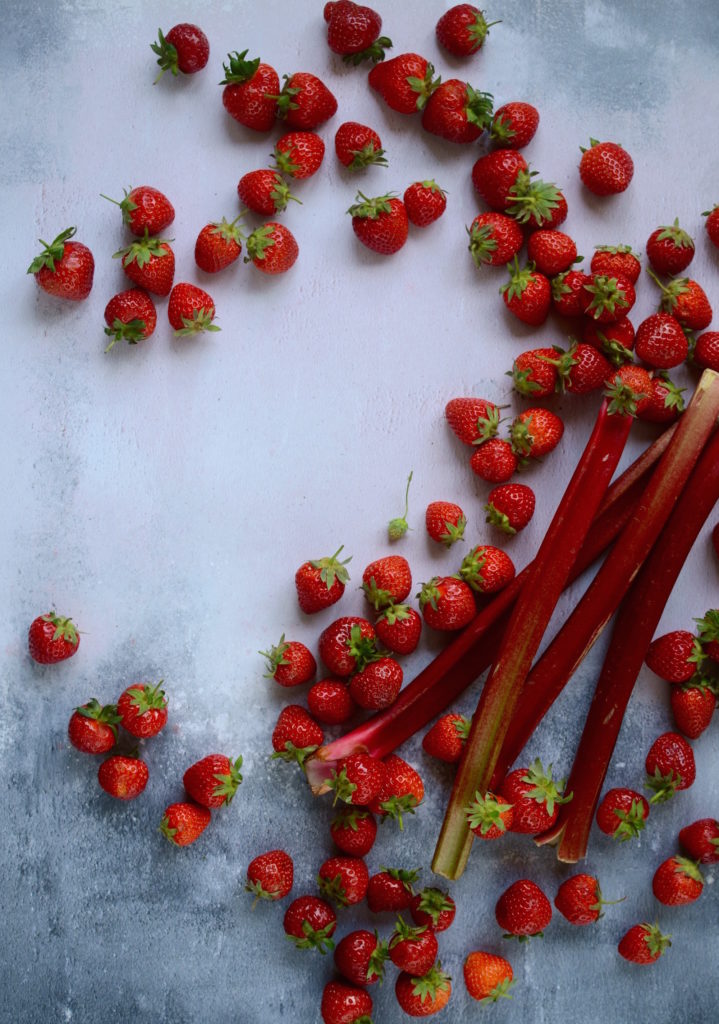
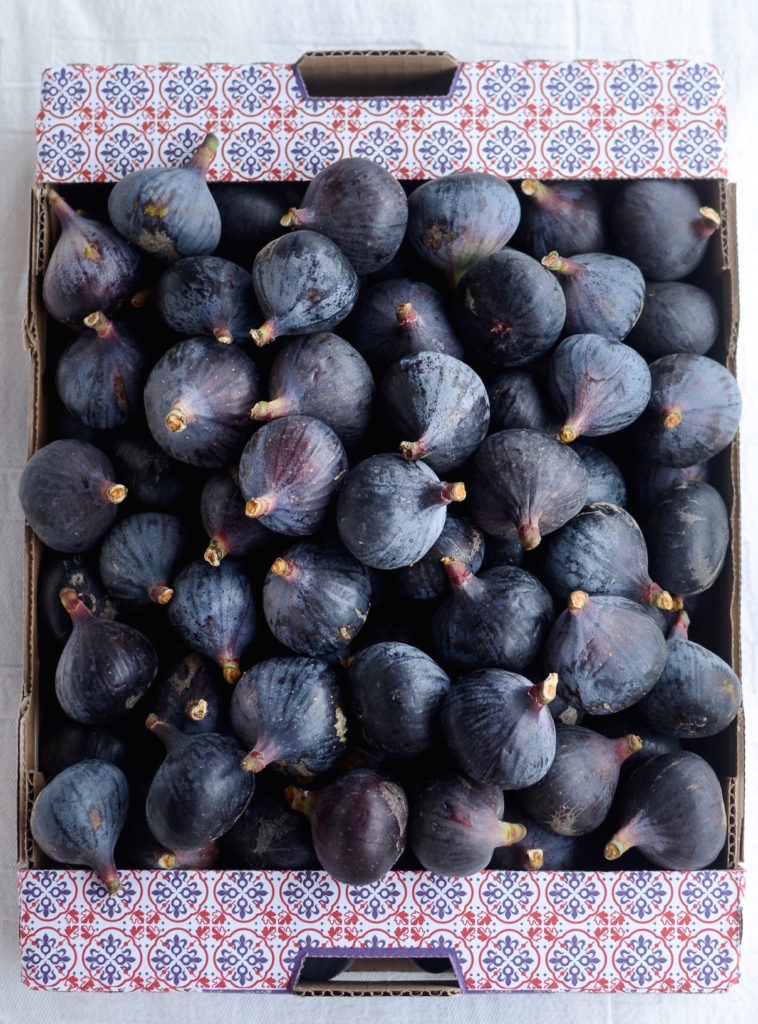
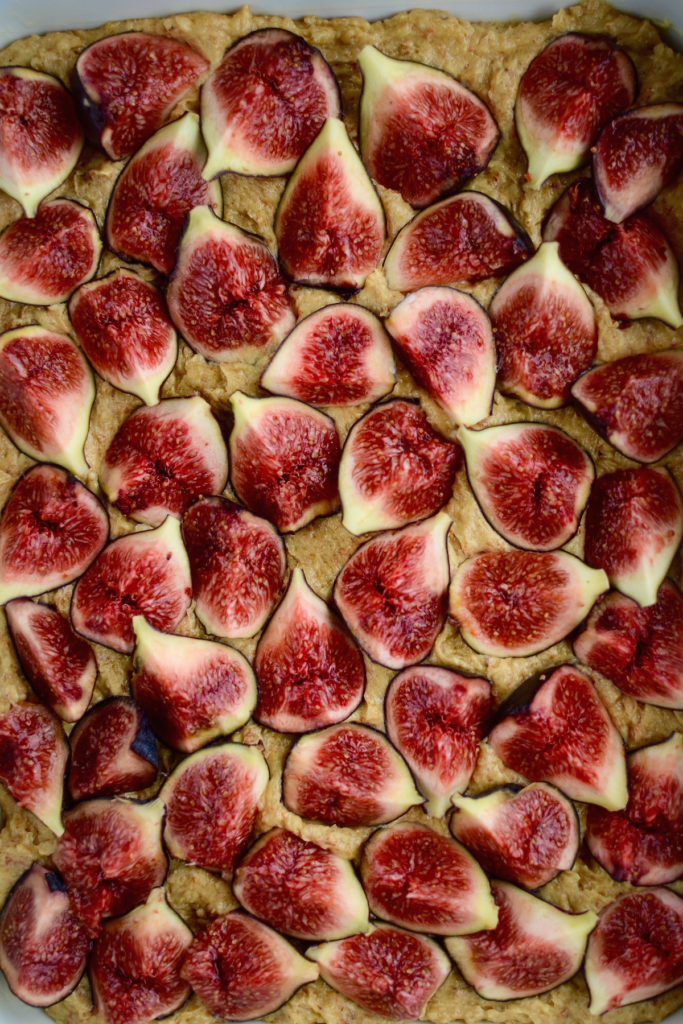
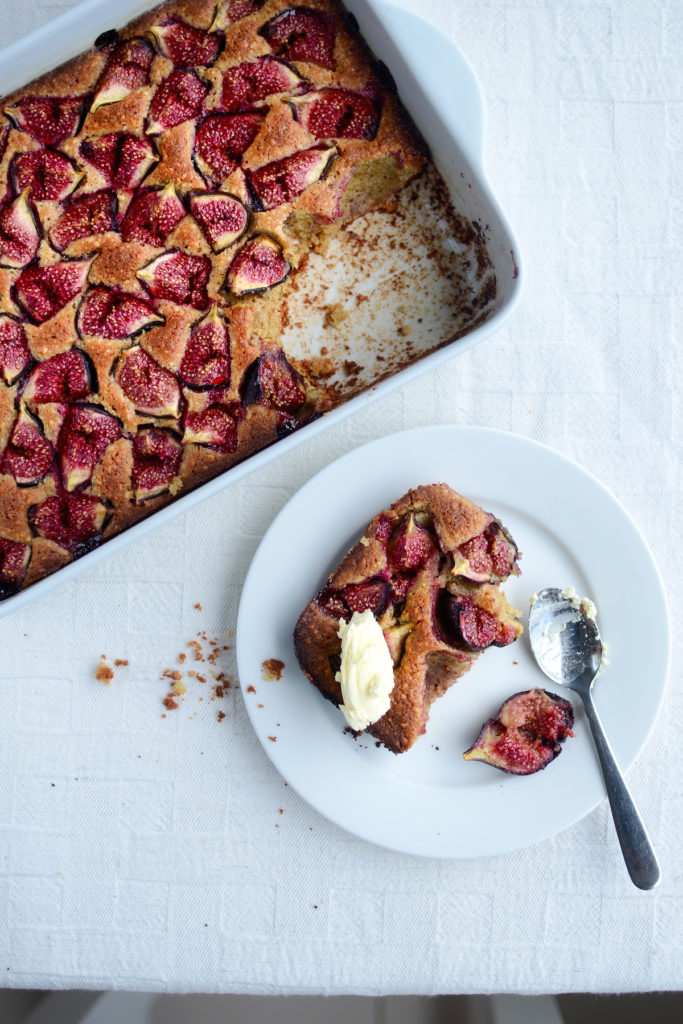
Fig and almond cake
Ah, a beautiful, juicy fig… and sunshine. And saltwater hugs. It was so good to be back in South Africa, spending time with family and friends. The kids loved every moment (especially the fact that they could wear shorts most of the time) and I enjoyed the slightly more relaxed pace. On our way from Hermanus to Plettenberg Bay, we stopped at a fig farm and bought a whole box of figs for £3.50! We were all salivating in the car the rest of the journey. We enjoyed them in so many different ways: gobbled up whole, sliced into salads, in smoothies, smashed on buttered toast. And then there was the cake, of course. The first piece eaten very quickly with a dollop of mascarpone. The second piece nibbled a little more slowly, savouring its crumbly texture and delicious flavour.
Ingredients
125g unsalted butter, room temperature
65g (1/2 cup loosely packed) light muscovado sugar
3 medium eggs
160g (roughly 1 cup) whole raw almonds
80g (scant ½ cup) spelt flour or gluten-free flour blend
½ teaspoon baking powder
pinch of salt
zest from 3 large organic lemons
12 figs, stalk removed and quartered
Method
- Preheat oven to 180°C. Lightly grease a medium sized ovenproof dish (or cake tin).
- Beat the butter until light and fluffy. Add the sugar and beat for another minute or two.
- Add the eggs, one at a time, beating well after each addition.
- Process the almonds in a food processor until they resemble a coarse meal. Add this, as well as the flour, baking powder and salt to the mixture and stir until just combined. Stir in the lemon zest.
- Spoon the mixture into the greased dish, flatten the top with a spatula and press the fig quarters into the batter.
- Bake for 25 – 30 minutes or until golden and crunchy-looking, and a toothpick inserted in the centre comes out clean. Do not overbake, as it will dry out.